


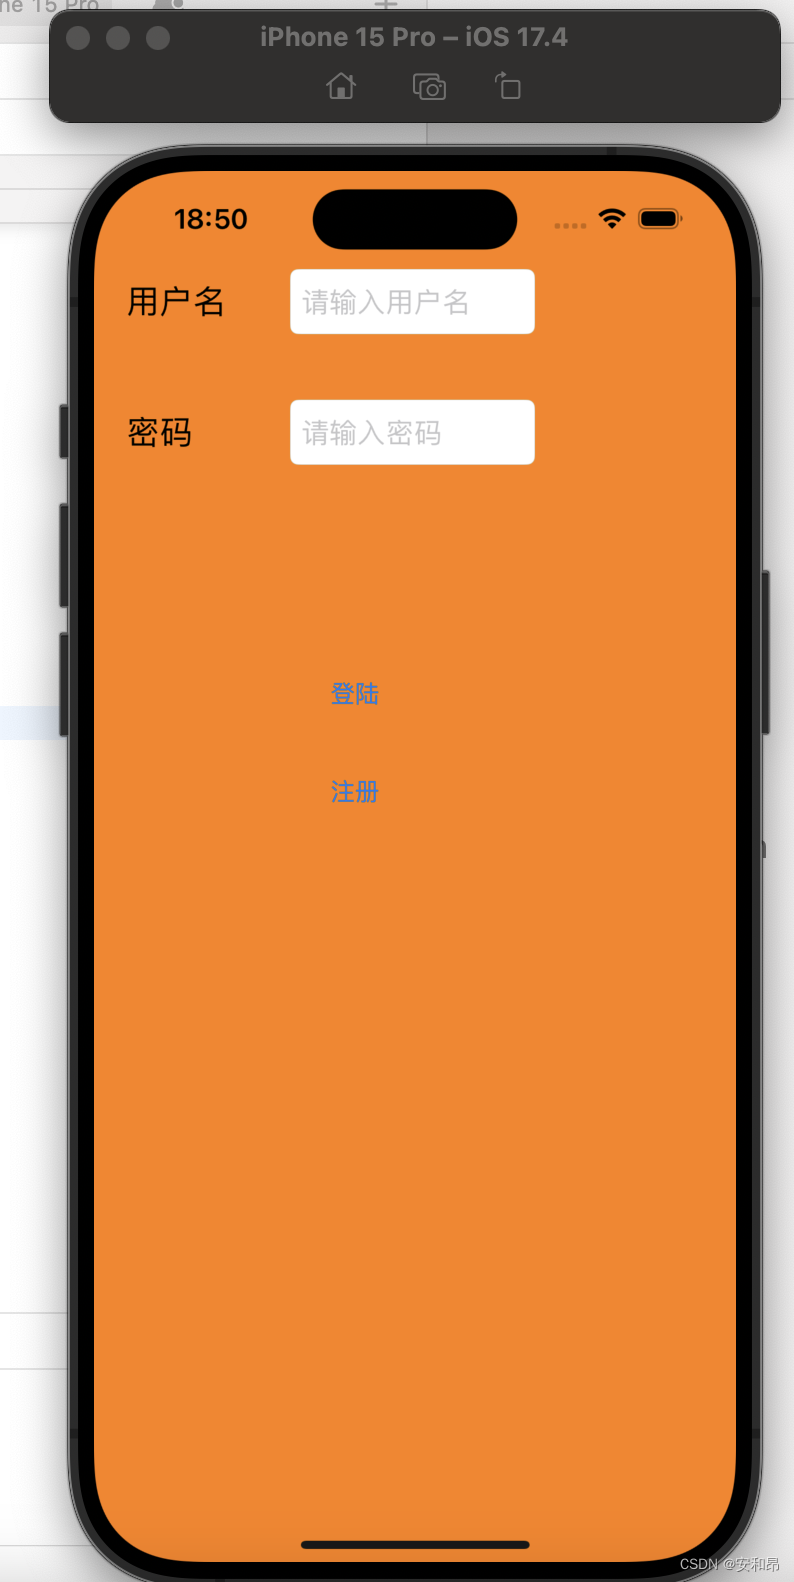
UI的登陆界面实例
在学习了UILabel,UIButton,UIView,UITextField的内容之后,我们就可以写一个简单的登陆界面
我们可以通过UILabel来编写我们显示在登陆界面上的文字比方说下面这两行字就是通过UILabel去实现的。

下面给出一下实现的代码
_lbUserName = [[UILabel alloc] init];
    _lbUserName.frame = CGRectMake(20, 60, 80, 40);//设置位置和大小
    _lbUserName.text = @"用户名";
    _lbUserName.font = [UIFont systemFontOfSize:20];//设置字体大小
    _lbUserName.textAlignment = NSTextAlignmentLeft;
    _lbUserPassword = [[UILabel alloc] initWithFrame:CGRectMake(20, 140, 80, 40)];
    _lbUserPassword.text = @"密码";
    _lbUserPassword.font = [UIFont systemFontOfSize:20];
    _lbUserPassword.textAlignment = NSTextAlignmentLeft;
为了给用户返回提示,设计了一个警告对话框来用于给用户返回提示,这个警告对话框是通过UIAlertController来实现的,下面给出代码
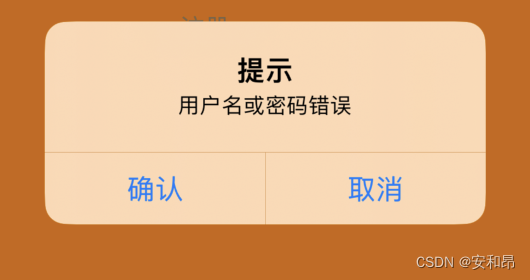
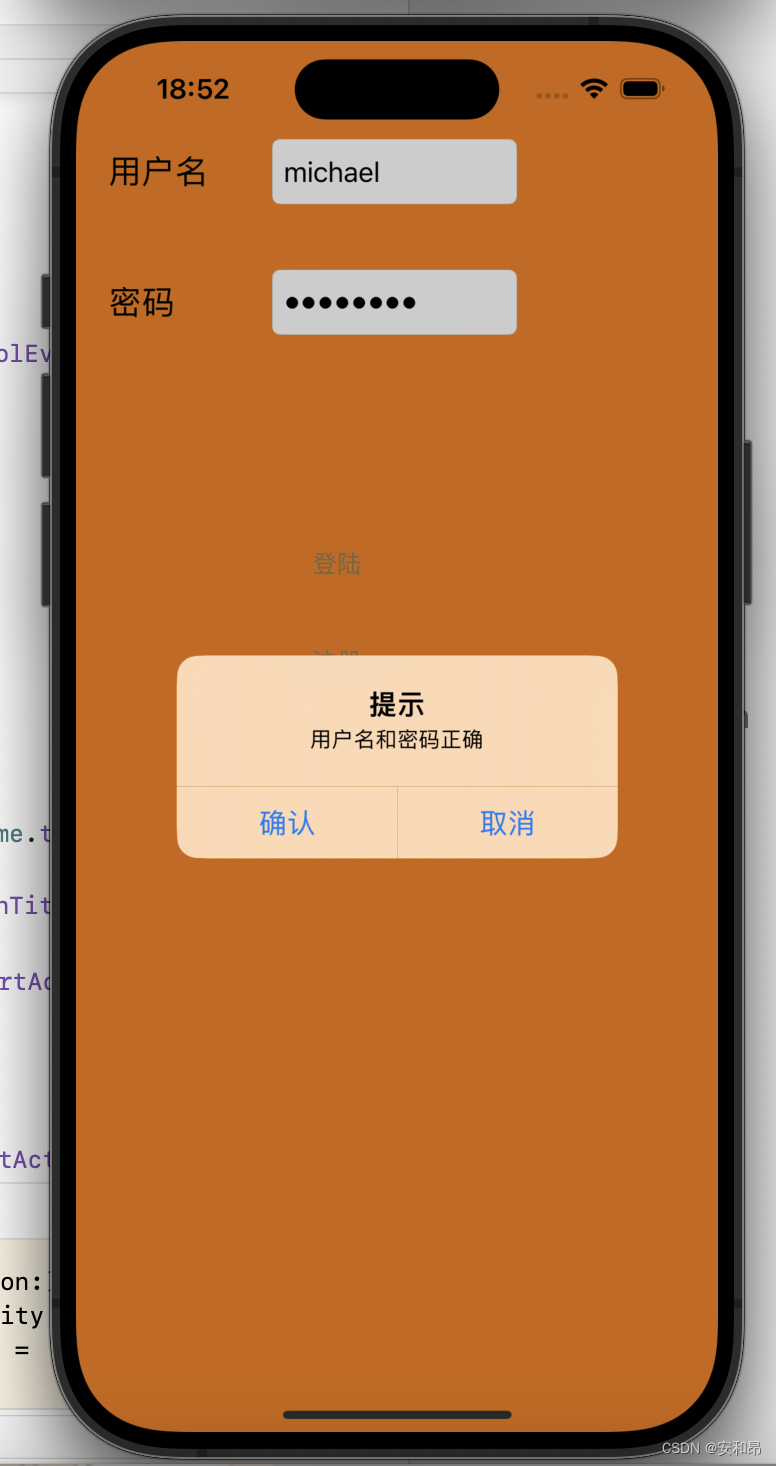
				UIAlertController* alertController = [UIAlertController alertControllerWithTitle:@"提示" message:@"用户名和密码正确" preferredStyle:UIAlertControllerStyleAlert];//p1:标题名字,p2:显示的信息,p3是用来指定 UIAlertController 的样式的。UIAlertControllerStyleAlert 是其中一种可选的样式。
        UIAlertAction* confirm = [UIAlertAction actionWithTitle:@"确认" style:UIAlertActionStyleDefault handler:^(UIAlertAction* _Nonnull action) {
            NSLog(@"点击确认");
        }];//UIAlertAction 是用来创建 UIAlertController 中的按钮的。p1:按钮标题,p2:风格,p3:按钮的点击事件处理
        [alertController addAction:confirm];//给这个弹窗添加上确认这个按钮
        UIAlertAction* cancel = [UIAlertAction actionWithTitle:@"取消" style:UIAlertActionStyleDefault handler:^(UIAlertAction* _Nonnull action) {
            NSLog(@"点击取消");
        }];
        [alertController addAction: cancel];
        [self presentViewController:alertController animated:YES completion:nil];
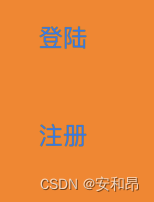
创建登陆和注册两个按钮,来实现点击登陆的效果
		_btLogin = [UIButton buttonWithType:UIButtonTypeRoundedRect];
    _btLogin.frame = CGRectMake(120, 300, 80, 40);
    [_btLogin setTitle:@"登陆" forState:UIControlStateNormal];//设置按钮类型
    [_btLogin addTarget:self action:@selector(pressLogin) forControlEvents:UIControlEventTouchUpInside];//为按钮添加点击事件
    [self.view addSubview:_btLogin];
下面给出一下整体实现的代码
#import "ViewController.h"

@interface ViewController ()

@end

@implementation ViewController

- (void)viewDidLoad {
    [super viewDidLoad];
    self.view.backgroundColor = [UIColor orangeColor];
    _lbUserName = [[UILabel alloc] init];
    _lbUserName.frame = CGRectMake(20, 60, 80, 40);
    _lbUserName.text = @"用户名";
    _lbUserName.font = [UIFont systemFontOfSize:20];
    _lbUserName.textAlignment = NSTextAlignmentLeft;
    _lbUserPassword = [[UILabel alloc] initWithFrame:CGRectMake(20, 140, 80, 40)];
    _lbUserPassword.text = @"密码";
    _lbUserPassword.font = [UIFont systemFontOfSize:20];
    _lbUserPassword.textAlignment = NSTextAlignmentLeft;
    [self.view addSubview:_lbUserName];
    [self.view addSubview:_lbUserPassword];

    _tfUserName = [[UITextField alloc] initWithFrame:CGRectMake(120, 60, 150, 40)];
    _tfUserName.placeholder = @"请输入用户名";
    _tfUserName.borderStyle = UITextBorderStyleRoundedRect;
    _tfUserPassword = [[UITextField alloc] initWithFrame:CGRectMake(120, 140, 150, 40)];
    _tfUserPassword.placeholder = @"请输入密码";
    _tfUserPassword.borderStyle = UITextBorderStyleRoundedRect;
    _tfUserPassword.secureTextEntry = YES;
    [self.view addSubview:_tfUserName];
    [self.view addSubview:_tfUserPassword];

    _btLogin = [UIButton buttonWithType:UIButtonTypeRoundedRect];
    _btLogin.frame = CGRectMake(120, 300, 80, 40);
    [_btLogin setTitle:@"登陆" forState:UIControlStateNormal];
    [_btLogin addTarget:self action:@selector(pressLogin) forControlEvents:UIControlEventTouchUpInside];
    [self.view addSubview:_btLogin];

    _btRegister = [UIButton buttonWithType:UIButtonTypeRoundedRect];
    _btRegister.frame = CGRectMake(120, 360, 80, 40);
    [_btRegister setTitle:@"注册" forState:UIControlStateNormal];
    [_btRegister addTarget:self action:@selector(pressRegister) forControlEvents:UIControlEventTouchUpInside];
    [self.view addSubview:_btRegister];
    // Do any additional setup after loading the view.
}
- (void) pressLogin {
    NSString* strName = @"michael";
    NSString* strPass = @"12345678";
    if ([strPass isEqual: _tfUserPassword.text] && [strName isEqual: self.tfUserName.text]) {
        NSLog(@"用户名密码正确");
        UIAlertController* alertController = [UIAlertController alertControllerWithTitle:@"提示" message:@"用户名和密码正确" preferredStyle:UIAlertControllerStyleAlert];
        UIAlertAction* confirm = [UIAlertAction actionWithTitle:@"确认" style:UIAlertActionStyleDefault handler:^(UIAlertAction* _Nonnull action) {
            NSLog(@"点击确认");
        }];
        [alertController addAction:confirm];
        UIAlertAction* cancel = [UIAlertAction actionWithTitle:@"取消" style:UIAlertActionStyleDefault handler:^(UIAlertAction* _Nonnull action) {
            NSLog(@"点击取消");
        }];
        [alertController addAction: cancel];
        [self presentViewController:alertController animated:YES completion:nil];
    } else {
        NSLog(@"用户名或密码错误");
        UIAlertController* alertController = [UIAlertController alertControllerWithTitle:@"提示" message:@"用户名或密码错误" preferredStyle:UIAlertControllerStyleAlert];
        UIAlertAction* confirm = [UIAlertAction actionWithTitle:@"确认" style:UIAlertActionStyleDefault handler:^(UIAlertAction* _Nonnull action) {
            NSLog(@"点击确认");
        }];
        [alertController addAction:confirm];
        UIAlertAction* cancel = [UIAlertAction actionWithTitle:@"取消" style:UIAlertActionStyleDefault handler:^(UIAlertAction* _Nonnull action) {
            NSLog(@"点击取消");
        }];
        [alertController addAction: cancel];
        [self presentViewController:alertController animated:YES completion:nil];
    }
}
- (void) pressRegister {
    NSLog(@"ddd");
}

-(void) touchesBegan:(NSSet<UITouch *> *)touches withEvent:(UIEvent *)event {
    [_tfUserName resignFirstResponder];
    [_tfUserName resignFirstResponder];
}
@end
最后实现的效果:
登陆成功的界面:


 919
919


 被折叠的 条评论
为什么被折叠?
被折叠的 条评论
为什么被折叠?
 到【灌水乐园】发言


