


- 实验环境:idea 2021.1.1 jdk 1.8 vnc viewer
- 在idea中创建maven项目
File->New->Project
选择maven

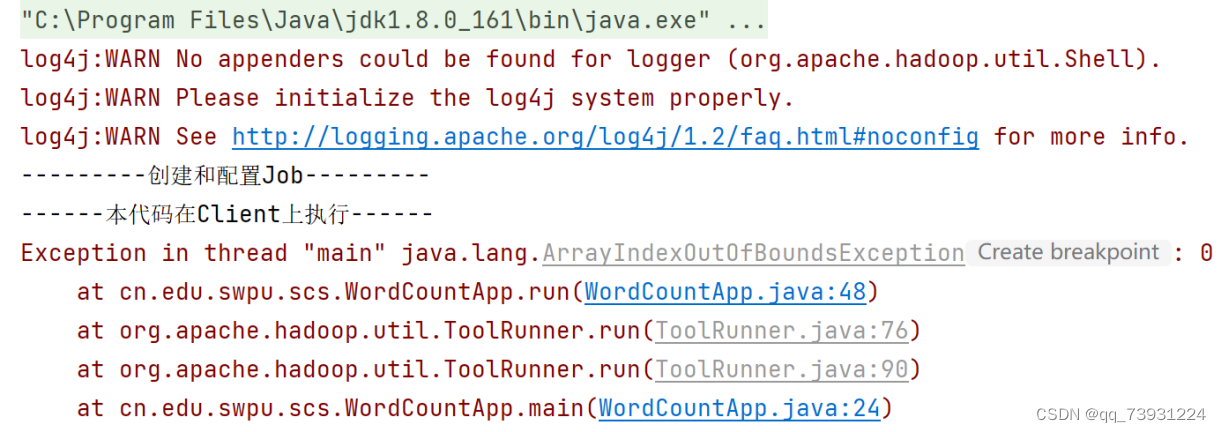
Jdk版本不能太高,否则在vnc viewer中运行jar包时会报错,之前用jdk17进行编译,运行时出现java.lang.UnsupportedClassVersionError,因为jdk版本太高了。点击Next,为maven项目取名
修改pom.xml
查询maven组件配置https://mvnrepository.com/
需要查询的组件,版本号这里选择的是3.1.2:
hadoop-hdfs
hadoop-common
hadoop-mapreduce-client-core

在pom.xml文件中的根节点<project></project>中,添加一个<dependencies></dependencies>子节点,将复制下来的maven放在<dependencies></dependencies>中,如下图:
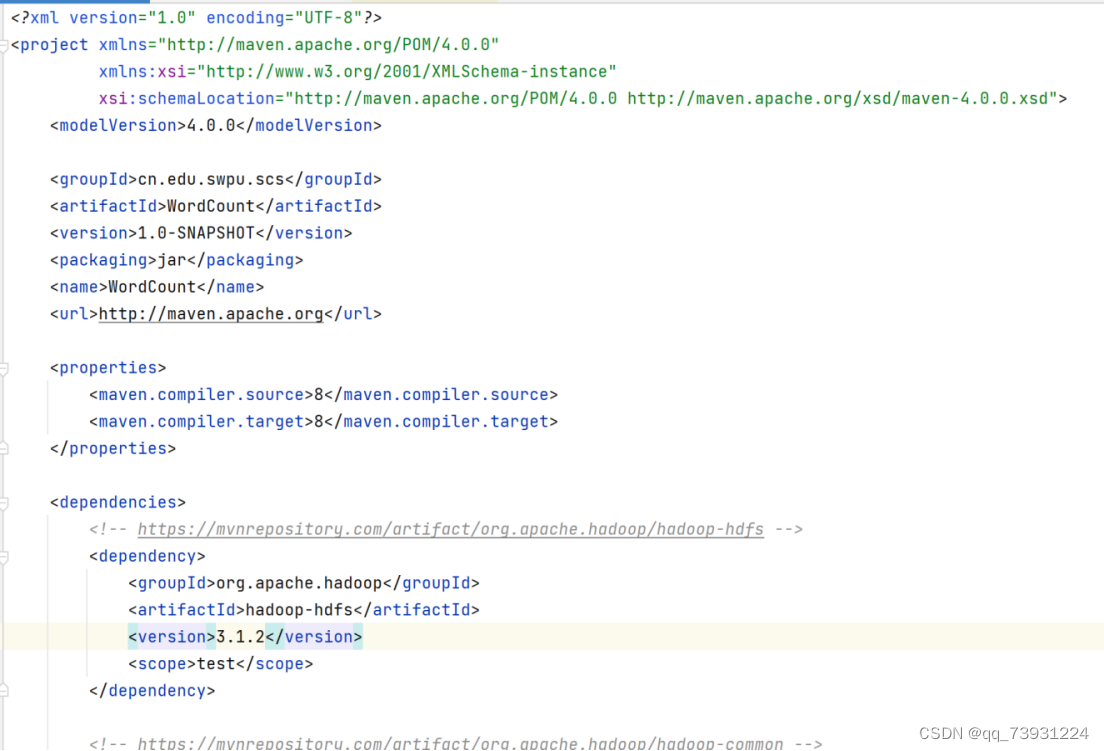

<?xml version="1.0" encoding="UTF-8"?>
<project xmlns="http://maven.apache.org/POM/4.0.0"
         xmlns:xsi="http://www.w3.org/2001/XMLSchema-instance"
         xsi:schemaLocation="http://maven.apache.org/POM/4.0.0 http://maven.apache.org/xsd/maven-4.0.0.xsd">
    <modelVersion>4.0.0</modelVersion>

    <groupId>cn.edu.swpu.scs</groupId>
    <artifactId>WordCount</artifactId>
    <version>1.0-SNAPSHOT</version>
    <packaging>jar</packaging>
    <name>WordCount</name>
    <url>http://maven.apache.org</url>

    <properties>
        <maven.compiler.source>8</maven.compiler.source>
        <maven.compiler.target>8</maven.compiler.target>
    </properties>

    <dependencies>
        <!-- https://mvnrepository.com/artifact/org.apache.hadoop/hadoop-hdfs -->
        <dependency>
            <groupId>org.apache.hadoop</groupId>
            <artifactId>hadoop-hdfs</artifactId>
            <version>3.1.2</version>
            <scope>test</scope>
        </dependency>

        <!-- https://mvnrepository.com/artifact/org.apache.hadoop/hadoop-common -->
        <dependency>
            <groupId>org.apache.hadoop</groupId>
            <artifactId>hadoop-common</artifactId>
            <version>3.1.2</version>
        </dependency>

        <!-- https://mvnrepository.com/artifact/org.apache.hadoop/hadoop-mapreduce-client-core -->
        <dependency>
            <groupId>org.apache.hadoop</groupId>
            <artifactId>hadoop-mapreduce-client-core</artifactId>
            <version>3.1.2</version>
        </dependency>

    </dependencies>
</project>
右键pom.xml,打开setting.xml,配置镜像源

编辑如下镜像源,配置多个镜像
<?xml version="1.0" encoding="UTF-8"?>
<settings xmlns="http://maven.apache.org/SETTINGS/1.0.0"
          xmlns:xsi="http://www.w3.org/2001/XMLSchema-instance"
          xsi:schemaLocation="http://maven.apache.org/SETTINGS/1.0.0 http://maven.apache.org/xsd/settings-1.0.0.xsd">
    <mirrors>

        <mirror>
            <id>central</id>
            <url>https://repo1.maven.org/maven2/</url>
            <mirrorOf>central</mirrorOf>
        </mirror>
        <mirror>
            <id>netease</id>
            <url>http://maven.netease.com/repository/public/</url>
            <mirrorOf>central</mirrorOf>
        </mirror>
        <mirror>
            <id>huaweicloud</id>
            <url>https://repo.huaweicloud.com/repository/maven/</url>
            <mirrorOf>central</mirrorOf>
        </mirror>
        <mirror>
            <id>tencent</id>
            <url>https://mirrors.cloud.tencent.com/repository/maven/</url>
            <mirrorOf>central</mirrorOf>
        </mirror>
        <mirror>
            <id>ustc</id>
            <url>http://mirrors.ustc.edu.cn/maven/maven2/</url>
            <mirrorOf>central</mirrorOf>
        </mirror>
        <mirror>
            <id>nju</id>
            <url>http://maven.nju.edu.cn/repository/</url>
            <mirrorOf>central</mirrorOf>
        </mirror>
        <mirror>
            <id>tsinghua</id>
            <url>https://repo.maven.apache.org/maven2/</url>
            <mirrorOf>central</mirrorOf>
        </mirror>
        <mirror>
            <id>bit</id>
            <url>http://mirror.bit.edu.cn/maven/</url>
            <mirrorOf>central</mirrorOf>
        </mirror>
        <mirror>
            <id>neusoft</id>
            <url>https://mirrors.neusoft.edu.cn/maven2/</url>
            <mirrorOf>central</mirrorOf>
        </mirror>
        <mirror>
            <id>opencas</id>
            <url>http://maven.opencas.cn/maven/</url>
            <mirrorOf>central</mirrorOf>
        </mirror>
        <mirror>
            <id>bjtu</id>
            <url>http://maven.bjtu.edu.cn/maven2/</url>
            <mirrorOf>central</mirrorOf>
        </mirror>
        <mirror>
            <id>aliyun</id>
            <url>http://maven.aliyun.com/</url>
            <mirrorOf>central</mirrorOf>
        </mirror>
    </mirrors>
</settings>
点击出现的"Import Changes",之后会自动下载相应的jar包,下载完成后创建包,我这里创建的包名为cn.edu.swpu.scs,也可以创建包名为cn.edu.swpu.scs.WordCount,这样与java代码引用的包名一致,二者要相对应。

WordCount.java
package cn.edu.swpu.scs;

import java.io.IOException;
import java.util.Iterator;
import java.util.StringTokenizer;

import org.apache.hadoop.conf.Configuration;
import org.apache.hadoop.conf.Configured;
import org.apache.hadoop.fs.Path;
import org.apache.hadoop.io.LongWritable;
import org.apache.hadoop.io.IntWritable;
import org.apache.hadoop.io.Text;
import org.apache.hadoop.mapreduce.Job;
import org.apache.hadoop.mapreduce.Mapper;
import org.apache.hadoop.mapreduce.Reducer;
import org.apache.hadoop.mapreduce.lib.input.TextInputFormat;
import org.apache.hadoop.mapreduce.lib.output.TextOutputFormat;
import org.apache.hadoop.util.Tool;
import org.apache.hadoop.util.ToolRunner;

public class WordCountApp extends Configured implements Tool {

    public static void main( String[] args ) throws Exception {
        int res = ToolRunner.run(new WordCountApp(), args);
        System.exit(res);
    }

    // 执行
    public int run(String[] args) throws Exception {
        Configuration conf = new Configuration();

        System.out.println("---------创建和配置Job---------");
        System.out.println("------本代码在Client上执行------");

        // 创建作业
        Job job = Job.getInstance(conf, "WordCount");

        // 指定作业的主类
        job.setJarByClass(WordCountApp.class);

        // 指定Map和Reduce类
        job.setMapperClass(Map.class);
        job.setReducerClass(Reduce.class);
        job.setCombinerClass(Reduce.class);

        // 指定输入格式为:文本格式文件
        job.setInputFormatClass(TextInputFormat.class);
        TextInputFormat.addInputPath(job, new Path(args[0]));

        // 指定输出格式为:文本格式文件,键为文本、值为整型数
        job.setOutputFormatClass(TextOutputFormat.class);
        job.setOutputKeyClass(Text.class);
        job.setOutputValueClass(IntWritable.class);
        TextOutputFormat.setOutputPath(job, new Path(args[1]));

        // 执行MapReduce
        boolean res = job.waitForCompletion(true);
        if(res)
            return 0;
        else
            return -1;
    }

    // Map过程
    public static class Map extends Mapper<LongWritable, Text, Text, IntWritable> {
        private final static IntWritable one = new IntWritable(1);
        private Text word = new Text();
        @Override
        public void map(LongWritable key, Text value, Context context)
                throws IOException, InterruptedException {
            String line = value.toString();
  			/*
  			String[] words = line.split(" ");
  			for(String word : words){
  				context.write(new Text(word), one);
  			}
  			*/
            System.out.println("---------" + key.toString() + "---" + line + "---------");
            StringTokenizer tokenizer = new StringTokenizer(line);	//split line to words by space
            while (tokenizer.hasMoreTokens()) {						//operate all word by loop
                word.set(tokenizer.nextToken());
                context.write(word, one);							//write KV to context, word is key, word number is value
            }
        }
    }

    // Reduce过程
    public static class Reduce extends Reducer<Text, IntWritable, Text, IntWritable> {
        @Override
        public void reduce(Text key, Iterable<IntWritable> val, Context context)	//mothod for each key,input format key(value1,value2,......)
                throws IOException, InterruptedException {
            int sum = 0;
            Iterator<IntWritable> values = val.iterator();
            while (values.hasNext()) {
                sum += values.next().get();					//sum value(one word count)
            }
            context.write(key, new IntWritable(sum));		//write one key and its count
        }
    }
}
右键run进行编译

代码会报错,但是是正常的
只要此时target目录内有这三个类就代表编译成功了

现在可以开始打包jar包
执行:File --> Project Structure --> Project Settings --> Artifacts --> + --> JAR --> Empty
创建与包名一致的目录结构,

右键scs,找到刚才的三个Java类,添加进去

选中第一个java类,Ctrl+shift,点击第三个,即可选中三个

点击ok,执行 Build --> Build Artifacts完成build,完成后,在项目的out目录中可找到创建的JAR包,如下图:

打包完成后,打开vnc viewer,点击左上角图标,选择transfer files

点击send files,找到jar位置,点击打开

选择downloads目录,点击OK,上传完成,

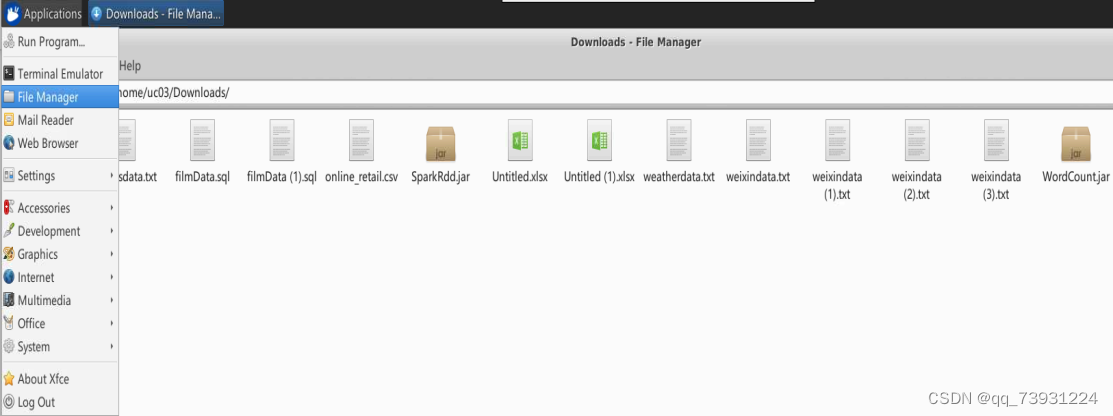
点击左上角Application->File Manager->Downloads,可以找到刚刚传上去的jar包
打开终端,执行命令如下:hadoop jar <jar路径> <输入目录> <输出目录>
输入目录为:/user/ua02/engarticles
输出目录为:/user/<用户名>/output<编号>
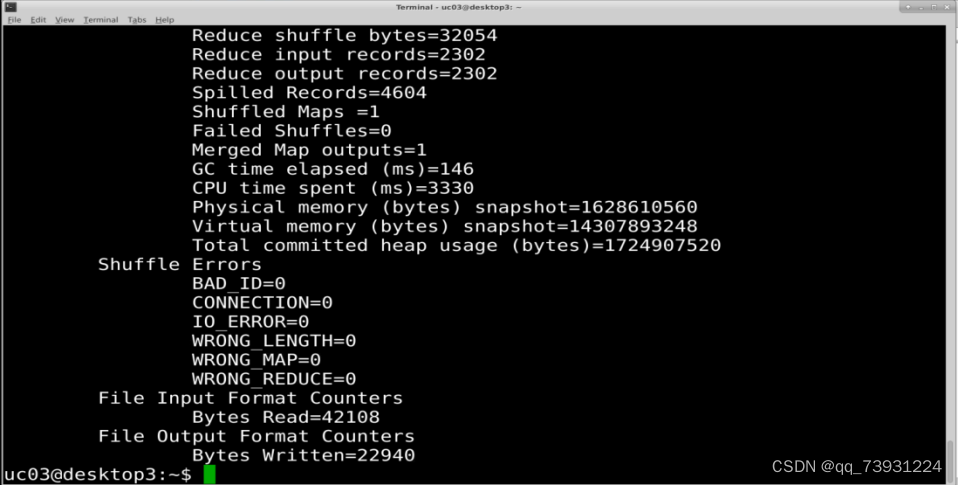
我这里输入命令:hadoop jar /home/uc03/Downloads/WordCount.jar cn.edu.swpu.scs.WordCountApp (指定main方法所在的位置,缺少会找不到main方法,WordCountApp是我创建java类的名字) /user/ua02/engarticles (输入目录这里都一样) /user/uc03/output02 (输出目录一定要不存在,不然会报错,不用单独创建output02,执行后会自动生成)

执行结果如下图:


 2501
2501

 被折叠的 条评论
为什么被折叠?
被折叠的 条评论
为什么被折叠?
 到【灌水乐园】发言


