


前言
前段时间看到了谷雨系列的教程感觉不错,就在自己手头的板子上测试了一遍。
这个系列更多的是自己的学习记录,如有错误,欢迎评论指正。
1.硬件
笔者手中一个nRF52832和一个nRF52840,本系列都使用这两个做测试。
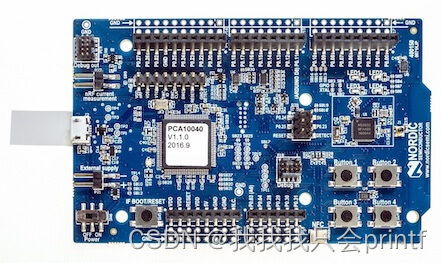
52832:
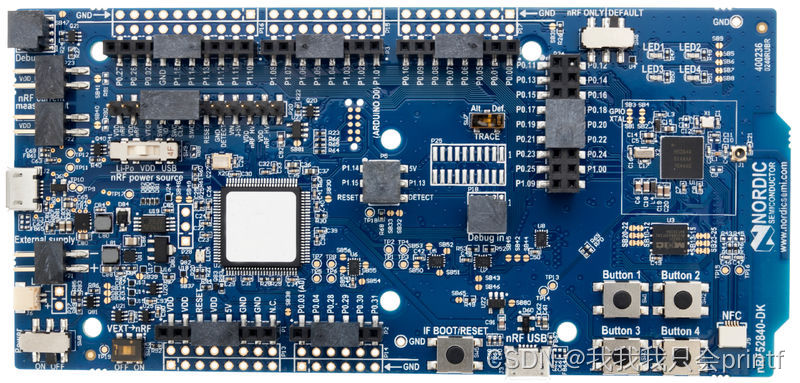
52840:
1.下载SDK与测试demo
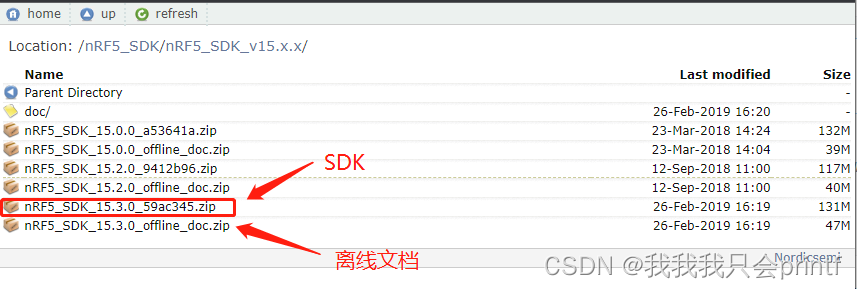
注意选择自己需要的版本,理论上版本越新越好。因为笔者之前下载过15.3,所以本系列都使用15.3测试,如下图:
前文已经说过,本系列是基于谷雨的教程做的,所以下载谷雨的demo:
谷雨demo
2.安装SES、JLINK等工具
这个不再赘述,网上很多教程。
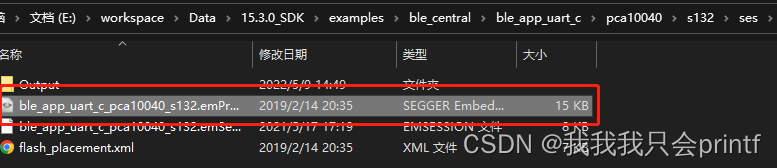
3.工程编译
笔者手头的板子一个是nrf52832,一个是nrf52840,所以根据对应:
我把nrf52832作为中心设备(central),它板子编号是PCA10040(官方规定,板子上写的有),协议栈是S132
我把nrf52840作为外围设备(peripheral),nrf52840是PCA10056,协议栈是S140
这个要根据实际情况来选择。

打开后请把 central 的main.c替换为:
1.2_ble_central_scan_all下的main.c
把 peripheral 的main.c替换为:
2.2_ble_peripheral_adv_all下的main.c
编译后发现缺少一个头文件:
![]()
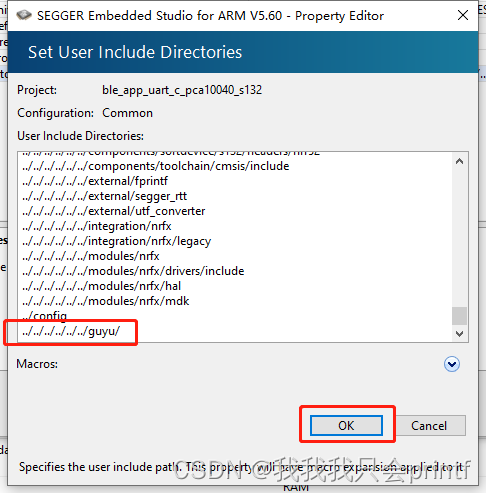
可以在SDK下创建一个文件夹,比如我这里是:
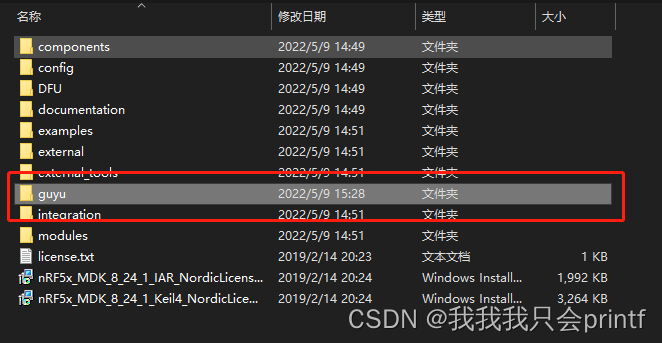
把谷雨demo中的两个文件放进去:

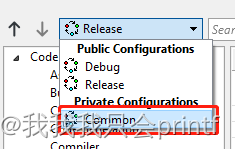
然后在工程中创建一个文件夹,我这里取名common:
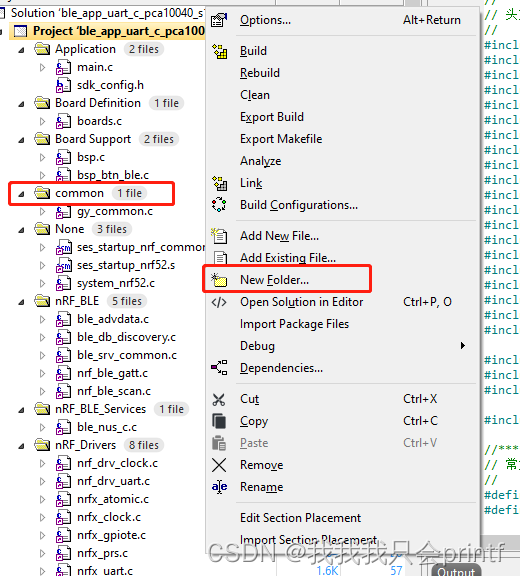
在创建好的文件夹里面添加文件:
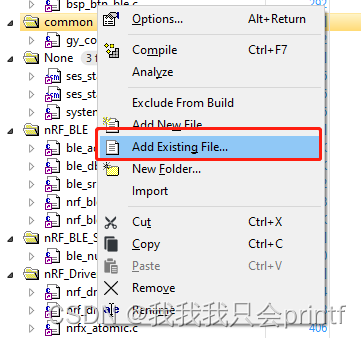
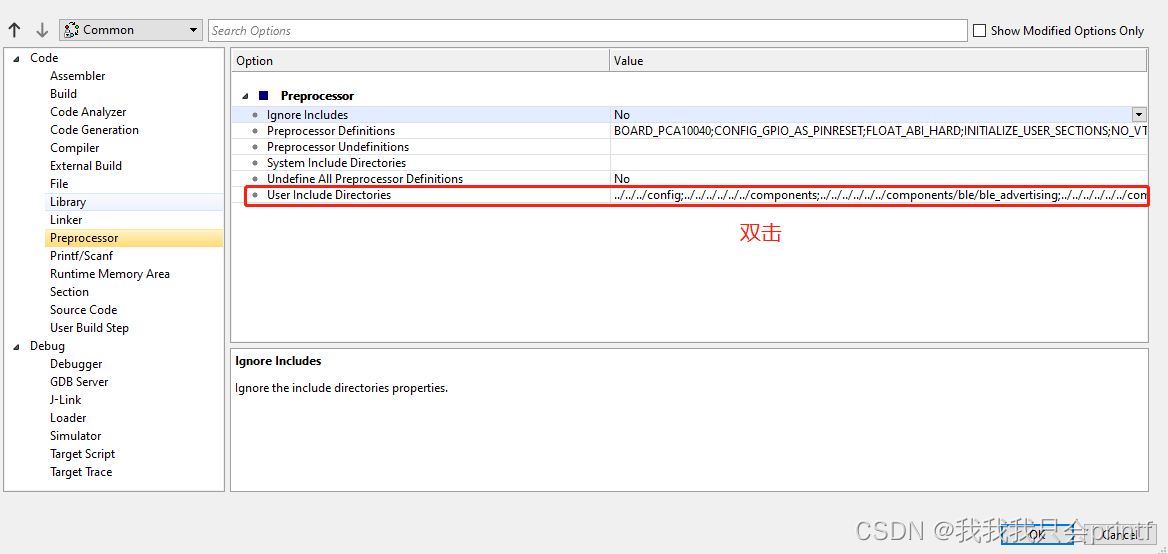
添加完成后,还要把这个文件夹添加到头文件搜索路径,否则这个文件夹内的.h不会被搜索:
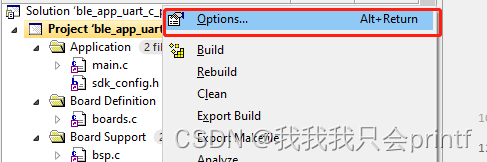
然后再次编译可以编译成功。
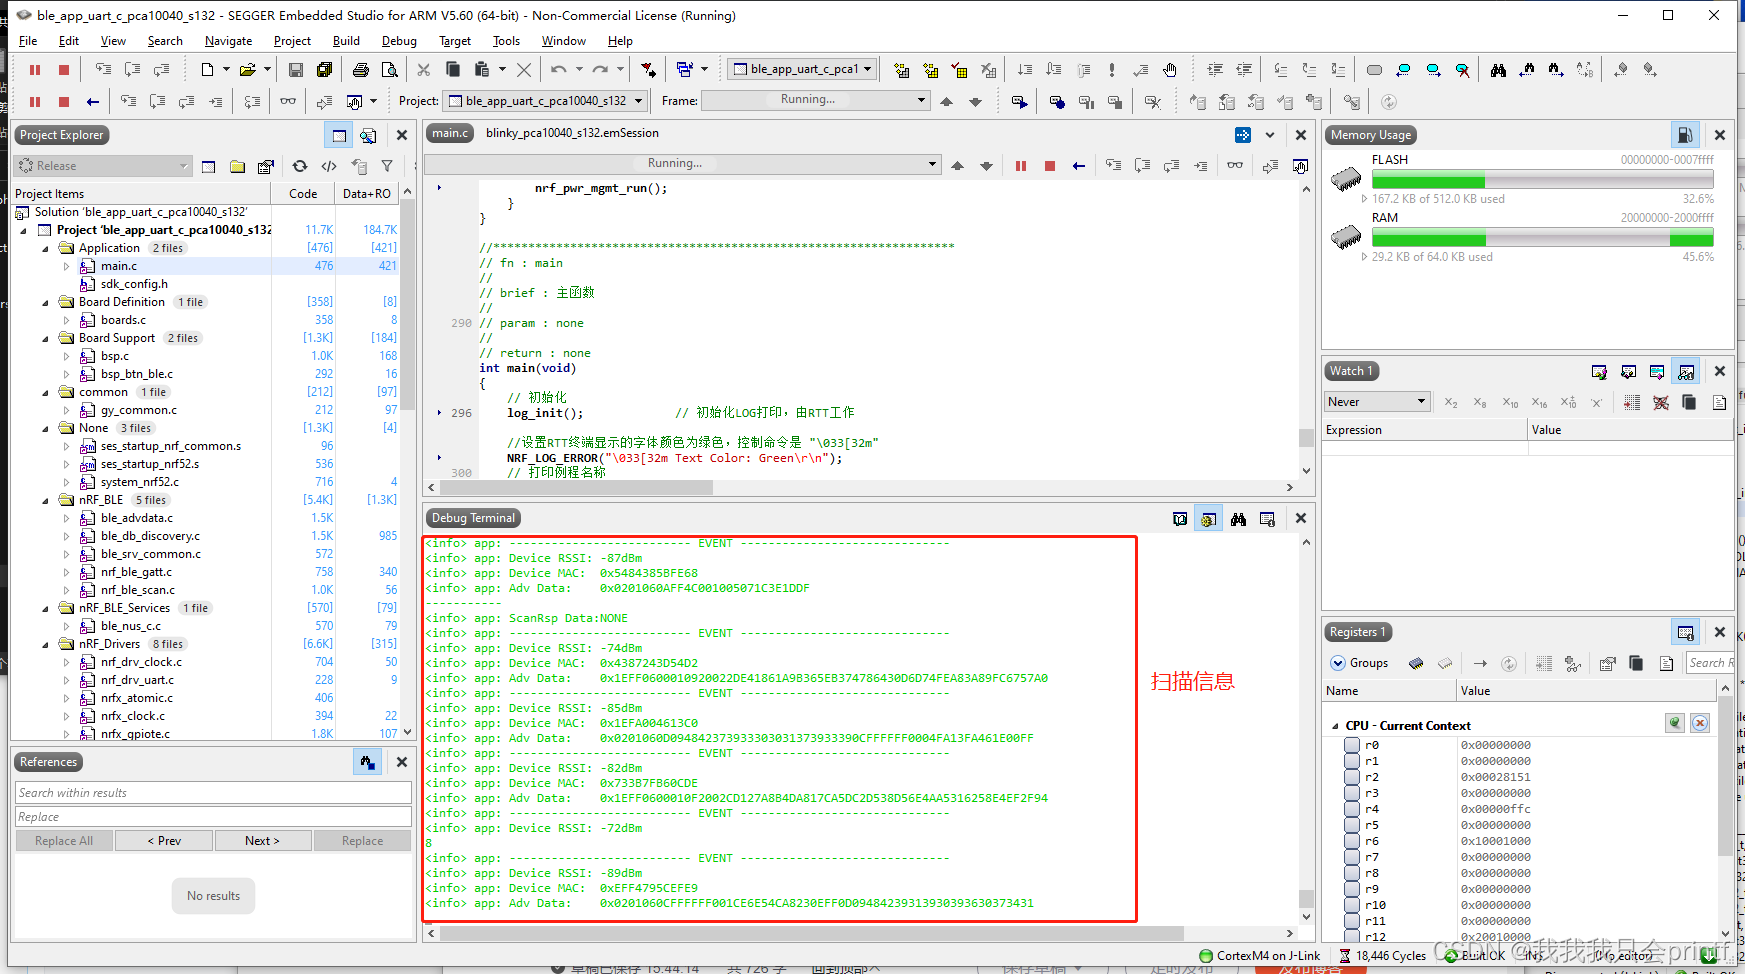
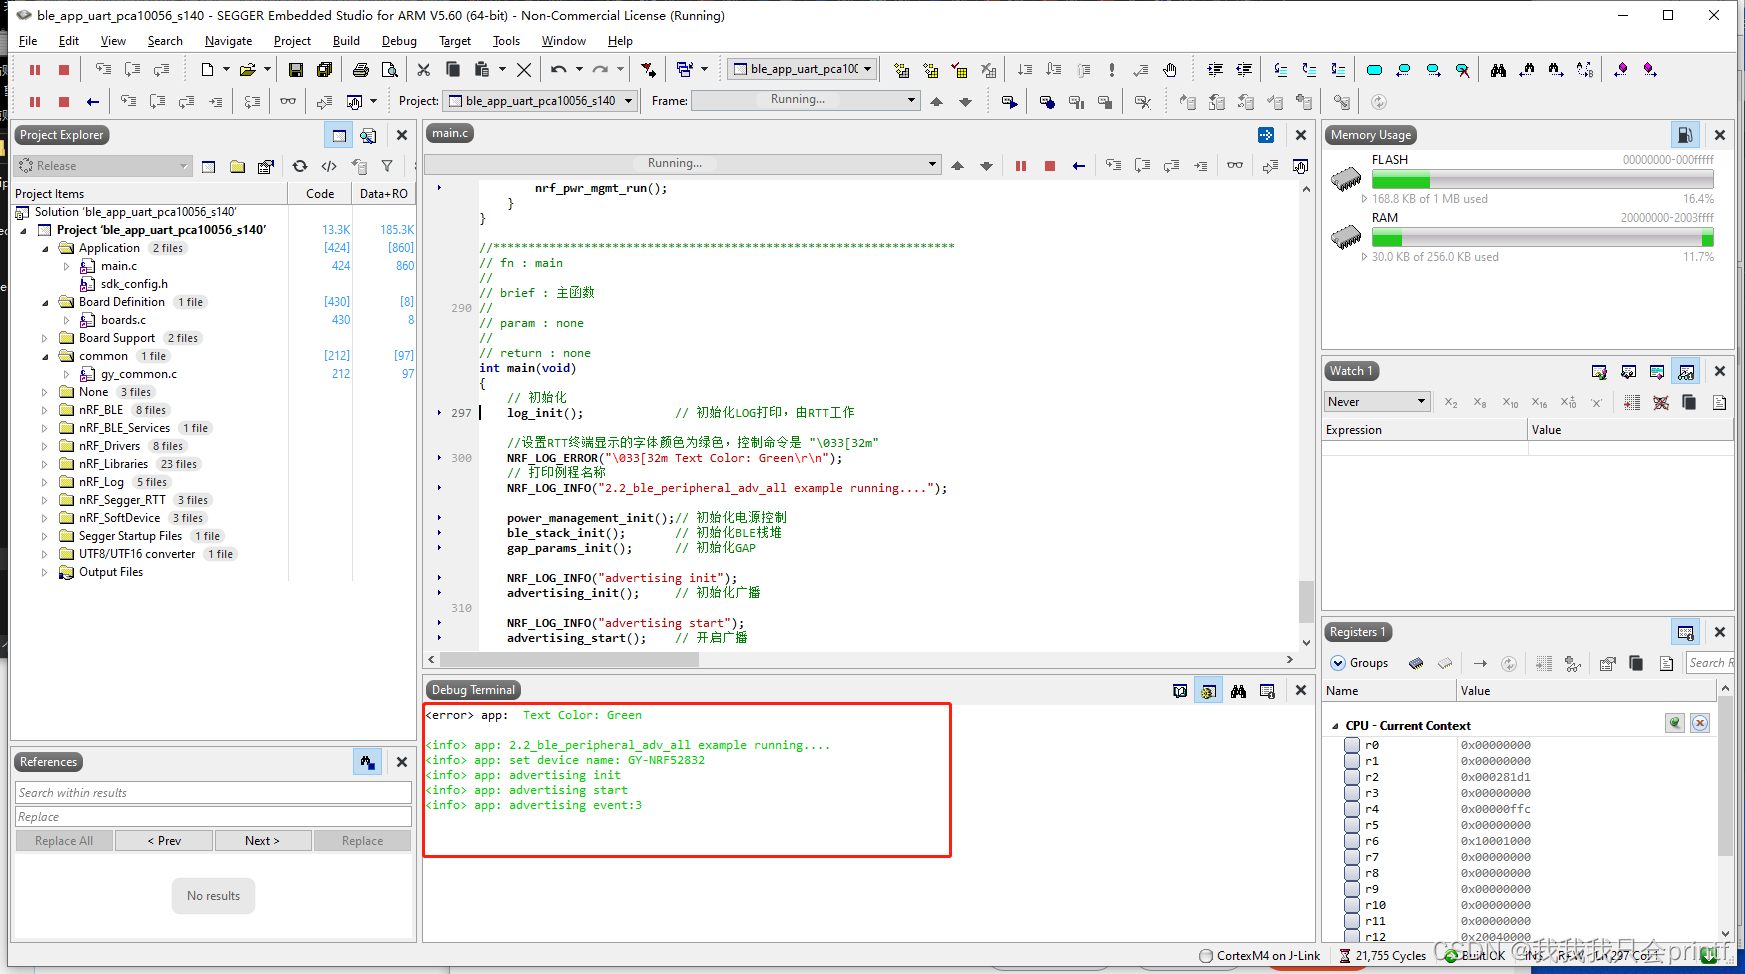
4.实验现象
central:
peripheral:
5.总结
主机端负责扫描,从机端负责广播
5.1 主机端
扫描分为两步:
1)扫描初始化
2)开始扫描
5.1.1 扫描初始化
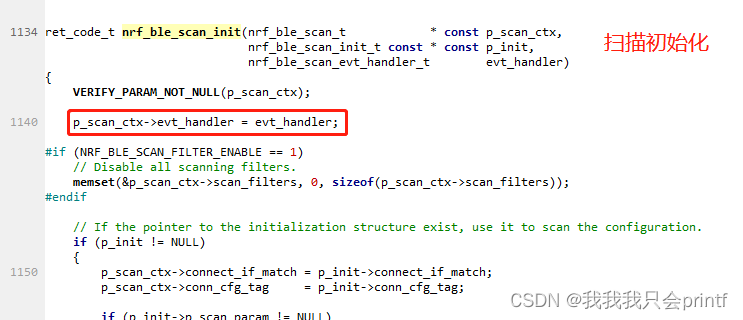
其中扫描初始化中最重要的就是 nrf_ble_scan_init 这个函数,而这个函数最重要的在于它的三个参数,它们分别是:
扫描实例(化虚为实,把一个抽象的概念转化为一个可以操作的实体)
扫描初始化结构体,它包含了有关扫描的所有设置
处理扫描事件的回调函数,每当有扫描相关事件发生时,它会被执行
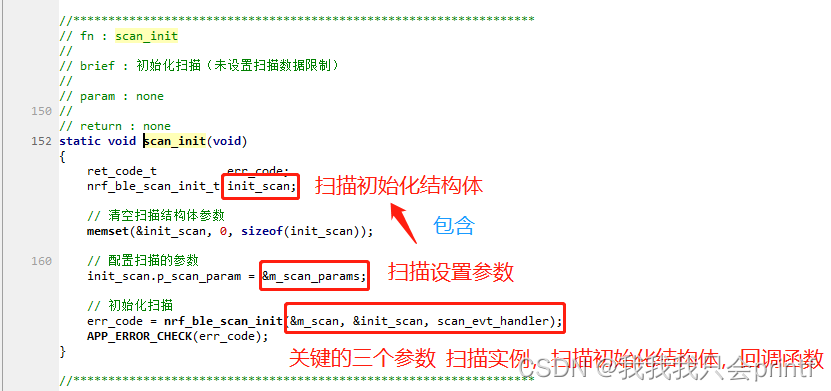
所以扫描初始化就转化为了如何定义和设置这三个参数!
5.1.2 扫描实例
首先是扫描实例,它最简单,不需要我们自己写代码,只用一个宏定义即可定义:
NRF_BLE_SCAN_DEF(m_scan); // 定义扫描实例的名称其中 m_scan 就是我们给实例取的名字,你当然也可以换成其他名称。定义好后,就可以直接使用了,无需其他更改。
5.1.3 扫描初始化结构体
这个结构体定义如下:
typedef struct
{
    ble_gap_scan_params_t const * p_scan_param;     /**< BLE GAP scan parameters required to initialize the module. Can be initialized as NULL. If NULL, the parameters required to initialize the module are loaded from the static configuration. */
    bool                          connect_if_match; /**< If set to true, the module automatically connects after a filter match or successful identification of a device from the whitelist. */
    ble_gap_conn_params_t const * p_conn_param;     /**< Connection parameters. Can be initialized as NULL. If NULL, the default static configuration is used. */
    uint8_t                       conn_cfg_tag;     /**< Variable to keep track of what connection settings will be used if a filer match or a whitelist match results in a connection. */
} nrf_ble_scan_init_t;
在这个demo里,我们最主要的是设置 p_scan_param这个成员,从名字也可以看出,它是扫描参数,其他参数在后续的例子中有讲解。而扫描参数结构体定义如下:
/**@brief GAP scanning parameters. */
typedef struct
{
  uint8_t               extended               : 1; /**< If 1, the scanner will accept extended advertising packets.
                                                         If set to 0, the scanner will not receive advertising packets
                                                         on secondary advertising channels, and will not be able
                                                         to receive long advertising PDUs. */
  uint8_t               report_incomplete_evts : 1; /**< If 1, events of type @ref ble_gap_evt_adv_report_t may have
                                                         @ref ble_gap_adv_report_type_t::status set to
                                                         @ref BLE_GAP_ADV_DATA_STATUS_INCOMPLETE_MORE_DATA.
                                                         This parameter is ignored when used with @ref sd_ble_gap_connect
                                                         @note This may be used to abort receiving more packets from an extended
                                                               advertising event, and is only available for extended
                                                               scanning, see @ref sd_ble_gap_scan_start.
                                                         @note This feature is not supported by this SoftDevice. */
  uint8_t               active                 : 1; /**< If 1, perform active scanning by sending scan requests.
                                                         This parameter is ignored when used with @ref sd_ble_gap_connect. */
  uint8_t               filter_policy          : 2; /**< Scanning filter policy. @sa BLE_GAP_SCAN_FILTER_POLICIES.
                                                         @note Only @ref BLE_GAP_SCAN_FP_ACCEPT_ALL and
                                                               @ref BLE_GAP_SCAN_FP_WHITELIST are valid when used with
                                                               @ref sd_ble_gap_connect */
  uint8_t               scan_phys;                  /**< Bitfield of PHYs to scan on. If set to @ref BLE_GAP_PHY_AUTO,
                                                         scan_phys will default to @ref BLE_GAP_PHY_1MBPS.
                                                         - If @ref ble_gap_scan_params_t::extended is set to 0, the only
                                                           supported PHY is @ref BLE_GAP_PHY_1MBPS.
                                                         - When used with @ref sd_ble_gap_scan_start,
                                                           the bitfield indicates the PHYs the scanner will use for scanning
                                                           on primary advertising channels. The scanner will accept
                                                           @ref BLE_GAP_PHYS_SUPPORTED as secondary advertising channel PHYs.
                                                         - When used with @ref sd_ble_gap_connect, the bitfield indicates
                                                           the PHYs the initiator will use for scanning on primary advertising
                                                           channels. The initiator will accept connections initiated on either
                                                           of the @ref BLE_GAP_PHYS_SUPPORTED PHYs.
                                                           If scan_phys contains @ref BLE_GAP_PHY_1MBPS and/or @ref BLE_GAP_PHY_2MBPS,
                                                           the primary scan PHY is @ref BLE_GAP_PHY_1MBPS. */
  uint16_t              interval;                   /**< Scan interval in 625 us units. @sa BLE_GAP_SCAN_INTERVALS. */
  uint16_t              window;                     /**< Scan window in 625 us units. @sa BLE_GAP_SCAN_WINDOW. */
  uint16_t              timeout;                    /**< Scan timeout in 10 ms units. @sa BLE_GAP_SCAN_TIMEOUT. */
  ble_gap_ch_mask_t     channel_mask;               /**< Channel mask for primary and secondary advertising channels.
                                                         At least one of the primary channels, that is channel index 37-39, must be
                                                         set to 0.
                                                         Masking away secondary channels is not supported. */
} ble_gap_scan_params_t;
所以,我们设置扫描相关参数就是要设置这个结构体成员,它们的含义注释中都有。这里我的扫描参数设置是:
// 定义扫描参数
static ble_gap_scan_params_t m_scan_params =
{
    .active        = 1,                            // 1为主动扫描,可获得广播数据及扫描回调数据
    .interval      = NRF_BLE_SCAN_SCAN_INTERVAL,   // 扫描间隔:160*0.625 = 100ms
    .window        = NRF_BLE_SCAN_SCAN_WINDOW,     // 扫描窗口:80*0.625 = 50ms
    .timeout       = NRF_BLE_SCAN_SCAN_DURATION,   // 扫描持续的时间:设置为0,一直扫描,直到明确的停止扫描
    .filter_policy = BLE_GAP_SCAN_FP_ACCEPT_ALL,   // 扫描所有BLE设备,不做限制
    .scan_phys     = BLE_GAP_PHY_1MBPS,            // 扫描1MBPS的PHY
};
总结起来就是,我们扫描是主动扫描,所以可以触发扫描回调数据,否则只是被动的扫描,只能得到广播数据,然后我们扫描所有的1MBPS的设备,没有过滤,而且会一直扫描,没有超时限制。其次我们的扫描是每隔100ms扫描一次,一次扫描是50ms,剩下的50ms休息,相当于占空比50%。
5.1.4 扫描处理回调函数
扫描一旦开始后,我们怎么处理扫描的事件?
Nordic的做法是我们提供给协议栈一个回调函数,每当底层有相关事件时,协议栈就触发我们设置的这个函数。
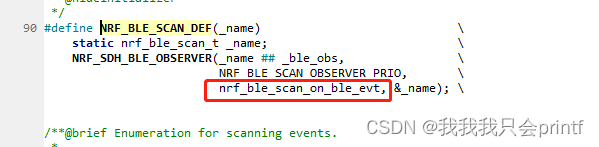
注意,我们提供给协议栈的函数可不是 scan_evt_handler !
而是在扫描实例化时用nordic宏定义时注册好的,传给协议栈的函数也是Nordic写好的:
在这个函数中,比如协议栈扫描到广播事件:
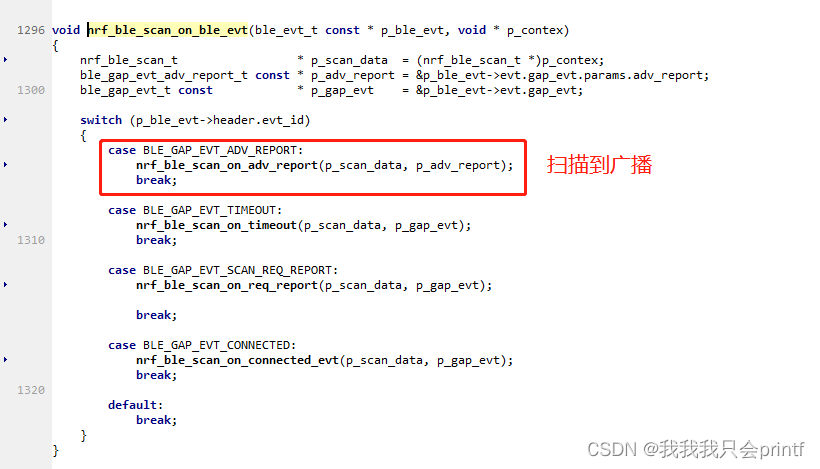
而在这个 nrf_ble_scan_on_adv_report 处理函数中,才会调用我们的扫描回调:
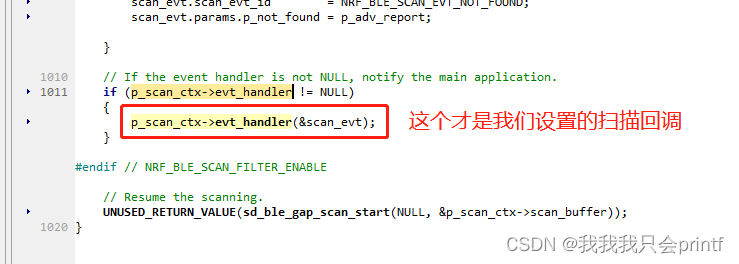
它是在扫描初始化里面赋值给它的:
这个函数类型必须是:
typedef void (*nrf_ble_scan_evt_handler_t)(scan_evt_t const * p_scan_evt);也就是返回为空,但是参数必须是scan_evt_t这个结构体指针。这个结构体是:
typedef struct
{
    nrf_ble_scan_evt_t scan_evt_id; /**< Type of event propagated to the main application. */
    union
    {
        nrf_ble_scan_evt_filter_match_t   filter_match;           /**< Scan filter match. */
        ble_gap_evt_scan_req_report_t     req_report;             /**< Scan request report parameters. */
        ble_gap_evt_timeout_t             timeout;                /**< Timeout event parameters. */
        ble_gap_evt_adv_report_t const  * p_whitelist_adv_report; /**< Advertising report event parameters for whitelist. */
        ble_gap_evt_adv_report_t const  * p_not_found;            /**< Advertising report event parameters when filter is not found. */
        nrf_ble_scan_evt_connected_t      connected;              /**< Connected event parameters. */
        nrf_ble_scan_evt_connecting_err_t connecting_err;         /**< Error event when connecting. Propagates the error code returned by the SoftDevice API @ref sd_ble_gap_scan_start. */
    } params;
    ble_gap_scan_params_t const * p_scan_params;                  /**< GAP scanning parameters. These parameters are needed to establish connection. */
} scan_evt_t;
第一个成员就是事件类型ID:
typedef enum
{
    NRF_BLE_SCAN_EVT_FILTER_MATCH,         /**< A filter is matched or all filters are matched in the multifilter mode. */
    NRF_BLE_SCAN_EVT_WHITELIST_REQUEST,    /**< Request the whitelist from the main application. For whitelist scanning to work, the whitelist must be set when this event occurs. */
    NRF_BLE_SCAN_EVT_WHITELIST_ADV_REPORT, /**< Send notification to the main application when a device from the whitelist is found. */
    NRF_BLE_SCAN_EVT_NOT_FOUND,            /**< The filter was not matched for the scan data. */
    NRF_BLE_SCAN_EVT_SCAN_TIMEOUT,         /**< Scan timeout. */
    NRF_BLE_SCAN_EVT_SCAN_REQ_REPORT,      /**< Scan request report. */
    NRF_BLE_SCAN_EVT_CONNECTING_ERROR,     /**< Error occurred when establishing the connection. In this event, an error is passed from the function call @ref sd_ble_gap_connect. */
    NRF_BLE_SCAN_EVT_CONNECTED             /**< Connected to device. */
} nrf_ble_scan_evt_t;
可以看到除去一些过滤匹配相关、白名单、超时、连接等,未过滤的扫描数据对应的ID是:
NRF_BLE_SCAN_EVT_NOT_FOUND
所以在回调函数内有:
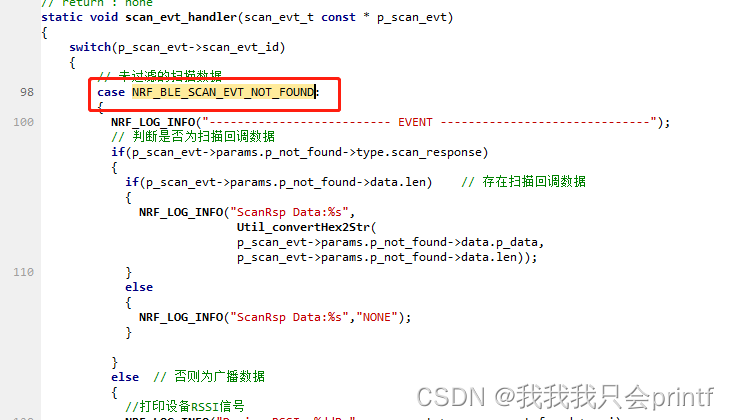
然后再判断扫描是否有应答:
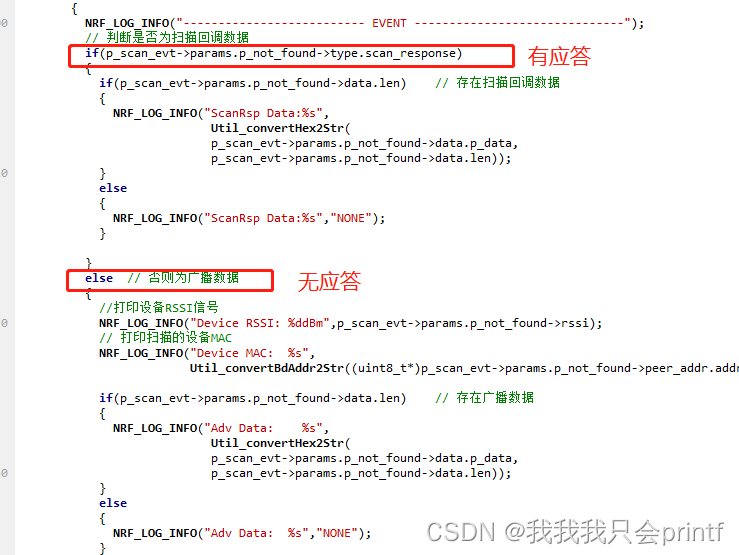
但是注意,如果有应答,但是应答中的数据长度为0,我们认为没有应答数据,也就是负载长度为0的情况。
5.1.5 扫描开始
很简单,直接调用的库函数:
//******************************************************************
// fn : scan_start
//
// brief : 开始扫描
//
// param : none
//
// return : none
static void scan_start(void)
{
    ret_code_t ret;

    ret = nrf_ble_scan_start(&m_scan);
    APP_ERROR_CHECK(ret);
}
因为我们没有设置扫描超时,所以即使没有扫描到设备也只能手动停止扫描。可以使用:
void nrf_ble_scan_stop(void)如果要设置扫描超时可以设置:

这个数字是从1~0xFFFF,单位10ms。
5.2 从机端
从机端最重要的两个函数:
1.广播初始化
2.开始广播
这与主机端很相似。
至于这个例子中为什么要有GAP的初始化,是因为为了让我们可以看到设备的名字,这样更加直观,比如你可以直接用手机上的蓝牙工具可以直接看到从机。其实广播数据中是可以带设备名字的,但是这要去分析广播数据,并没有GAP来的直观。
5.2.1 广播初始化
static void advertising_init(void)
{
uint32_t err_code;
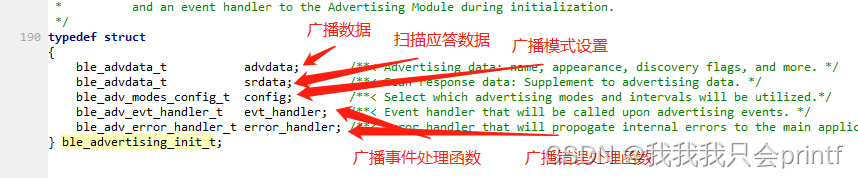
ble_advertising_init_t init;
memset(&init, 0, sizeof(init));
//为了掩饰广播的状态变化,这里设置一个广播事件回调函数。
init.evt_handler = adv_evt_callback;
// 广播数据包含所有设备名称(FULL NAME)
init.advdata.name_type = BLE_ADVDATA_FULL_NAME;
// 扫描回调数据中包含设备MAC地址
init.srdata.include_ble_device_addr = true;
#if 0
//设置受限广播模式,广播超时后停止广播
init.advdata.flags = BLE_GAP_ADV_FLAGS_LE_ONLY_LIMITED_DISC_MODE;
// 配置广播周期,先快速广播18s(周期40ms),再慢速广播18s(周期100ms),最后停止广播
init.config.ble_adv_fast_enabled = true;
init.config.ble_adv_fast_interval = 64; // 64*0.625 = 40ms
init.config.ble_adv_fast_timeout = 1800; // 1800*10ms = 18s
init.config.ble_adv_slow_enabled = true;
init.config.ble_adv_slow_interval = 160; // 160*0.625 = 100ms
init.config.ble_adv_slow_timeout = 1800; // 1800*10ms = 18s
#else
//设置一般广播模式,持续广播,永不超时
init.advdata.flags = BLE_GAP_ADV_FLAGS_LE_ONLY_GENERAL_DISC_MODE;
init.config.ble_adv_fast_enabled = true;
init.config.ble_adv_fast_interval = 160; // 160*0.625 = 100ms
init.config.ble_adv_fast_timeout = 0; // 0表示不超时
#endif
err_code = ble_advertising_init(&m_advertising, &init);
APP_ERROR_CHECK(err_code);
ble_advertising_conn_cfg_tag_set(&m_advertising, APP_BLE_CONN_CFG_TAG);
}其实对比主机端也可以看出来
这里最终要的函数就是 ble_advertising_init ,所以我们要提供它所需要的两个参数
广播实例、广播初始化参数:
BLE_ADVERTISING_DEF(m_advertising); // 广播实例广播初始化参数:
比如我们想要设置广播数据中的名称和扫描应答数据中带MAC地址:
    // 广播数据包含所有设备名称(FULL NAME)
    init.advdata.name_type = BLE_ADVDATA_FULL_NAME;

    // 扫描回调数据中包含设备MAC地址
    init.srdata.include_ble_device_addr = true;
而其他我们都没有设置,所以主机扫描到的数据为:
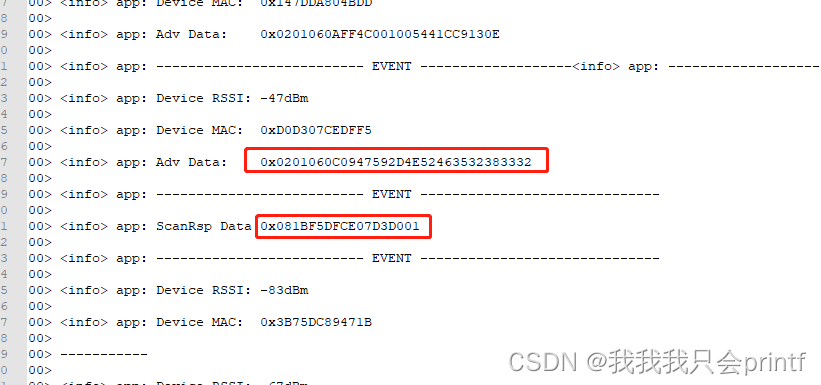
而广播数据格式为:
长度(1byte) + 类型(1byte) + 数据 + 长度(1byte) + 类型(1byte) + 数据 + ......
这里广播数据为:0201060C0947592D4E52463532383332,可以看出来是两条:
020106
02代表这条数据长度带上类型一共2bytes,类型是01,也就是flags类型:

我们这里flags设置的是:


它的值等于6。也就是广播中的数据和我们设置的一样。
0C0947592D4E52463532383332
这里同理,长度0x0C,类型是名字:
 数据正是我们设备名字的ASCII值:
'G','Y','-','N','R','F','5','2','8','3','2'
5.2.2 开始广播
//******************************************************************
// fn : advertising_start
//
// brief : 用于开启广播
//
// param : none
//
// return : none
static void advertising_start(void)
{
    uint32_t err_code = ble_advertising_start(&m_advertising, BLE_ADV_MODE_FAST);
    APP_ERROR_CHECK(err_code);
}
可以看到很简单,参数就两个,广播实例和当前广播模式。注意,当前广播模式就是,广播一开始的模式,而这个模式如果你在初始化阶段配置了多个模式,在这个一开始的模式结束后,是会切换到其他模式的!切换主要在这个函数中的:

更新2023-11-27:
懒人专用链接:github仓库


 925
925

 被折叠的 条评论
为什么被折叠?
被折叠的 条评论
为什么被折叠?
 到【灌水乐园】发言


