


UI设计
本来和小组负责人讨论后是想先实现简单的DIY海报效果的,用户自己上传图片,然后写文字,选择样式和大小等等,之后再进行完善,例如各种情况的海报分类,下图就是之前设计想要用来配合完善功能使用的UI分类界面(只是设计效果,banner还未换为本项目相关文字),之后经过和负责人的讨论,因为国庆中秋正好一块了,就想做一种现成海报,然后用户改文字,比较方便用户。

··············································
经讨论之后,就开始着手设计需要新增加的页面,为一个选择海报界面,以及海报更多界面。
选择海报界面,因为是做中秋国庆的,就没有像上面的设计一样分类那么多,一个banner加上下面的提示配上团团的形象以及海报展示就可以。为了避免单调在图片下方加了点装饰。如下图。

海报更多界面为点击右方更多按钮后跳转的界面,为了展示全部的相关海报而设计。为了搭配之后海报制作界面的背景色,背景以及上方的提示,均采用了相关黄色。
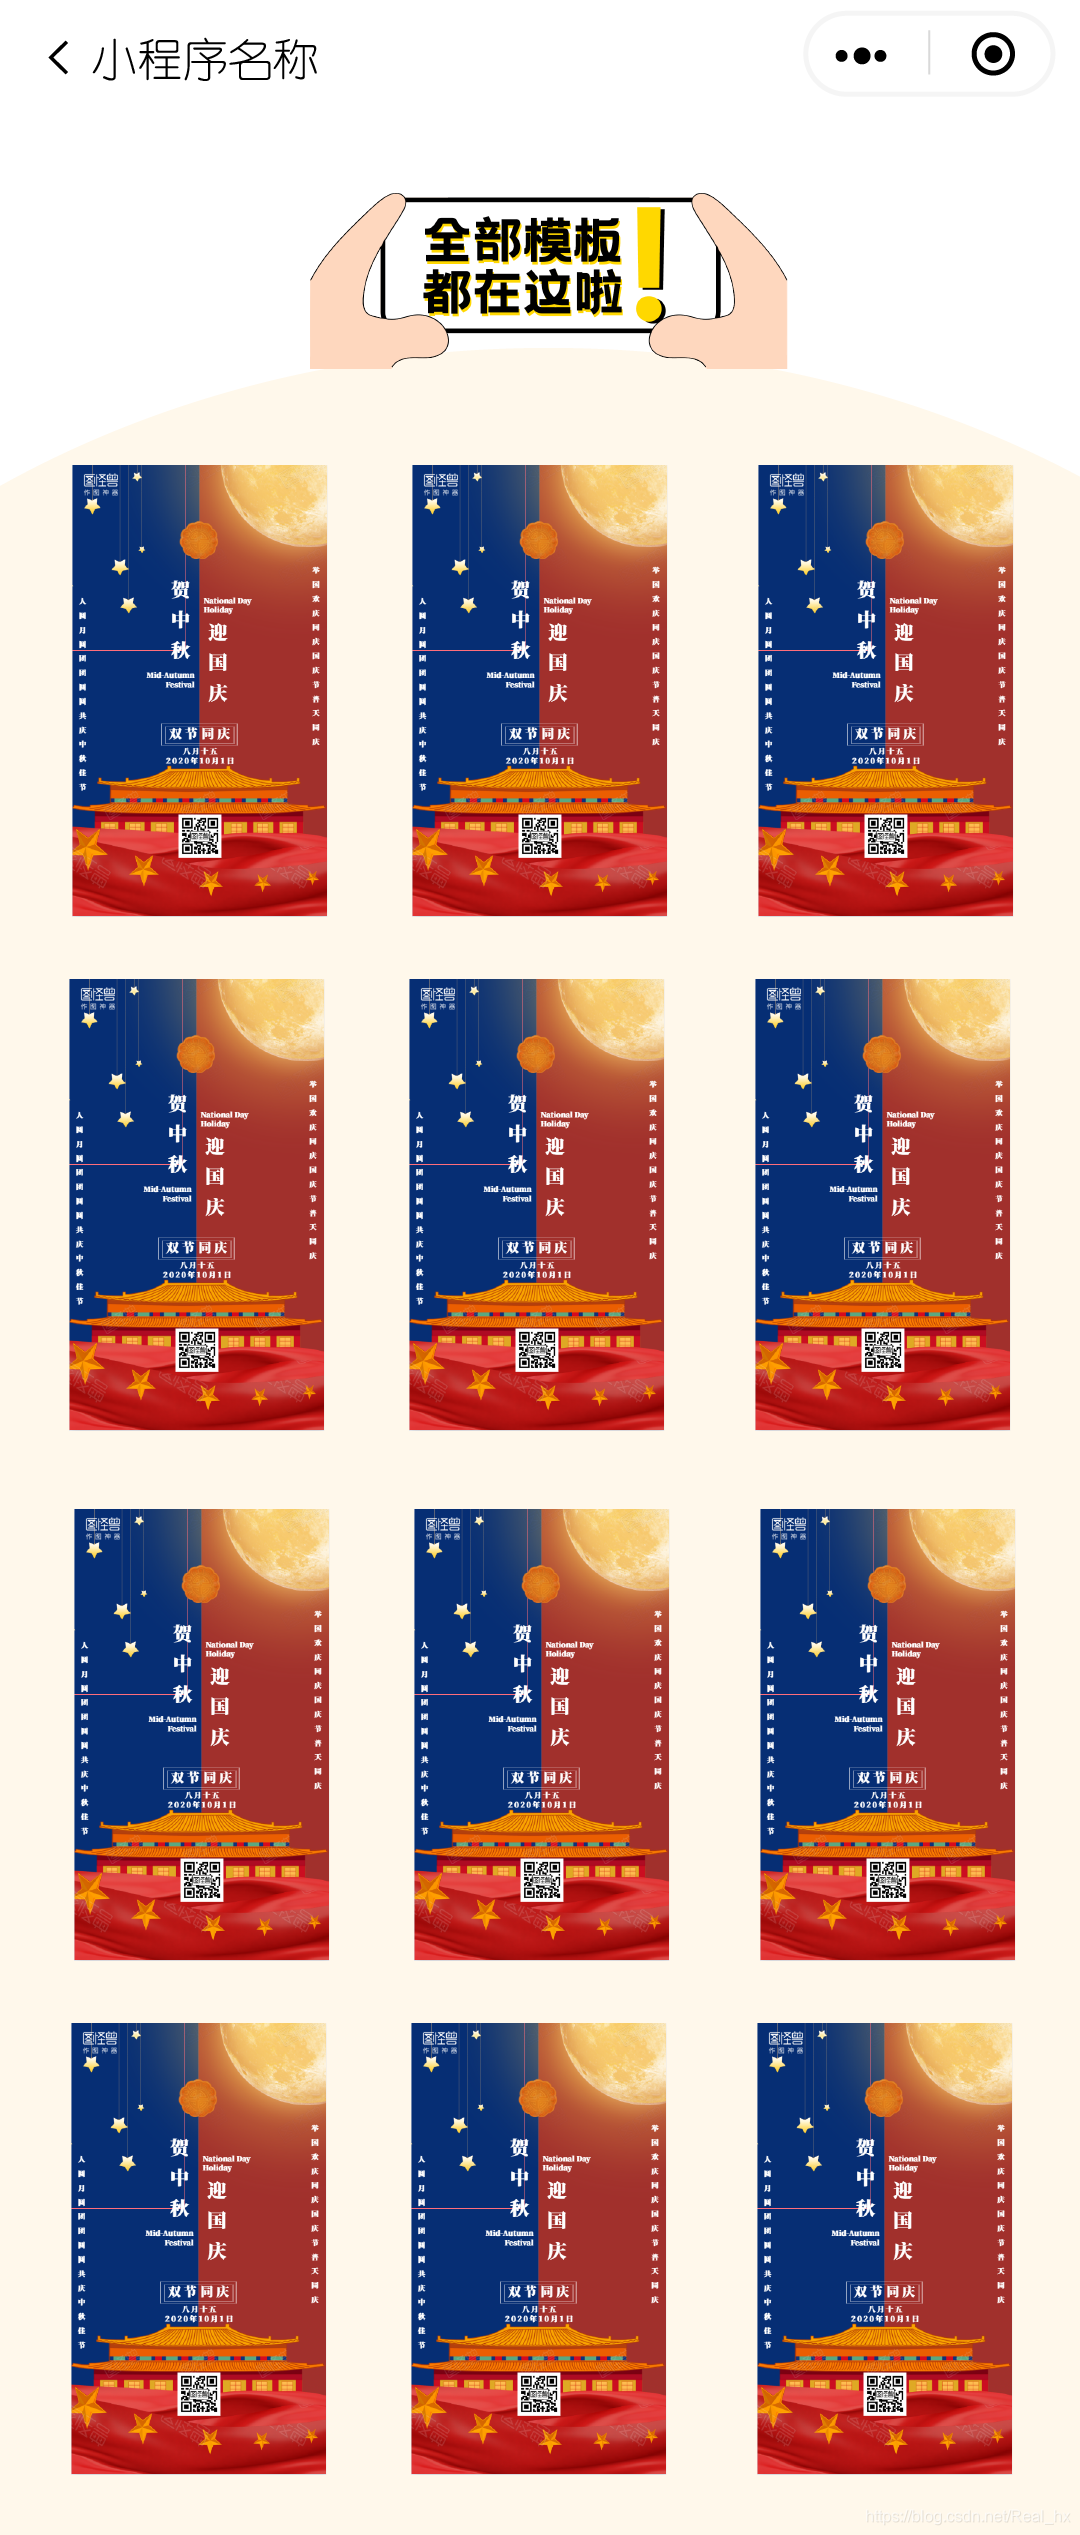
以上为新增的UI设计界面,海报图片均为网上截图,只是进行效果展示,因为图片版权问题一直没能积极地去寻找符合该项目的海报模板,希望之后可以解决并且快速完成。
U前端页面实现
主要实现上面UI设计的后面两个界面,并且对之前同学的页面进行了一些修改。
因为之前同学用的是云开发,将图片上传到云端再使用,而我这边添加需要需要麻烦她又比较不方便,就还是选择了直接在文件夹里放然后调用。
之前同学直接采用按钮以及设计边框样式实现我的 UI按钮,后经修改,改为按钮添加背景图片,直接将图片显示在按钮上。
修改了图片被压缩的问题,设置banner的自适应高度。
··································
图片被压缩问题解决
WXML
<view class="outerList">
 <image bindtap="line1"  class="img1 btn" src="cloud://createyoung-40a8b.6372-createyoung-40a8b-1303021949/photos1/效果-19.png"></image>
</view>
WXSS
.outerList{
  display:flex;
    justify-content: center;
    align-items:center;
    margin-top: 50rpx;
}
.outerList image{
  width: 605rpx;
  height: 686rpx;
}
··································
banner自适应高度
·········
WXML
<image style="width:100%;height:{{imgheight}}rpx " src="cloud://createyoung-40a8b.6372-createyoung-40a8b-1303021949/photos1/效果-21.png" mode=""></image>
·········
JS
首先得获取原来图片的长宽,修改以下imgwidth,imgheight的数值。
data: {
    imgheight:0
  },
  onLoad:function(){
    var imgwidth = 1082,
    imgheight = 476,
    //宽高比
    ratio = imgwidth / imgheight;
  console.log(imgwidth, imgheight)
  //计算的高度值
  var viewHeight = 750 / ratio;
  var imgheight = viewHeight
  this.setData({
    imgheight: imgheight,
  })
  },
··································
按钮展示图片
 <button class="btn-go" bindtap="make">
    <image src="../../images/18.png"></image>
    </button>
.btn-go{
  background: rgba(0,0,0,0);
  width: 384rpx;
  height: 98rpx;
  padding: 0;
  background-repeat: no-repeat;
  background-size: 100% 100%;
  margin-top: 50rpx;
  margin-bottom: 50rpx;
}
.btn-go image{
  width: 384rpx;
  height: 98rpx;
}
.btn-go::after{
  border: 0;
}
最终效果如下图

选择图片界面主要也是解决了图片的压缩问题,然后给按钮加图片,和上面雷同,就不再放代码了。
··································
页面实现其实用到的只是和前面总结中的差不多
海报分类界面
banner也是使用了高度自适应,可以根据不同的手机像素进行比例缩放上面已经放过代码。
··································
组件居中
.img_view{
  display:flex;
    justify-content: center;
    align-items:center;
    margin-top: 30rpx;     //上方离上一个组件的距离
}
··································
下图右侧红框部分,运用flex布局,设置其右侧距离,设置按钮图片的大小
·········
WXML
<view class="right_view">
<image  class="img_right" src="../../images/26.png"></image>
</view>
·········
WXSS
.right_view{
  display: flex;
  flex-direction: row-reverse;
  margin-right: 45rpx;
}
.img_right{
  width:62rpx;
  height:24rpx;
  margin-top: -50rpx;
}

··································
下方海报装饰部分
·········
WXML
<view class="img_view">
<image class="bg" style="width:687rpx;height:568rpx;" src="../../images/24.png"></image>
 </view>
·········
WXSS
设置其置于下层,不会遮挡到上面的东西
.bg{
  position:absolute;
  z-index:-1;
  margin-top: 325rpx;
}

··································
海报布局
·········
WXML
<view class="content">
 <image style="width:179rpx;height:316rpx;margin-left:50rpx" src="../../images/25.png"></image>
  <image style="width:179rpx;height:316rpx" src="../../images/25.png"></image>
   <image style="width:179rpx;height:316rpx;margin-right:50rpx" src="../../images/25.png"></image>
 </view>
 <view class="content2">
 <image style="width:179rpx;height:316rpx;margin-left:50rpx" src="../../images/25.png"></image>
  <image style="width:179rpx;height:316rpx" src="../../images/25.png"></image>
   <image style="width:179rpx;height:316rpx;margin-right:50rpx" src="../../images/25.png"></image>
 </view>
·········
WXSS
使用flex布局,横向平均划分三张海报,并且调节距离等数值
.content{
  display: flex;
  flex-direction: row;
  align-items: center;
  justify-content: space-around;
  margin-top: -10rpx;
}
.content2{
  display: flex;
  flex-direction: row;
  align-items: center;
  justify-content: space-around;
  margin-top: 40rpx;
}
··································
海报更多界面
背景图片的设置,主要设置图片的平铺,以及渲染顺序,因为图片问题还调节了上方距离,使距离合适
·········
WXML
<image class="background" src="../../images/27.png" mode="WidthFix"></image>
·········
WXSS
.background {
  width: 100%;
  height: 100%;
  position:absolute;
  background-size:100% 100%;
  z-index: -1;
  margin-top: -60rpx;
}
··································
剩下的主要就是图片的显示以及居中的问题了,注意调节好位置和距离,以及下方海报的展示和分类界面实现方法一致,所以就不再放代码了。

主要就是等版权问题了,这个项目也需要很多的海报图片等支持才能做下去。
其他内容等讨论过再继续完善。


 3343
3343


 被折叠的 条评论
为什么被折叠?
被折叠的 条评论
为什么被折叠?
 到【灌水乐园】发言


