


#import "ViewController.h"
@interface ViewController ()
@property (weak, nonatomic) IBOutlet UILabel *label1;
@property (weak, nonatomic) IBOutlet UISwitch *leftSwitch;
@property (weak, nonatomic) IBOutlet UISwitch *rightSwitch;
@property (weak, nonatomic) IBOutlet UITextField *title1;
@property (weak, nonatomic) IBOutlet UIButton *btn1;
@end
@implementation ViewController
- (void)viewDidLoad {
[super viewDidLoad];
// Do any additional setup after loading the view, typically from a nib.
[self demo1];
// [self demo2];
// [self test2];
// [self test1];
}
- (void)test1{
UIView *view1 = [[UIView alloc]init];
view1.backgroundColor = [UIColor orangeColor];
[self.view addSubview:view1];
//添加限制,约束
[view1 mas_makeConstraints:^(MASConstraintMaker *make){
//edges 边
//insets 内边距
//with 没有功能,只是为了可读性更强
make.edges.equalTo(self.view).with.insets(UIEdgeInsetsMake(10, 10, 10, 10));
// make.leftMargin.mas_equalTo(10);
// make.topMargin.mas_equalTo(10);
// make.rightMargin.mas_equalTo(10);
// make.bottomMargin.mas_equalTo(10);
}];
}
- (void)test2{
UIView *view1 = [[UIView alloc]init];
view1.backgroundColor = [UIColor purpleColor];
[self.view addSubview:view1];
UIView *view2 = [[UIView alloc]init];
view2.backgroundColor = [UIColor orangeColor];
[self.view addSubview:view2];
UIView *view3 = [[UIView alloc]init];
view3.backgroundColor = [UIColor blueColor];
[self.view addSubview:view3];
//增加约束
[view1 mas_makeConstraints:^(MASConstraintMaker *make) {
// make.size.mas_equalTo(CGSizeMake(300, 300));
// make.width.mas_equalTo(100);
// make.left.mas_equalTo(self.view.mas_left).with.offset(10);
// make.centerY.mas_equalTo(self.view.mas_centerY);//让view1的y坐标的中点等于self.view的y坐标中点
make.width.mas_equalTo(view2.mas_width);//宽度等于view2的宽度
make.left.mas_equalTo(self.view.mas_left).with.offset(10);//view1的左边距
make.right.mas_equalTo(view2.mas_left).with.offset(-10);//view1的右边距,相对view2来设置
make.top.mas_equalTo(self.view.mas_top).offset(10);
make.bottom.mas_equalTo(view3.mas_top).offset(-10);
}];
[view2 mas_makeConstraints:^(MASConstraintMaker *make) {
// make.centerY.mas_equalTo(self.view.mas_centerY);
make.width.mas_equalTo(view1.mas_width);
make.left.mas_equalTo(view1.mas_right).with.offset(10);
make.right.mas_equalTo(self.view.mas_right).with.offset(-10);
make.top.mas_equalTo(self.view.mas_top).offset(10);
make.bottom.mas_equalTo(view3.mas_top).offset(-10);
}];
[view3 mas_makeConstraints:^(MASConstraintMaker *make) {
// make.centerY.mas_equalTo(self.view.mas_centerY);
make.height.mas_equalTo(view1.mas_height);
make.width.mas_equalTo(self.view.mas_width).offset(-20);
make.top.mas_equalTo(view1.mas_bottom).offset(10);
make.bottom.mas_equalTo(-10);
make.left.mas_equalTo(self.view.mas_left).offset(10);
make.right.mas_equalTo(-10);
}];
//从无到有 显示布局动画
[UIView animateWithDuration:3.0 animations:^{
[self.view layoutIfNeeded];//告知页面布局立刻更新
NSLog(@"%@",NSStringFromCGRect(view1.frame));
}];
}
-(void)demo2{
//将三个视图添加进父视图
UIView *greenView = [[UIView alloc]init];
greenView.backgroundColor = [UIColor greenColor];
[self.view addSubview:greenView];
UIView *redView = [[UIView alloc]init];
redView.backgroundColor = [UIColor redColor];
[self.view addSubview:redView];
UIView *blueView = [[UIView alloc]init];
blueView.backgroundColor = [UIColor blueColor];
[self.view addSubview:blueView];
int padding =20;
//添加约束
[greenView mas_makeConstraints:^(MASConstraintMaker *make) {
//Masonry中添加属性基本都是 make开头
//equalTo :表示添加属性和某个视图或者位置相等
//offset :表示对前面 self.view.mas_left这个位置偏移多少
//multipliedBy :表示这个视图占之前的视图大小的几分之几,0.5就是占一半
//center : 表示这个视图和之前的视图中心点的位置
make.top .equalTo(self.view.mas_top) .offset(0);
make.left .equalTo(self.view.mas_left) .offset(0);
make.width .equalTo(self.view.mas_width) .multipliedBy(0.5);
make.height.equalTo(self.view.mas_height).multipliedBy(0.5);
}];
[redView mas_makeConstraints:^(MASConstraintMaker *make) {
make.top .equalTo(greenView.mas_top);
make.left .equalTo(greenView.mas_right).offset(padding);
//当我们有多个属性和某个视图是完全一样的时候,我们可以使用 and 或者 with关键词进行连接
make.height.and.width.equalTo(greenView);
}];
[blueView mas_makeConstraints:^(MASConstraintMaker *make) {
make.top .equalTo(greenView.mas_bottom).offset(padding);
make.bottom.equalTo(self.view).offset(-padding);
make.left .equalTo(self.view).offset(padding);
make.right .equalTo(self.view).offset(-padding);
//这里需要注意,我们添加约束还可以使用 mas_equalTo
//mas_equalTo :后面的约束条件是数值或者结构体等类型,其本质就是对其参数进行了一个BOX操作(装箱)
//一般将数值类型的约束用mas_equalTo,而相对于某个控件,或者某个控件的某个约束,使用equalTo
}];
}
-(void)demo1{
//label和button只设置两个约束,不需要写自身宽高的约束
_label1.backgroundColor= [UIColor blueColor];
_label1.textAlignment = NSTextAlignmentCenter;
[_label1 mas_updateConstraints:^(MASConstraintMaker *make) {
make.top.mas_equalTo(self.view).offset(100); //有效的约束
make.centerX.mas_equalTo(self.view);//有效
}];
//不设置高度,高度会根据内容计算
UILabel *lable2 = [[UILabel alloc]init];
lable2.numberOfLines = 0;
[self.view addSubview:lable2];
lable2.backgroundColor = [UIColor orangeColor];
lable2.text = @"djakdflajkfdlajfddafdafdafdafdafdafdafdafdafdafdadafdafafdafdafd";
[lable2 mas_remakeConstraints:^(MASConstraintMaker *make) {
make.top.mas_equalTo(self.view).offset(20);
make.width.mas_equalTo(@250);
make.centerX.mas_equalTo(self.view);
}];
[_leftSwitch mas_makeConstraints:^(MASConstraintMaker *make) {
make.top.equalTo(_label1).offset(40);
make.center.right.equalTo(self.view).offset(10);
make.size.mas_equalTo(CGSizeMake(60, 30));
}];
_title1.backgroundColor = [UIColor purpleColor];
// [_title1 mas_makeConstraints:^(MASConstraintMaker *make) {
// make.size.mas_equalTo(CGSizeMake(300, 100));
// // make.center.equalTo(self.view);
// }];
// [_title1 mas_remakeConstraints:^(MASConstraintMaker *make) {
// make.width.equalTo(@500);
// }];
UIView *bgView = [[UIView alloc]init];
bgView.backgroundColor = [UIColor yellowColor];
[self.view addSubview:bgView];
[bgView mas_makeConstraints:^(MASConstraintMaker *make) {
make.size.mas_equalTo(CGSizeMake(100, 100));
// make.center.mas_equalTo(self.view);//屏幕中心
make.bottom.mas_equalTo(self.view.mas_bottom).offset(-150);
make.centerX.mas_equalTo(self.view); //水平居中
// make.centerY.mas_equalTo(self.view); //垂直居中
//横向居中
// make.edges.mas_equalTo(self.view).insets(UIEdgeInsetsMake(SCREEN_HEIGHT-150, SCREEN_WIDTH/2-50, 50, SCREEN_WIDTH/2-50));
}];
}
首先,在正式使用Masonry之前,我们先来看看在xib中我们是如何使用AutoLayout

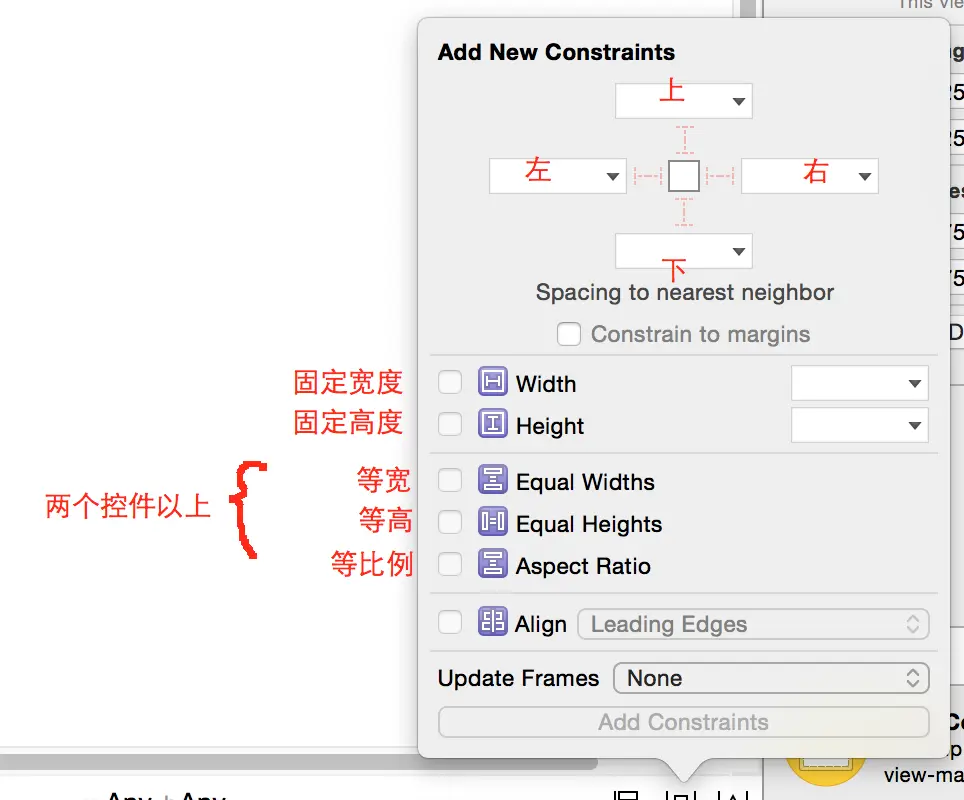
从图中我们可以看出,只要设置相应得局限,控制好父视图与子视图之间的关系就应该很ok的拖出你需要的需求。这里就不详细讲解具体拖拽的方法.....
然后,我们按着上图的属性来看看如何简单得使用Masonry
这里是Masonry给我们的属性
@property (nonatomic, strong, readonly) MASConstraint *left; //左侧
@property (nonatomic, strong, readonly) MASConstraint *top; //上侧
@property (nonatomic, strong, readonly) MASConstraint *right; //右侧
@property (nonatomic, strong, readonly) MASConstraint *bottom; //下侧
@property (nonatomic, strong, readonly) MASConstraint *leading; //首部
@property (nonatomic, strong, readonly) MASConstraint *trailing; //尾部
@property (nonatomic, strong, readonly) MASConstraint *width; //宽
@property (nonatomic, strong, readonly) MASConstraint *height; //高
@property (nonatomic, strong, readonly) MASConstraint *centerX; //横向居中
@property (nonatomic, strong, readonly) MASConstraint *centerY; //纵向居中
@property (nonatomic, strong, readonly) MASConstraint *baseline; //文本基线
属性有了,接着我们应该怎么在视图中添加约束呢,Masonry给我们提供了3个方法
//新增约束
- (NSArray *)mas_makeConstraints:(void(^)(MASConstraintMaker *make))block;//更新约束
- (NSArray *)mas_updateConstraints:(void(^)(MASConstraintMaker *make))block;//清楚之前的所有约束,只会保留最新的约束
- (NSArray *)mas_remakeConstraints:(void(^)(MASConstraintMaker *make))block;
合理的利用这个3个函数,基本上可以应对任何情况了
准备工作已经完成,我们来看几个小demo
1.居中一个view
// 防止block中的循环引用
__weak typeof (self) weakSelf = self;
// 初始化一个View
UIView *bgView = [[UIView alloc]init];
bgView.backgroundColor = [UIColor redColor];
[self.view addSubview:bgView];
// 使用mas_makeConstraints添加约束
[bgView mas_makeConstraints:^(MASConstraintMaker *make) {
make.center.equalTo(weakSelf.view);
make.size.mas_equalTo(CGSizeMake(200, 200));
}];
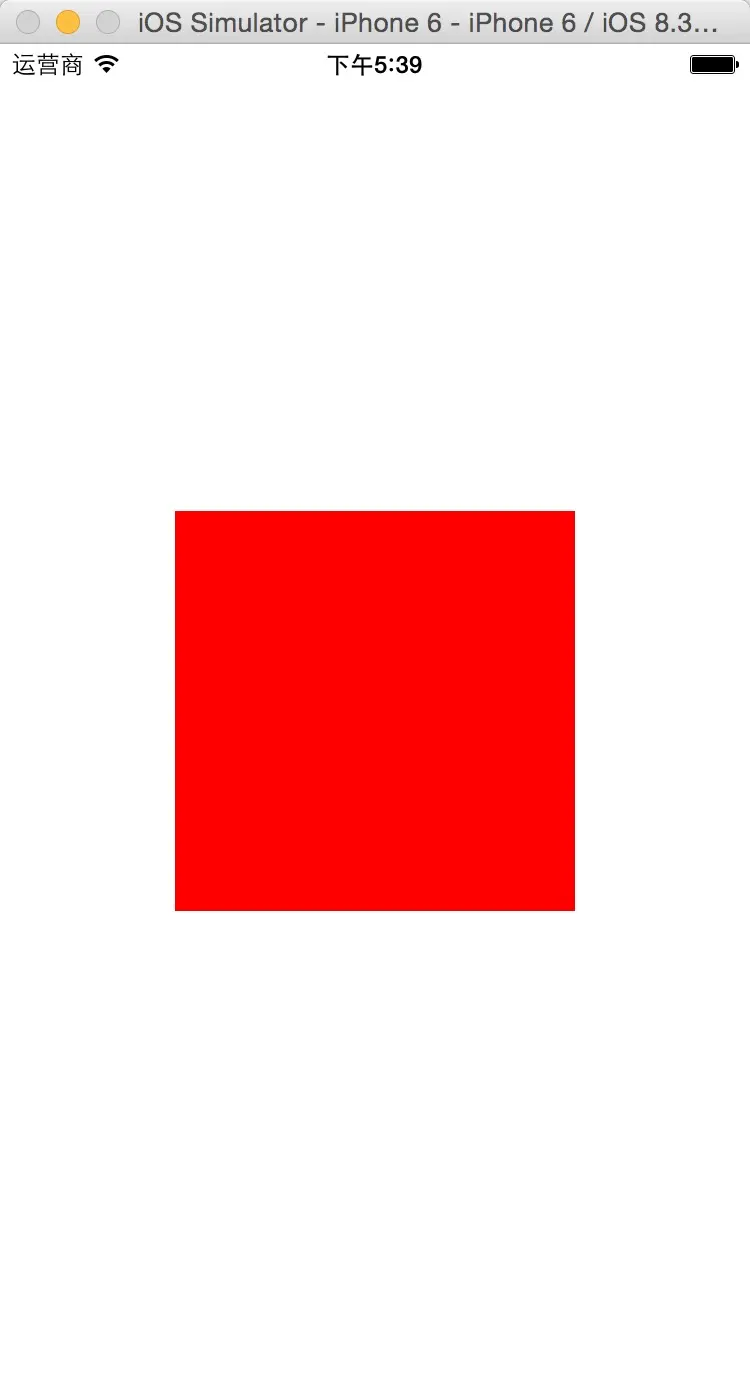
是不是很简单,这里有一点要必须注意下,添加约束前必须要把view添加到视图上。
那我要是不想固定他得宽高呢,让view的大小根据间距来控制怎么做
我们来设置一个基于父视图间距为10的view
[bgView mas_makeConstraints:^(MASConstraintMaker *make) {
make.center.equalTo(weakSelf.view);
make.edges.mas_offset(UIEdgeInsetsMake(10, 10, 10, 10));
}];
这样就ok了!!!
make.edges.mas_offset(UIEdgeInsetsMake(10, 10, 10, 10));
等同于
make.top.equalTo(weakSelf.view).with.offset(10);
make.left.equalTo(weakSelf.view).with.offset(10);
make.bottom.equalTo(weakSelf.view).with.offset(-10);
make.right.equalTo(weakSelf.view).with.offset(-10);
2.多个view
2个view横向居中,第二个view距离第一个view间距为10
UIView *view1 = [[UIButton alloc]init];
view1.backgroundColor = [UIColor redColor];
[self.view addSubview:view1];
[view1 mas_makeConstraints:^(MASConstraintMaker *make) {
make.size.mas_equalTo(CGSizeMake(90, 90));
make.centerX.equalTo(weakSelf.view);
make.top.width.offset(90);
}];
UIView *view2 = [[UILabel alloc]init];
view2.backgroundColor = [UIColor yellowColor];
[self.view addSubview:view2];
[view2 mas_makeConstraints:^(MASConstraintMaker *make) {
make.size.mas_equalTo(CGSizeMake(100, 100));
make.centerX.equalTo(view1);
make.top.equalTo(view1.mas_bottom).with.offset(20);
}];
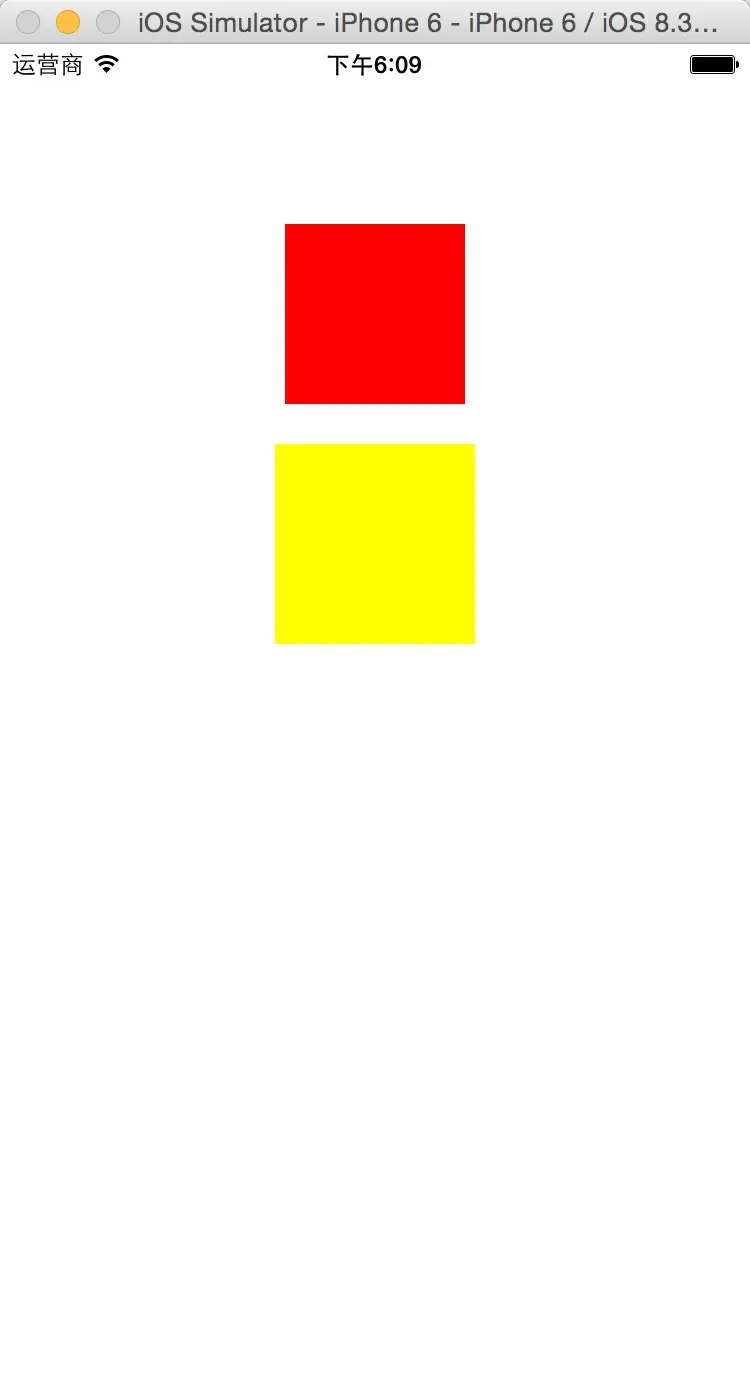
大家有没有看到第二个view代码中
make.top.equalTo(view1.mas_bottom).with.offset(20);
view1.mas_bottom 是什么意思呢?如果只写view1,Masonry会默认是view1中最上面开始算起,也就是view2 间距view1 Y轴开始20的间距
通过这个也就可以很方便的设置view同另一个view之间上下左右的间距了
大家不妨试试view.mas_top view.mas_left view.mas_right 的效果是什么样得了
下面我附上一个完整的界面demo,大家可以看看
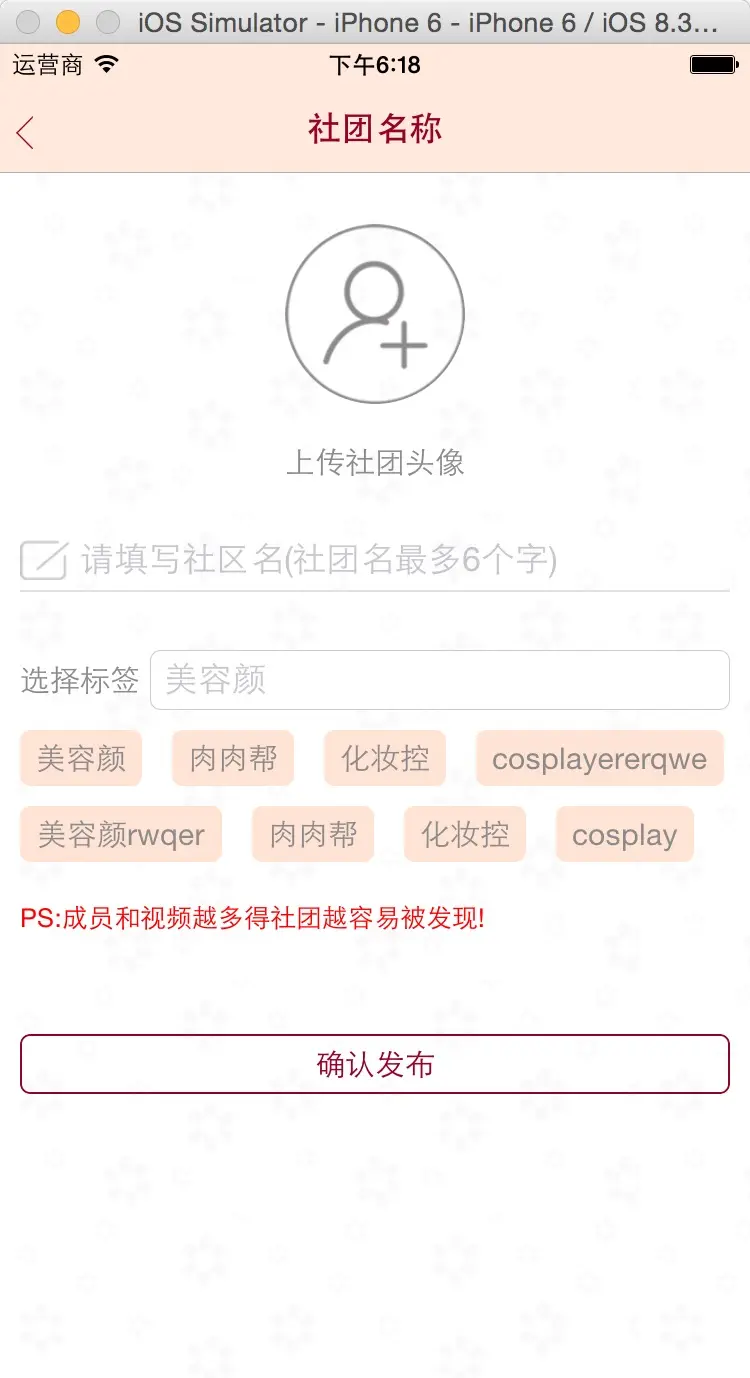
代码如下:
- (void)setupFrame {
__weak typeof(self) weakSelf = self;
//上传头像
UIButton *iconBtn = [[UIButton alloc]init];
[iconBtn setCornerRadius:45];
[iconBtn setBackgroundImage:[UIImage imageNamed:@"huantouxiang"] forState:UIControlStateNormal];
[iconBtn addTarget:self action:@selector(iconButton) forControlEvents:UIControlEventTouchDown];
[self.view addSubview:iconBtn];
self.iconBtn = iconBtn;
[self.iconBtn mas_makeConstraints:^(MASConstraintMaker *make) {
make.size.mas_equalTo(CGSizeMake(90, 90));
make.centerX.equalTo(weakSelf.view);
make.top.width.offset(90);
}];
//上传社区头像文字提醒
UILabel *iconLabel = [[UILabel alloc]init];
iconLabel.textColor = c3;
iconLabel.text = @"上传社团头像";
iconLabel.font = [UIFont systemFontOfSize:15];
[self.view addSubview:iconLabel];
[iconLabel mas_makeConstraints:^(MASConstraintMaker *make) {
make.centerX.equalTo(iconBtn);
make.top.equalTo(iconBtn.mas_bottom).with.offset(20);
}];
//社团编辑图标
UIImageView *editIcon = [[UIImageView alloc]init];
editIcon.image = [UIImage imageNamed:@"bianxie"];
[self.view addSubview:editIcon];
[editIcon mas_makeConstraints:^(MASConstraintMaker *make) {
make.size.mas_equalTo(CGSizeMake(25, 20));
make.left.equalTo(weakSelf.view).with.offset(10);
make.top.equalTo(iconLabel.mas_bottom).with.offset(30);
}];
//社团名
UITextField *nameText = [[UITextField alloc]init];
nameText.placeholder = @"请填写社区名(社团名最多6个字)";
[self.view addSubview:nameText];
self.nameText = nameText;
[nameText mas_makeConstraints:^(MASConstraintMaker *make) {
make.height.mas_equalTo(@20);
make.centerY.equalTo(editIcon);
make.right.equalTo(weakSelf.view).with.offset(-10);
make.left.equalTo(editIcon.mas_right).with.offset(5);
}];
//分割线
UIImageView *xian = [[UIImageView alloc]init];
xian.backgroundColor = DBColor(226, 226, 226);
[self.view addSubview:xian];
[xian mas_makeConstraints:^(MASConstraintMaker *make) {
make.height.mas_equalTo(@1);
make.left.equalTo(weakSelf.view).with.offset(10);
make.right.equalTo(weakSelf.view).with.offset(-10);
make.top.equalTo(editIcon.mas_bottom).with.offset(5);
}];
//选择标签
UILabel *tagLabel = [[UILabel alloc]init];
tagLabel.text = @"选择标签";
tagLabel.textColor = c3;
tagLabel.font = [UIFont systemFontOfSize:15];
[self.view addSubview:tagLabel];
[tagLabel mas_makeConstraints:^(MASConstraintMaker *make) {
make.height.mas_equalTo(@20);
make.width.mas_equalTo(@60);
make.left.equalTo(weakSelf.view).with.offset(10);
make.top.equalTo(xian).with.offset(35);
}];
//跳转标签选择
UITextField *tagText = [[UITextField alloc]init];
tagText.placeholder = @"美容颜";
tagText.borderStyle=UITextBorderStyleRoundedRect;
tagText.delegate = self;
[tagText addTarget:self action:@selector(textTag) forControlEvents:UIControlEventTouchDown];
[self.view addSubview:tagText];
[tagText mas_makeConstraints:^(MASConstraintMaker *make) {
make.centerY.equalTo(tagLabel);
make.right.equalTo(weakSelf.view).with.offset(-10);
make.left.equalTo(tagLabel.mas_right).with.offset(5);
}];
//tagView
self.tagView = ({
SKTagView *view = [SKTagView new];
view.backgroundColor = [UIColor clearColor];
view.padding = UIEdgeInsetsMake(0, 0, 0, 0);
view.insets = 15;
view.lineSpace = 10;
__weak SKTagView *weakView = view;
view.didClickTagAtIndex = ^(NSUInteger index){
//Remove tag
[weakView removeTagAtIndex:index];
};
view;
});
[self.view addSubview:self.tagView];
[self.tagView mas_makeConstraints:^(MASConstraintMaker *make) {
make.left.equalTo(weakSelf.view).with.offset(10);
make.right.equalTo(weakSelf.view).with.offset(-10);
make.top.equalTo(tagText.mas_bottom).with.offset(10);
}];
//label标识语
UILabel *label = [[UILabel alloc]init];
label.font = [UIFont systemFontOfSize:13];
label.textColor = [UIColor redColor];
label.text = @"PS:成员和视频越多得社团越容易被发现!";
[self.view addSubview:label];
[label mas_makeConstraints:^(MASConstraintMaker *make) {
make.left.equalTo(weakSelf.view).with.offset(10);
make.right.equalTo(weakSelf.view).with.offset(-10);
make.top.equalTo(self.tagView.mas_bottom).with.offset(20);
}];
UIButton *commitBtn = [[UIButton alloc]init];
[commitBtn setCornerRadius:5];
[commitBtn setBorderWidth:1 color:DBTextThemeColor];
[commitBtn setTitleColor:DBTextThemeColor forState:UIControlStateNormal];
commitBtn.titleLabel.font = [UIFont systemFontOfSize:15];
[commitBtn setTitle:@"确认发布" forState:UIControlStateNormal];
[commitBtn addTarget:self action:@selector(commitButton) forControlEvents:UIControlEventTouchDown];
[self.view addSubview:commitBtn];
[commitBtn mas_makeConstraints:^(MASConstraintMaker *make) {
make.height.mas_equalTo(@30);
make.left.equalTo(weakSelf.view).with.offset(10);
make.right.equalTo(weakSelf.view).with.offset(-10);
make.top.equalTo(label.mas_bottom).with.offset(50);
}];
}


 1191
1191

 被折叠的 条评论
为什么被折叠?
被折叠的 条评论
为什么被折叠?
 到【灌水乐园】发言


