


🌹作者主页:青花锁 🌹简介:Java领域优质创作者🏆、Java微服务架构公号作者😄
🌹简历模板、学习资料、面试题库、技术互助
🌹文末获取联系方式 📝

系列文章目录
文章目录
前言
芋道 SpringBoot是一款国产的SpringCloud微服务框架,包括Outh2.0、微服务网关、微服务注册中心、配置中心、消息队列、任务调度、链路追踪、服务保障等。
今天介绍下芋道 SpringBoot入门,包括SpringBoot介绍、第一个SpringBoot案例,所需要下载安装的基础工具等。
1、芋道网站
源码分析首页:https://www.iocoder.cn/
芋道 SpringBoot快速入门章:https://www.iocoder.cn/Spring-Boot/quick-start/?github
下面是我自己整理的Spingboot、微服务学习专栏,从Spingboot 零基础到微服务实战。
SpringBoot框架学习专栏:https://blog.csdn.net/s445320/category_12273537.html
SpringCloud微服务学习专栏 :https://blog.csdn.net/s445320/category_12439818.html
微服务实战专栏:https://blog.csdn.net/s445320/category_12345409.html
2、下载和安装maven工具
https://maven.apache.org/download.cgi
常用版本3:https://dlcdn.apache.org/maven/maven-3(只有最新的几个版本)
更新下载站:https://archive.apache.org/dist/maven/maven-3/ (包含从3.0 到 3.9的大多数版本)
下载解压,修改conf下的setting.xml,优先从阿里云镜像拉取关联包
<mirrors>
    <!-- mirror
     | Specifies a repository mirror site to use instead of a given repository. The repository that
     | this mirror serves has an ID that matches the mirrorOf element of this mirror. IDs are used
     | for inheritance and direct lookup purposes, and must be unique across the set of mirrors.
     |
    <mirror>
      <id>mirrorId</id>
      <mirrorOf>repositoryId</mirrorOf>
      <name>Human Readable Name for this Mirror.</name>
      <url>http://my.repository.com/repo/path</url>
    </mirror>
     -->
    <mirror>
        <id>alimaven</id>
        <name>aliyun maven</name>
        <url>http://maven.aliyun.com/nexus/content/groups/public/</url>
        <mirrorOf>central</mirrorOf>
    </mirror>
    <mirror>
        <id>maven.net.cn</id>
        <name>oneof the central mirrors in china</name>
        <url>http://maven.net.cn/content/groups/public/</url>
        <mirrorOf>central</mirrorOf>
    </mirror>
    <mirror>
        <id>central</id>
        <name>Maven Repository Switchboard</name>
        <url>http://repo1.maven.org/maven2/</url>
        <mirrorOf>central</mirrorOf>
    </mirror>
</mirrors>
修改本地maven库路径
<localRepository>d:\localRepository</localRepository>
3、第一个SpringBoot 项目
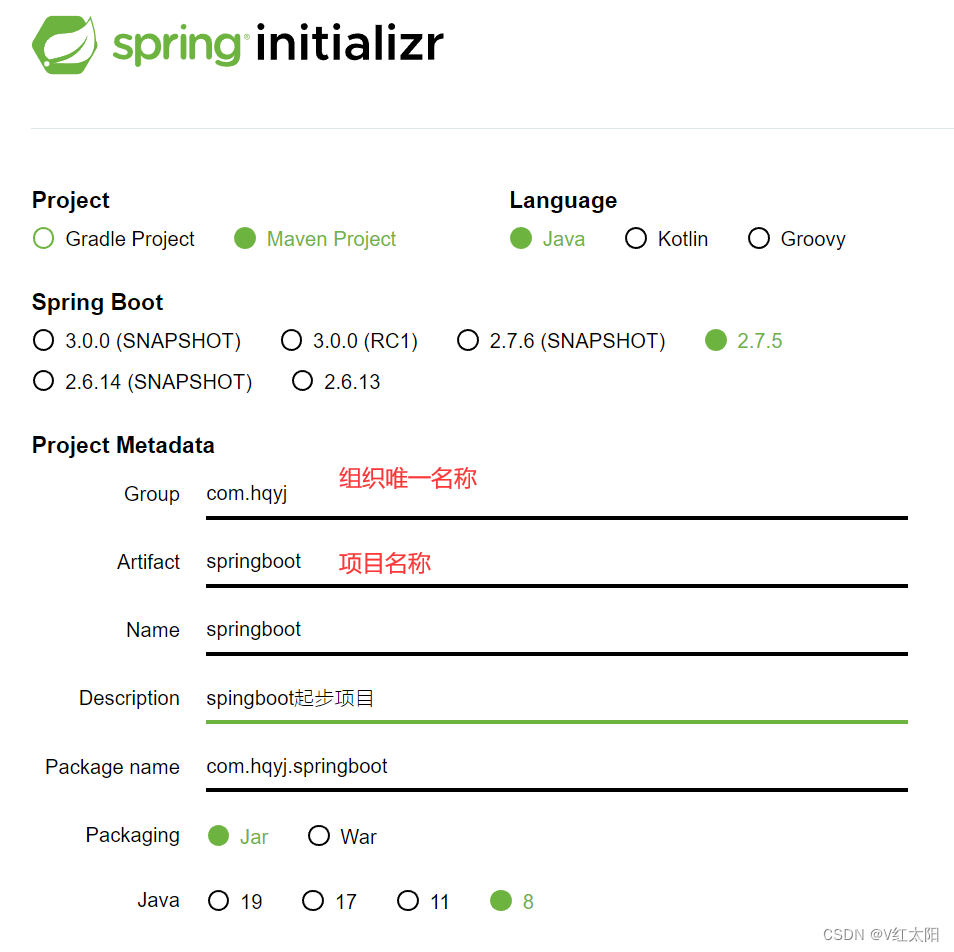
3.1、初始化项目
https://start.spring.io/
3.2、配置maven

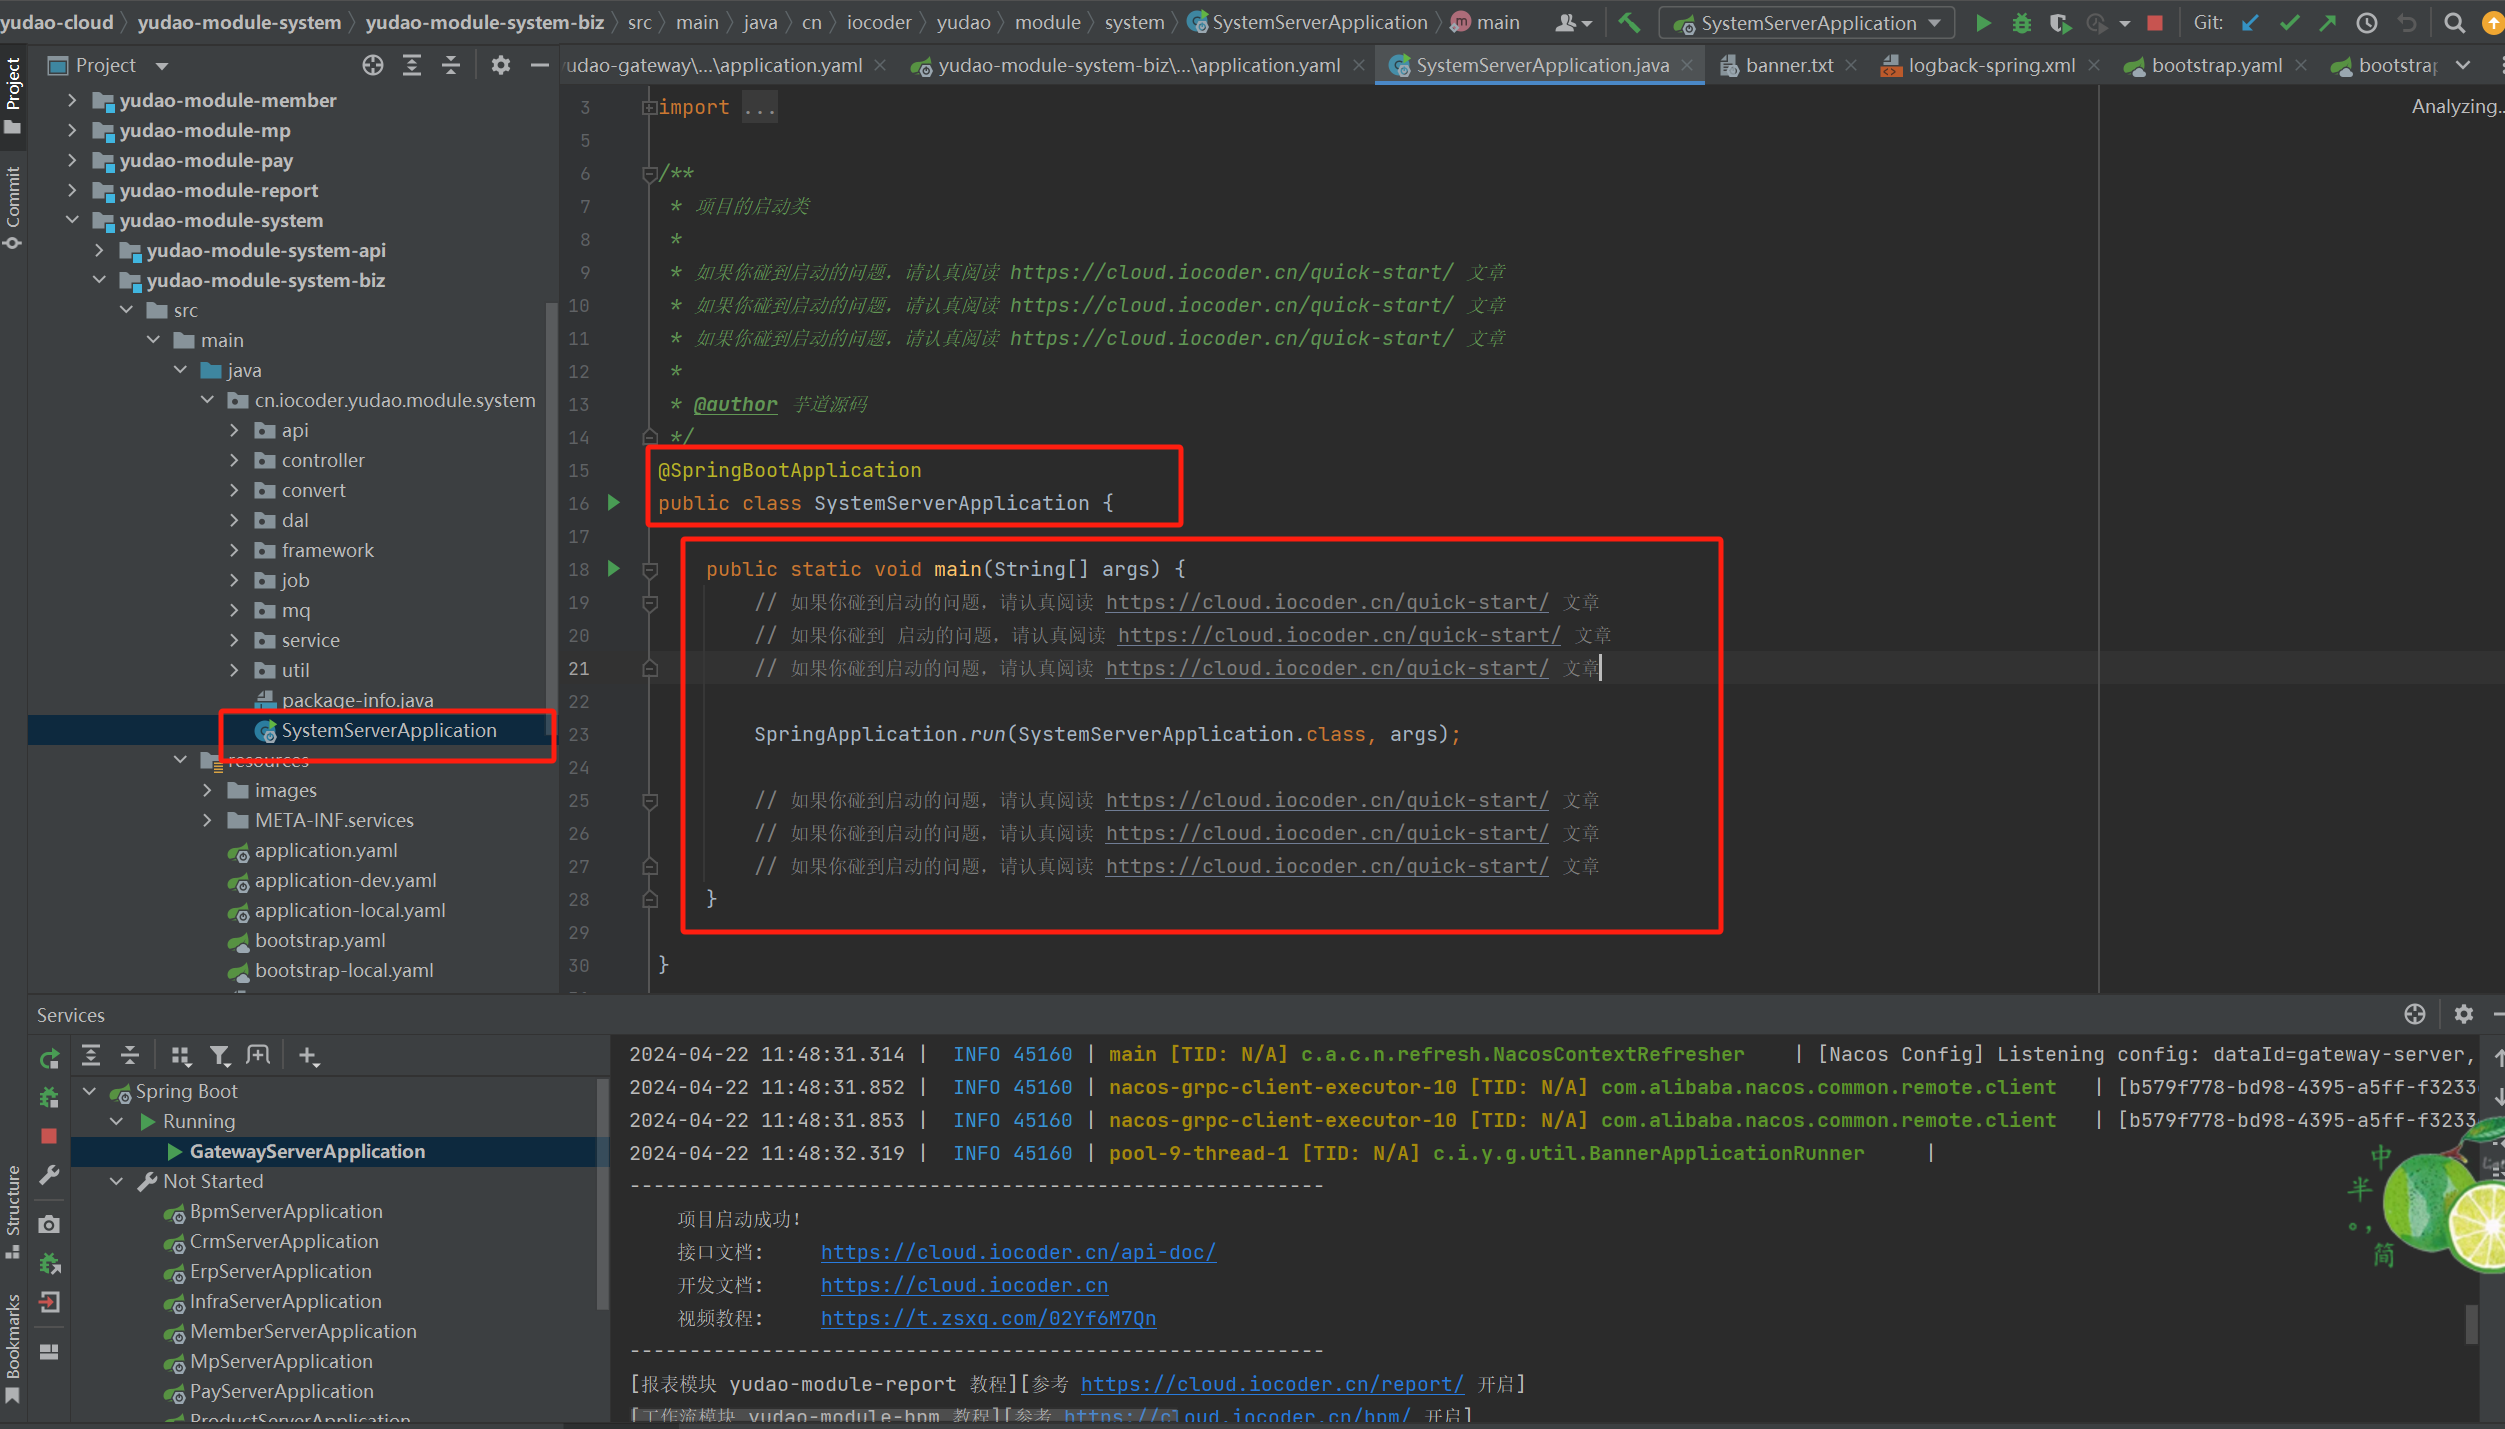
3.3、启动项目
在pom.xml添加web依赖,集成内嵌tomcat
<dependency>
    <groupId>org.springframework.boot</groupId>
    <artifactId>spring-boot-starter-web</artifactId>
</dependency>

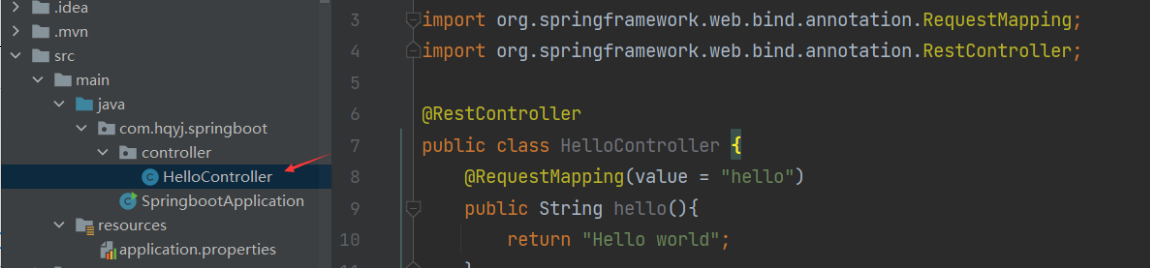
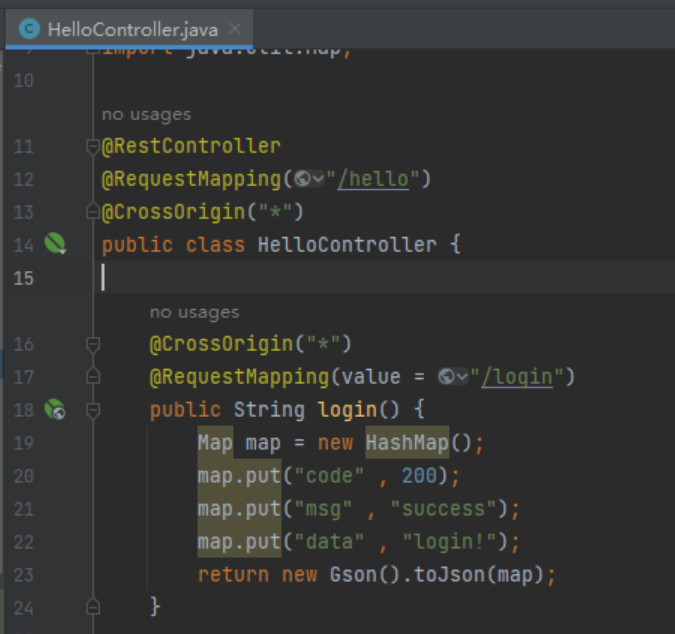
3.4、定义一个hello world接口
3.4.1、在Controller包下创建类,并编写hello world接口
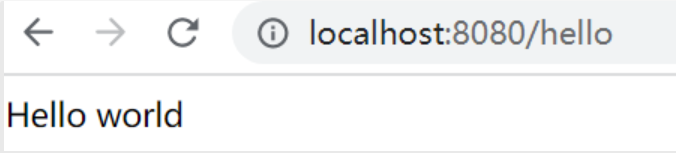
3.4.2、通过浏览器访问接口
地址:http://localhost:8080/hello
3.5、解决接口跨域问题
3.5.1、类或方法解决接口跨域问题
1、在class或method上加上【@CrossOrigin(“*”)】,解决跨域问题
3.5.2、配置全局跨域
新建【config】package,添加自定义的跨域java文件
import org.springframework.context.annotation.Configuration;
import org.springframework.web.servlet.config.annotation.CorsRegistry;
import org.springframework.web.servlet.config.annotation.WebMvcConfigurer;

@Configuration
public class MyWebMvcConfig implements WebMvcConfigurer {

    @Override
    public void addCorsMappings(CorsRegistry registry) {
        registry.addMapping("/**")
                .allowedHeaders("*")
                .allowedMethods("*")
                .maxAge(1800)
                .allowedOrigins("*");
    }
}
4、接收参数
4.1、通过HttpServletRequest 接收参数
前端访问路径:http://127.0.0.1/user/login?userName=zs&pwd=123
后端Java代码:
	@RequestMapping("/login")
    public Map login(HttpServletRequest request , HttpServletResponse response) {
        // URL: http://127.0.0.1/user/login?userName=zs&pwd=123
        Map map = new HashMap();
        map.put("code" , 200);
        map.put("msg" , "success");

        //第一种方式接收入参
        String userName = request.getParameter("userName");
        String pwd = request.getParameter("pwd");
        return map;
    }
4.2、通过@RequestParam接收参数
前端访问路径:http://127.0.0.1/user/login?userName=zs&pwd=123
后端Java代码:
    @RequestMapping("/login")
    public Map login(@RequestParam(value="name" ,required=true) String userName,
                     @RequestParam(value="pwd" ,required=true) String password,
                     HttpServletResponse response) {
        // @RequestParam(value="name" ,required=true) required=true传入的值不允许为空
        // URL: http://127.0.0.1/user/login?userName=zs&pwd=123
        //第二种方式接收入参
        System.out.println(userName + "||" + password);

        Map map = new HashMap();
        map.put("code" , 200);
        map.put("msg" , "success");
        return map;
    }
4.3、通过@PathVariable 接收参数
前端访问路径:http://127.0.0.1/user/logintwo/zs/123
后端Java代码:
    @RequestMapping("/logintwo/{userName}/{pwd}")
    public Map loginTwo(@PathVariable String userName,
                        @PathVariable String pwd) {
        // URL: http://127.0.0.1/user/logintwo/zs/123
        //第三种方式接收入参
        System.out.println(userName + "||" + pwd);

        Map map = new HashMap();
        map.put("code" , 200);
        map.put("msg" , "success");

        return map;
    }
4.4、通过@RequestBody 接收参数
前端JavaScript代码:
	//针对@RequestBody 接收入参的前端ajax请求
    $.ajax({
      url: "http://localhost:8089/api/Home",
      data: JSON.stringify(obj),
      method: "post",
      dataType: "json",
      contentType: 'application/json',
      success: function (data) {
          console.log(data)
          if (data.code == 200) {
              alert("登录成功");
          } else {
              alert("登录失败:" + data.msg);
          }
      }
后端Java代码:
    @PostMapping("/register")
    public Map register(@RequestBody User user) {
        // URL: http://127.0.0.1/user/register/
        // {userName:xxx,pwd:xxx}
        //第四种方式接收入参
        System.out.println(new Gson().toJson(user) );

        Map map = new HashMap();
        map.put("code" , 200);
        map.put("msg" , "success");

        return map;
    }
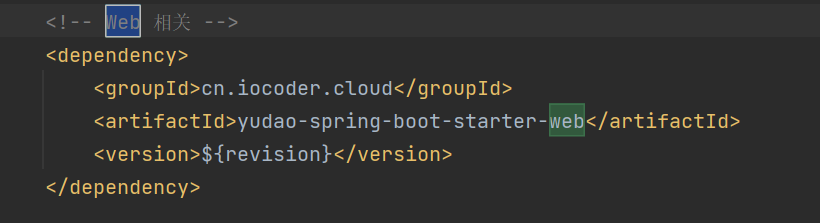
5、starter机制
starter 中整合了该场景下各种可能用到的依赖,用户只需要在 Maven 中引入 starter 依赖,SpringBoot 就能自动扫描到要加载的信息并启动相应的默认配置
比如:
<!--spring boot parent项目依赖,版本依赖-->
<parent>
    <groupId>org.springframework.boot</groupId>
    <artifactId>spring-boot-starter-parent</artifactId>
    <version>2.6.13</version>
    <relativePath/> <!-- lookup parent from repository -->
</parent>
Spring Boot 项目可以通过继承 spring-boot-starter-parent 来获得一些合理的默认配置,它主要提供了以下特性:
- 默认 JDK 版本(Java 8)
- 默认字符集(UTF-8)
- 依赖管理功能
- 资源过滤
- 默认插件配置
- 识别 application.properties 和 application.yml 类型的配置文件
6、YAML标记语言
springBoot 默认使用以下 2 种全局的配置文件,其文件名是固定的。
6.1、application.properties
server.port= 8081
6.2、application.yml
server:
 	port: 8081
6.2.1、YAML 简介
YAML 全称 YAML Ain’t Markup Language,比xml更适合做配置文件
YAML 的语法如下:
- 使用缩进表示层级关系。
- 缩进时不允许使用 Tab 键,只允许使用空格。
- 缩进的空格数不重要,但同级元素必须左侧对齐。
- 大小写敏感。
比如:
 server:
 	port: 8081
 spring:
 	profiles: dev
 	datasource:
 		url: xxxxxxxxx
6.2.2、YYAML 支持以下三种数据结构
6.2.2.1、对象:键值对的集合
使用缩进表示对象与属性的层级关系
 user:
    name: Kelvin
    gender: 男
行内写法:
user: {name: Kelvin,gender: 男}
6.2.2.2、数组:一组按次序排列的值
使用-表示集合元素
 hobbyList:
	 - run
	 - badminton
	 - mountain climb
或
hobbyList: [run,badminton,mountain climb]
使用,表示数组元素
hobbies:run,badminton,mountain climb
6.2.2.3、字面量:单个的、不可拆分的值
数值、日期、字符串等
YAML组织结构:一个文件可有多个文档组成,文档之间用“—”分隔
7、配置文件与JavaBean绑定
SpringBoot 提供了以下 2 种方式进行配置绑定:
7.1、使用 @ConfigurationProperties 注解
定义JavaBean
user:
  userName: Kelvin
  gender: 男
  # 对应的Bean文件里的数组
  hobbies: run, badminton, mountainclimb
  # 对应的Bean文件里的List
  hobbyList:
    - run
    - badminton
    - mountainclimb
import lombok.Data;
import org.springframework.boot.context.properties.ConfigurationProperties;
import org.springframework.stereotype.Component;
import java.util.List;
/**
 * 用户实体类
 */
@Data
@Component
@ConfigurationProperties(prefix = "user")
public class User {

    /**
     * 名字
     */
//    @Value("${user.userName}")
    private String userName;

    /**
     * 性别
     */
//    @Value("${user.gender}")
    private String gender;

    /**
     * 爱好
     */
//    @Value("${user.hobbies}")
    private String[] hobbies;

    /**
     * 爱好
     */
    private List<String> hobbyList;

    public User() {
    }
}
@SpringBootTest
class SpringbootApplicationTests {
    /**
     * 用户实体类对象
     */
    @Autowired
    private User user;

    @Test
    void contextLoads() {
        System.out.println("#############user: " + user);
    }
}
打印日志:#############user: User{name=‘Kelvin’, gender=‘男’, hobbies=[run, badminton, mountainclimb]}
7.2、使用 @Value 注解
/**
 * 用户实体类
 */
@Component
public class User {
    /**
     * 名字
     */
    @Value("${user.userName}")
    private String userName;
    /**
     * 性别
     */
    @Value("${user.gender}")
    private String gender;

    /**
     * 爱好
     */
    private String[] hobbies;
}
7.3、@Value 与 @ConfigurationProperties 对比
7.3.1、 使用位置不同
- @ConfigurationProperties:标注在 JavaBean 的类名上;
- @Value:标注在 JavaBean 的属性上。
7.3.2、功能不同
- @ConfigurationProperties:用于批量绑定配置文件中的配置;
- @Value:只能一个一个的指定需要绑定的配置。
7.3.3、松散绑定支持不同@ConfigurationProperties:支持松散绑定(松散语法),例如实体类 Person 中有一个属性为 firstName,那么配置文件中的属性名支持以下写法:
- person.firstName
- person.first-name
- person.first_name
- PERSON_FIRST_NAME
@Vaule:不支持松散绑定。
7.3.4、 SpEL 支持不同
- @ConfigurationProperties:不支持 SpEL 表达式;
- @Value:支持 SpEL 表达式。
7.3.5、复杂类型封装
- @ConfigurationProperties:支持所有类型数据的封装,例如 Map、List、Set、以及对象等;
- @Value:只支持基本数据类型的封装,例如字符串、布尔值、整数等类型。
7.3.6、应用场景不同
@Value 和 @ConfigurationProperties 两个注解之间,并没有明显的优劣之分,它们只是适合的应用场景不同而已。
- 若只是获取配置文件中的某项值,则推荐使用 @Value 注解;
- 若专门编写了一个 JavaBean 来和配置文件进行映射,则建议使用 @ConfigurationProperties 注解。
7.4、非application配置文件
@PropertySource(value =“classpath:userinfo.properties”)
定义配置文件
user.userName=Tiger
user.gender=男
user.hobbies=run,badminton,mountainclimb
往期热门专栏回顾
资料获取,更多粉丝福利,关注下方公众号获取


 5万+
5万+

 被折叠的 条评论
为什么被折叠?
被折叠的 条评论
为什么被折叠?
 到【灌水乐园】发言


