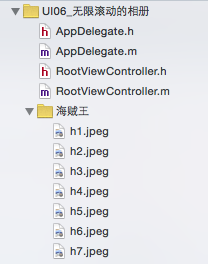
RootViewController.m
#import "RootViewController.h"

1.写两个宏.
#define WIDTH self.view.frame.size.width
#define HEIGHT self.view.frame.size.height

@interface RootViewController ()<UIScrollViewDelegate>

2.定义两个属性.
@property(nonatomic, retain)UIScrollView *scrollView;
@property(nonatomic, retain)UIPageControl *page;

@end

@implementation RootViewController

- (void)dealloc
{
    [_scrollView release];
    [super dealloc];
}

- (void)viewDidLoad {
    [super viewDidLoad];
    // Do any additional setup after loading the view.
    self.view.backgroundColor = [UIColor whiteColor];

    3.创建一个scrollview.
    self.scrollView = [[UIScrollView alloc] initWithFrame:CGRectMake(0, 0, WIDTH, HEIGHT)];
    [self.view addSubview:self.scrollView];
    [_scrollView release];

    4.设置屏幕移动范围.
    self.scrollView.contentSize = CGSizeMake(WIDTH * 9, HEIGHT);

    5.设置按页滚动.
    self.scrollView.pagingEnabled = YES;


    6.创建一个imageView,放最后一张图片.
    UIImageView *topImageView = [[UIImageView alloc] initWithFrame:CGRectMake(0, 0, WIDTH, HEIGHT)];
    topImageView.image = [UIImage imageNamed:@"h7.jpeg"];
    [self.scrollView addSubview:topImageView];
    [topImageView release];
    topImageView.userInteractionEnabled = YES;

    7.创建中间的1-7的视图.
    for (NSInteger i = 1; i < 8 ; i++) {
        NSString *imageName = [NSString stringWithFormat:@"h%ld.jpeg",i];
        UIImageView *imageView = [[UIImageView alloc] initWithFrame:CGRectMake(WIDTH * i, 0, WIDTH, HEIGHT)];
        imageView.image = [UIImage imageNamed:imageName];
        [self.scrollView addSubview:imageView];
        [imageView release];
        imageView.userInteractionEnabled = YES;
    }

    8.创建一个imageview,放第一张图片.
    UIImageView *lastImageView = [[UIImageView alloc] initWithFrame:CGRectMake(WIDTH * 8, 0, WIDTH, HEIGHT)];
    lastImageView.image = [UIImage imageNamed:@"h1.jpeg"];
    [self.scrollView addSubview:lastImageView];
    [lastImageView release];
    lastImageView.userInteractionEnabled = YES;

    9.为了能显示第一张图片,我们需要先设置一个偏移量,这样能直接显示罗宾的第一张图片,
    self.scrollView.contentOffset = CGPointMake(WIDTH, 0);

    10.设置代理人.
    self.scrollView.delegate = self;

    11.创建一个pageControl.
    self.page = [[UIPageControl alloc] initWithFrame:CGRectMake(100, 600, 200, 40)];
    self.page.backgroundColor = [UIColor greenColor];
    self.page.layer.borderWidth = 1;
    self.page.layer.cornerRadius = 10;
    [self.view addSubview:self.page];
    [_page release];

    12.设置页数
    self.page.numberOfPages = 7;

    13.设置未选中页的点颜色
    self.page.pageIndicatorTintColor = [UIColor blackColor];

    14.设置选中页的点颜色
    self.page.currentPageIndicatorTintColor = [UIColor yellowColor];

    15.点击换页按钮,切换图片.
    [self.page addTarget:self action:@selector(pageAction:) forControlEvents:UIControlEventValueChanged];

    16.想要scrollview实现缩放功能,需要先设置最大最小的缩放比例.
    self.scrollView.minimumZoomScale = 0.5;
    self.scrollView.maximumZoomScale = 2;
}

17.滑动结束,触发的协议方法
- (void)scrollViewDidEndDecelerating:(UIScrollView *)scrollView {
    if (self.scrollView.contentOffset.x == WIDTH * 8) {
        self.scrollView.contentOffset = CGPointMake(WIDTH, 0);
//        self.page.currentPage = 0;
    } else if (self.scrollView.contentOffset.x == 0) {
        self.scrollView.contentOffset = CGPointMake(WIDTH * 7, 0);
//        self.page.currentPage = 6;
    }

    // pageContro和scrollView进行关联,点的移动方向和scrollview的偏移量有关.
    // 无论怎么方向滑动,当pageControl和scrollview关联的时候,偏移量都是修改好得,所以可以正确的滚动和显示.
    self.page.currentPage = self.scrollView.contentOffset.x / WIDTH - 1;
}

18.点击页面切换点的方法.
- (void)pageAction:(UIPageControl *)page {
    // 还是设置偏移量.
    NSLog(@"%ld", page.currentPage);
    [self.scrollView setContentOffset:CGPointMake((page.currentPage + 1) * WIDTH, 0) animated:YES];
}UI_无限滚动相册
最新推荐文章于 2024-04-30 13:13:02 发布


 590
590

 被折叠的 条评论
为什么被折叠?


