Flutter小功能实现-咖啡店

1 导航栏实现

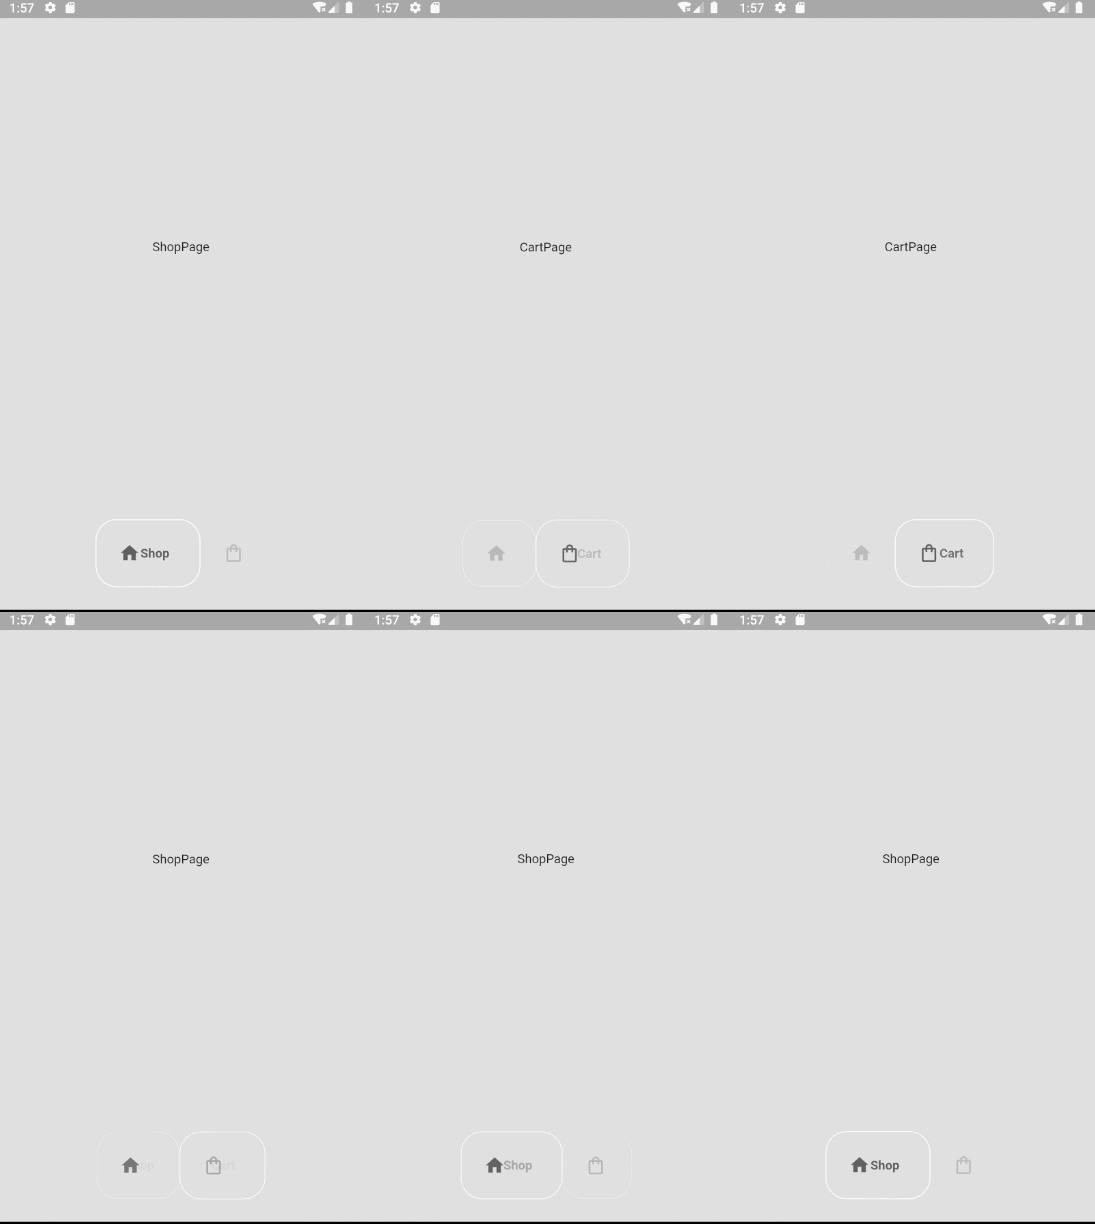
效果图:


1.Package

google_nav_bar: ^5.0.6

使用文档:

google_nav_bar | Flutter Package

2.Code

//MyBottomNavBar

class MyBottomNavBar extends StatelessWidget {
  void Function(int)? onTabChange;

  MyBottomNavBar({super.key, required this.onTabChange});

  @override
  Widget build(BuildContext context) {
    return Container(
      margin: const EdgeInsets.all(25),
      child: GNav(
          onTabChange: (value) => onTabChange!(value),
          color: Colors.grey[400],
          mainAxisAlignment: MainAxisAlignment.center,
          activeColor: Colors.grey[700],
          tabBackgroundColor: Colors.grey.shade300,
          tabBorderRadius: 24,
          tabActiveBorder: Border.all(color: Colors.white),
          tabs: const [
            GButton(icon: Icons.home, text: 'Shop'),
            GButton(icon: Icons.shopping_bag_outlined, text: 'Cart'),
          ]),
    );
  }
}

//HomePage

class HomePage extends StatefulWidget {
  const HomePage({super.key});

  @override
  State<HomePage> createState() => _HomePageState();
}

class _HomePageState extends State<HomePage> {
  int _selectPage = 0;

  final List<Widget> _pages = [ShopPage(), CartPage()];

  @override
  Widget build(BuildContext context) {
    return Scaffold(
      backgroundColor: backgroundColor,
      bottomNavigationBar: MyBottomNavBar(
        onTabChange: (index) => navigateBottomBar(index),
      ),
      body: _pages[_selectPage],
    );
  }

  ///点击底部按钮响切换
  ///
  navigateBottomBar(int index) {
    setState(() {
      _selectPage = index;
    });
  }
}

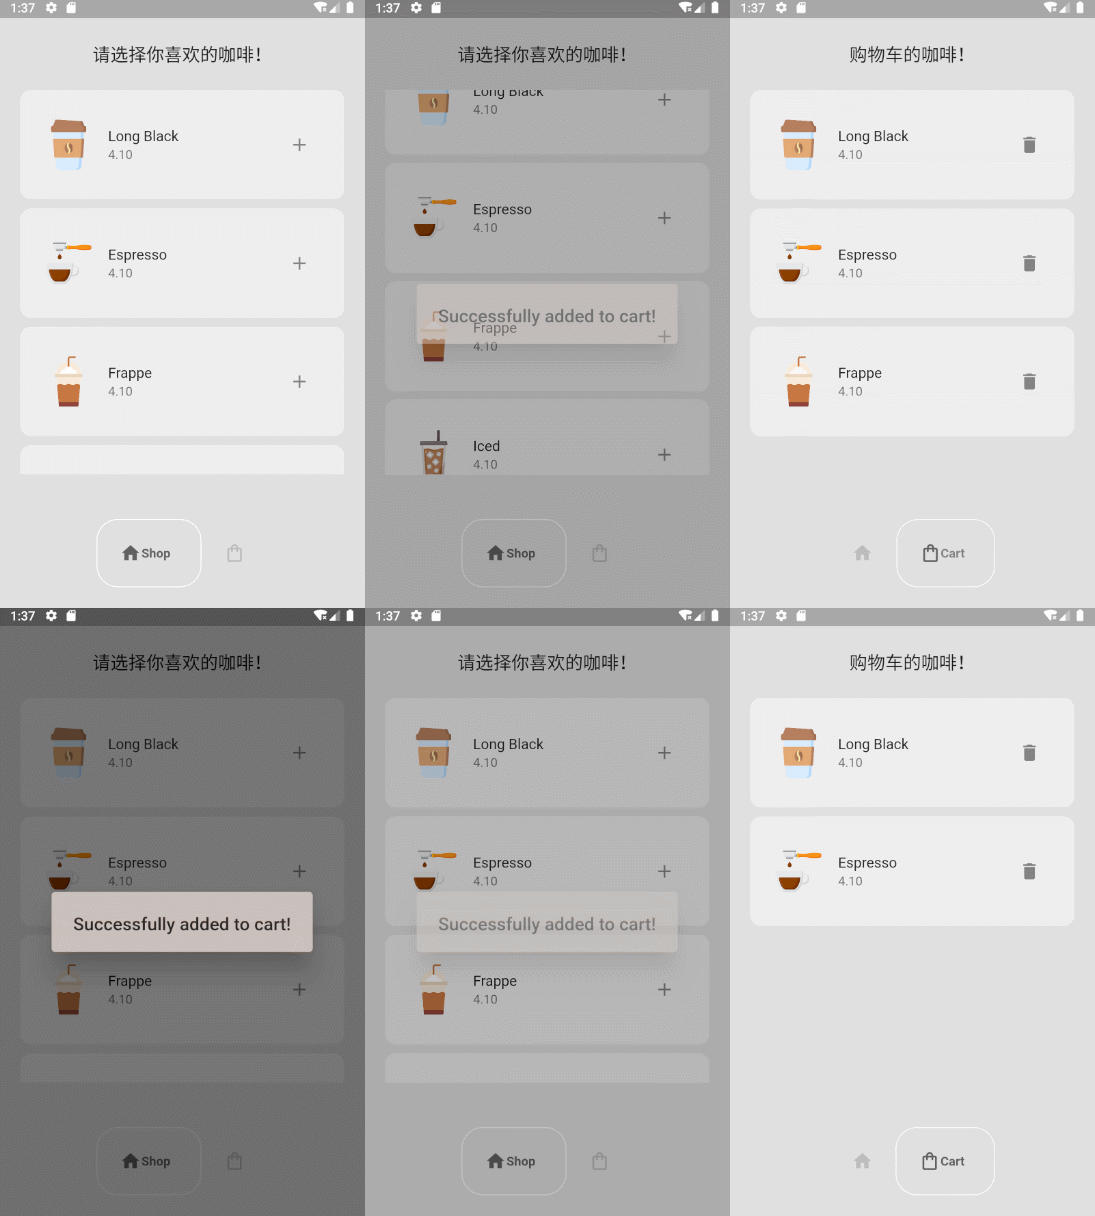
2 商品列表实现
1.Package

provider

使用文档:

provider | Flutter Package

2.Code

Models 数据模型

Coffee 咖啡数据模型:名称、价格、图片

CoffeeShop 咖啡售卖数据模型:coffeeShop 在售咖啡种类,userCart用户购物车 ,addItemToCart添加到购物车方法,removeItemFromCart从购物车移除方法

class Coffee {
  final String name;
  final String price;
  final String imagePath;

  Coffee({required this.name, required this.price, required this.imagePath});
}

class CoffeeShop extends ChangeNotifier {
  //sale list
  final List<Coffee> _shop = [
    Coffee(
        name: 'Long Black',
        price: '4.10',
        imagePath: 'lib/images/coffee-cup.png'),
    Coffee(
        name: 'Espresso', price: '4.10', imagePath: 'lib/images/espresso.png'),
    Coffee(name: 'Frappe', price: '4.10', imagePath: 'lib/images/frappe.png'),
    Coffee(name: 'Iced', price: '4.10', imagePath: 'lib/images/iced.png'),
    Coffee(name: 'Latte', price: '4.10', imagePath: 'lib/images/latte.png'),
  ];

  //user cart
  final List<Coffee> _userCart = [];

  //get coffee list
  List<Coffee> get coffeeShop => _shop;

  //get user cart
  List<Coffee> get userCart => _userCart;

  //add item to cart
  void addItemToCart(Coffee coffee) {
    _userCart.add(coffee);
    notifyListeners();
  }

  //remove item from cart
  void removeItemFromCart(Coffee coffee) {
    _userCart.remove(coffee);
    notifyListeners();
  }
}

商品展示Tile组件

class CoffeeTile extends StatelessWidget {
  final Coffee coffee;
  final Icon icon;
  void Function()? onPressed;
  CoffeeTile({
    super.key,
    required this.coffee,
    required this.onPressed,
    required this.icon,
  });

  @override
  Widget build(BuildContext context) {
    return Container(
      decoration: BoxDecoration(
          color: Colors.grey[200], borderRadius: BorderRadius.circular(12)),
      margin: const EdgeInsets.only(bottom: 10),
      padding: const EdgeInsets.symmetric(vertical: 25, horizontal: 10),
      child: ListTile(
        title: Text(coffee.name),
        subtitle: Text(coffee.price),
        leading: Image.asset(coffee.imagePath),
        trailing: IconButton(
          icon: icon,
          onPressed: onPressed,
        ),
      ),
    );
  }
}

3.源码下载:

https://download.csdn.net/download/sc_liuliye/88278760

  • 0
    点赞
  • 0
    收藏
    觉得还不错? 一键收藏
  • 打赏
    打赏
  • 0
    评论
好的,我可以为您讲解一下Flutter自定义Tab导航的实现方法。 对于顶部导航,可以使用TabBar和TabBarView来实现。TabBar是一个水平的导航栏,TabBarView是一个可以滚动的控件,可以用来展示不同的页面内容。下面是一个简单的示例代码: ``` TabController _tabController; @override void initState() { super.initState(); _tabController = TabController(length: 2, vsync: this); } @override Widget build(BuildContext context) { return Scaffold( appBar: AppBar( title: Text('顶部导航'), bottom: TabBar( controller: _tabController, tabs: [ Tab(text: 'Tab1'), Tab(text: 'Tab2'), ], ), ), body: TabBarView( controller: _tabController, children: [ // Tab1页面内容 Container( child: Text('Tab1'), ), // Tab2页面内容 Container( child: Text('Tab2'), ), ], ), ); } ``` 对于底部导航,可以使用BottomNavigationBar来实现。BottomNavigationBar是一个底部导航栏,可以用来切换不同的页面。下面是一个简单的示例代码: ``` int _currentIndex = 0; @override Widget build(BuildContext context) { return Scaffold( appBar: AppBar( title: Text('底部导航'), ), body: Center( child: Text('当前页面: $_currentIndex'), ), bottomNavigationBar: BottomNavigationBar( currentIndex: _currentIndex, onTap: (index) { setState(() { _currentIndex = index; }); }, items: [ BottomNavigationBarItem( icon: Icon(Icons.home), title: Text('首页'), ), BottomNavigationBarItem( icon: Icon(Icons.search), title: Text('搜索'), ), BottomNavigationBarItem( icon: Icon(Icons.person), title: Text('个人中心'), ), ], ), ); } ``` 对于自定义Tab导航,可以使用自定义控件来实现。比如,可以使用Row和GestureDetector来构建一个自定义的Tab导航栏。下面是一个简单的示例代码: ``` int _currentIndex = 0; @override Widget build(BuildContext context) { return Scaffold( appBar: AppBar( title: Text('自定义Tab导航'), ), body: Center( child: Text('当前页面: $_currentIndex'), ), bottomNavigationBar: Row( mainAxisAlignment: MainAxisAlignment.spaceAround, children: [ GestureDetector( onTap: () { setState(() { _currentIndex = 0; }); }, child: Column( children: [ Icon(Icons.home, color: _currentIndex == 0 ? Colors.blue : Colors.grey), Text('首页', style: TextStyle(color: _currentIndex == 0 ? Colors.blue : Colors.grey)), ], ), ), GestureDetector( onTap: () { setState(() { _currentIndex = 1; }); }, child: Column( children: [ Icon(Icons.search, color: _currentIndex == 1 ? Colors.blue : Colors.grey), Text('搜索', style: TextStyle(color: _currentIndex == 1 ? Colors.blue : Colors.grey)), ], ), ), GestureDetector( onTap: () { setState(() { _currentIndex = 2; }); }, child: Column( children: [ Icon(Icons.person, color: _currentIndex == 2 ? Colors.blue : Colors.grey), Text('个人中心', style: TextStyle(color: _currentIndex == 2 ? Colors.blue : Colors.grey)), ], ), ), ], ), ); } ``` 以上是三种常见的Tab导航实现方法,您可以根据自己的需求选择合适的方式来实现

“相关推荐”对你有帮助么?

  • 非常没帮助
  • 没帮助
  • 一般
  • 有帮助
  • 非常有帮助
提交
评论
添加红包

请填写红包祝福语或标题

红包个数最小为10个

红包金额最低5元

当前余额3.43前往充值 >
需支付:10.00
成就一亿技术人!
领取后你会自动成为博主和红包主的粉丝 规则
hope_wisdom
发出的红包

打赏作者

一毛钱的年代

你的鼓励将是我创作的最大动力

¥1 ¥2 ¥4 ¥6 ¥10 ¥20
扫码支付:¥1
获取中
扫码支付

您的余额不足,请更换扫码支付或充值

打赏作者

实付
使用余额支付
点击重新获取
扫码支付
钱包余额 0

抵扣说明:

1.余额是钱包充值的虚拟货币,按照1:1的比例进行支付金额的抵扣。
2.余额无法直接购买下载,可以购买VIP、付费专栏及课程。

余额充值