


使用串口线,将两台计算机、或将计算机与设备连接后。便可通过串口,进行通信。
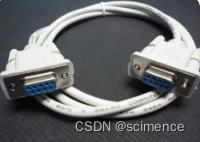
串口通信,实现串口数据的发送和接收即可。
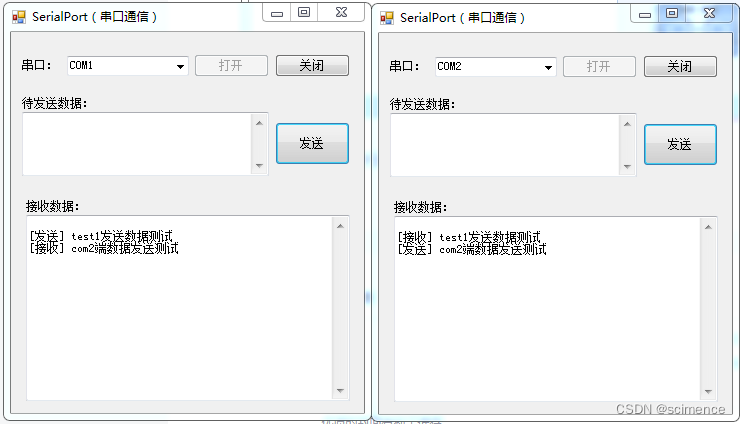
因为只有一台计算机,我们使用虚拟串口模拟软件,将COM1和COM2两个串口连接(替代串口线的连接)。
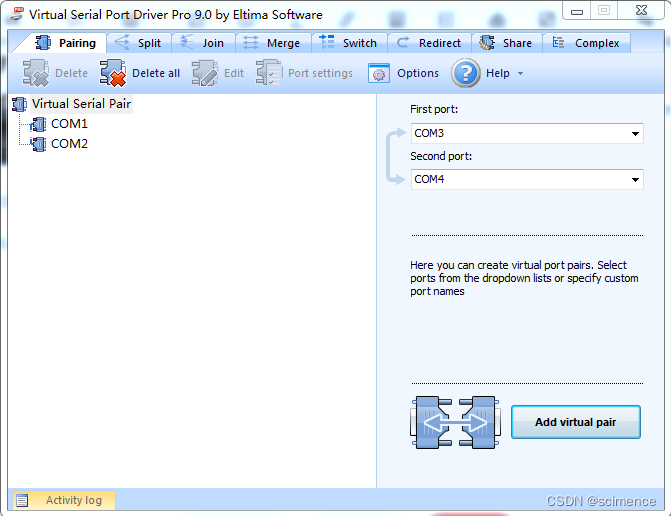
通过这两个串口进行通信。
源码:
using System;
using System.Collections.Generic;
using System.ComponentModel;
using System.Data;
using System.Drawing;
using System.IO.Ports;
using System.Linq;
using System.Text;
using System.Windows.Forms;

namespace SerialPortDemo
{
    public partial class Form1 : Form
    {
        public Form1()
        {
            InitializeComponent();
        }

        SerialPort port;

        private void Form1_Load(object sender, EventArgs e)
        {
            for (int i = 1; i < 256; i++)
            {
                comboBox1.Items.Add("COM" + i);
            }
            comboBox1.SelectedIndex = 0;
        }

        /// <summary>
        /// 打开指定的串口
        /// </summary>
        private void button1_Click(object sender, EventArgs e)
        {
            try
            {

                if (port == null)
                {
                    port = new SerialPort(comboBox1.Text, 115200, Parity.Even, 8, StopBits.One);
                    port.RtsEnable = true;  // 启用请求发送(RTS)信号
                    port.DtrEnable = true;  // 启用数据终端就绪(DTR)信息
                    port.ReadTimeout = 3000;

                    port.DataReceived += port_DataReceived; // 添加数据接收处理逻辑
                }

                if (!port.IsOpen)
                {
                    port.Open();

                    button1.Enabled = false;
                    button3.Enabled = true;
                }
            }
            catch (Exception)
            {
                port = null;
                MessageBox.Show("串口" + comboBox1.Text + "可能已占用,请选择其它端口!");
            }
        }

        /// <summary>
        /// 关闭对应的串口
        /// </summary>
        private void button3_Click(object sender, EventArgs e)
        {
            if (port != null && port.IsOpen)
            {
                port.Close();

                button1.Enabled = true;
                button3.Enabled = false;

                port = null;
            }
        }

        public delegate void ShowTextD(string content);
        public event ShowTextD ShowTextI;

        /// <summary>
        /// 输出显示发送或接收的数据
        /// </summary>
        private void ShowText(string content)
        {
            textBox1.Text += "\r\n" + content;
            textBox1.ScrollToCaret();
        }

        /// <summary>
        /// 串口数据接收处理逻辑
        /// </summary>
        private void port_DataReceived(object sender, SerialDataReceivedEventArgs e)
        {
            //string content = "[接收]" + port.ReadExisting();

            int len = port.BytesToRead;
            byte[] buf = new byte[len];
            port.Read(buf, 0, len);
            string content = "[接收] " + Encoding.Default.GetString(buf);

            if (ShowTextI == null) ShowTextI = ShowText;
            this.Invoke(ShowTextI, content);
            //throw new NotImplementedException();
        }

        /// <summary>
        /// 发送数据
        private void button2_Click(object sender, EventArgs e)
        {
            if (port != null && port.IsOpen)
            {
                String content = textBox2.Text;
                if (!String.IsNullOrEmpty(content))
                {
                    //port.Write(content);
                    byte[] data = Encoding.Default.GetBytes(content);
                    port.Write(data, 0, data.Length);

                    ShowText("[发送] " + content);

                    textBox2.Text = "";
                }
            }
        }

    }
}
namespace SerialPortDemo
{
    partial class Form1
    {
        /// <summary>
        /// 必需的设计器变量。
        /// </summary>
        private System.ComponentModel.IContainer components = null;

        /// <summary>
        /// 清理所有正在使用的资源。
        /// </summary>
        /// <param name="disposing">如果应释放托管资源,为 true;否则为 false。</param>
        protected override void Dispose(bool disposing)
        {
            if (disposing && (components != null))
            {
                components.Dispose();
            }
            base.Dispose(disposing);
        }

        #region Windows 窗体设计器生成的代码

        /// <summary>
        /// 设计器支持所需的方法 - 不要
        /// 使用代码编辑器修改此方法的内容。
        /// </summary>
        private void InitializeComponent()
        {
            this.button1 = new System.Windows.Forms.Button();
            this.comboBox1 = new System.Windows.Forms.ComboBox();
            this.label1 = new System.Windows.Forms.Label();
            this.textBox1 = new System.Windows.Forms.TextBox();
            this.textBox2 = new System.Windows.Forms.TextBox();
            this.button2 = new System.Windows.Forms.Button();
            this.label2 = new System.Windows.Forms.Label();
            this.label3 = new System.Windows.Forms.Label();
            this.button3 = new System.Windows.Forms.Button();
            this.SuspendLayout();
            //
            // button1
            //
            this.button1.Location = new System.Drawing.Point(183, 22);
            this.button1.Name = "button1";
            this.button1.Size = new System.Drawing.Size(75, 23);
            this.button1.TabIndex = 0;
            this.button1.Text = "打开";
            this.button1.UseVisualStyleBackColor = true;
            this.button1.Click += new System.EventHandler(this.button1_Click);
            //
            // comboBox1
            //
            this.comboBox1.FormattingEnabled = true;
            this.comboBox1.Location = new System.Drawing.Point(56, 24);
            this.comboBox1.Name = "comboBox1";
            this.comboBox1.Size = new System.Drawing.Size(122, 20);
            this.comboBox1.TabIndex = 1;
            //
            // label1
            //
            this.label1.AutoSize = true;
            this.label1.Location = new System.Drawing.Point(9, 27);
            this.label1.Name = "label1";
            this.label1.Size = new System.Drawing.Size(41, 12);
            this.label1.TabIndex = 2;
            this.label1.Text = "串口:";
            //
            // textBox1
            //
            this.textBox1.Location = new System.Drawing.Point(15, 183);
            this.textBox1.Multiline = true;
            this.textBox1.Name = "textBox1";
            this.textBox1.ScrollBars = System.Windows.Forms.ScrollBars.Both;
            this.textBox1.Size = new System.Drawing.Size(324, 186);
            this.textBox1.TabIndex = 3;
            //
            // textBox2
            //
            this.textBox2.Location = new System.Drawing.Point(11, 80);
            this.textBox2.Multiline = true;
            this.textBox2.Name = "textBox2";
            this.textBox2.ScrollBars = System.Windows.Forms.ScrollBars.Both;
            this.textBox2.Size = new System.Drawing.Size(247, 64);
            this.textBox2.TabIndex = 4;
            //
            // button2
            //
            this.button2.Location = new System.Drawing.Point(264, 90);
            this.button2.Name = "button2";
            this.button2.Size = new System.Drawing.Size(75, 43);
            this.button2.TabIndex = 5;
            this.button2.Text = "发送";
            this.button2.UseVisualStyleBackColor = true;
            this.button2.Click += new System.EventHandler(this.button2_Click);
            //
            // label2
            //
            this.label2.AutoSize = true;
            this.label2.Location = new System.Drawing.Point(9, 65);
            this.label2.Name = "label2";
            this.label2.Size = new System.Drawing.Size(77, 12);
            this.label2.TabIndex = 6;
            this.label2.Text = "待发送数据:";
            //
            // label3
            //
            this.label3.AutoSize = true;
            this.label3.Location = new System.Drawing.Point(13, 168);
            this.label3.Name = "label3";
            this.label3.Size = new System.Drawing.Size(65, 12);
            this.label3.TabIndex = 7;
            this.label3.Text = "接收数据:";
            //
            // button3
            //
            this.button3.Location = new System.Drawing.Point(264, 22);
            this.button3.Name = "button3";
            this.button3.Size = new System.Drawing.Size(75, 23);
            this.button3.TabIndex = 8;
            this.button3.Text = "关闭";
            this.button3.UseVisualStyleBackColor = true;
            this.button3.Click += new System.EventHandler(this.button3_Click);
            //
            // Form1
            //
            this.AutoScaleDimensions = new System.Drawing.SizeF(6F, 12F);
            this.AutoScaleMode = System.Windows.Forms.AutoScaleMode.Font;
            this.ClientSize = new System.Drawing.Size(353, 381);
            this.Controls.Add(this.button3);
            this.Controls.Add(this.label3);
            this.Controls.Add(this.label2);
            this.Controls.Add(this.button2);
            this.Controls.Add(this.textBox2);
            this.Controls.Add(this.textBox1);
            this.Controls.Add(this.label1);
            this.Controls.Add(this.comboBox1);
            this.Controls.Add(this.button1);
            this.Name = "Form1";
            this.StartPosition = System.Windows.Forms.FormStartPosition.CenterScreen;
            this.Text = "SerialPort(串口通信)";
            this.Load += new System.EventHandler(this.Form1_Load);
            this.ResumeLayout(false);
            this.PerformLayout();

        }

        #endregion

        private System.Windows.Forms.Button button1;
        private System.Windows.Forms.ComboBox comboBox1;
        private System.Windows.Forms.Label label1;
        private System.Windows.Forms.TextBox textBox1;
        private System.Windows.Forms.TextBox textBox2;
        private System.Windows.Forms.Button button2;
        private System.Windows.Forms.Label label2;
        private System.Windows.Forms.Label label3;
        private System.Windows.Forms.Button button3;
    }
}


 1万+
1万+


 被折叠的 条评论
为什么被折叠?
被折叠的 条评论
为什么被折叠?
 到【灌水乐园】发言


