热修复And插件化学习总结

     说是心得,还不如说是相关资料整理,以便日后自己继续学习查阅。

    首先需要明确插件化和热修复的概念问题。

    插件化:是将功能代码做成APK的形式,想要让新的代码生效,需要下载APK,加载APK中的新的代码和资源,这个过程需要重启APP,重启之后才能生效。

                   优势:可解决65535方法数问题,可让一个项目多个团队并行开发独立功能。

    热修复:是将新的代码打成jar/dex的形式,也需要下载jar/dex包,然后载入APP,一般来说,一旦载入马上就能生效,无需重启APP。

                   优势:轻量化,对用户透明化,修复起效快。

    共同点:都采用了Java  classloader加载类的原理,以及android 多dex分包原理。


    插件化开发框架:


    1.企鹅的tinker: https://github.com/Tencent/tinker

    2.Small:  https://github.com/wequick/Small

    3.更多查看此文:http://www.trinea.cn/android/android-plugin/


    ############热修复############


   热修复准备

   安卓App热补丁动态修复技术介绍 QQ空间团队

  Android dex分包方案 开源中国

   原理分析

   Android 热补丁动态修复框架小结 鸿洋_

   Android热更新实现原理 大头鬼Bruce


    热修复框架:


     https://github.com/alibaba/AndFix    alibaba (推荐)

   https://github.com/dodola/RocooFix  dodola(推荐)  

     https://github.com/dodola/AnoleFix     dodola (测试中...)    


   https://github.com/dodola/HotFix dodola (已过时)

   https://github.com/jasonross/Nuwa 寒江不钓 (已过时)

   https://github.com/bunnyblue/DroidFix BunnyBlue


   如何使用RocooFixs

RocooFix支持两种模式: 
1、静态修复某种情况下需要重启应用。 (推荐使用) 
2、动态修复,无需重启应用即可生效。

使用方法:

 //打补丁
        RocooFix.init(this);

//方案1:静态启用,一般在Application里加载补丁

/**
  * 从Assets里取出补丁,一般用于测试
  *
  * @param context
  * @param assetName
  */
RocooFix.initPathFromAssets(Context context, String assetName);

 /**
   * 从指定目录加载补丁
   * @param context
   * @param dexPath
   */
RocooFix.applyPatch(Context context, String dexPath);


//方案2:动态打补丁,立即生效,有性能问题,适用于补丁方法数较少的情况,建议在ART虚拟机里启用该模式
/**
 * 从Asset里加载补丁,一般用于本地测试
 * @param context
 * @param assetName
 */
RocooFix.initPathFromAssetsRuntime(Context context, String assetName) ;

/**
 * 从指定目录加载补丁
 * @param context
 * @param dexPath
 */ 
RocooFix.applyPatchRuntime(Context context, String dexPath)  ;
 
 
  • 1
  • 2
  • 3
  • 4
  • 5
  • 6
  • 7
  • 8
  • 9
  • 10
  • 11
  • 12
  • 13
  • 14
  • 15
  • 16
  • 17
  • 18
  • 19
  • 20
  • 21
  • 22
  • 23
  • 24
  • 25
  • 26
  • 27
  • 28
  • 29
  • 30
  • 31
  • 32
  • 33
  • 34
  • 35
  • 36
  • 1
  • 2
  • 3
  • 4
  • 5
  • 6
  • 7
  • 8
  • 9
  • 10
  • 11
  • 12
  • 13
  • 14
  • 15
  • 16
  • 17
  • 18
  • 19
  • 20
  • 21
  • 22
  • 23
  • 24
  • 25
  • 26
  • 27
  • 28
  • 29
  • 30
  • 31
  • 32
  • 33
  • 34
  • 35
  • 36

没有加群的朋友可以下载上面的RocooFix_libs包跟着我一步步来做:

项目使用Android Studio开发,所以准备好翻墙工具下载依赖包!!!

一、新建Android项目 app

二、将上面下载文件里面的rocoo作为lib库导入 
在app的build.gradle 里面添加compile project(‘:rocoo’),也可以手动添加依赖。

三、下载下来的文件夹里面还有个buildsrc文件直接放到app项目平级目录中(这个不用做任何操作)
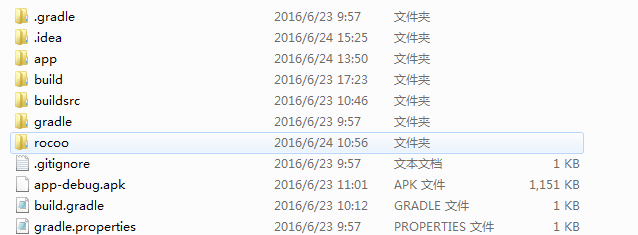
到此我们的目录结构为:

这里写图片描述

四:配置 根目录里面的 build.gradle文件:

buildscript {
    repositories {
        jcenter()
        maven {
            url "http://dl.bintray.com/dodola/maven"   //添加
        }
    }
    dependencies {
        classpath 'com.android.tools.build:gradle:2.1.2'
        classpath 'org.jacoco:org.jacoco.core:0.7.4.201502262128'   //添加
        // NOTE: Do not place your application dependencies here; they belong
        // in the individual module build.gradle files
    }
}
 
 
  • 1
  • 2
  • 3
  • 4
  • 5
  • 6
  • 7
  • 8
  • 9
  • 10
  • 11
  • 12
  • 13
  • 14
  • 1
  • 2
  • 3
  • 4
  • 5
  • 6
  • 7
  • 8
  • 9
  • 10
  • 11
  • 12
  • 13
  • 14

、配置 app 里面的build.gradle 文件

apply plugin: 'com.android.application'
apply plugin: 'com.dodola.rocoofix'            //添加

android {
    compileSdkVersion 23
    buildToolsVersion "23.0.3"

    defaultConfig {
        applicationId "com.test.hotfixtest"
        minSdkVersion 15
        targetSdkVersion 23
        versionCode 6
        versionName "1.0"
    }
//添加
    buildTypes {
        release {
            minifyEnabled true
            proguardFiles getDefaultProguardFile('proguard-android.txt'), 'proguard-rules.pro'
        }
        debug {
            minifyEnabled true
            proguardFiles getDefaultProguardFile('proguard-android.txt'), 'proguard-rules.pro'
        }
    }

}

/**
*
*必须添加
**/
rocoo_fix {
    preVersionPath = '5'
    enable = true
}

dependencies {
    compile fileTree(include: ['*.jar'], dir: 'libs')
    testCompile 'junit:junit:4.12'
    compile 'com.android.support:appcompat-v7:23.1.1'
    compile project(':rocoo')
}


  • 1
  • 2
  • 3
  • 4
  • 5
  • 6
  • 7
  • 8
  • 9
  • 10
  • 11
  • 12
  • 13
  • 14
  • 15
  • 16
  • 17
  • 18
  • 19
  • 20
  • 21
  • 22
  • 23
  • 24
  • 25
  • 26
  • 27
  • 28
  • 29
  • 30
  • 31
  • 32
  • 33
  • 34
  • 35
  • 36
  • 37
  • 38
  • 39
  • 40
  • 41
  • 42
  • 43
  • 44
  • 1
  • 2
  • 3
  • 4
  • 5
  • 6
  • 7
  • 8
  • 9
  • 10
  • 11
  • 12
  • 13
  • 14
  • 15
  • 16
  • 17
  • 18
  • 19
  • 20
  • 21
  • 22
  • 23
  • 24
  • 25
  • 26
  • 27
  • 28
  • 29
  • 30
  • 31
  • 32
  • 33
  • 34
  • 35
  • 36
  • 37
  • 38
  • 39
  • 40
  • 41
  • 42
  • 43
  • 44

preVersionPath = ‘1’ //注意:此项属性只在需要制作补丁的时候才需开启!!如果不需要制作补丁则需要去掉此项(其中的数值是前一个版本的版本号)

enable = true //注意:关掉此项会无法生成Hash.txt文件

重点介绍一下 preVersionPath 的属性: 
rocoo_fix将制作补丁的步骤透明化,用户无需手动备份hash.txt文件,插件会自动根据当前的versionCode生成hash.txt和mapping.txt文件到指定目录; 
上一个版本发布的时候版本号是1,那么生成的文件会放在app源码目录/rocooFix/version1/[debug]|[release]的目录下,如果需要制作补丁那么在配置里指定preVersionPath 属性,它的值是上一个版本的版本号,这里的值是1, 
然后将build.gradle的versionCode的号码修改,这里修改成2,只要和之前的版本不同就可以,没有具体值的要求

六、添加混淆代码(proguard-rules.pro):

-keep class com.dodola.rocoofix.** {*;}
-keep class com.lody.legend.* {*;}
 
 
  • 1
  • 2
  • 1
  • 2

七、添加测试代码:

新建一个Java类:

public class HelloHack {
         public String showHello() {
                return "rocoofix";
              }
    }
 
 
  • 1
  • 2
  • 3
  • 4
  • 5
  • 1
  • 2
  • 3
  • 4
  • 5

在建一个继承Application的类:

public class RocooApplication extends Application {
    @Override
    protected void attachBaseContext(Context base) {
        super.attachBaseContext(base);
        //需要打补丁时开启
        RocooFix.init(this);
        //测试从assets文件夹读取补丁
        RocooFix.initPathFromAssets(this, "patch.jar");
    }
}
 
 
  • 1
  • 2
  • 3
  • 4
  • 5
  • 6
  • 7
  • 8
  • 9
  • 10
  • 1
  • 2
  • 3
  • 4
  • 5
  • 6
  • 7
  • 8
  • 9
  • 10

八、运行项目看是否报错。测试已没错。

九、生成 patch.jar 文件 
1、首先随便修改下代码如:

public class HelloHack {
         public String showHello() {
                return "rocoofix——ok";
              }
    }
 
 
  • 1
  • 2
  • 3
  • 4
  • 5
  • 1
  • 2
  • 3
  • 4
  • 5

2、修改 app 项目中的build.gradle 文件把 versionCode 版本修改一下,把preVersionPath值修改成versionCode没修改之前的值。

然后运行项目就会在app目录下生成app\rocoofix\version4\debug\patch.jar 了,得到这个文件就算成功了。

最后我们就可以随便测试补丁了,放在sd目录或者assets文件下,关闭补丁RocooFix.init(this) 运行没修改前的代码看看程序是否变了。

ps:实际项目中,还需要将补丁从服务器下载到用户客户端,这个过程无非就是http请求,其中逻辑自行定制。

ps:这里做好心理准备补丁在有些机型会失效,目前测试MI 2S 4.4.4系统 成功。后面还会带来阿里的框架AndFix试用。


  • 1
    点赞
  • 2
    收藏
    觉得还不错? 一键收藏
  • 0
    评论

“相关推荐”对你有帮助么?

  • 非常没帮助
  • 没帮助
  • 一般
  • 有帮助
  • 非常有帮助
提交
评论
添加红包

请填写红包祝福语或标题

红包个数最小为10个

红包金额最低5元

当前余额3.43前往充值 >
需支付:10.00
成就一亿技术人!
领取后你会自动成为博主和红包主的粉丝 规则
hope_wisdom
发出的红包
实付
使用余额支付
点击重新获取
扫码支付
钱包余额 0

抵扣说明:

1.余额是钱包充值的虚拟货币,按照1:1的比例进行支付金额的抵扣。
2.余额无法直接购买下载,可以购买VIP、付费专栏及课程。

余额充值