C# 制作指示灯(经典)

群友提问:C#中的指示灯怎么做,改变状态有什么好的方法吗?

制作指示灯的方法有很多中:比如:

  1. 通过GDI+绘制自定义LED指示灯控件;

  2. 调用现成的第三方控件库;

  3. 采用label标签,通过改变背景色实现;等等

本文就以第三种方式展开讲解

01实现效果
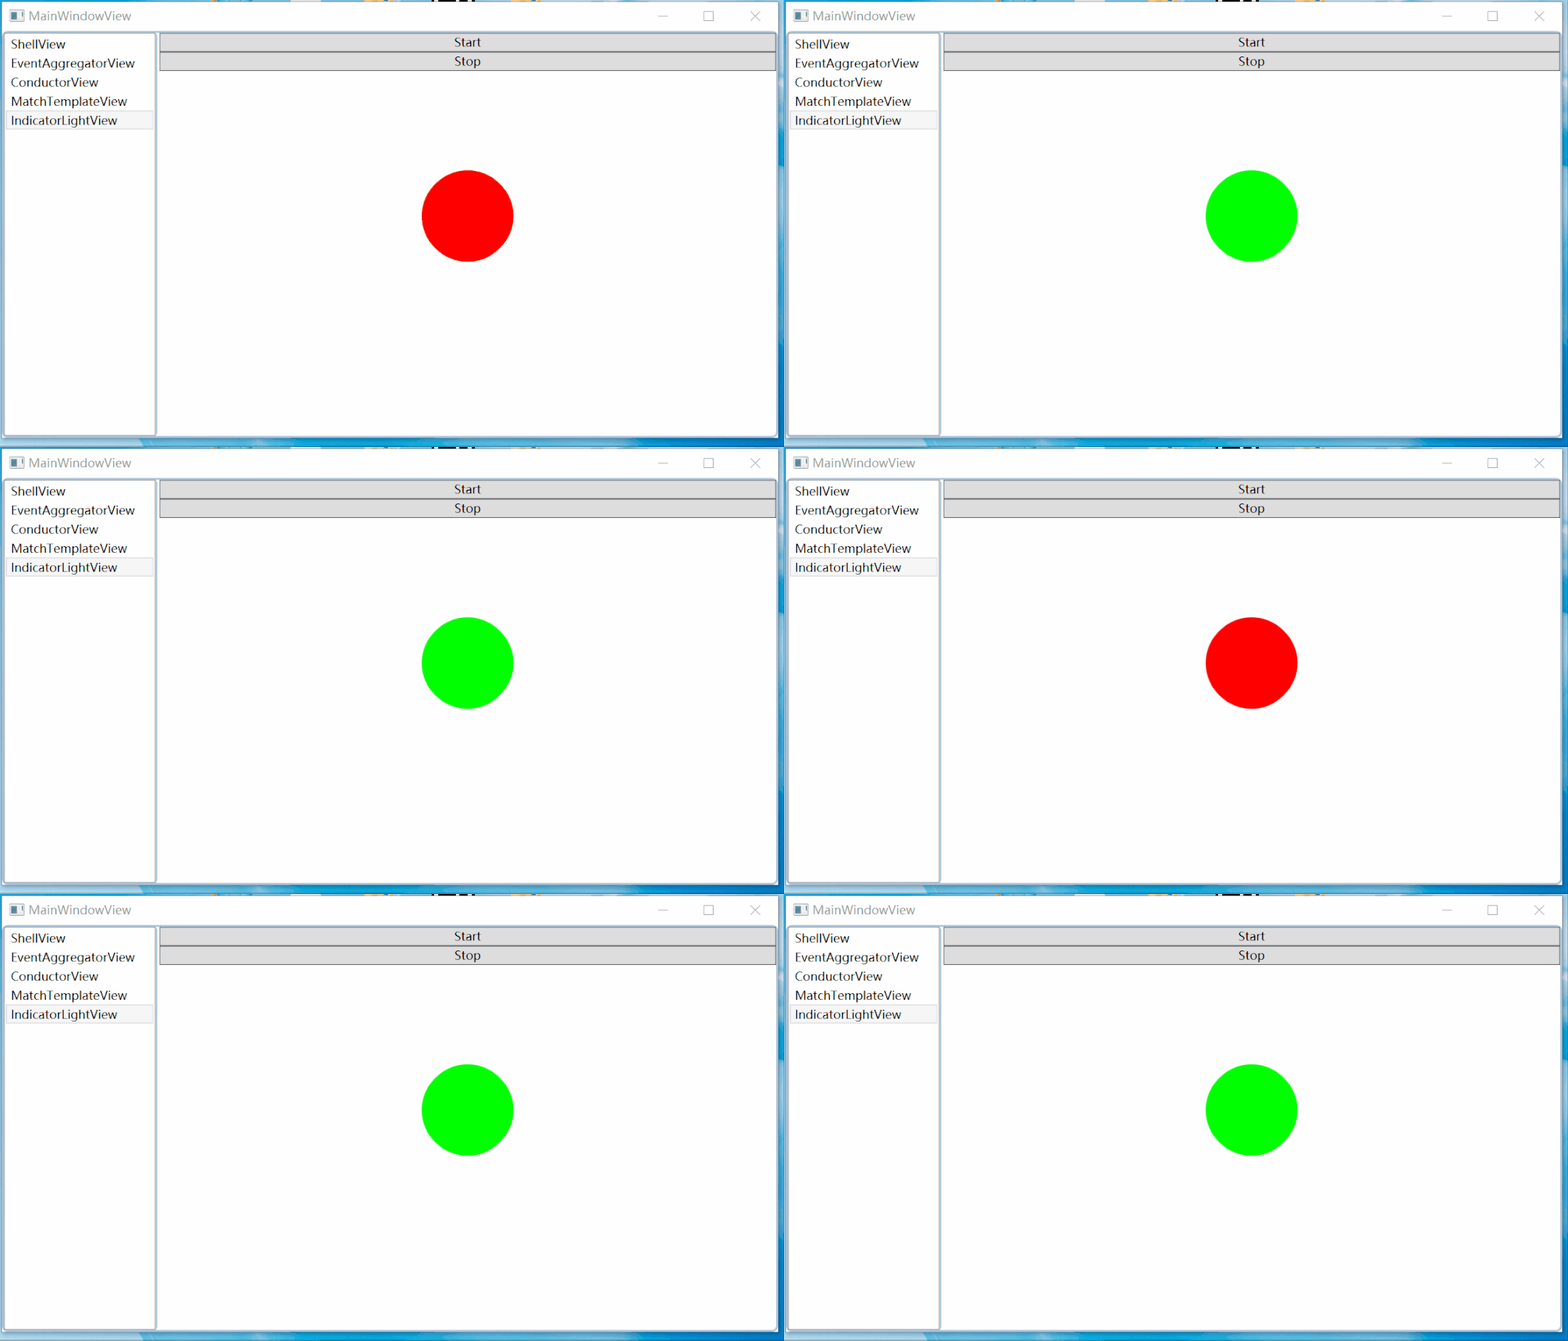
02实现代码

前台代码:

添加两个按钮和一个标签:


  <StackPanel>
        <Border BorderBrush="Red"></Border>
        <Button Name="StartBtn" Content="Start"/>
        <Button Name="StopBtn" Content="Stop"/>
        <Label Name="DisplayLbl" Visibility="{Binding DisplaySwitch}" FontSize="200"
               HorizontalAlignment="Center" VerticalAlignment="Center"
               Content="{Binding LabelText}" Foreground="{Binding ForeColor}" />
    </StackPanel>

后台代码:

①安装PropertyChanged.Fody,using PropertyChanged;然后在类前面添加   [AddINotifyPropertyChangedInterface],类中所有属性变更后就会自动通知界面变更;

②通过DisplaySwitch 属性控制指示灯的显示或者隐藏,然后通过界面的start按钮启动指示灯,stop关闭指示灯;

③指示灯背景色的改变通过独立线程控制,跨线程修改UI线程控件属性使用Caliburn.Micro框架下的  Execute.OnUIThread(()=>{});实现。


using PropertyChanged;
using System.Threading;
using System.Windows;
using System.Windows.Media;
using Brush = System.Windows.Media.Brush;

namespace Caliburn.Micro.Hello
{
    [AddINotifyPropertyChangedInterface]
    public class IndicatorLightViewModel : IViewModel
    {
        public Visibility DisplaySwitch { get; set; } = Visibility.Hidden;
        public string LabelText { get; set; }

        public Brush ForeColor { get; set; }

        private Thread workTask;
        public IndicatorLightViewModel()
        {
            ForeColor = new SolidColorBrush(Color.FromRgb(255, 0, 0));
        }
        public void StartBtn()
        {
            DisplaySwitch = Visibility.Visible;
            LabelText = "●";
            if (workTask == null || !workTask.IsAlive)
            {
                workTask = new Thread(IndicatorLightOperation);//添加线程 
                workTask.IsBackground = true;
                workTask.Start();
            }
        }
        public void StopBtn()
        {
            if (workTask == null || workTask.IsAlive)
            {
                workTask.Abort();
            }
            DisplaySwitch = Visibility.Hidden;
        }

        public void IndicatorLightOperation()
        {
            while (true)
            {
                Execute.OnUIThread(()=>
                {
                    if (((SolidColorBrush)ForeColor).Color.Equals(Color.FromRgb(255, 0, 0)))
                    {
                        ForeColor = new SolidColorBrush(Color.FromRgb(0, 255, 0));
                    }
                    else
                    {
                        ForeColor = new SolidColorBrush(Color.FromRgb(255, 0, 0));
                    }
                });
                Thread.Sleep(500);
            }

        }
    }
}

03其它相关:Brush颜色转换

1、String转换成Color

  Color color = (Color)ColorConverter.ConvertFromString(string);

2、String转换成Brush

   BrushConverter brushConverter = new BrushConverter();
   Brush brush = (Brush)brushConverter.ConvertFromString(string);

3、Color转换成Brush
    Brush brush = new SolidColorBrush(color));
    
 4、Brush转换成Color有两种方法:

(1)先将Brush转成string,再转成Color。

Color color= (Color)ColorConverter.ConvertFromString(brush.ToString());

(2)将Brush转成SolidColorBrush,再取Color。

 Color color= ((SolidColorBrush)CadColor.Background).Color;

  • 3
    点赞
  • 4
    收藏
    觉得还不错? 一键收藏
  • 1
    评论
以下是使用C#自定义指示灯控件的步骤: 1. 首先,你需要在Visual Studio中创建一个新的WinForm项目。 2. 在解决方案资源管理器中,右键单击项目名称,然后选择“添加”>“用户控件”。 3. 在“添加新项”对话框中,选择“用户控件”模板,将名称设置为“IndicatorLightControl”,然后单击“添加”。 4. 在“IndicatorLightControl.cs”文件中,添加以下代码: ```csharp public partial class IndicatorLightControl : UserControl { private bool _isBlinking = false; private bool _isOn = false; private Color _onColor = Color.Green; private Color _offColor = Color.Red; private int _blinkInterval = 500; public IndicatorLightControl() { InitializeComponent(); } public bool IsBlinking { get { return _isBlinking; } set { _isBlinking = value; if (_isBlinking) { blinkTimer.Start(); } else { blinkTimer.Stop(); _isOn = false; this.BackColor = _offColor; } } } public bool IsOn { get { return _isOn; } set { _isOn = value; if (_isOn) { this.BackColor = _onColor; } else { this.BackColor = _offColor; } } } public Color OnColor { get { return _onColor; } set { _onColor = value; if (_isOn) { this.BackColor = _onColor; } } } public Color OffColor { get { return _offColor; } set { _offColor = value; if (!_isOn) { this.BackColor = _offColor; } } } public int BlinkInterval { get { return _blinkInterval; } set { _blinkInterval = value; blinkTimer.Interval = _blinkInterval; } } private void blinkTimer_Tick(object sender, EventArgs e) { _isOn = !_isOn; if (_isOn) { this.BackColor = _onColor; } else { this.BackColor = _offColor; } } } ``` 5. 在“IndicatorLightControl.Designer.cs”文件中,添加以下代码: ```csharp partial class IndicatorLightControl { private System.ComponentModel.IContainer components = null; private System.Windows.Forms.Timer blinkTimer; private void InitializeComponent() { this.components = new System.ComponentModel.Container(); this.blinkTimer = new System.Windows.Forms.Timer(this.components); this.SuspendLayout(); // // blinkTimer // this.blinkTimer.Tick += new System.EventHandler(this.blinkTimer_Tick); // // IndicatorLightControl // this.BackColor = System.Drawing.Color.Red; this.Name = "IndicatorLightControl"; this.Size = new System.Drawing.Size(20, 20); this.ResumeLayout(false); } } ``` 6. 在你的WinForm中,将“IndicatorLightControl”控件拖放到你的窗体上。 7. 在属性窗口中,你可以设置控件的颜色、是否闪烁以及闪烁速度等属性。

“相关推荐”对你有帮助么?

  • 非常没帮助
  • 没帮助
  • 一般
  • 有帮助
  • 非常有帮助
提交
评论 1
添加红包

请填写红包祝福语或标题

红包个数最小为10个

红包金额最低5元

当前余额3.43前往充值 >
需支付:10.00
成就一亿技术人!
领取后你会自动成为博主和红包主的粉丝 规则
hope_wisdom
发出的红包
实付
使用余额支付
点击重新获取
扫码支付
钱包余额 0

抵扣说明:

1.余额是钱包充值的虚拟货币,按照1:1的比例进行支付金额的抵扣。
2.余额无法直接购买下载,可以购买VIP、付费专栏及课程。

余额充值