


VNC的安装及部署Tight+Tiger+Viewer+noVNC
1.VNC Viewer
https://www.realvnc.com/en/connect/download/viewer/?lai_sr=5-9&lai_sl=l
2.TightVNC
https://www.tightvnc.com/download.php
3.TigerVNC(直接可执行文件)
https://sourceforge.net/projects/tigervnc/files/stable/1.12.0/
4.UltraVNC
5.noVNC
https://github.com/novnc/noVNC
https://github.com/novnc/websockify
-
noVNC工作原理:
浏览器加载noVNC的HTML5页面,包括JavaScript和Canvas元素
noVNC客户端使用Websocket与Websockify建立连接
Websockify为协议转换代理,通过TCP与VNCServer建立连接

-
Github上下载并安装noVNC,并install其依赖的python3和websockify
#sudo apt-get install novnc python3-pip
#sudo pip3 install websockify (经常会发生下载超时,需要不断尝试)
#pip3 install jwcrypto (安装成功后,会带有jwcrypto,不需要再次安装) -
注意:
-
可以尝试更换清华源#pip3 install websockify -i https://pypi.tuna.tsinghua.edu.cn/simple
-
如果想卸载,执行如下指令
#pip uninstall websockify
#sudo apt-get remove --auto-remove websockify -
启动命令:
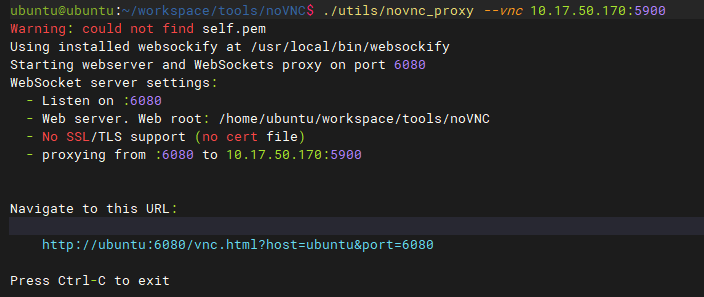
先执行#./utils/novnc_proxy --vnc 10.17.50.170:5900
web输入#http://localhost:6080/vnc.html -
ubuntu环境启动noVNC:
-
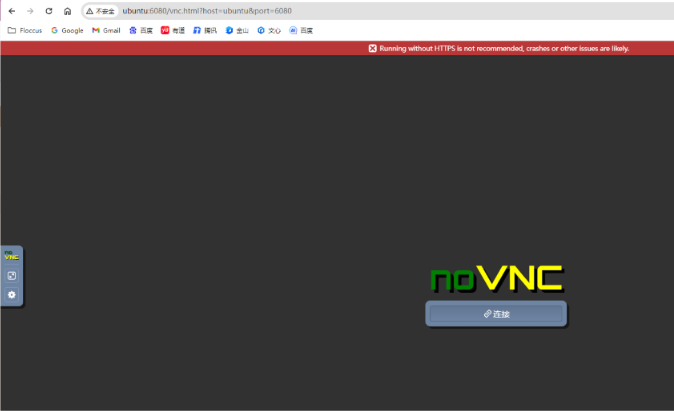
浏览器输入:http://ubuntu:6080/vnc.html?host=ubuntu&port=6080


 1万+
1万+

 被折叠的 条评论
为什么被折叠?
被折叠的 条评论
为什么被折叠?
 到【灌水乐园】发言


