


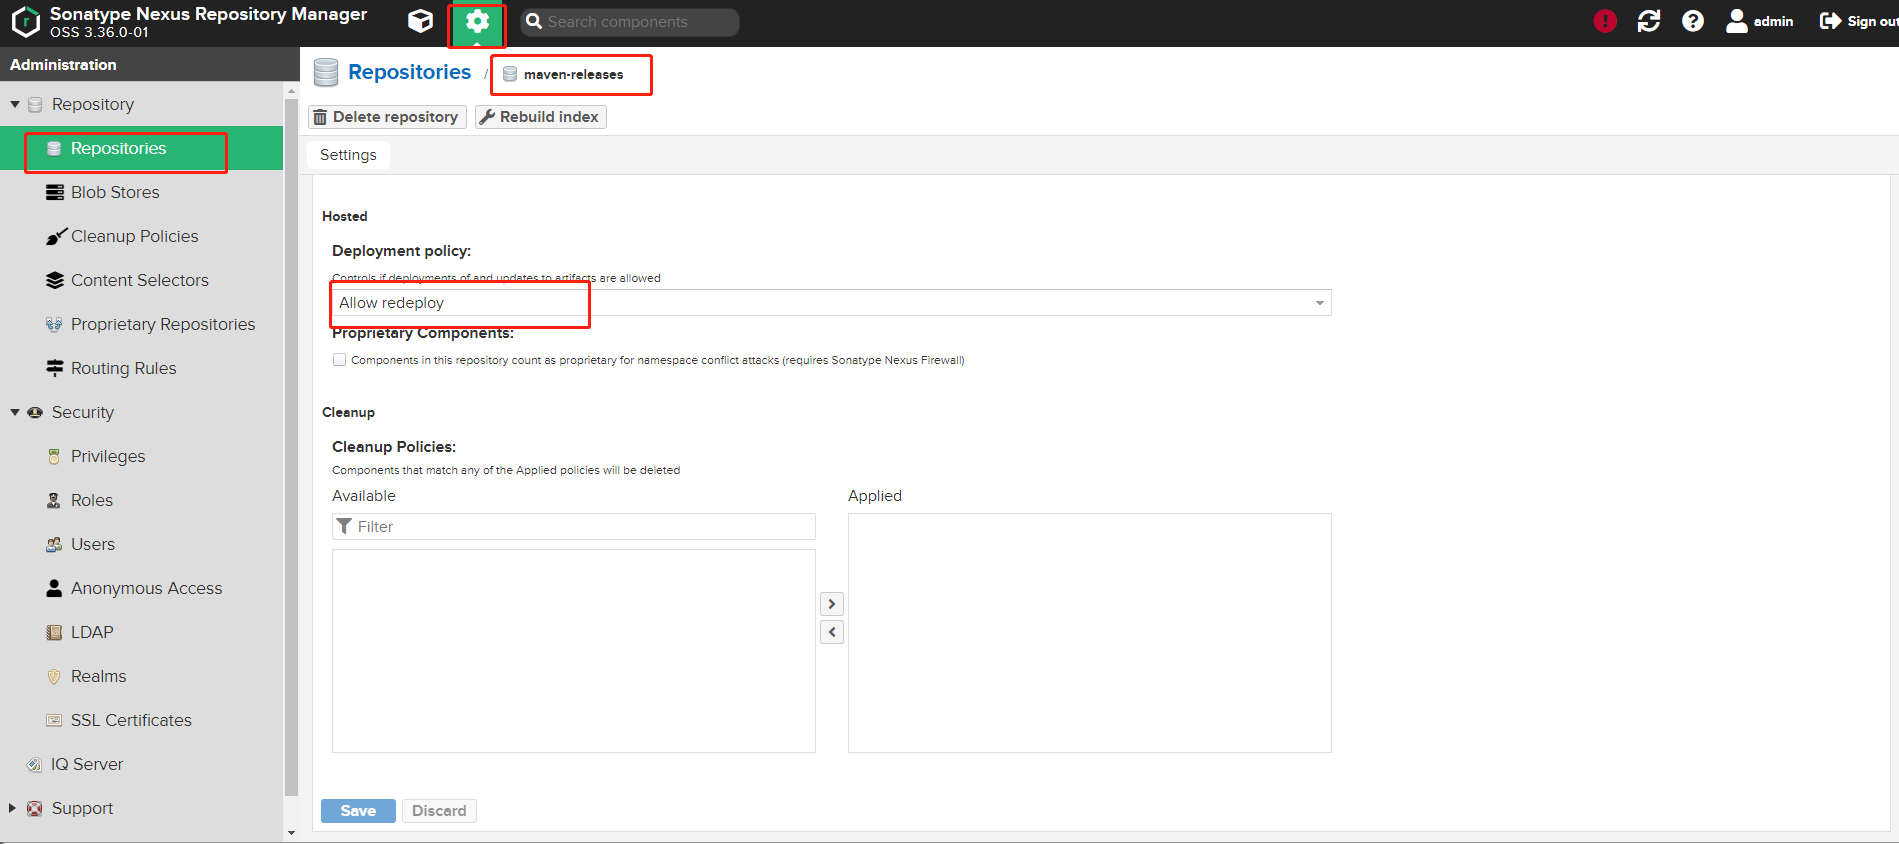
前提浏览器登录nexus管理界面–>设置图标–>Repository–>Repositories–>maven-releases–>Hosted–>请选择‘Allow redeploy’策略,(默认是disable策略,然后保存。 请注意,不同版本的nexus,进入的路径可能有细微区别)
-
依赖
<dependency>
<groupId>com.squareup.okhttp3</groupId>
<artifactId>okhttp</artifactId>
<version>3.8.1</version>
</dependency>
- 代码(需要在代码中修改nexus3的请求url和base64加密的字符串)
package com.test;
import okhttp3.*;
import java.io.File;
import java.io.IOException;
import java.util.*;public class LocalRepositoryImport {
/**
* 本地仓库路径
*/
private static String basePath = "D:\\soft\\apache-maven-3.6.2\\repo\\";/**
* SNAPSHOT版本
*
*/
private static String check = "SNAPSHOT";/**
* 忽略jar文件
*/
private static String[] ignorePath = {};private static List<String> jarFiles = new ArrayList<>();
/**
* http://192.168.8.103:30022/ web访问地址
*/
private static String RELEASES_URL = "http://192.168.8.103:30022/service/rest/v1/components?repository=maven-releases";private static String SNAPSHOTS_URL = "http://192.168.8.103:30022/service/rest/v1/components?repository=maven-snapshots";
/**
* http请求处理器.
*/
private static final OkHttpClient CLIENT = new OkHttpClient().newBuilder().build();
public static void main(String[] args) throws IOException {
loadJarFilePath(basePath);
uploadJarFile();
}/**
* 查找jar文件
*
* @param basePath
*/
private static void loadJarFilePath(String basePath) {
File tmp = new File(basePath);
if (!tmp.exists()) {
return;
}
File[] files = tmp.listFiles();
for (File file : files) {
if (file.getName().endsWith(".jar")) {
//加入到待上传jar文件列表
jarFiles.add(file.getAbsolutePath());
}
if (file.isDirectory()) {
//深搜遍历
loadJarFilePath(file.getAbsolutePath());
}
}
}/**
* 上传文件
*
* @throws IOException
*/
private static void uploadJarFile() throws IOException {
if (jarFiles.size() > 0) {
for (String jarFile : jarFiles) {
String url = jarFile.contains(check) ? SNAPSHOTS_URL : RELEASES_URL;String spitPath = jarFile.substring(basePath.length());
Map<String, String> textMap = getTextMap(spitPath);
RequestBody formBody = getFormBody(jarFile, textMap.get("fileName"),
textMap.get("groupId"), textMap.get("artifactId"), textMap.get("version"));Request request = new Request.Builder()
.url(url)
.method("POST", formBody)
//YWRtaW4lM0FhZG1pbjEyMw== BASE64加密-->格式 用户名:密码
.addHeader("Authorization", "Basic YWRtaW4lM0FhZG1pbjEyMw==")
.build();
Response response = CLIENT.newCall(request).execute();
String s = response.body().string();
if (s != null && !s.equals("")) {
System.out.println("错误信息:" + s + "\n失败jar文件: " + jarFile);
}
}
}
}
private static Map<String, String> getTextMap(String filePath) {
Map<String, String> ret = new HashMap<>();
String[] split = filePath.split("\\\\");
ret.put("fileName", split[split.length - 1]);
ret.put("version", split[split.length - 2]);
ret.put("artifactId", split[split.length - 3]);
StringJoiner groupId = new StringJoiner(".");
for (int i = 0; i < split.length - 3; i++) {
groupId.add(split[i]);
}
ret.put("groupId", groupId.toString());
return ret;
}
private static RequestBody getFormBody(String jarFilePath, String fileName, String groupId, String artifactId, String version) {
MultipartBody.Builder builder = new MultipartBody.Builder().setType(MultipartBody.FORM);
RequestBody jarFileBody = RequestBody.create(MediaType.parse("application/octet-stream"), new File(jarFilePath));
builder.addFormDataPart("maven2.asset1", fileName, jarFileBody);
builder.addFormDataPart("maven2.groupId", groupId);
builder.addFormDataPart("maven2.artifactId", artifactId);
builder.addFormDataPart("maven2.version", version);
builder.addFormDataPart("maven2.asset1.extension", "jar");
return builder.build();
}


 977
977


 被折叠的 条评论
为什么被折叠?
被折叠的 条评论
为什么被折叠?
 到【灌水乐园】发言


