


在Android stdio 中的layout中设置UI的标签页。
百度了很久没有找到是如何用拖拽控件的方式来实现的。
所以最后还是选择用直接手写代码的方式来实现。
这里我们只放了两个标签页。(为了结构清晰,加太多容易晕)
首先我们新建一个Java语言的 empty demo。
然后在目录layout中添加两个xxxx.xml文件。分别命名为test_left 和 test_right。

注意看目录是哪一层下面的。
然后设置一下布局:
这里用的是
<androidx.constraintlayout.widget.ConstraintLayout
因为这个布局可以把控件任意拖拽位置。
具体设置如下:(不要觉得写这么多,其实都是生成的,直接吧上面那句话抄一下就好....)
<androidx.constraintlayout.widget.ConstraintLayout xmlns:android="http://schemas.android.com/apk/res/android"
    xmlns:app="http://schemas.android.com/apk/res-auto"
    xmlns:tools="http://schemas.android.com/tools"
    android:orientation="vertical" android:layout_width="match_parent"
    android:layout_height="match_parent">


</androidx.constraintlayout.widget.ConstraintLayout>
到这里layout设置完成。
设置完成layout后我们需要新建三个类。
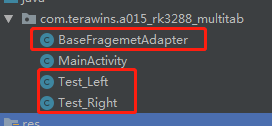
BaseFragemetAdapter这个类是用来管理我们标签页类的。
下面的两个标签页类,就是用来被管理的。(这里标签页类名和layout名相同,是为了方便对应)。
Test_Left这个类用来管理test_left这个layout。
同理,Test_Right这个类用来管理test_right这个layout。
下面我们先
 最低0.47元/天 解锁文章


 611
611


 被折叠的 条评论
为什么被折叠?
被折叠的 条评论
为什么被折叠?
 到【灌水乐园】发言


