


文章目录
前言
桶复制: 可以理解像 mysql 主从备份, 可以作为数据备份(我目前的需求也是如此)
1.minio 简单使用。
2.两台服务器(A,B),分别都是单节点单驱动部署(Single-Node Single-Drive)
3.A:源, B::目标
4.服务器系统版本 银河麒麟Linux(V10)
5.官方建议两个服务器的minio 版本最好一致
一、部署
参考官方文档:
下载
下载二进制文件
添加可执行权限
复制到 /usr/local/bin/ 目录下
wget https://dl.min.io/server/minio/release/linux-amd64/minio
chmod +x minio
sudo mv minio /usr/local/bin/
用户组
创建用户、组 (我觉得这步可以省略,直接使用 root 也可以,但是为了安全考虑还是建议跟着官方来做)
groupadd -r minio-user
useradd -M -r -g minio-user minio-user
# /mnt/data 就是要存贮文件的目录
chown minio-user:minio-user /mnt/data
添加 minio.service 文件
/etc/systemd/system/minio.service
内容如下:
[Unit]
Description=MinIO
Documentation=https://min.io/docs/minio/linux/index.html
Wants=network-online.target
After=network-online.target
AssertFileIsExecutable=/usr/local/bin/minio

[Service]
WorkingDirectory=/usr/local
# 用户和组,对应上面步骤的新建用户、组
User=minio-user
Group=minio-user
ProtectProc=invisible

EnvironmentFile=-/etc/default/minio
ExecStartPre=/bin/bash -c "if [ -z \"${MINIO_VOLUMES}\" ]; then echo \"Variable MINIO_VOLUMES not set in /etc/default/minio\"; exit 1; fi"
# 在这里我还指定了自定义端口 --address API 端口。  --console-address 浏览器访问的端口
ExecStart=/usr/local/bin/minio server $MINIO_OPTS $MINIO_VOLUMES --address ":9000" --console-address ":9999"
# 原文如下
# ExecStart=/usr/local/bin/minio server $MINIO_OPTS $MINIO_VOLUMES

# MinIO RELEASE.2023-05-04T21-44-30Z adds support for Type=notify (https://www.freedesktop.org/software/systemd/man/systemd.service.html#Type=)
# This may improve systemctl setups where other services use `After=minio.server`
# Uncomment the line to enable the functionality
# Type=notify

# Let systemd restart this service always
Restart=always

# Specifies the maximum file descriptor number that can be opened by this process
LimitNOFILE=65536

# Specifies the maximum number of threads this process can create
TasksMax=infinity

# Disable timeout logic and wait until process is stopped
TimeoutStopSec=infinity
SendSIGKILL=no

[Install]
WantedBy=multi-user.target

# Built for ${project.name}-${project.version} (${project.name})
新建配置文件 minio
/etc/default/minio
内容如下
# MINIO_ROOT_USER and MINIO_ROOT_PASSWORD sets the root account for the MinIO server.
# This user has unrestricted permissions to perform S3 and administrative API operations on any resource in the deployment.
# Omit to use the default values 'minioadmin:minioadmin'.
# MinIO recommends setting non-default values as a best practice, regardless of environment
# 这个可以理解是管理员的账号密码,浏览器访问ip:9999 需要用到
MINIO_ROOT_USER=myminioadmin
MINIO_ROOT_PASSWORD=minio-secret-key-change-me

# MINIO_VOLUMES sets the storage volume or path to use for the MinIO server.
# 需要改成要存贮文件的路径,一般指定空间比较大的分区
MINIO_VOLUMES="/mnt/data"

# MINIO_SERVER_URL sets the hostname of the local machine for use with the MinIO Server
# MinIO assumes your network control plane can correctly resolve this hostname to the local machine

# Uncomment the following line and replace the value with the correct hostname for the local machine and port for the MinIO server (9000 by default).

#MINIO_SERVER_URL="http://minio.example.net:9000"
启动
sudo systemctl start minio.service
到此部署完了
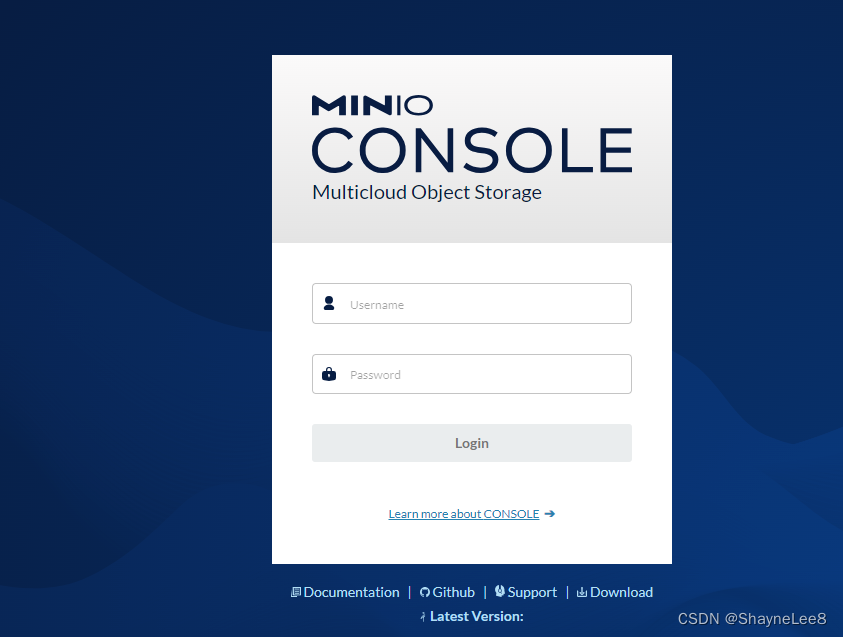
访问 IP:9999
看到登录页面
使用上面配置文件的账号、密码登录成功。
perfect!!!
二、安装 mc
参考官网教程
三、桶复制
1.权限
事后想想,直接用上面配置文件的管理员用户密码应该也可以。就不用再新建用户、权限了(待确认)。
官方流程如下:
建立 Replication Admin 用户
在 A 服务器操作:
先建立别名: minio-main
mc alias set minio-main http://A服务的IP:9000 管理员账号 管理员密码
然后执行:
wget -O - https://min.io/docs/minio/linux/examples/ReplicationAdminPolicy.json | \
mc admin policy create minio-main ReplicationAdminPolicy /dev/stdin
mc admin user add minio-main ReplicationAdmin LongRandomSecretKey
mc admin policy attach minio-main ReplicationAdminPolicy --user ReplicationAdmin
附:
wget 是在线下载,如果没有网络,可以从我这下载好ReplicationAdminPolicy.json,ReplicationRemoteUserPolicy.json。
然后修改第一个命令为:
mc admin policy create minio-main ReplicationAdminPolicy [json文件目录]
再创建别名:minio-source
mc alias set minio-source http://A服务的IP:9000 ReplicationAdmin LongRandomSecretKey
建立 Replication Remote User 用户
在 B 服务器操作:
先建立别名: minio-slave
mc alias set minio-slave http://B服务的IP:9000 管理员账号 管理员密码
然后执行:
wget -O - https://min.io/docs/minio/linux/examples/ReplicationRemoteUserPolicy.json | \
mc admin policy create minio-slave ReplicationRemoteUserPolicy /dev/stdin
mc admin user add minio-slave ReplicationRemoteUser LongRandomSecretKey
mc admin policy attach minio-slave ReplicationRemoteUserPolicy --user ReplicationRemoteUser


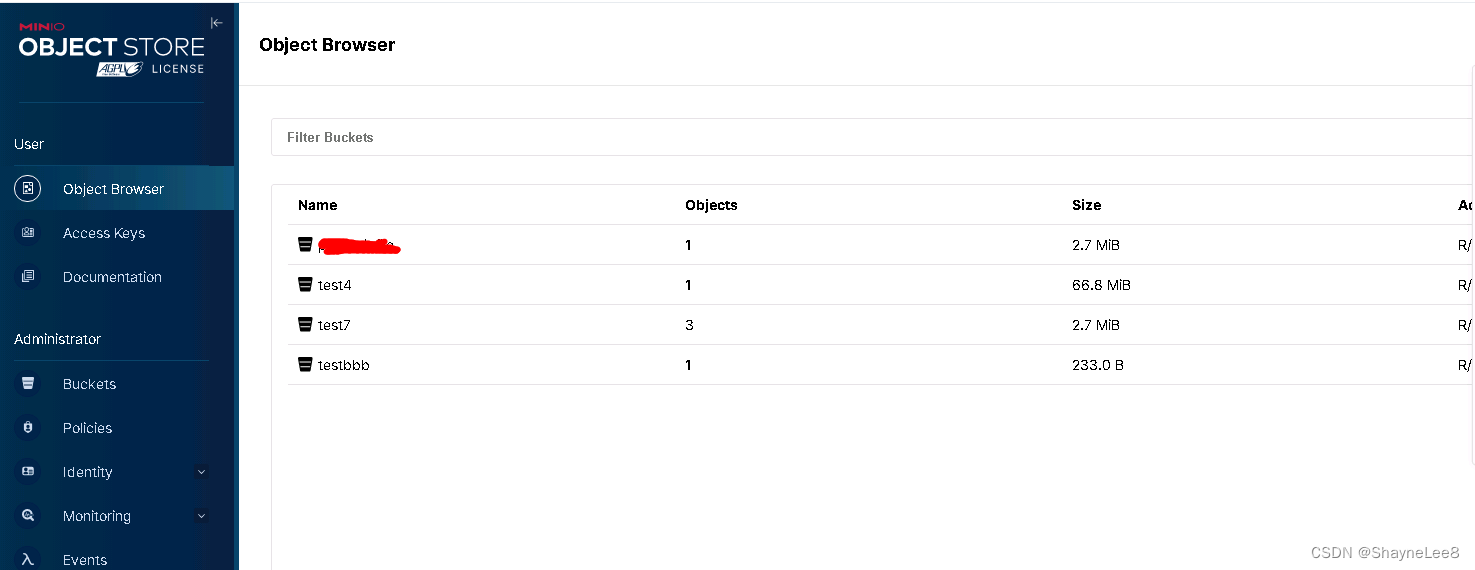
2.建立桶
分别在 A, B 服务器建立桶。
我在 A 建立了 bucket : test7; B建立了 bucket : test8 ; (可以同名)
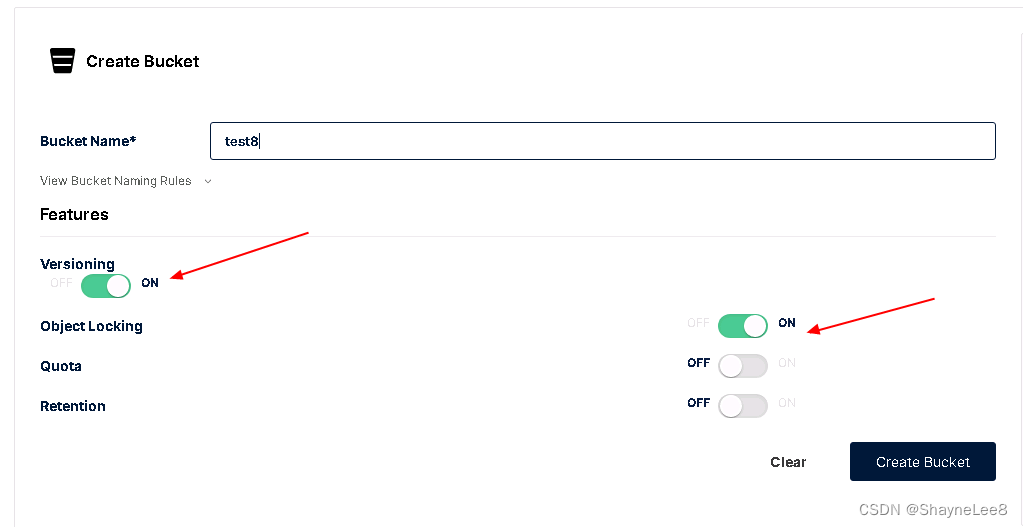
特别注意
启用 version
启用 object locking
如下:
3建立桶复制
在 A 服务器操作
mc replicate add minio-source/test7 \
--remote-bucket 'http://ReplicationRemoteUser:LongRandomSecretKey@B的IP:9000/test8' \
   --replicate "delete,delete-marker,existing-objects"
如下代表成功:

4.验证
在 A test7 上传,删除 文件, B test8 也是有同样的效果。
总结
总体比较简单,就是遇到问题不好排查,毕竟 Minio 还在完善。
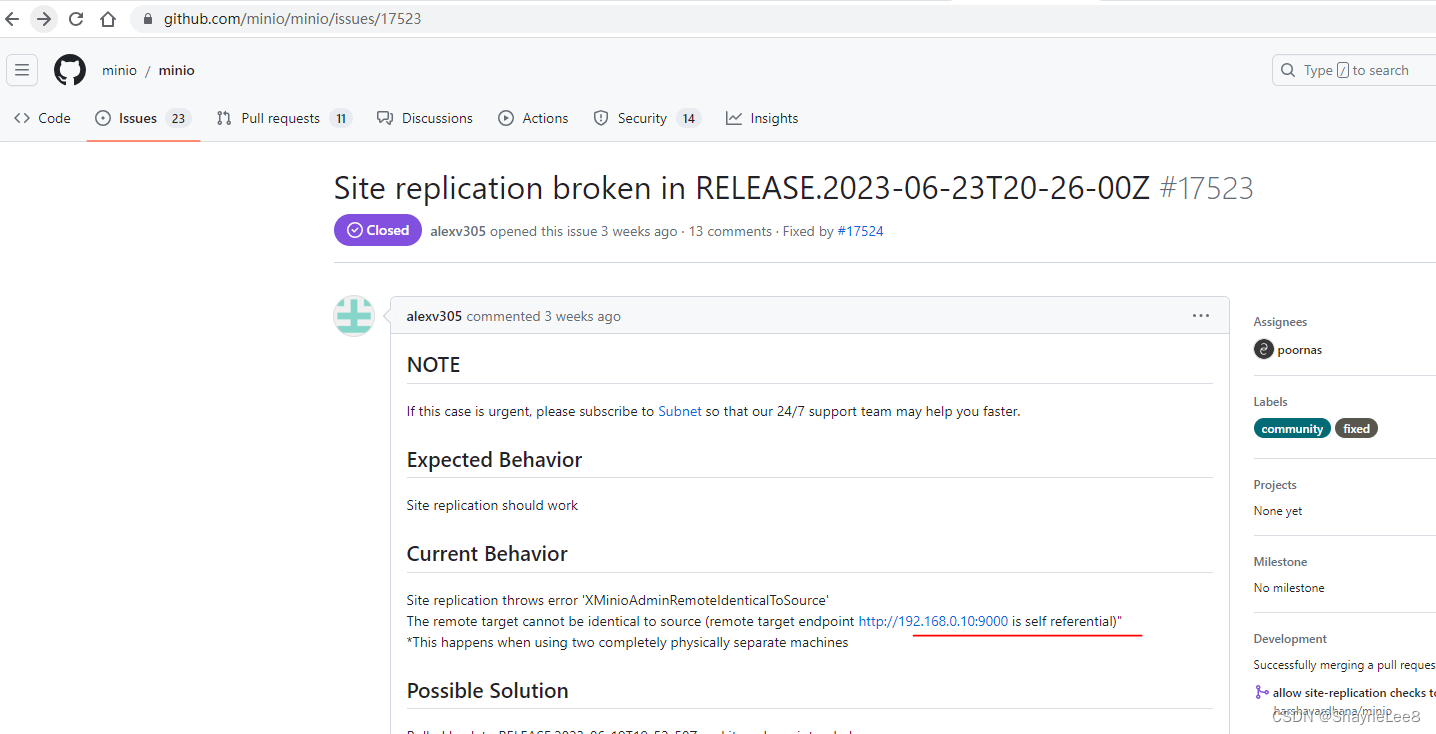
遇到问题
开始我就遇到 cannot be identical
如下的问题

网上找了很久,但是没有找到和我相似的问题,感觉这个问题就我一个人遇到。
最后还是想到去官方 githup 问题版块去搜问题,好巧不巧刚好遇到和我一样的问题,并且作者给出解决方案,总之就是下载最新版本替换 /usr/local/bin/minio 就好了。
!!! 以后遇到问题还是多多从源头去找答案。


 843
843


 被折叠的 条评论
为什么被折叠?
被折叠的 条评论
为什么被折叠?
 到【灌水乐园】发言


