


Lab 5: Creating a Foundational Module
Purpose
Estimated time to complete this lab: 30 minutes
In this exercise, you will learn how to use the Web Client Software Factory to create a foundational module. A foundational module does not contain Web pages; it also should not contain anything related to the user interface (UI). The primary purpose of a foundational module is to provide services to the other modules in the application. For example, a foundational module can contain code that provides instrumentation, such as logging.
In the following procedures, you will create a foundational module and implement a simple service that is responsible for providing navigation between views. You will update the EFT module to consume the navigation service to provide the “Process Transfers” page flow, as shown in Figure 1.

Figure 1
Process Transfers page flow
Preparation
Before proceeding with this lab, you must install and configure the prerequisite software. For more information, see Web Client Software Factory Hands-On Labs.
Open the solution for the previous lab (either the one that you created or the end solution for that lab.) If you use the provided end solution, you must enable the guidance package for that solution.
To enable the Web Client Development guidance package with the Guidance Package Manager
1. Using Visual Studio, open the solution.
2. On the Tools menu, click Guidance Package Manager.
3. In the Guidance Package Manager dialog box, click Enable / Disable Packages.
4. In the Enable and Disable Packages dialog box, select the Web Client Development check box.
5. Click OK.
Procedures
This lab includes the following tasks:
· Task 1: Use the Guidance Package to Add a New Foundational Module
· Task 2: Review the Foundational Module Configuration Section
· Task 3: Create a Navigation Service Implementation
· Task 4: Register the Navigation Service as a Global Service
· Task 5: Specify That the EFT Module Depends on the Navigation Module
· Task 6: Add a View to the EFT Module to Review the Transfers
· Task 7: Add a Summary View to the EFT
· Task 8: Add a Submit Button to the NewTransferView View
· Task 9: Update the EFT Module Controller to Use the INavigationService
The next sections describe each of these tasks.
Task 1: Use the Guidance Package to Add a New Foundational Module
The Web Client Development guidance package included in the Web Client Software Factory includes the Add Foundational Module recipe, which automates the creation of foundational modules. In this task, you will use the recipe to add a foundational module to your application.
To use the guidance package to add a new foundational module
1. In the Modules solution folder, create a subfolder named Navigation.
2. In Solution Explorer, right-click the Navigation solution folder, point to Web Client Factory, and then click Add Foundational Module (C#), as shown in Figure 2. This opens the Add New Project dialog box.
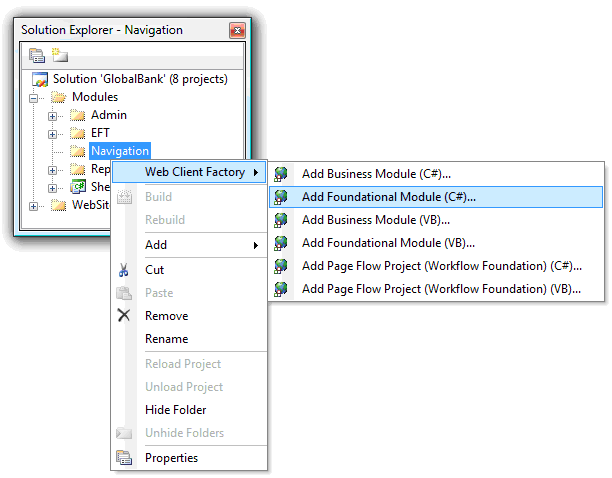
Figure 2
Process to open Add New Project dialog box
3. In the Name box of the Add New Project dialog box, type Navigation, and then type % SOLUTION_DIR% /Modules/Navigation in the Location box, as shown in Figure 3. (If you use the Browse button to set the location, you will have to create the Navigation folder).
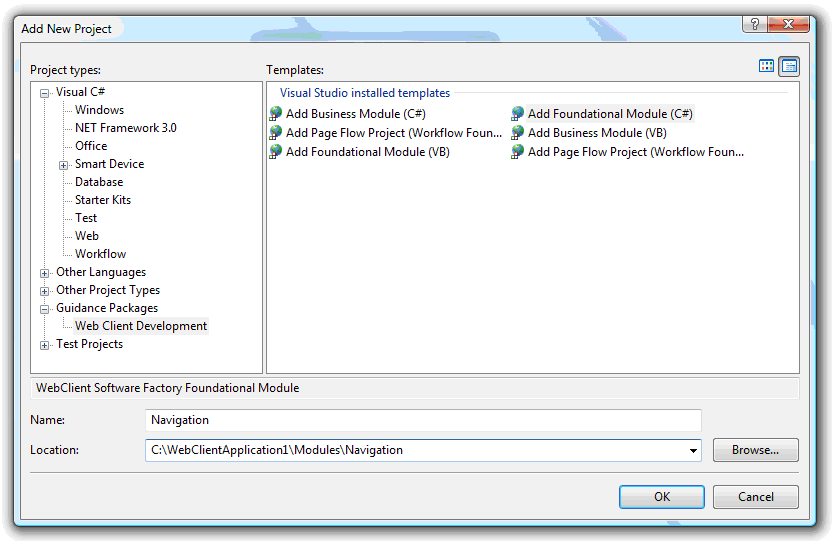
Figure 3
Add New Project dialog box
4. Click OK to create the project and launch the recipe wizard, which is illustrated in Figure 4.
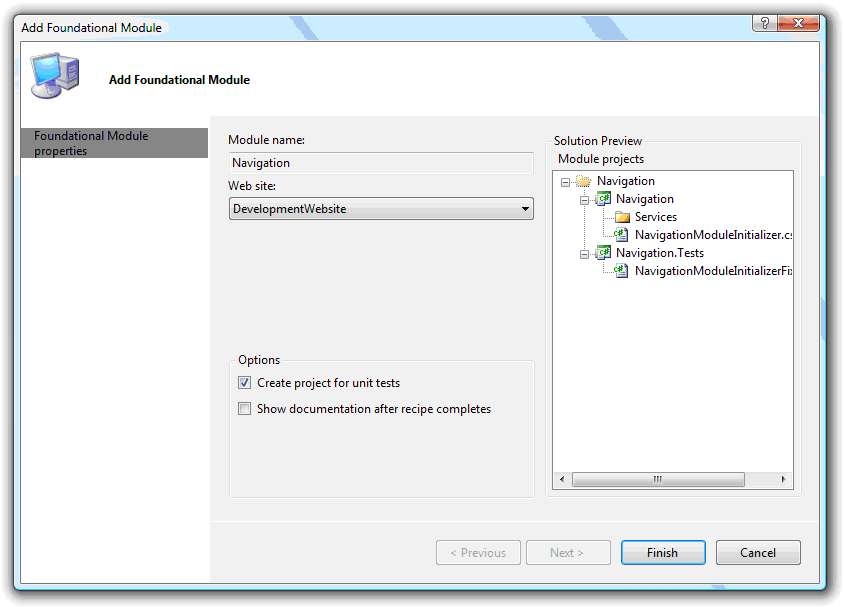
Figure 4
Add Foundational Model recipe wizard
5. Select the Create project for unit tests check box, and then click Finish to create the module.
Task 2: Review the Foundational Module Configuration Section
All modules have an associated configuration section in a Web.config file. The Composite Web Application Block uses this configuration to identify the module assembly and, in case of business modules, to identify the location of the module’s Web pages. When your Web client application starts, the Composite Web Application Block locates the configuration section for each module and uses this information to load module assemblies. You can specify the module configuration in the Web.config file for the Web site, or, in the case of business modules, you can create a module-specific Web.config file in the module's Web site folder. In this task, you will review the configuration section created by the Add Foundational Module recipe for the Navigation module.
To review the foundational module configuration section
1. Open the root Web.config file of the DevelopmentWebsite site.
2. Locate the compositeWeb configuration section. This section contains configuration information for the modules of your application.
3. Locate the configuration section for the Navigation module.
<module name="Navigation" assemblyName="Navigation" />
Note: This configuration section specifies the module name and the module assembly. Business modules also specify a virtualPath attribute, which defines the location of the module Web pages. Inside a module element, you can also specify dependencies on other modules. For more information, see ”Modules” in Web Client Software Factory Help.
Task 3: Create a Navigation Service Implementation
In this task, you will create a simple service that will provide navigation logic between pages.
To create a navigation service implementation
1. Create a new interface named INavigationService in the Services folder of the Navigation module. The interface will only contain a method named Navigate that will perform a page transition. Use the following code as the interface definition.
public interface INavigationService
{
void Navigate(string view);
}
2. In the Navigation project, add a reference to the System.Web assembly. To do this, right-click the Navigation project node in Solution Explorer, and then click Add Reference. On the .NET tab, select System.Web, and then click OK.
3. In the Services folder, create a class named RedirectNavigationService. Implement the INavigationService interface you defined in the previous step, and then use the ASP.NET Response.Redirect method to provide navigation, as shown in the following code.
public class RedirectNavigationService : INavigationService
{
#region INavigationService Members
public void Navigate(string view)
{
System.Web.HttpContext.Current.Response.Redirect(view, true);
}
#endregion
}
Task 4: Register the Navigation Service as a Global Service
To be able to consume the navigation service from any module in your application, you must register it as a global service. Global services are services that can be shared across multiple modules in the solution. In this task, you will register the INavigationService as a global service by implementing the AddGlobalServices method in the module initialization class of the Navigation module.
To register the navigation service as a global service
1. In the Navigation project, open the file NavigationModuleInitializer.cs. This is the Navigation module’s initialization class.
2. Add the following using statement to the top of the file. You will use it to reference the navigation service.
using GlobalBank.Navigation.Services;
3. Locate the AddGlobalServices method. (You use this method to register global services.) Add the following code to the method body to register the navigation service.
globalServices.AddNew<RedirectNavigationService, INavigationService>();
Note: The globalServices object is a collection of services. In this particular case, it is the services collection of the root composition container. You use the AddNew method to have ObjectBuilder create a new instance of the service and add it to the services collection. By adding a service to the services collection of the root composition container, you automatically make it available to all the modules in your application.
For more information about registering services, see “How to: Register and Use Services” in Web Client Software Factory Help.
Task 5: Specify That the EFT Module Depends on the Navigation Module
You can express module dependencies in the module configuration section. Module dependencies define the order that modules are loaded by the Composite Web Application Block when the application starts. In this task, you will specify that the EFT module depends on the Navigation module. This means the Composite Web Application Block will load the Navigation module before the EFT module, and the INavigationService service (registered by the Navigation module) will be available when the EFT module is loaded.
To specify that the EFT module depends on the Navigation module
1. In the EFT folder of the DevelopmentWebsite site, open the Web.config file.
2. Add the bold line of the following tag inside the dependencies tag.
<module name="EFT" assemblyName="EFT" virtualPath="~/EFT">
<dependencies>
<dependency module="Shell" />
<dependency module="Navigation" />
</dependencies>
</module>
Note: By default, business modules created with the Add Business Module recipe have a dependency on the Shell module. This is because business modules consume the ISiteMapBuilderService (to build the module’s site map), which is registered by the Shell module.
Task 6: Add a View to the EFT Module to Review the Transfers
In this task, you will create a view that will let users review the transfers before submitting them. You will use the INavigationService to navigate from the NewTransfersView view to this view.
To add a view to the EFT module to review the transfers
1. In the EFT folder for the Web site, create a new view named ReviewTransfersView. To do this, right-click the EFT folder in the DevelopmentWebsite site, point to Web Client Factory, and then click Add View (with presenter) (C#). In the Name box of the recipe wizard, type ReviewTransfersView, and then click Finish to create the view, which illustrated in Figure 5.
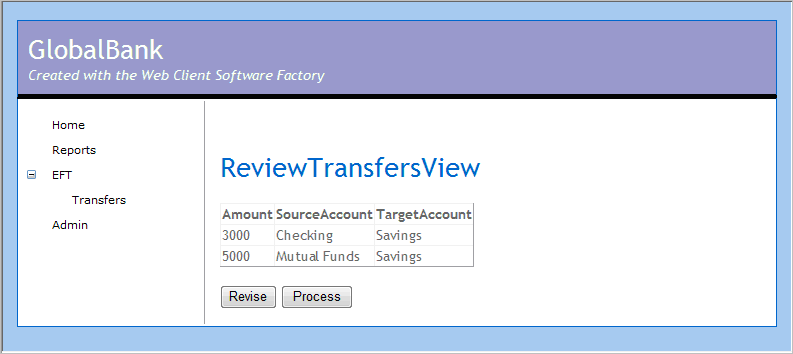
Figure 5
ReviewTransfersView view
2. Add the following using statement to the IReviewTransfersView interface file.
using GlobalBank.EFT.BusinessEntities;
3. Add the following property to the IReviewTransfersView interface definition. This property will be called by the presenter to set the transfers to display in the view.
IList<Transfer> Transfers { set; }
4. Open the Design view for the Web page ReviewTransfersView.aspx, and then drag an ObjectContainerDataSource control from the Toolbox. You will use this control to bind the list of transfers with a GridView control.
Note: To add the ObjectContainerDataSource control to the Toolbox, right-click the Data tab in the Toolbox, and then click Choose Items. On the .NET Framework Components tab, click Browse, select the Microsoft.Practices.Web.UI.WebControls.dll assembly (located in %WCSF_INSTALL_DIR%/Microsoft Practices Library/Microsoft.Practices.Web.UI.WebControls.dll), and then click Open. In the list of components, click ObjectContainerDataSource, and then click OK.
5. On the Smart Tag menu, click Configure Data Source. The Configure Data Source dialog box appears.
6. In the Configure Data Source dialog box, select the data object type GlobalBank.EFT.BusinessEntities.Transfer, and then click OK.
7. In the Properties window of the control, set the ID of the control to TransfersDataSource.
8. Add a GridView control below the page title.
9. Bind the GridView control to the TransfersDataSource control. To do this, set the DataSourceID property to TransfersDataSource.
10. Click the Edit Fields link on the Smart Tag. (If the GridView Tasks shortcut menu does not appear, right-click the GridView control, and then click Show Smart Tag.)
11. Under Selected fields in the Fields dialog box, delete the Status field and the Id field.
12. Click OK to close the Fields dialog box.
13. Add two buttons labeled Revise and Process to the page. Set the ID property to ReviseButton and ProcessButton, respectively.
14. Double-click ReviseButton to have Visual Studio create event handlers for the click event. Repeat this step with the ProcessButton.
15. Implement the handlers for the click event of both buttons. In the handlers, forward the events to the presenter, as shown in the following code.
protected void ReviseButton_Click(object sender, EventArgs e)
{
_presenter.OnReviseTransfers();
}
protected void ProcessButton_Click(object sender, EventArgs e)
{
_presenter.OnProcessTransfers();
}
16. Open the ReviewTransfersView.aspx.cs file, and then add the following using statements.
using System.Collections.Generic;
using GlobalBank.EFT.BusinessEntities;
17. Paste the following code inside the class body to implement the Transfers property. This property will set the transfers in the TransfersDataSource control.
public System.Collections.Generic.IList<Transfer> Transfers
{
set { TransfersDataSource.DataSource = value; }
}
18. Modify the ReviewTransfersViewPresenter’s constructor method to make ObjectBuilder inject a new instance of the EFTController class in the constructor. To do this, uncomment the constructor generated by the Add View (with presenter) recipe.
private EFTController _controller;
public ReviewTransfersViewPresenter([CreateNew] EFTController controller)
{
_controller = controller;
}
19. Implement the OnReviseTransfers method and the OnProcessTransfers method in the presenter. In these methods, call the EFTController methods to revise and process the transfers, respectively. You will implement the EFTController methods in a subsequent task.
public void OnReviseTransfers()
{
_controller.ReviseTransfers();
}
public void OnProcessTransfers()
{
_controller.ProcessTransfers();
}
20. When the view loads, it must show the transfers the user entered in the NewTransfersView view. To do this, implement the OnViewLoaded method with the following code.
public override void OnViewLoaded()
{
this.View.Transfers = _controller.GetTransfers();
}
21. Add a stub implementation of the Transfers property in the MockReviewTransfersView test class located in EFT.Tests/ReviewTransfersViewPresenterFixture.cs. (The purpose of the stub is to allow the solution to successfully compile.)
public IList<GlobalBank.EFT.BusinessEntities.Transfer> Transfers
{
set { throw new Exception("The property is not implemented.");} }
Note: Creating unit tests is out of the scope of the current lab. For information about how to unit test a presenter, see “Lab 3: Adding Views and Unit Testing” and ”How to: Unit Test a Presenter” in Web Client Software Factory Help.
Task 7: Add a Summary View to the EFT
In this task, you will create a view that will show a summary when the user completes the page flow.
To add a summary view to the EFT
1. Create a new view named SummaryView in the EFT folder of the Web site. To do this in Solution Explorer, right-click the EFT folder in the DevelopmentWebsite site, point to Web Client Factory, and then click Add View (with Presenter) (C#). In the Name box of the recipe wizard, type SummaryView, and then click Finish to create the view.
2. In the view, add a legend below the header saying that the transfers have been processed, as shown in Figure 6.
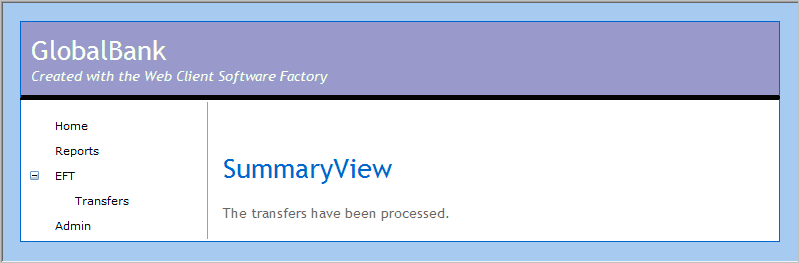
Figure 6
SummaryView view
Task 8: Add a Submit Button to the NewTransferView View
In this task, you will add a submit button to the NewTransferView view. When the user clicks the button, the browser will be redirected to the ReviewTransfersView view so users can review the transfers before actually submitting them.
To add a Submit button to the NewTransferView view
1. Open the Designer for the EFT/NewTransferView.aspx page and add a button below the GridView control.
2. Set the button’s Text property to Submit Transfers.
3. Set the ID property to SubmitTransfersButton.
4. Double-click the button to have Visual Studio generate an event handler for the click event. Add the bold line in the following code to forward the event to the presenter.
protected void SubmitTransfersButton_Click(object sender, EventArgs e)
{
_presenter.OnSubmitTransfers();
}
5. Implement the OnSubmitTransfers method in the presenter. To do this, open the NewTransferViewPresenter.cs file located in the EFT module, and then add the following code. In the next task, you will implement the SubmitTransfers method in the controller.
public void OnSubmitTransfers()
{
_controller.SubmitTransfers();
}
Task 9: Update the EFT Module Controller to Use the INavigationService
In this task, you will update the EFT module controller to use the INavigationService to perform transitions between views.
To update the EFT module controller to use the INavigationService
1. In the EFT project, add a project reference to the Navigation project. To do this, right-click the EFT project, and then click Add Reference. On the Projects tab, select the Navigation project, and then click OK.
Note: You add a reference to the Navigation module because the EFT module requires the INavigationService service. This creates a dependency on the Navigation module. If you want to decouple the modules, you could create a separate project for the service interfaces and have the EFT module have a reference to it instead of having a direct reference to the Navigation project. If you do this, you do not have to rebuild the EFT project when you change the service implementation, as long as the interface remains unchanged.
2. Open the file EFTController.cs located in the root of the EFT project.
3. Add the following using statement. You will use it to refer to the navigation service.
using GlobalBank.Navigation.Services;
4. Add the following member variable declaration to the class. This variable will hold a reference to an instance of the INavigationService.
private INavigationService _navigationService;
To get a reference to a valid instance of the INavigationService, you will use the Dependency Injection pattern. ObjectBuilder will inject a valid instance when creating the EFTController class.
Note: For more information about the Dependency Injection pattern, see ”Dependency Injection” in Web Client Software Factory Help.
5. Add a second parameter to the constructor to obtain a reference to an instance of the INavigationService service. Store it in the variable you defined in the previous step, as shown in the bold lines of the following code.
[InjectionConstructor]
public EFTController(
[ServiceDependency] ITransferService transferService,
[ServiceDependency] INavigationService navigationService)
{
_transferService = transferService;
_navigationService = navigationService;
}
6. Change the CreateNewTransfers method of the EFT module controller so that it uses the INavigationService to navigate to the NewTransferView view.
public virtual void CreateNewTransfers()
{
_navigationService.Navigate("NewTransferView.aspx");
}
7. Implement the ReviseTransfers method. This method should use the INavigationService to redirect the browser back to the NewTransferView view so the user can revise the transfers, as shown in the following code.
public virtual void ReviseTransfers()
{
_navigationService.Navigate("NewTransferView.aspx");
}
8. Implement the SubmitTransfers method. This method should use the INavigationService to redirect the browser to the ReviewTransfersView view, as shown in the following code.
public virtual void SubmitTransfers()
{
_navigationService.Navigate("ReviewTransfersView.aspx");
}
9. Implement the ProcessTransfers method. This method is called when the user confirms the transfers; therefore, it should process the transfers, remove the transfers from the user’s session, and redirect the browser to the SummaryView view. You can use the following code to implement the method.
public virtual void ProcessTransfers()
{
_transferService.ProcessTransfers(Transfers.ToArray());
Transfers.Clear();
_navigationService.Navigate("SummaryView.aspx");
}
Verification
In this section, you will validate that you implemented the Process Transfers page flow correctly.
To validate that you implemented the Process Transfers page flow correctly
1. Comment the test method GetLastTransferDateConsumesITransferService located in the EFT.Tests/EFTModuleControllerFixture.cs file (it is no longer valid and would raise compilation errors).
2. Build and run the application.
3. Click the Transfers site map node to start the Process Transfers page flow.
4. Complete the page flow.
5. After you process a transfer, click the Transfers site map node again. You should see the date and time of the transfer you have just added, as shown in Figure 7.
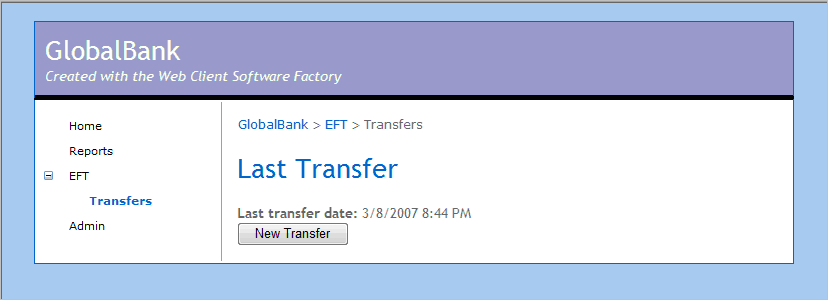
Figure 7
Last Transfer page


 1039
1039

 被折叠的 条评论
为什么被折叠?
被折叠的 条评论
为什么被折叠?
 到【灌水乐园】发言


