


概述
HTML网页中,我们需要上传文件,需要使用这样一段代码:
<form>
	<input type="file"></input>
</form>
运行效果

点击控件任何地方(包括右边的选择文件按钮,和左边编辑框),都会弹出文件选择对话框,选择文件上传。但是本控件显示简陋,提示信息死板,满足不了我们需要。
本文以修改显示图片为例,详细讲讲我最近解决方案。
前端代码
index.html
<!DOCTYPE html PUBLIC "-//W3C//DTD XHTML 1.0 Transitional//EN" "http://www.w3.org/TR/xhtml1/DTD/xhtml1-transitional.dtd">
<html xmlns="http://www.w3.org/1999/xhtml">
<head>
<meta http-equiv="Content-Type" content="text/html; charset=gb2312" />
<title></title>
</head>
<script type="text/javascript">
function onLoadSelfAccount() {
    src = document.getElementById('idUserLogo');
    dest = document.getElementById('idUserLogoImgFiled');

    src.style.display = "block";
    dest.style.display = "block";

    src.style.position = "absolute";
    src.style.left = dest.offsetLeft;
    src.style.top = dest.offsetTop;
}
function onChangeUsersLogo(){
    var temp_form = document.getElementById("idFormUserLogo");
    temp_form.submit();
}

function onLoadUsersLogoError(){
    var idUserLogoSt = document.getElementById("idUserLogoSt");

    idUserLogoSt.style.display = 'block';
    idUserLogoSt.innerHTML = 'No user logo ......';
}

function onLoadUsersLogoDone(){
    var idUserLogoSt = document.getElementById("idUserLogoSt");

    idUserLogoSt.style.display = 'none';
    idUserLogoSt.innerHTML = '';
}
</script>
<style type="text/css">
#idUserLogoImgFiled{
    width:128px;
    height:128px;
    top: 0;
    left:0;
    display: none;
    #position: absolute;
}
#idUserLogo{
    width:132px;
    height:132px;
    #position: absolute;
    top: 0;
    left:0;
    display: none;
    filter: alpha(opacity:0);
    opacity: 0;
}
</style>
<body onload="onLoadSelfAccount()">
<form id="idFormUserLogo" enctype='multipart/form-data' method="post" action="/Function/UserLogo/Upload">
	<input id="idUserLogo" type="file" name="nameUserLogo" accept=".jpg,.png,.bmp,.jpeg,.psd" title=" " onchange="onChangeUsersLogo()"></input>
	<img id="idUserLogoImgFiled" src="/user_logo" onerror="onLoadUsersLogoError()" onload="onLoadUsersLogoDone()"></img>
	<p id="idUserLogoSt" style="font-size:16px;color:blue;display:none"></p>
</form>
</body>
</html>
后端代码
后端是用python,基于flask架构,使用编辑器pycharm
main.py
# 导入Flask类
import os
from io import BytesIO

from PIL import Image
from flask import Flask, render_template, make_response, session, request

print("__name__ ", __name__);

# 实例化,可视为固定格式
app = Flask(__name__)

# route()方法用于设定路由;类似spring路由配置
FILE_EXTENSIONS_LOGO = set(['png', 'jpg', 'bmp', 'jpeg', 'psd', 'PNG', 'JPG', 'BMP', 'JPEG', 'PSD'])

@app.route('/')
def index():
    return render_template("index.html")


@app.route('/user_logo')
def get_user_logo():
    tmp_extension = ''
    try:
        for tmp_extension in FILE_EXTENSIONS_LOGO :
            tmp_file = 'users_logo/root.' + tmp_extension
            if os.path.exists(tmp_file) :
                break
        image = Image.open(tmp_file)
    except IOError:
        print('IOError')
        image = None
    except FileNotFoundError:
        print('FileNotFoundError')
        image = None
    if image is None:
        #image = Image.new('RGB', (128, 128), (119, 136, 153))
        response = make_response()
        response.headers['Content-Type'] = 'image/gif'
        return response
    buf = BytesIO()
    if tmp_extension == 'jpg' or tmp_extension == 'JPG' :
        image.save(buf, 'jpeg')
    else :
        image.save(buf, tmp_extension)
    buf_str = buf.getvalue()
    response = make_response(buf_str)
    response.headers['Content-Type'] = 'image/gif'
    return response

@app.route('/Function/UserLogo/Upload', methods=['post'])
def user_logo_upload() :
    logo_file = request.files['nameUserLogo']
    print("filename ", logo_file.filename)
    file_name, file_extension = os.path.splitext(logo_file.filename)
    print("file_name file_extension", file_name, file_extension)
    if file_extension[0] == '.' and file_extension[1:] in FILE_EXTENSIONS_LOGO :
        print("file_extension in FILE_EXTENSIONS_LOGO")
        for tmp_extension in FILE_EXTENSIONS_LOGO:
            tmp_file = 'users_logo/root.' + tmp_extension
            if os.path.exists(tmp_file) :
                os.remove(tmp_file)
        logo_file.save('users_logo/root' + file_extension)
    else :
        print("file_extension not in FILE_EXTENSIONS_LOGO")
        return render_template("index.html")
    return render_template("index.html")

if __name__ == '__main__':
    app.run(port=80, debug=True)
运行效果
后台没有图片的时候,会有提示

点击图片,选择文件

选中图片之后

再同样操作换图片

关键点
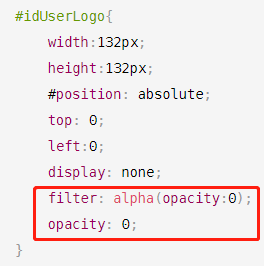
1、css把input控件一定设置为透明
filter: alpha(opacity:0);
opacity: 0;
2、最好input控件略大于img控件
input:132132
img:128128
以防边界点击情况
3、input和img控件没有载入完html不显示
css中
display:none
4、加载完成之后调整input和img控件
<body onload="onLoadSelfAccount()">
function onLoadSelfAccount() {
    src = document.getElementById('idUserLogo');
    dest = document.getElementById('idUserLogoImgFiled');

    src.style.display = "block";
    dest.style.display = "block";

    src.style.position = "absolute";
    src.style.left = dest.offsetLeft;
    src.style.top = dest.offsetTop;
}
注意顺序,是input控件移动,这样保证input控件在img控件上面,按钮点击的时候,就能保证是input响应。
5、去掉没有选文件,鼠标悬停提示
上面html的代码,这一段
<input id="idUserLogo" type="file" name="nameUserLogo" accept=".jpg,.png,.bmp,.jpeg,.psd" title=" " onchange="onChangeUsersLogo()"></input>
特别注意title=" ",里面是一个空格
如果没有这个属性,鼠标就会出现如下效果
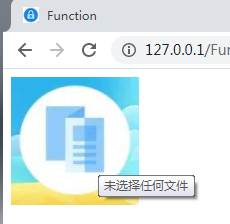
有提示信息:未选择任何文件
这不是我们想要的
小结
本文后台代码就不介绍了,因为大部分后台java做的,已提供了代码供参考。
本人是初学业余者,python中flask框架写后台,前端html+javascript+css,做一个登录,用户的显示修改功能,其中碰到的用户头像修改问题,把详细解决过程记录下来。
如下本人正式的demo:


 1784
1784


 被折叠的 条评论
为什么被折叠?
被折叠的 条评论
为什么被折叠?
 到【灌水乐园】发言


