一个可以根据自己的level等级, 将指定的Drawable缩放到一定比例
资源放置位置:
Eclipse/AS: res/drawable/filename.xml
引用用法:
In Java: R.drawable.filename
In XML: @drawable/filename
语法:
<?xml version="1.0" encoding="utf-8"?>
<scale
    xmlns:android="http://schemas.android.com/apk/res/android"
    android:drawable="@drawable/drawable_resource"
    android:scaleGravity=["top" | "bottom" | "left" | "right" | "center_vertical" |
                          "fill_vertical" | "center_horizontal" | "fill_horizontal" |
                          "center" | "fill" | "clip_vertical" | "clip_horizontal"]
    android:scaleHeight="percentage"
android:scaleWidth="percentage" />- 首个标签必须是scale;
- android:drawable: Drawable资源引用;
- android:scaleGravity: 缩放的方向, 比如: top, 缩放的时候就会向顶部靠拢,bottom, 缩放时会想底部靠拢;
- android:scaleHeight: 表示Drawable能够在高度上缩放的百分比, 比如: 50%,
android:scaleWidth: 表示Drawable能够在宽度上缩放的百分比, 同上;
Scale Drawable不能单独的使用, 他需要配合Level等级使用, level的取值是0~10000, (0为不可见)
例子:
布局XML代码:
<?xml version="1.0" encoding="utf-8"?>
<LinearLayout xmlns:android="http://schemas.android.com/apk/res/android"
              android:layout_width="match_parent"
              android:layout_height="match_parent"
              android:orientation="vertical">

    <TextView
        android:id="@+id/tv"
        android:layout_width="match_parent"
        android:layout_height="100dip"
        android:background="@drawable/scale_drawable_left"
        android:gravity="center"
        android:text="宽高可缩放百分比为100%"/>

    <View
        android:layout_width="match_parent"
        android:layout_height="1dip"
        android:background="@android:color/black"/>

    <TextView
        android:id="@+id/tv1"
        android:layout_width="match_parent"
        android:layout_height="100dip"
        android:background="@drawable/scale_drawable_left_half"
        android:gravity="center"
        android:text="宽高可缩放百分比为50%"/>

    <Button
        android:id="@+id/btn1"
        android:layout_width="match_parent"
        android:layout_height="wrap_content"
        android:text="set Level 0"
        android:textAllCaps="false"/>

    <Button
        android:id="@+id/btn2"
        android:layout_width="match_parent"
        android:layout_height="wrap_content"
        android:text="set Level 500"
        android:textAllCaps="false"/>

    <Button
        android:id="@+id/btn3"
        android:layout_width="match_parent"
        android:layout_height="wrap_content"
        android:text="set Level 5000"
        android:textAllCaps="false"/>
</LinearLayout>
scale_drawable_left.xml代码
<?xml version="1.0" encoding="utf-8"?>
<scale xmlns:android="http://schemas.android.com/apk/res/android"
      android:drawable="@drawable/button_selected"
      android:scaleGravity="left"
      android:scaleHeight="100%"
      android:scaleWidth="100%">
</scale>
scale_drawable_left_half.xml代码
<?xml version="1.0" encoding="utf-8"?>
<scale xmlns:android="http://schemas.android.com/apk/res/android"
      android:drawable="@drawable/button_selected"
      android:scaleGravity="left"
      android:scaleHeight="50%"
      android:scaleWidth="50%">
</scale>
逻辑Java代码
@Override
protected void onCreate(Bundle savedInstanceState) {
    super.onCreate(savedInstanceState);

    setContentView(R.layout.test_scale1);
    final TextView textView = (TextView) findViewById(R.id.tv);
    final TextView textView1 = (TextView) findViewById(R.id.tv1);
    textView.getBackground().setLevel(10000);
    textView1.getBackground().setLevel(10000);
    findViewById(R.id.btn1).setOnClickListener(new View.OnClickListener() {
        @Override
        public void onClick(View v) {
            textView.getBackground().setLevel(0);
            textView1.getBackground().setLevel(0);
        }
    });
    findViewById(R.id.btn2).setOnClickListener(new View.OnClickListener() {
        @Override
        public void onClick(View v) {
            textView.getBackground().setLevel(500);
            textView1.getBackground().setLevel(500);
        }
    });
    findViewById(R.id.btn3).setOnClickListener(new View.OnClickListener() {
        @Override
        public void onClick(View v) {
            textView.getBackground().setLevel(5000);
            textView1.getBackground().setLevel(5000);
        }
    });
}
代码解读:
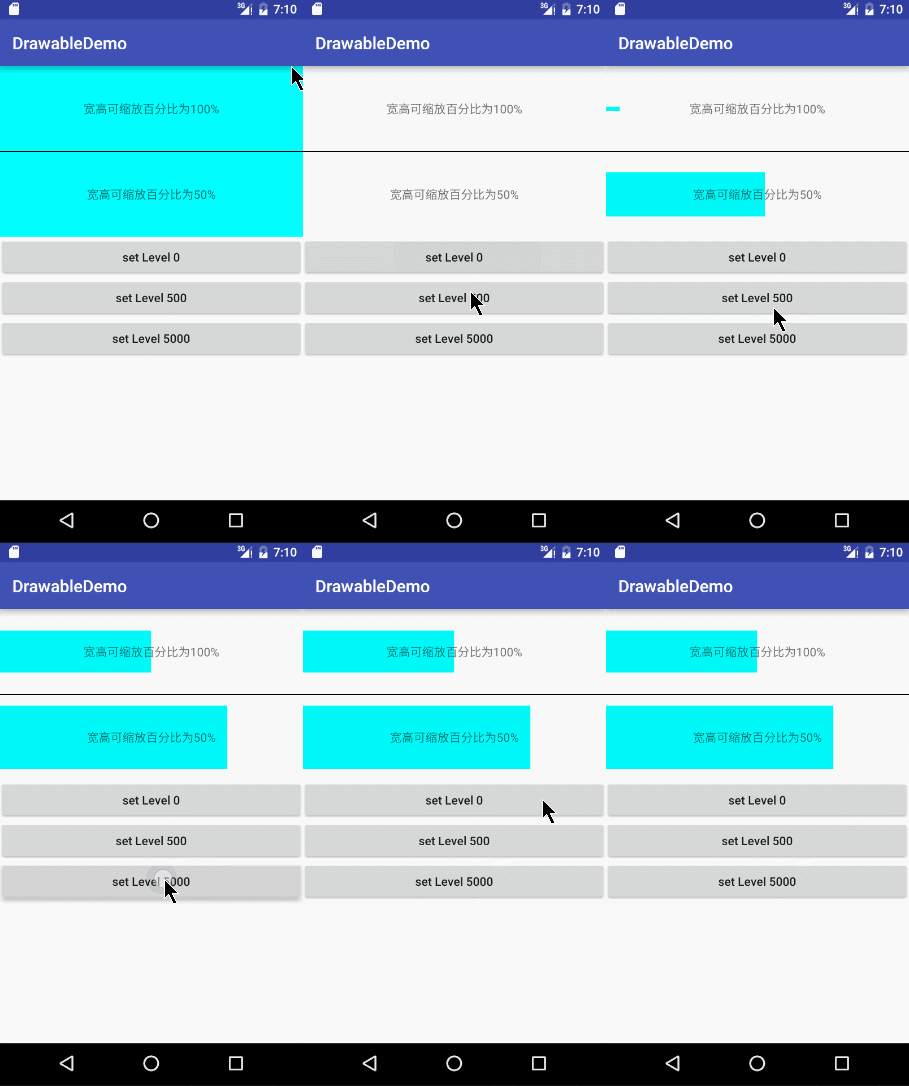
先来理清下View的宽高, Drawable的宽高, 可缩放的百分比, Level等级三者间的关系: 一个个来说:
- View的宽高: 在整个过程中是不会发生变化;
- 可缩放的百分比: 先搞清楚这个百分比, 它是控件能够缩小的最小尺寸, 比如:10%, 表示Drawable最小能缩小到控件的10%宽或者高, 这时候还需要加上一个level等级
- Level等级:取值是0~10000; 上面Drawable能放大或缩小的区间是10%~100%, 这个区间就是用0~10000是描述.
它们和缩放后的宽高存在一个等式:
缩放后的宽高 = Drawable显示的宽高(大多时候是View的宽高) * 可缩放的百分比 * (设置的Level/10000);
使用前需要初始化, 给一个初始值, 不然Drawable不可见
textView.getBackground().setLevel(10000);
设置的时候
textView.getBackground().setLevel(5000);
当然Drawable还可以当做ImageView的源文件src属性去使用, 代码如下:
mImageView.getDrawable().setLevel(10000);
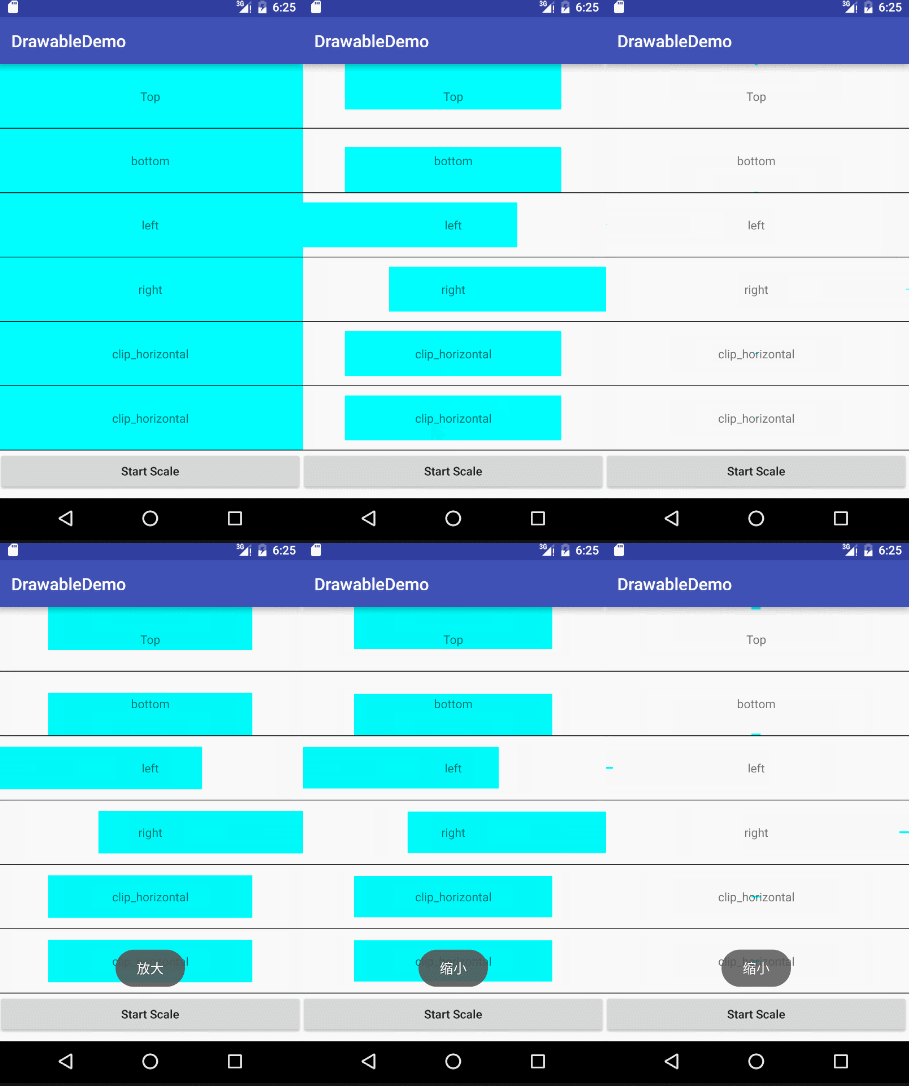
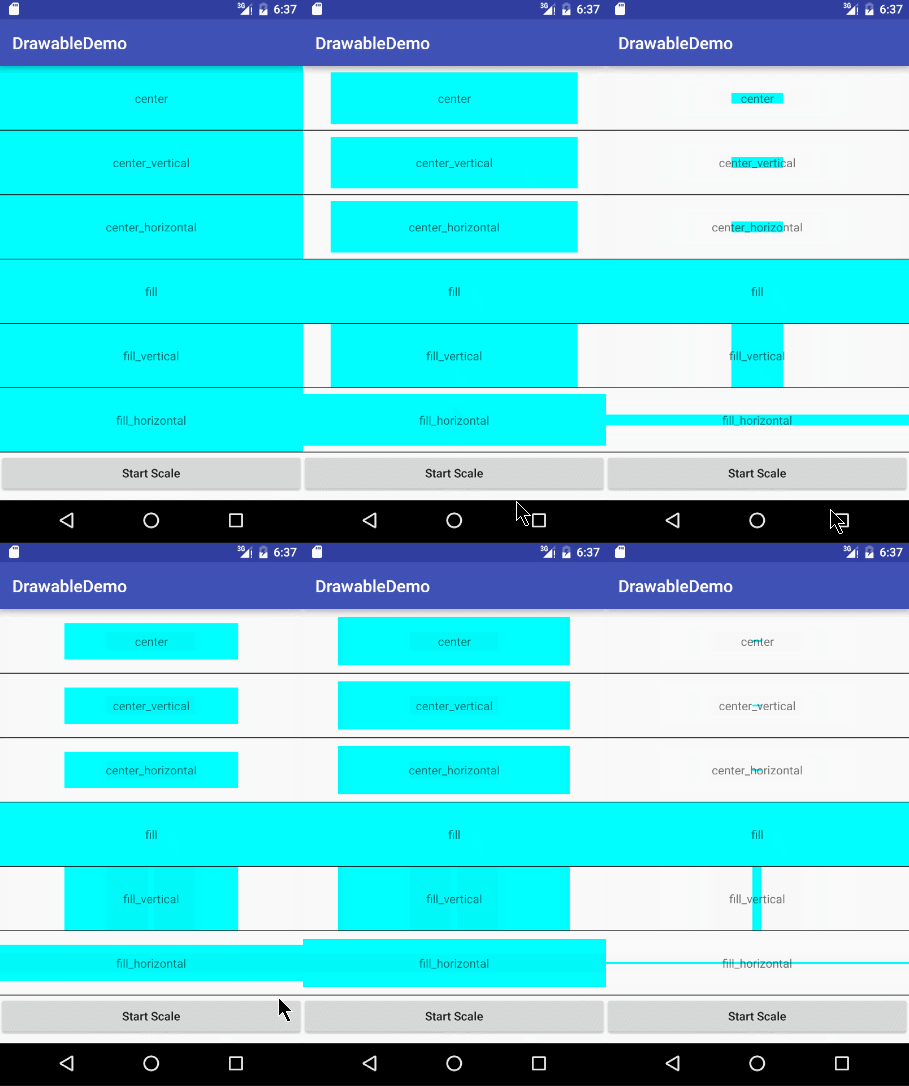
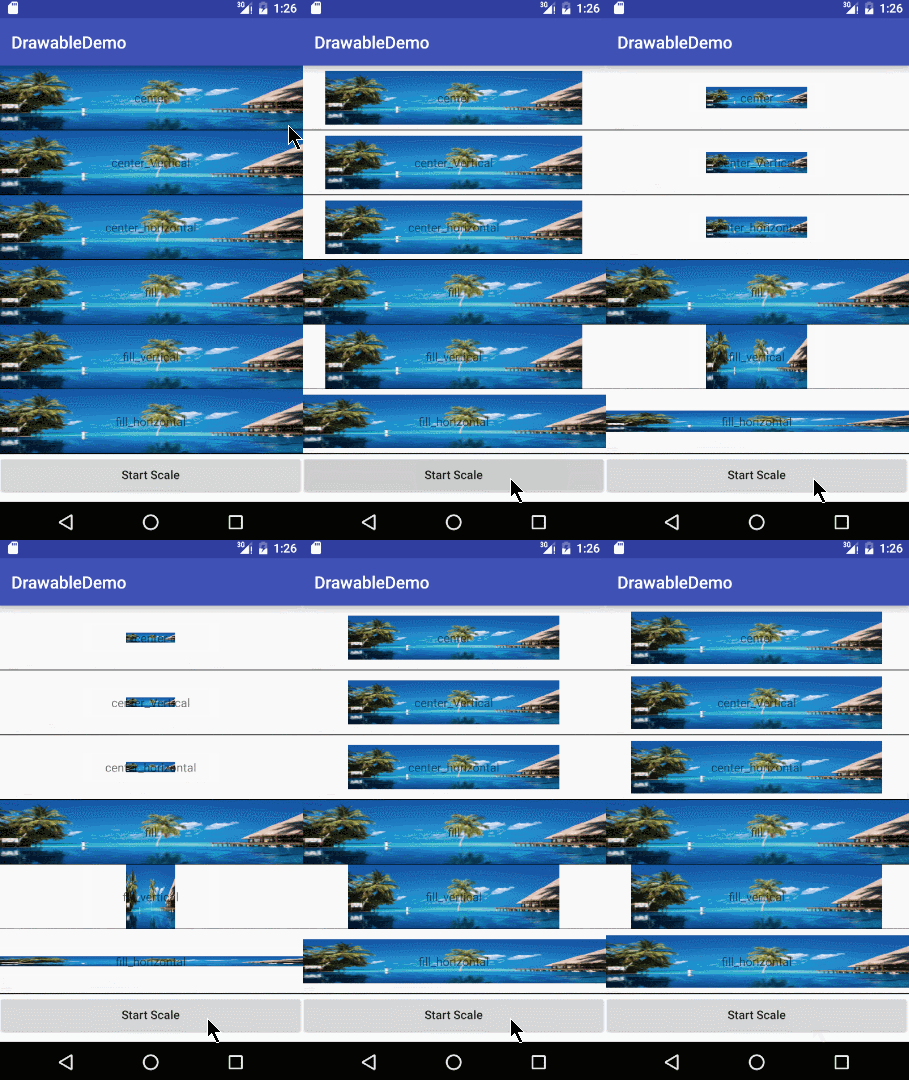
- 下面是不同android:scaleGravity/缩放方向的区别: 写成了一个动画效果,
这里用的是shape图片
这里用的是png图片。
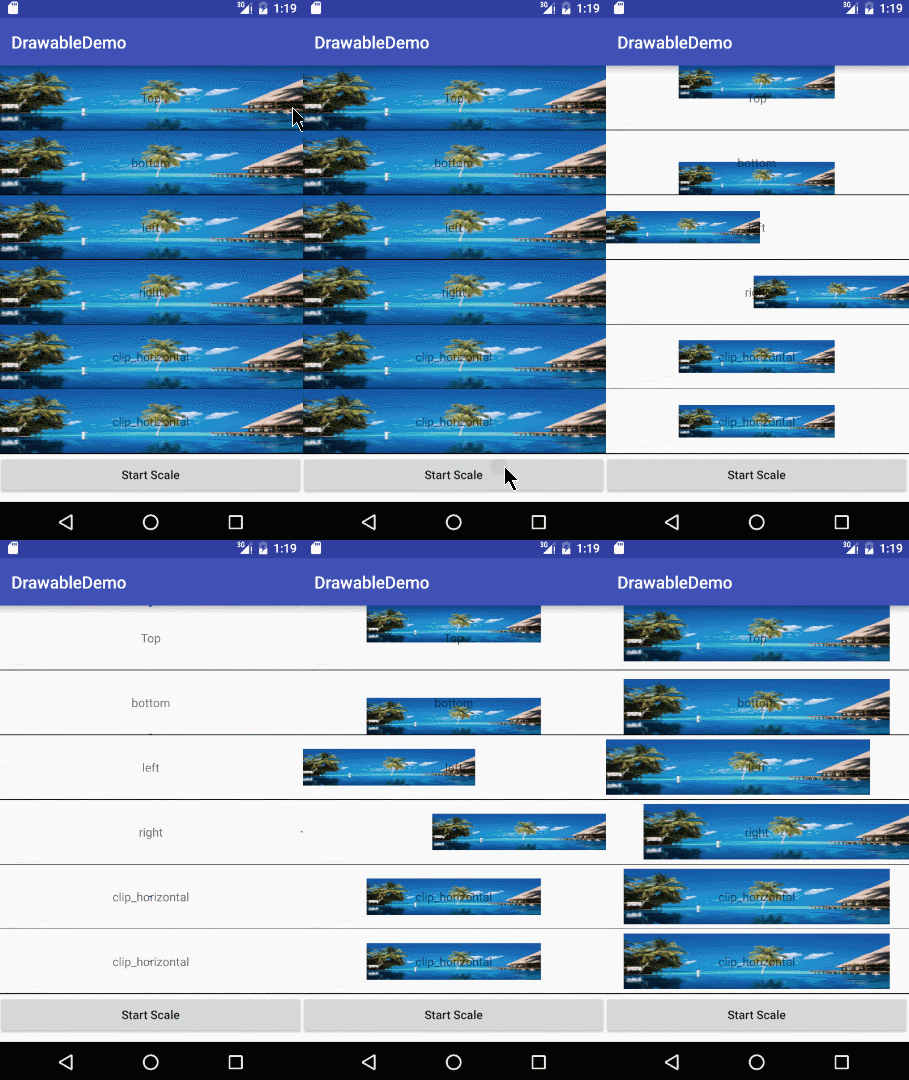
Drawable都是同一个: 仅仅改变了android:scaleGravity的参数
<?xml version="1.0" encoding="utf-8"?>
<scale xmlns:android="http://schemas.android.com/apk/res/android"
      android:drawable="@mipmap/img_scale"
      android:scaleGravity="center"
      android:scaleHeight="100%"
      android:scaleWidth="100%">
</scale>
代码也很简单, 点击事件就执行了这个Runnaable:
    boolean flag;
    private Runnable startScaleThread = new Runnable() {
        @Override
        public void run() {
            int level = tv1.getBackground().getLevel();
            //缩小动画
            if (flag) {
                level += 100;
                if (level >= 10000) {
                    flag = false;
                    //Toast.makeText(MainActivity.this, "缩小", Toast.LENGTH_SHORT).show();
                }
                //放大动画
            } else {
                level -= 100;
                if (level <= 100) {
                    flag = true;
                    //Toast.makeText(MainActivity.this, "放大", Toast.LENGTH_SHORT).show();
                }
            }
            tv1.getBackground().setLevel(level);
            tv2.getBackground().setLevel(level);
            tv3.getBackground().setLevel(level);
            tv4.getBackground().setLevel(level);
            tv5.getBackground().setLevel(level);
            tv6.getBackground().setLevel(level);
            tv1.postDelayed(startScaleThread, 10);
        }
    };


 本文详细介绍了Android中Scale Drawable的使用,包括其在资源中的位置、引用方式、语法特性,如`android:scaleGravity`、`android:scaleHeight`和`android:scaleWidth`。重点强调了Scale Drawable需要配合Level等级使用,通过Level控制Drawable的缩放比例,并提供了实例代码展示如何在Java和XML中设置和使用Scale Drawable。此外,还讨论了`android:scaleGravity`不同值对缩放方向的影响,并通过动画效果展示其区别。


 1479
1479

 被折叠的 条评论
为什么被折叠?


