


ElasticStack—Beats
定义
BEATS 轻量型数据采集器 官网:https://www.elastic.co/cn/beats/
Beats 是一个免费且开放的平台,集合了多种单一用途数据采集器。它们从成百上千、上万台机器和系统向 Logstash 或 ElasticSearch 发送数据。
一、ElasticStack 的组成
Beats 采集端 ---- kafka 消息队列 ---- logstash 数据处理引擎 ---- ElasticSearch 数据存储 ---- Kibana数据展示
二、Beats 组件
![[外链图片转存失败,源站可能有防盗链机制,建议将图片保存下来直接上传(img-6Lqjux3H-1594637012061)(C:\Users\86156\Pictures\devops\ELK\批注 2020-07-10 165923.png)]](https://img-blog.csdnimg.cn/20200713184509784.png?x-oss-process=image/watermark,type_ZmFuZ3poZW5naGVpdGk,shadow_10,text_aHR0cHM6Ly9ibG9nLmNzZG4ubmV0L3NobTE5OTkwMTMx,size_16,color_FFFFFF,t_70)
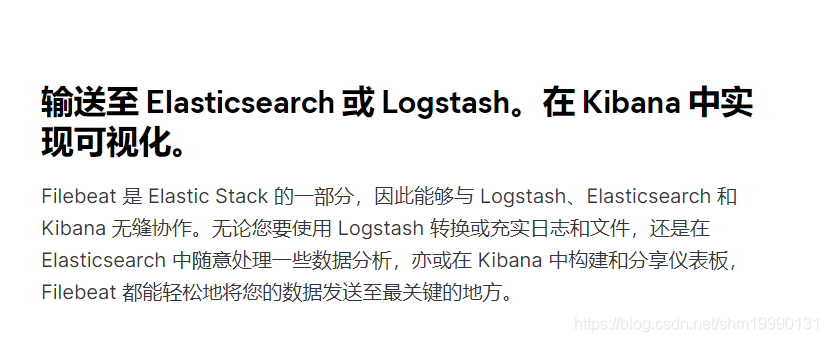
最重要的
FileBeat 日志采集
Metricbeat 系统指标采集
FileBeat 日志采集
官方文档:https://www.elastic.co/guide/en/beats/filebeat/current/filebeat-installation.html

Filebeat 可以有多个源数据端(input),不断产生日志,例如(nginx-access.log)
👇
Spooler 传输采集到的数据,到达数据的采集端( Kafka、Logstash)
👇
采集端(Kafka\logstash),实际生产环境种存在大量的日志文件,logstash 并不能处理高并发的大容量数据,会告诉 Filebeat 减缓日志读取速度。所以一般是 Filebeat ----> kafka ----> Logstash
二、 Filebeat 工作原理
Filebeat 由两个主要组件组成:prospector(发现文件) 和 harvester(读取文件内容)
-
havester:
- 负责读取单个文件的内容
- 如果文件在读取时被删除或者重命名,filebeat 将继续读取该文件
-
prospector
- prospector 负责管理 harvester 并找到所有要读取的文件来源
- 如果输入类型为日志,则查找器将查找路径匹配的所有文件,并为每个文件启动一个 harvester
- Filebeat 目前支持两种 prospector 类型,log 和 stdin。
-
Filebeat 如何保持文件的状态
- Filebeat 保存每个文件的状态并经常将状态刷新到磁盘上的注册文件中。
- 该状态用于记住 harvester 正在读取的最后偏移量,并确保发送所有日志行。
- 如果输出(例如ElasticSearch 或 Logstash )无法访问,Filebeat 会跟踪最后发送的行,并在输出再次可用时继续读取文件。
- 在 Filebeat 运行时,每个 prospector 内存中也会保存的文件状态信息,当重新启动 Filebeat时,将使用注册文件的数据来重建文件状态,Filebeat 将从每个 harvester 保存的最后段偏移量继续读取。
- 文件状态记录在 data/registry 文件中。
三、启动命令
路径下启动 -e -c 指定 采集数据的配置文件
./filebeat -e -c itcast.yml
./filebeat -e -c itcast.yml -d “publish”
-e:输出到标准输出,默认输出到 syslog 和 logs下
-c:指定配置文件
-d:输出 debug 信息
四、部署和运行
filebeat 下载地址:https://www.elastic.co/downloads/past-releases
软件包版本与 ES 集群和logstash 全部采用同一版本
tar -zxvf filebeat-7.6.2-linux-x86_64.tar.gz -C /usr/src/
mv /usr/src/filebeat-7.6.2-linux-x86_64/ /usr/local/filebeat
1、output.console 通过终端获取到数据
vim /usr/local/filebeat/itcast-log.yml
filebeat.inputs:	#写入数据
 - type: log		#log日志格式
   enabled: true	#开启 input
   paths:			#写入数据的路径文件
     - /itcast/beats/logs/*.log		#通过此 log 日志写入数据
setup.template.settings:
  index.number_of_shards: 3
output.console:		#输出收集的数据
  pretty: true		#以人性化方式显示
  enable: true		#是否开启 output
启动 filebeat
[root@node3 filebeat]# ./filebeat -e -c itcast-log.yml
不断的向 /itcast/beats/logs/路径下的 .log 日志文件写入内容,终端显示采集到的数据
{
  "@timestamp": "2020-07-10T09:52:22.880Z",		#时间
  "@metadata": {
    "beat": "filebeat",					#由谁获取的数据
    "type": "_doc",
    "version": "7.6.2"
  },
  "agent": {
    "version": "7.6.2",
    "type": "filebeat",
    "ephemeral_id": "de081f86-da27-4679-af73-b261ce5578d2",
    "hostname": "node3",
    "id": "4ca47258-8944-4973-9262-9a34d9284f4a"
  },
  "message": "asjd",					#数据内容
  "log": {
    "offset": 2,
    "file": {
      "path": "/itcast/beats/logs/abc.log"		#数据文件路径
    }
  },
  "input": {
    "type": "log"
  },
  "ecs": {
    "version": "1.4.0"
  },
  "host": {
    "name": "node3"
  }
}
2、输出 到 output.ElasicSearch
filebeat.inputs:
 - type: log
   enabled: true
   paths:
     - /itcast/beats/logs/*.log
   tags: ["web"]	#设置索引标签
   fileds:
     from: test-web
   fileds_under_root: true
setup.template.settings:
  index.number_of_shards: 3
output.elasticsearch:				#output到 Elasticsearch当中
  hosts: ["192.168.168.4:9200"]		#指定 Elasticsearch 的节点IP地址
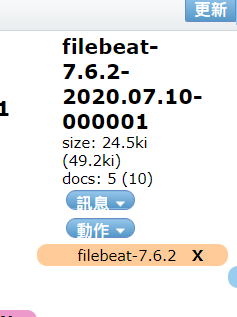
filebeat 按照时间来存储 索引数据,2020-07-10-000001,每一天都会更新一个新的索引**
3、读取 Nginx 日志文件
创建配置文件 itcast-nginx.yml
filebeat.inputs:
 - type: log
   enabled: true
   paths:
     - /usr/local/nginx/logs/access.log
   tags: ["nginx"]
setup.template.settings:
  index.number_of_shards: 3
output.elasticsearch:
  hosts: ["192.168.168.4:9200"]
4、Module 内置模块采集Nginx
Filebeat 内置模块目录 /usr/local/filebea/module/
Filebeat 开启 Module 的配置文件目录 /usr/local/filebeat/modules.d/


内置Module 启动nginx,禁用nginx
./filebeat modules enable nginx
./filebeat modules disable nginx
./filebeat modules list 查看是否启动成功
配置 Module – Nginx 配置文件
成功开启之后的 nginx.yml 是不带 disabled 的./modules.d/nginx.yml
- module: nginx
  # Access logs
  access:
    enabled: true
    var.paths: ["/usr/local/nginx/logs/access.log*"]	#重点:别忘了加个*
    # Set custom paths for the log files. If left empty,
    # Filebeat will choose the paths depending on your OS.
    #var.paths:

  # Error logs
  error:
    enabled: true
    var.paths: ["/usr/local/nginx/logs/error.log*"]   #重点: 别忘了加个 *
    # Set custom paths for the log files. If left empty,
    # Set custom paths for the log files. If left empty,
    # Filebeat will choose the paths depending on your OS.
    #var.paths:
配置 filebeat
vim /usr/local/filebeat/itcast-nginx.yml
filebeat.inputs:
setup.template.settings:
  index.number_of_shards: 3
output.elasticsearch:
  hosts: ["192.168.168.4:9200"]		#将数据输出到 ES
filebeat.config.modules:			#指定内置 Modules 模块
 path: ${path.config}/modules.d/nginx.yml	#nginx.yml 文件路径
 reload.enable: false				#是否重新加载,暂时 false
启动 filebeat ./filebeat -e -c itcast-nginx.yml
通过 Module 启动的 Nginx 日志采集,会对日志数据进行规范化的格式进行存储

这个阻塞日志意思:5分钟之内,没有新的数据产生,不是报错

官网所有 Module 的文档:
https://www.elastic.co/guide/en/beats/filebeat/current/filebeat-modules.html
Modules - Nginx - 日志仪表板
编辑收集日志的配置文件
vim itcast-nginx.yml
filebeat.inputs:
setup.template.settings:
  index.number_of_shards: 3
output.elasticsearch:
  hosts: ["192.168.168.4:9200"]
filebeat.config.modules:
  path: ${path.config}/modules.d/*.yml
  reload.enabled: true
setup.kibana:
  host: "192.168.168.4:5601"
安装仪表板
./filebeat -c itcast-nginx.yml setup
启动 filebeat
./filebeat -e -c itcast-nginx.yml
在 kibana - dashboard 里面搜过 Nginx,点击 Filebeat 的仪表板即可查看


 1071
1071


 被折叠的 条评论
为什么被折叠?
被折叠的 条评论
为什么被折叠?
 到【灌水乐园】发言


