


今天回过头来看了下Android的用PULL来解析Xml文件,感觉还是很有意思。话不多说,直接代码。
这是在书上的例子,首先是界面布局代码
<?xml version="1.0" encoding="utf-8"?>
<RelativeLayout xmlns:android="http://schemas.android.com/apk/res/android"
    xmlns:tools="http://schemas.android.com/tools"
    android:layout_width="match_parent"
    android:layout_height="match_parent"
    android:background="@mipmap/bg"
    tools:context="com.example.pc_bbj.study_homework2.MainActivity">
    <LinearLayout
        android:layout_width="wrap_content"
        android:layout_height="wrap_content"
        android:id="@+id/ll_btn"
        android:layout_alignParentBottom="true"
        android:orientation="horizontal"
        android:layout_centerHorizontal="true">

        <Button
            android:layout_width="wrap_content"
            android:layout_height="wrap_content"
            android:id="@+id/city_bj"
            android:text="北京"/>
        <Button
            android:layout_width="wrap_content"
            android:layout_height="wrap_content"
            android:id="@+id/city_sh"
            android:text="上海"/>
        <Button
            android:layout_width="wrap_content"
            android:layout_height="wrap_content"
            android:id="@+id/city_jl"
            android:text="吉林"/>
    </LinearLayout>
    <TextView
        android:layout_width="wrap_content"
        android:layout_height="wrap_content"
        android:id="@+id/select_city"
        android:layout_alignParentTop="true"
        android:layout_marginTop="30dp"
        android:text="上海"
        android:textColor="#ffffff"
        android:layout_toLeftOf="@id/icon"
        android:textSize="20sp"/>
    <ImageView
        android:layout_width="wrap_content"
        android:layout_height="wrap_content"
        android:id="@+id/icon"
        android:src="@mipmap/ic_launcher"
        android:layout_alignLeft="@id/ll_btn"
        android:layout_marginTop="25dp"
        android:layout_below="@id/select_city"
        android:paddingBottom="5dp"/>
    <TextView
        android:layout_width="wrap_content"
        android:layout_height="wrap_content"
        android:id="@+id/select_weather"
        android:layout_alignLeft="@id/icon"
        android:layout_below="@id/icon"
        android:layout_marginLeft="15dp"
        android:layout_marginTop="18dp"
        android:gravity="center"
        android:text="多云"
        android:textSize="18sp"
        android:textColor="#ffffff"/>
    <LinearLayout
        android:layout_width="wrap_content"
        android:layout_height="wrap_content"
        android:id="@+id/linearLayout1"
        android:orientation="vertical"
        android:layout_alignBottom="@+id/select_weather"
        android:layout_marginBottom="10dp"
        android:layout_alignRight="@id/ll_btn"
        android:gravity="center"
        >
        <TextView
            android:layout_width="wrap_content"
            android:layout_height="wrap_content"
            android:id="@+id/temp"
            android:layout_marginTop="10dp"
            android:gravity="center_vertical"
            android:text="-7℃"
            android:textColor="#ffffff"/>
        <TextView
            android:layout_width="wrap_content"
            android:layout_height="wrap_content"
            android:id="@+id/wind"
            android:text="风力:3级"
            android:textSize="18sp"
            android:textColor="#ffffff"/>
        <TextView
            android:layout_width="wrap_content"
            android:layout_height="wrap_content"
            android:id="@+id/pm"
            android:text="pm"
            android:textSize="18sp"
            android:textColor="#ffffff"/>
    </LinearLayout>
</RelativeLayout>
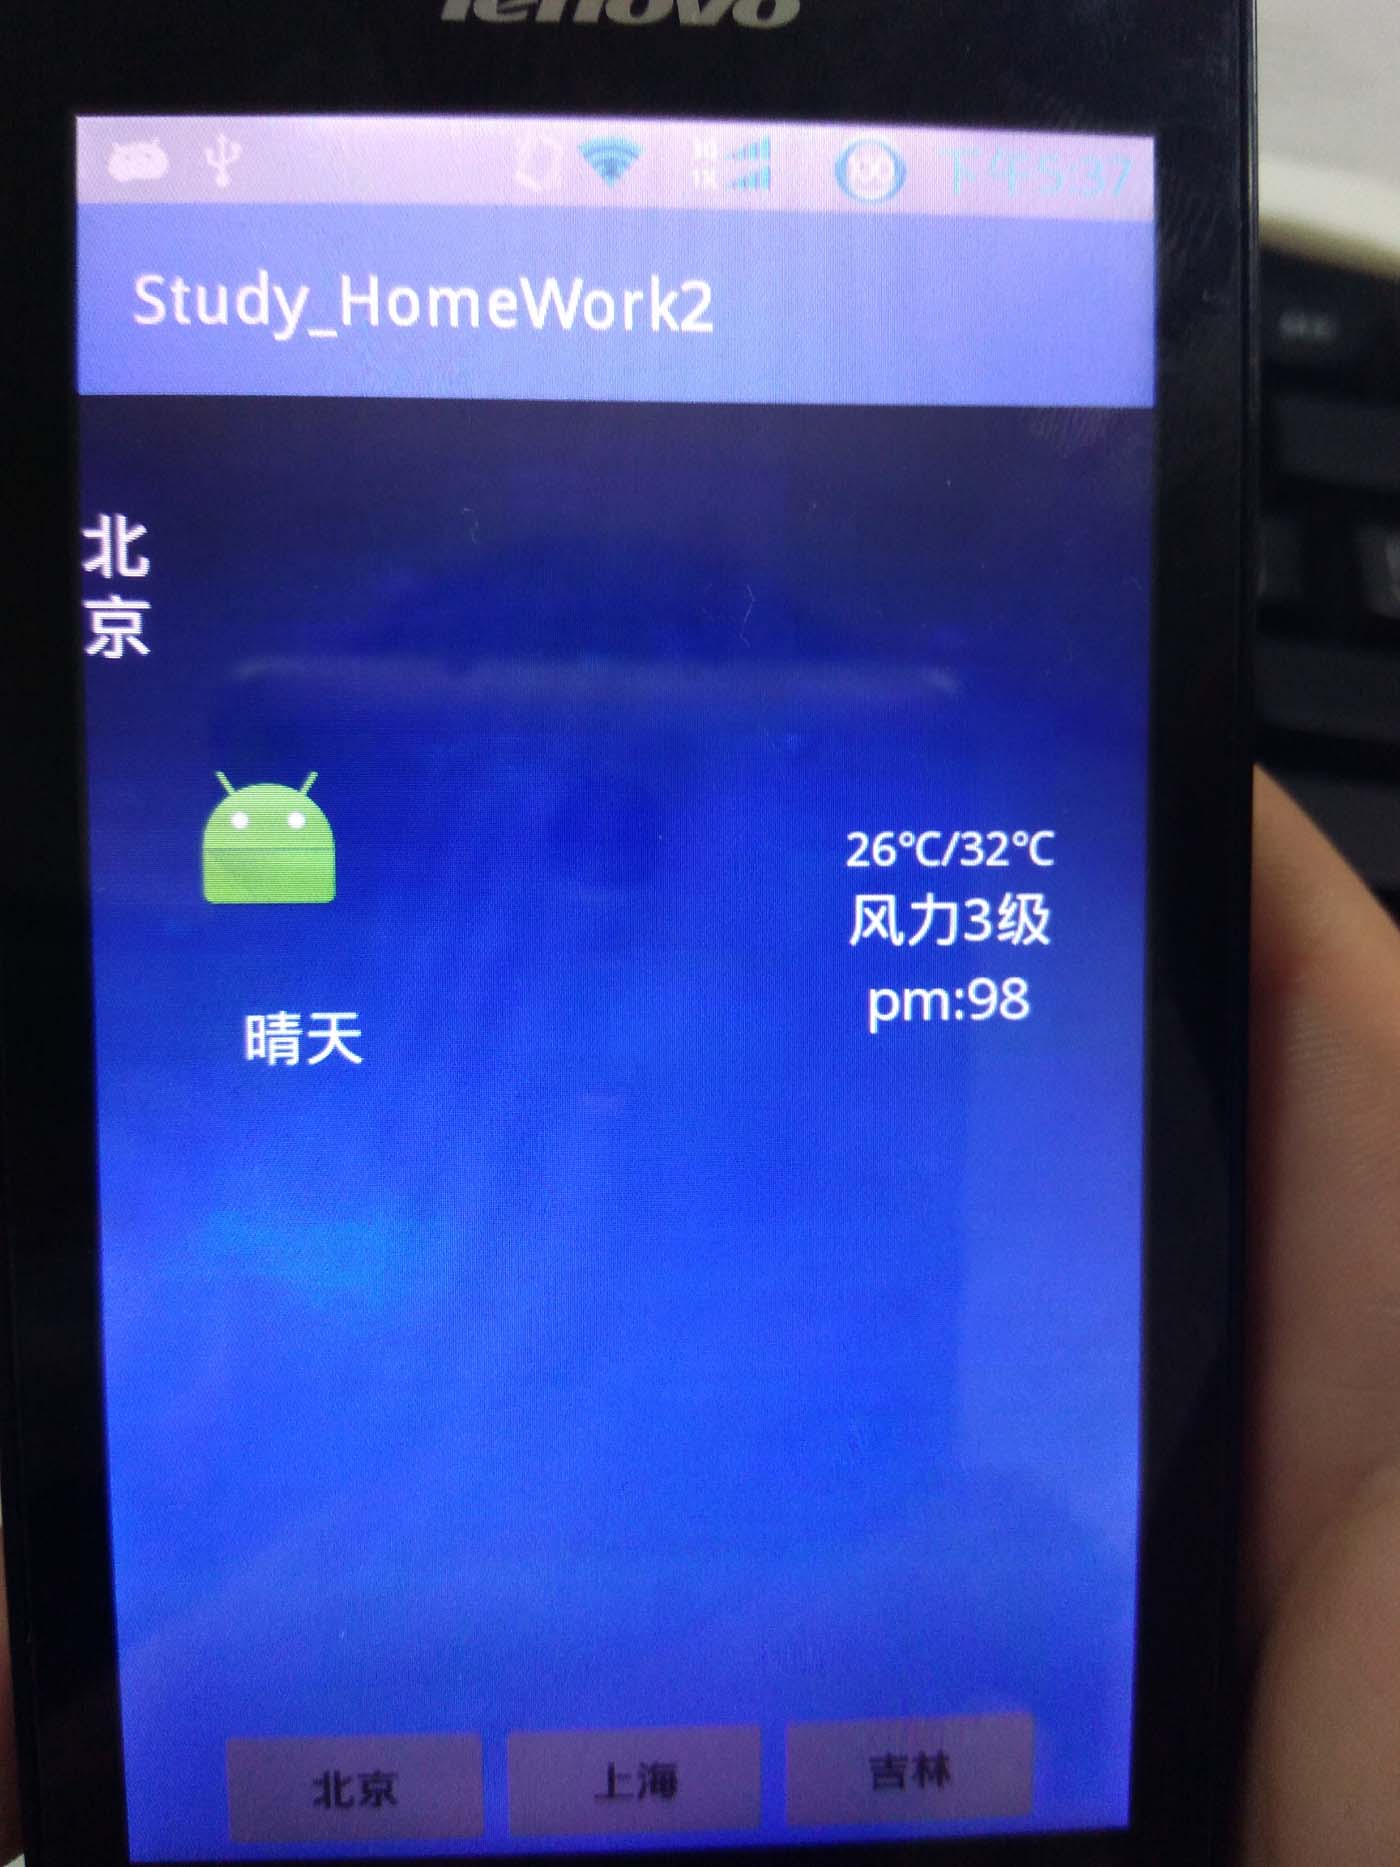
这里我用的是真机来测试的,所以我这里就上一张效果图了,还配上一张背景图,ic_launcher大家都有吧
**
这里是背景图

**
界面地方不多说,大家都能看懂,下面接下来是weather.xml文件
<?xml version="1.0" encoding="utf-8"?>
<infos>
    <city id="1">
        <temp>20℃/30℃</temp>
        <weather>晴天多云</weather>
        <name>上海</name>
        <pm>80</pm>
        <wind>1级</wind>
    </city>
    <city id="2">
        <temp>26℃/32℃</temp>
        <weather>晴天</weather>
        <name>北京</name>
        <pm>98</pm>
        <wind>3级</wind>
    </city>
    <city id="3">
        <temp>15℃/24℃</temp>
        <weather>多云</weather>
        <name>吉林</name>
        <pm>30</pm>
        <wind>5级</wind>
    </city>
</infos>
这个没有什么好描述的
还有吧所有信息封装起来,封装成一个Javabean代码
package com.example.pc_bbj.study_homework2;

/**
 * Created by PC_BBJ on 2016/3/21.
 */
public class WeatherInfo {
    private int id;
    private String name;
    private String weather;
    private String temp;
    private String pm;
    private String wind;

    public int getId() {
        return id;
    }

    public void setId(int id) {
        this.id = id;
    }

    public String getName() {
        return name;
    }

    public void setName(String name) {
        this.name = name;
    }

    public String getWeather() {
        return weather;
    }

    public void setWeather(String weather) {
        this.weather = weather;
    }

    public String getTemp() {
        return temp;
    }

    public void setTemp(String temp) {
        this.temp = temp;
    }

    public String getPm() {
        return pm;
    }

    public void setPm(String pm) {
        this.pm = pm;
    }

    public String getWind() {
        return wind;
    }

    public void setWind(String wind) {
        this.wind = wind;
    }
}
好了,最关键的东西来了
为了让代码容易阅读,创建一个工具类WeatherService,包含解析xml的逻辑代码
下面是代码
package com.example.pc_bbj.study_homework2;

import android.util.Xml;

import org.xmlpull.v1.XmlPullParser;

import java.io.InputStream;
import java.util.ArrayList;
import java.util.List;

/**
 * Created by PC_BBJ on 2016/3/21.
 * 这是一个解析XML的工具类
 */
public class WeatherService {
    //返回天气信息的集合
    //InputStream 是获取到weather那个xml文件
    public static List<WeatherInfo> getWeatherInfos(InputStream is)throws  Exception{
        //得到pull解析器
        XmlPullParser parser= Xml.newPullParser();
        //初始化解析器,第一个参数代表包含xml的数据
        parser.setInput(is,"utf-8");
        List<WeatherInfo> weatherInfos=null;
        WeatherInfo weatherInfo=null;
        //得到当前事件类型
        int type=parser.getEventType();
        while(type!=XmlPullParser.END_DOCUMENT)
        {
            switch (type){
                //一个节点的开始标签
                case XmlPullParser.START_TAG:
                    //解析搭配全局的开始标签 info根节点
                    if("infos".equals(parser.getName())){
                        weatherInfos=new ArrayList<WeatherInfo>();
                    }
                    else if("city".equals(parser.getName())){
                        weatherInfo=new WeatherInfo();
                        String idStr=parser.getAttributeValue(0);
                        weatherInfo.setId(Integer.parseInt(idStr));
                    }
                    else if("temp".equals(parser.getName())){
                        //paser.nextText()获取该Tag节点中的内容
                        String temp=parser.nextText();
                        weatherInfo.setTemp(temp);
                    }
                    else if("weather".equals(parser.getName())){
                        String weather=parser.nextText();
                        weatherInfo.setWeather(weather);
                    }
                    else if("name".equals(parser.getName())){
                        String name=parser.nextText();
                        weatherInfo.setName(name);
                    }
                    else if("pm".equals(parser.getName())){
                        String pm=parser.nextText();
                        weatherInfo.setPm(pm);
                    }
                    else if("wind".equals(parser.getName())){
                        String wind=parser.nextText();
                        weatherInfo.setWind(wind);
                    }
                    break;
                //一个节点结束的标签
                case XmlPullParser.END_TAG:
                    //一个城市的信息处理完毕.city的结束标签
                    if("city".equals(parser.getName()))
                    {
                        //一个城市的信息已经处理完毕了
                        weatherInfos.add(weatherInfo);
                        weatherInfo=null;
                    }
                    break;
            }
            //只要不解析到文档末尾,就解析下一个条目,的到下一个节点的事件类型
            type=parser.next();
            //必须不能忘,否则死循环
        }
        return weatherInfos;
    }
}
接下来是MainActivity这个类
处理逻辑的方法都在里面
package com.example.pc_bbj.study_homework2;

import android.support.v7.app.AppCompatActivity;
import android.os.Bundle;
import android.view.View;
import android.widget.ImageView;
import android.widget.TextView;
import android.widget.Toast;

import org.w3c.dom.Text;

import java.util.ArrayList;
import java.util.HashMap;
import java.util.List;
import java.util.Map;

public class MainActivity extends AppCompatActivity implements View.OnClickListener{

    private TextView select_city,select_weather,select_temp,select_wind,select_pm;
    private Map<String,String> map;
    private List<Map<String,String>> list;
    private String temp,weather,name,pm,wind;
    private ImageView icon;

    @Override
    protected void onCreate(Bundle savedInstanceState) {
        super.onCreate(savedInstanceState);
        setContentView(R.layout.activity_main);
        //初始化文本控件
        select_city=(TextView)findViewById(R.id.select_city);//城市
        select_weather=(TextView)findViewById(R.id.select_weather);
        select_temp=(TextView)findViewById(R.id.temp);
        select_pm=(TextView)findViewById(R.id.pm);
        select_wind=(TextView)findViewById(R.id.wind);
        icon=(ImageView)findViewById(R.id.icon);//android那个小机器人图标
        findViewById(R.id.city_bj).setOnClickListener(this);
        findViewById(R.id.city_sh).setOnClickListener(this);
        findViewById(R.id.city_jl).setOnClickListener(this);
        try{
            //调用上边写好的解析方法,weather.xml就在类的目录下,实用类加载器进行加载
            //infos就是每个城市的天气集合。里面有我们所需要的数据

            //List<WeatherInfo>infos=WeatherService.getWeatherInfos(MainActivity.class.getClassLoader().getResourceAsStream("weather.xml"));这是注释的
            List<WeatherInfo> infos=WeatherService.getWeatherInfos(this.getResources().openRawResource(R.raw.weather));
            //循环读取infos里面每一条数据
            list=new ArrayList<Map<String,String>>();
            for(int i=0;i<infos.size();i++){
                WeatherInfo info= infos.get(i);
                map= new HashMap<String,String>();
                map.put("temp",info.getTemp());
                map.put("weather",info.getWeather());
                map.put("name",info.getName());
                map.put("pm",info.getPm());
                map.put("wind",info.getWind());
                list.add(map);
            }
        //显示天气到文本空间中
        }catch (Exception e){
            e.printStackTrace();
            Toast.makeText(this,"解析信息失败",Toast.LENGTH_SHORT).show();
        }
        getMap(1,R.mipmap.ic_launcher);
    }


    @Override
    public void onClick(View v) {
        switch (v.getId()){
            case R.id.city_bj:
                getMap(1,R.mipmap.ic_launcher);
                break;
            case R.id.city_jl:
                getMap(2,R.mipmap.ic_launcher);
                break;
            case R.id.city_sh:
                getMap(0,R.mipmap.ic_launcher);
                break;
        }
    }
    private void getMap(int i, int ic_launcher) {
        Map<String,String> bjMap=list.get(i);
        temp=bjMap.get("temp");
        weather=bjMap.get("weather");
        name=bjMap.get("name");
        pm=bjMap.get("pm");
        wind=bjMap.get("wind");
        select_city.setText(name);
        select_weather.setText(weather);
        select_temp.setText(temp);
        select_wind.setText("风力"+wind);
        select_pm.setText("pm:"+pm);
        icon.setImageResource(ic_launcher);
    }
}
里面最有问题的就是
“`
//Listinfos=WeatherService.getWeatherInfos(MainActivity.class.getClassLoader().getResourceAsStream(“weather.xml”));这是注释的
List infos=WeatherService.getWeatherInfos(this.getResources().openRawResource(R.raw.weather));
书上用的是类加载器,但是用这种方法没有成功,感觉这位大兄弟,大家可以去看下,书上是叫吧xml文件放在src根目录下面,但是不能成功,所以百度之后这位大兄弟正解
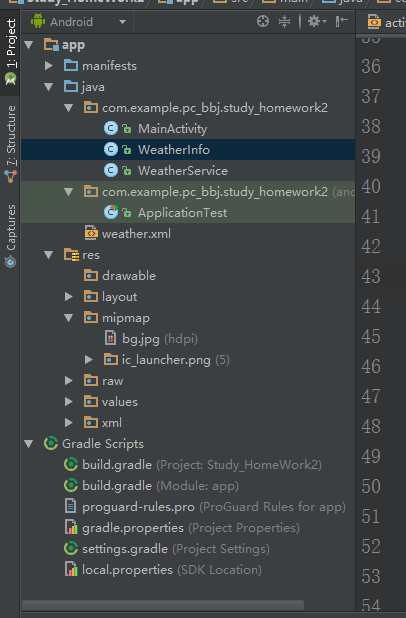
在截图一下我的项目吧,因为这里是传入的一个InputStream,所以我是把weather.xml文件放在raw在这个目录下面的
好了,今天的笔记就是这些


 370
370

 被折叠的 条评论
为什么被折叠?
被折叠的 条评论
为什么被折叠?
 到【灌水乐园】发言


