


前情概要
集成环境
github上的环境说明有点瑕疵, 在Wosao/readme上做了更正。本地集成环境如下:
1. AndroidStudio 1.4.1
2. Facebook SDK 4.6.0
3. Gradle 2.2
4. OS Win10
目标
本作是其中的第四篇, 通过本作,您可以了解如下内容:
1. 分享默认图片
2. 选择图片分享。
分享默认图片
本作代码 使用 git checkout -f MyDev-06-ShareDefaultImage 获得
首先,在act_home中添加xml 元素
<!-- 分享图片--> <LinearLayout android:id="@+id/ll_share_container" android:layout_width="match_parent" android:layout_height="300dp" android:orientation="horizontal" android:layout_above="@+id/ll_social_container" android:layout_marginBottom="30dp"> <LinearLayout android:id="@+id/ll_share1_container" android:layout_width="wrap_content" android:layout_height="match_parent" android:orientation="vertical" android:layout_weight="1"> <ImageView android:id="@+id/im_icon_share_default" android:layout_width="match_parent" android:layout_height="wrap_content" android:scaleType="fitXY" android:layout_weight="5" android:src="@drawable/icon_share" /> <Button android:id="@+id/bt_share1" android:layout_width="match_parent" android:layout_height="wrap_content" android:text="@string/button_share_txt" android:layout_gravity="center_horizontal" android:layout_weight="1" /> </LinearLayout> <LinearLayout android:id="@+id/ll_share2_container" android:layout_width="wrap_content" android:layout_height="match_parent" android:orientation="vertical" android:layout_weight="1"> <ImageView android:id="@+id/im_icon_share_select" android:layout_width="match_parent" android:layout_height="wrap_content" android:scaleType="fitXY" android:layout_weight="5" android:text="@string/iv_select_file" /> <Button android:id="@+id/bt_share2" android:layout_width="match_parent" android:layout_height="wrap_content" android:text="@string/button_share_txt" android:layout_gravity="center_horizontal" android:layout_weight="1" /> </LinearLayout> </LinearLayout>注意,这里添加了多个布局文件,为了后续选择图片分享的实现。而且为了等分左右屏幕,频繁使用android:weight, 在实际开发过程中,尽量避免频繁使用!
其次, 在代码中添加
//分享图片 private Button shareDefaultImage;//1)分享默认图片 shareDefaultImage = (Button)findViewById(R.id.bt_share1); shareDefaultImage.setOnClickListener(this);case R.id.bt_share1: //为了分别说明分享步骤,这里再次重复写登录步骤 Log.e(TAG, "onClick...share default image"); login4ShareImage(); break;最后, 在login4ShareImage中重复写了登录facebook的步骤
关键代码段如下:private void publishImage() { //Bitmap image = BitmapFactory.decodeResource(getResources(), R.mipmap.ic_launcher); Bitmap image = BitmapFactory.decodeResource(getResources(), R.drawable.icon_share ); SharePhoto photo = new SharePhoto.Builder() .setBitmap(image) .setCaption("Just for testing!!") .build(); SharePhotoContent content = new SharePhotoContent.Builder() .addPhoto(photo) .build(); ShareApi.share(content, null); }
选择图片分享
本作代码 使用 git checkout -f MyDev-07-ShareSeletedImage 获得
这个主题需要添加的内容比较多:
- 选择图片
- 生成特定宽高bitmap
选择图片
打开文件管理器
    private void openFileManager() {
        Intent it = new Intent(Intent.ACTION_PICK,
                android.provider.MediaStore.Images.Media.EXTERNAL_CONTENT_URI);
        it.setDataAndType(MediaStore.Images.Media.EXTERNAL_CONTENT_URI, "image/*");

        try {
            startActivityForResult(it, REQUEST_CODE);
        } catch (ActivityNotFoundException exp) {
            Toast.makeText(this, getResources().getString(R.string.view_no_filemanager),
                    Toast.LENGTH_SHORT);
        } catch (Exception exp) {
            Toast.makeText(this, getResources().getString(R.string.view_filemanager_error),
                    Toast.LENGTH_SHORT);
        }
    }
回调处理
需要在onActivityResult中处理else if (requestCode == REQUEST_CODE && resultCode == RESULT_OK) {//获得选中的图片Uri Log.e(TAG, "onActivityResult(): data = " + data); getImageInfo(data); }获取必要信息
    private void getImageInfo(Intent data) {
        if (data == null) {
            Log.e(TAG, "data is null!");
            return;
        }
        Uri selectedUri = data.getData();
        Cursor cursor = null;
        String mimeType;

        try {
            cursor = getContentResolver().query(selectedUri, null, null, null, null);
            Log.e(TAG, "\n selectedUri = " + selectedUri + "\n cursor = " + cursor
                    + "\n started string = "
                    + selectedUri.toString().substring(0, 7));

            if (selectedUri != null
                    && selectedUri.toString().substring(0, 10)
                    .equals("content://") && cursor != null
                    && cursor.moveToFirst()) {

                mimeType = cursor
                        .getString(cursor
                                .getColumnIndexOrThrow(MediaStore.Images.Media.MIME_TYPE));
                Log.e(TAG, "mimeType  = " + mimeType);

                imagePath = cursor.getString(cursor
                        .getColumnIndexOrThrow(MediaStore.Images.Media.DATA));
                Log.e(TAG, "imagePath = " + imagePath);
            }

            // ImageView显示图片
            //1. 为了UI效果的美观, 2等分布局, 需要获得imageview 大小, 然后将选择的图片缩放为imageview大小
            //**注意:在onCreate中使用getHeight & getWidth获得控件的宽高是不行的,这是因为他们自己还没有被度量好**
            Bitmap bitmap = null;
            mHeight = selectedImage.getHeight();
            mWidth = selectedImage.getWidth();
            Log.e(TAG, "width = " + mWidth + ", mHeight = " + mHeight);

            //2. 将图片压缩成ImageView大小的bitmap
            if (imagePath != null && !imagePath.isEmpty()) {
                bitmap = Utils.decodeFile(imagePath, mWidth, mHeight);
                selectedImage.setImageBitmap(bitmap);
                bitmap.recycle();
            }

        }catch (Exception exp) {
            exp.printStackTrace();
            return;
        } finally {
            if (cursor != null && !cursor.isClosed()) {
                cursor.close();
            }
        }

    }
生成特定宽高bitmap
这里用到了Utils中的2个函数,通过文件路径获得bitmap。
- 1. decodeFile(String path)
- 2. decodeFile(String path, int reqWidth, int reqHeight)
详细的 参看源码!
在Wosao中 图片展示使用 [2] 个, 发送给facebook使用 [1] 函数。
sample运行效果
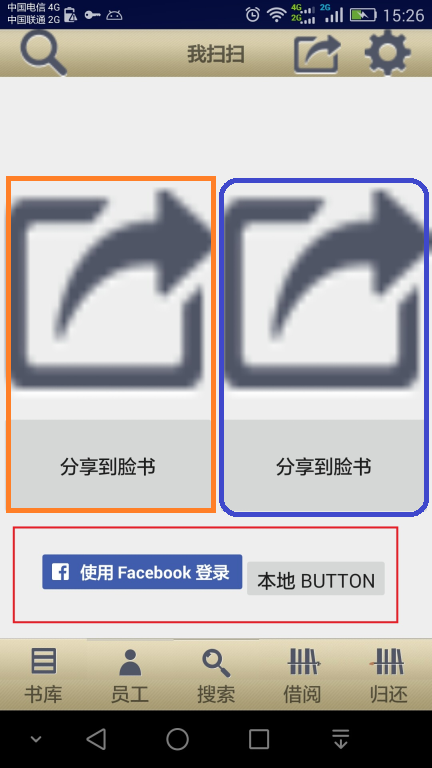
其中黄框分享默认图片到facebook,篮框分享选择图片, 注意篮框上部点击可以选择图片。


 1万+
1万+

 被折叠的 条评论
为什么被折叠?
被折叠的 条评论
为什么被折叠?
 到【灌水乐园】发言


