


 本文详细介绍了在英飞凌XMC4200Platform2Go开发板上如何使用DAVE软件中的定时器功能,包括生成精确时间延迟、周期性任务调度、计时计数、PWM生成以及超时处理。重点阐述了如何通过定时器实现延时和中断,以及在一个定时器上实现多个事件的顺序控制。
目录
设备
- 硬件: 英飞凌XMC4200Platform2Go开发板
- 软件: DAVE
软件中使用定时器的目的和应用
-
生成精确的时间延迟: 定时器可以用于生成精确的时间延迟,以便在程序中执行特定的操作或任务。这在需要精确时间控制的应用中很常见,比如在通信协议中等待特定时间窗口的到来。
-
周期性任务调度: 定时器可以用于调度周期性的任务,比如定期执行传感器数据采集、定期发送心跳信号等。通过定时器,可以确保这些任务在预定的时间间隔内得以执行,提高系统的稳定性和可靠性。
-
计时和计数: 定时器可以用于计时和计数操作,例如测量程序执行时间、计算特定事件发生的次数等。这在性能分析、系统调优和事件统计等方面都非常有用。
-
PWM(脉冲宽度调制)生成: 定时器通常用于生成PWM信号,用于控制电机速度、LED亮度调节、音频输出等应用中。定时器的计数功能可以精确控制PWM信号的周期和占空比。
-
检测超时和超时处理: 定时器还可以用于检测超时情况,并执行相应的超时处理。例如,在通信中,可以使用定时器来检测数据传输超时,并采取相应的错误处理措施。
总的来说,定时器在嵌入式系统中起着至关重要的作用,它们提供了一种有效的方式来控制时间、调度任务和执行时间相关的操作,从而实现系统的功能和性能要求。
本文意图
在项目开发中,我们经常需要实现定时器或延时功能,即在一定时间后触发特定事件。虽然我们可以简单地使用while或for循环来实现延时,但这种方法的延时时间不够精确,因此最好的方法是利用定时器来触发中断。
    for(int i=0;i<40000;i++){
    	__NOP();
    }
实现步骤
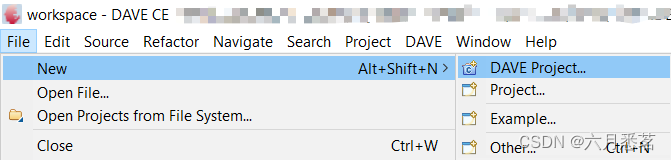
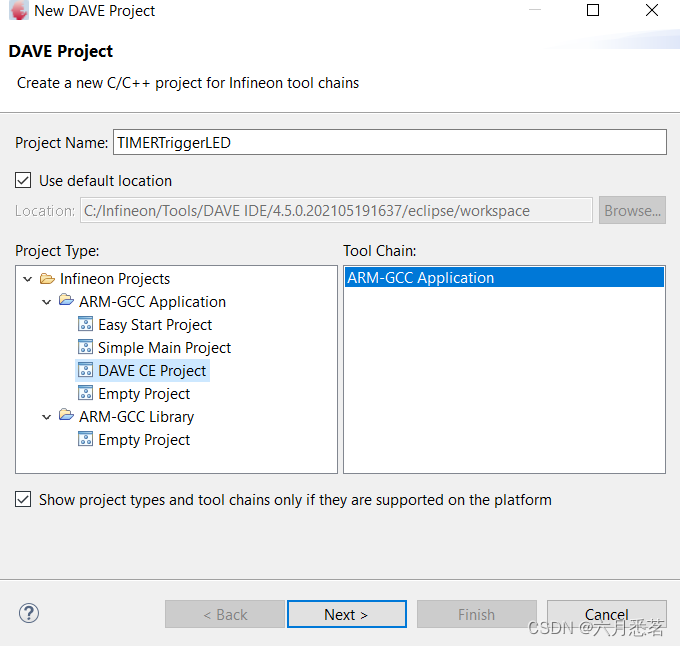
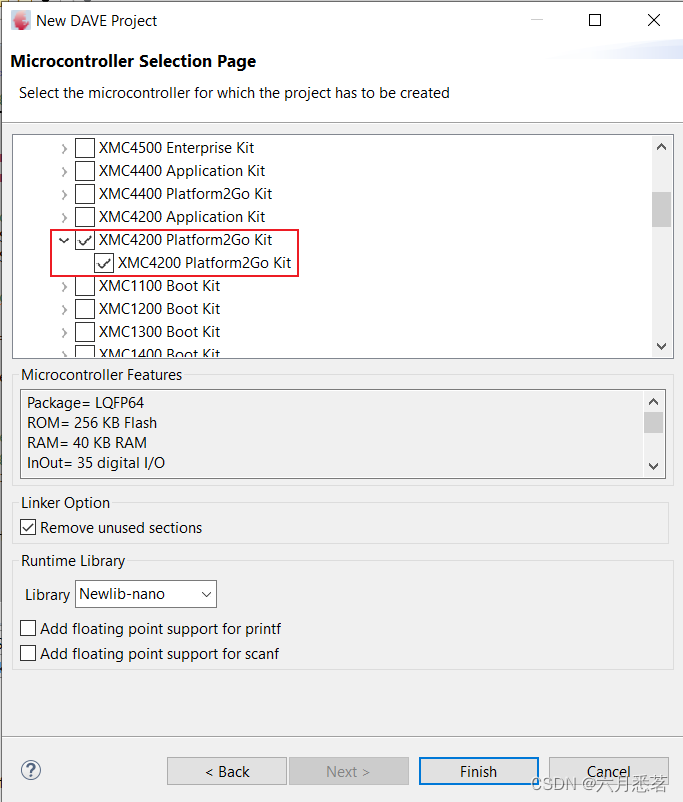
新建DAVE项目
Add new TIMER APP
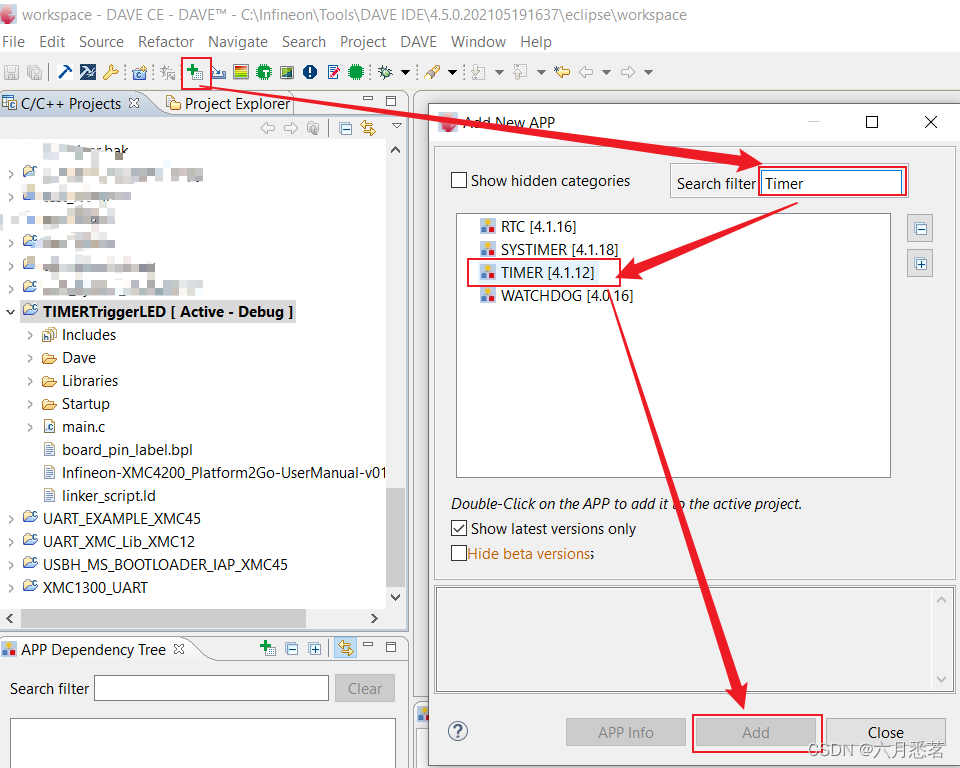
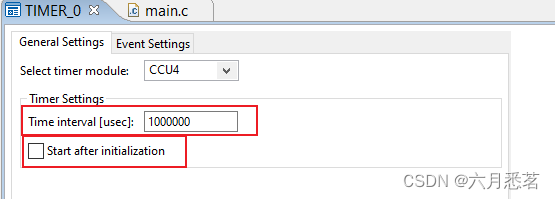
双击TIMER APP,设置时间长度,之后在代码中还可以重新设置。
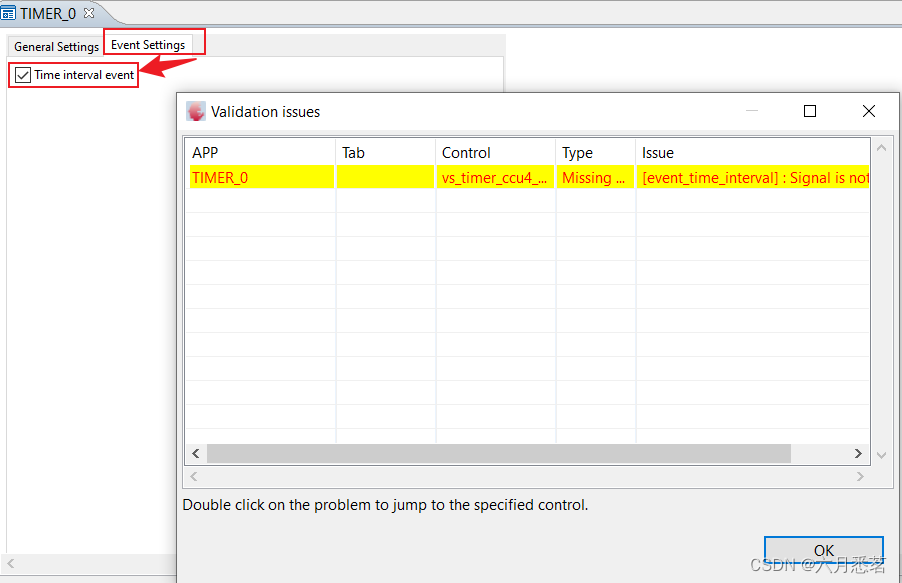
为了触发event,需要额外添加一个Interrupt APP。
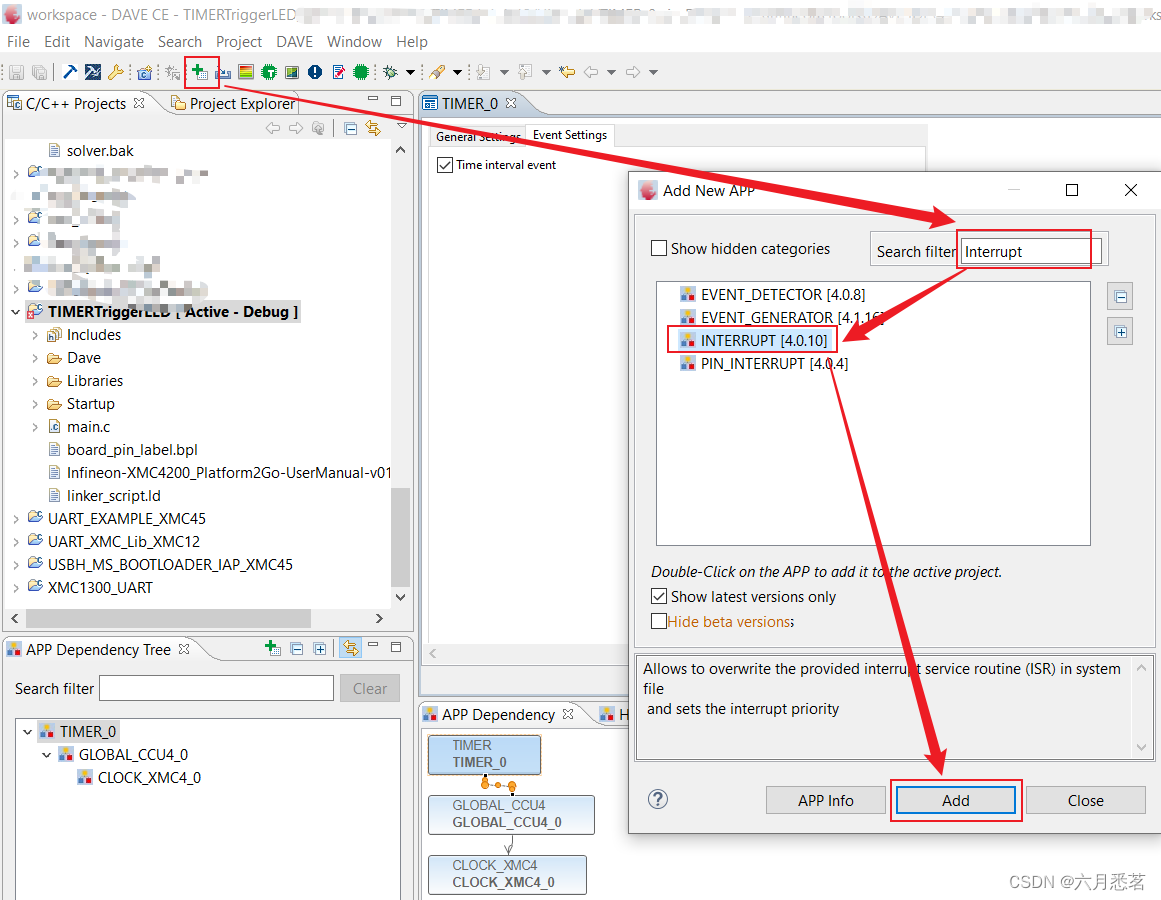
Add Interrupt APP
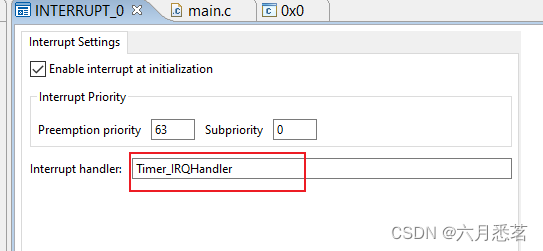
双击Interrupt APP,做一些Configuration。把Interrupt Handler的名字改为自己需要的名称
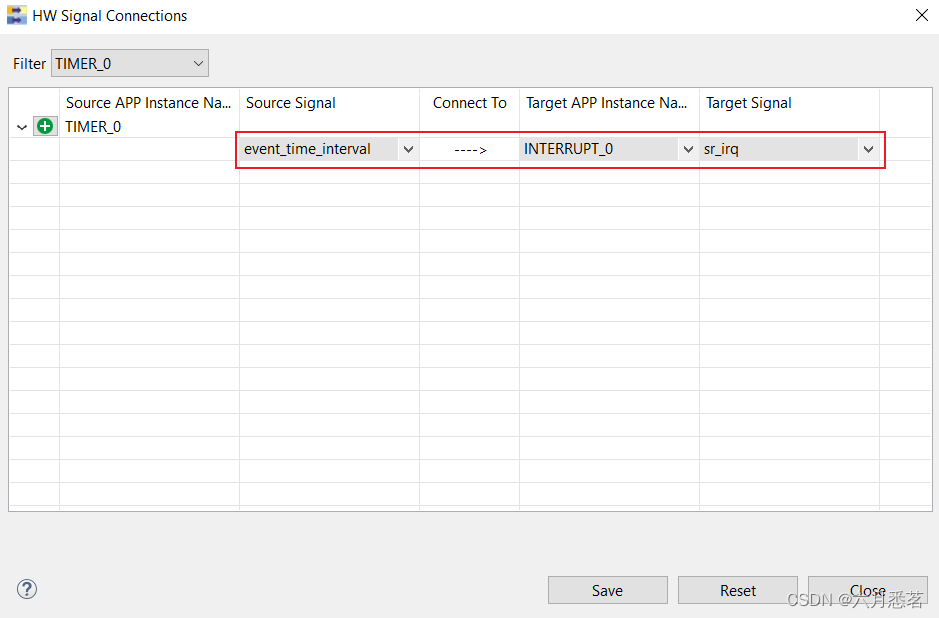
连接2个APP
为了将TIMER和INTERRUPT连接起来,右击TIMER APP, 选择“HW Signal connections"
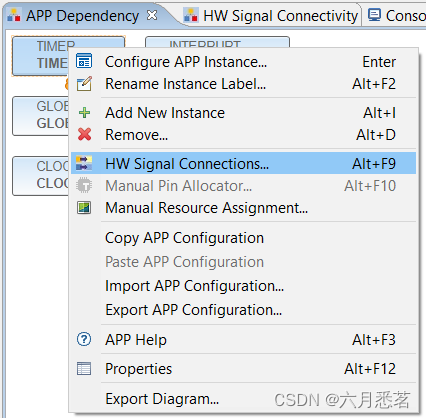
这样的话,当时间条件满足,会触发中断
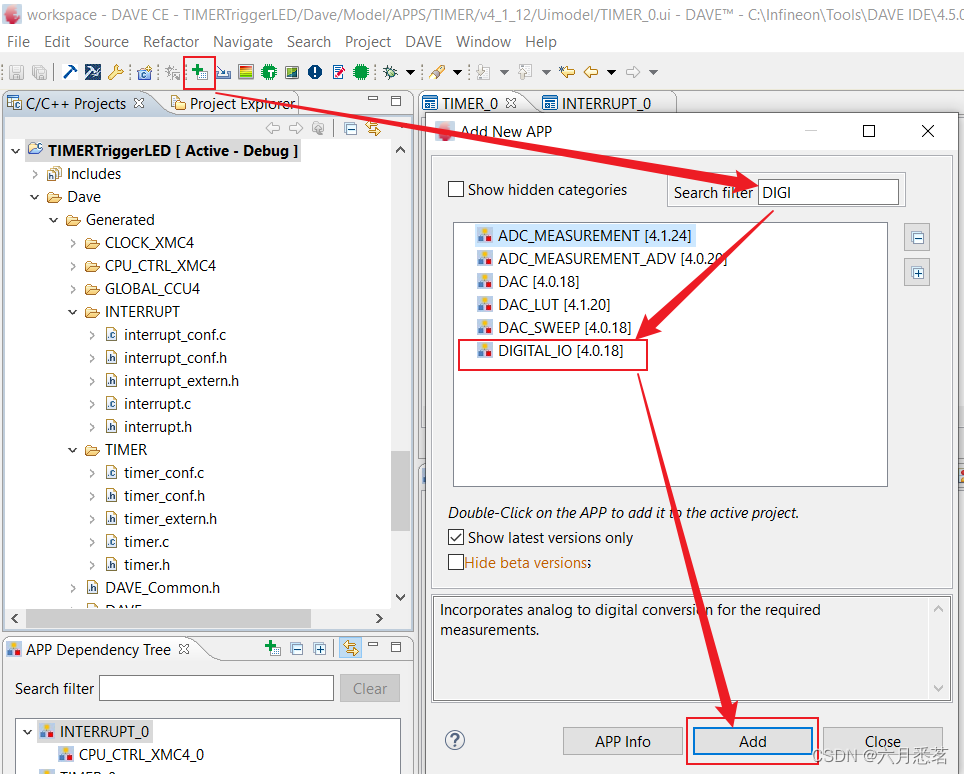
Add DIGITAL_IO APP
因为最后计时结束后想要点亮LED,所以需要添加DIGITAL_IO APP
双击DIGITAL_IO,选择PIN direction 为Input/Output
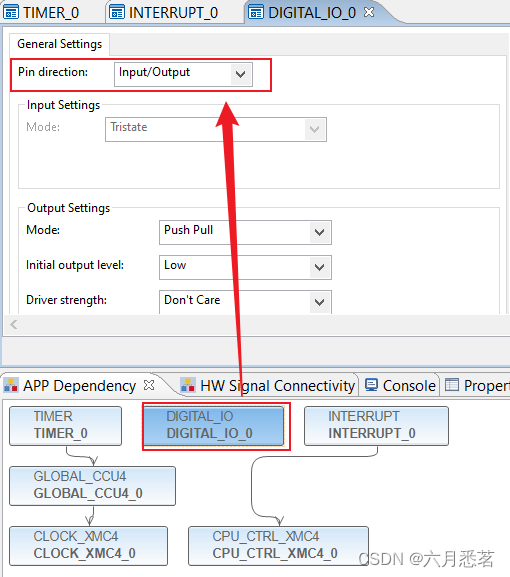
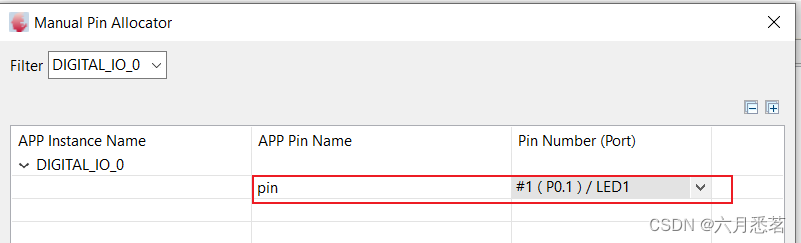
右击APP,进行PIN的配置
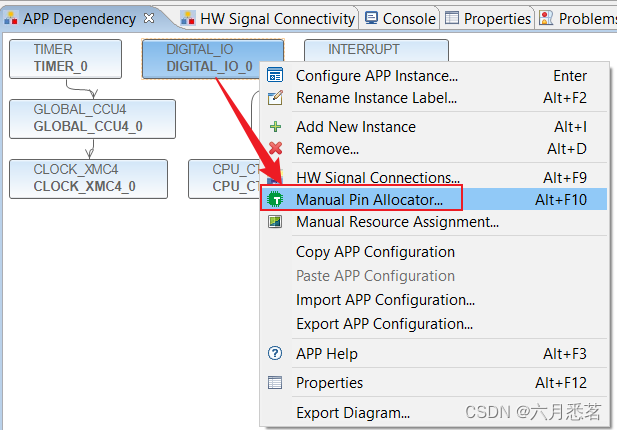
选择LED
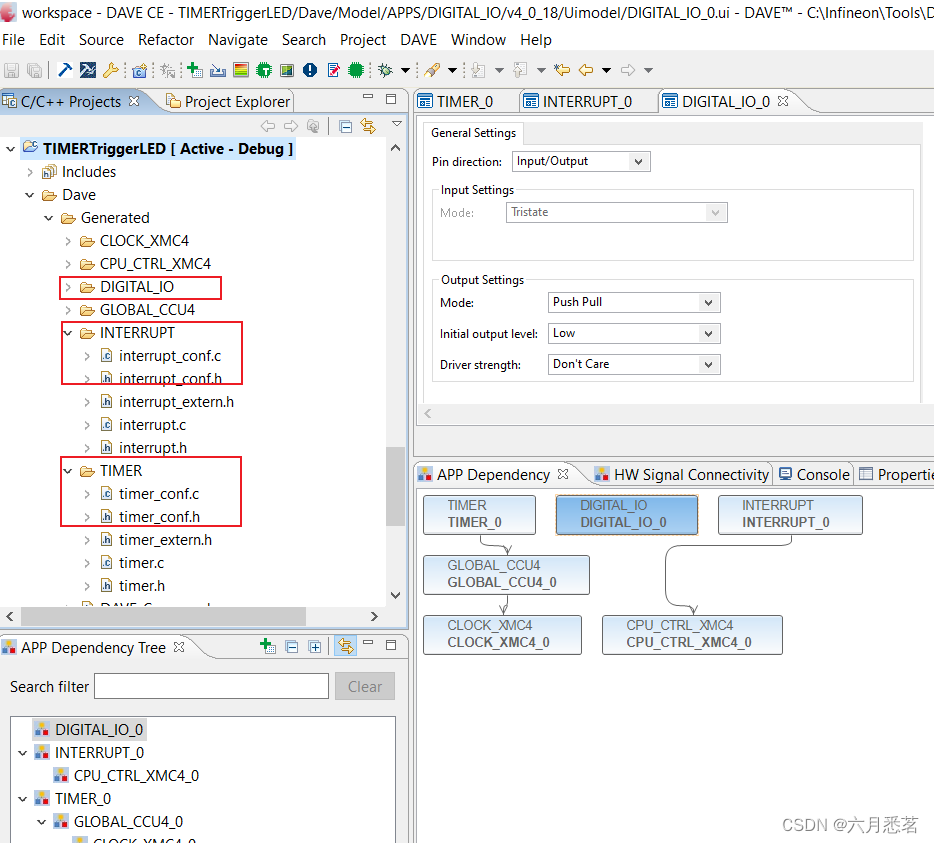
generate code
APP 配置好之后,我们点击generate code

DAVE文件夹下有个Generated 文件夹,会更新。
Coding
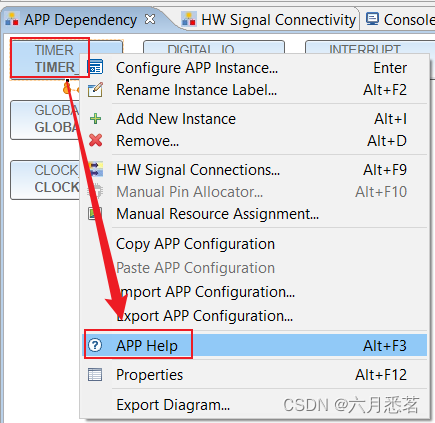
查看APP help
为了了解每个APP 的用法,我们可以右击APP,查看”APP help"

代码
#include "DAVE.h"                 //Declarations from DAVE Code Generation (includes SFR declaration)

/**

 * @brief main() - Application entry point
 *
 * <b>Details of function</b><br>
 * This routine is the application entry point. It is invoked by the device startup code. It is responsible for
 * invoking the APP initialization dispatcher routine - DAVE_Init() and hosting the place-holder for user application
 * code.
 */


int main(void)
{
  DAVE_STATUS_t status;


  status = DAVE_Init();           /* Initialization of DAVE APPs  */

  if (status != DAVE_STATUS_SUCCESS)
  {
    /* Placeholder for error handler code. The while loop below can be replaced with an user error handler. */
    XMC_DEBUG("DAVE APPs initialization failed\n");

    while(1U)
    {

    }
  }

  /* Placeholder for user application code. The while loop below can be replaced with user application code. */
/* Note:Input time interval value has to be scaled by 100 to the actual required value.
	     e.g. : required timer interval value = 30.45 micro seconds
	     Input value to the API = 30.45 * 100 = 3045 */

	  TIMER_SetTimeInterval(&TIMER_0, 100000000U);//1s delay
      TIMER_Start(&TIMER_0);
}

/* 中断 */
void Timer_IRQHandler(void)
{
	  TIMER_Stop(&TIMER_0);
	  DIGITAL_IO_SetOutputHigh(&DIGITAL_IO_0);//点亮LED
	  TIMER_ClearEvent(&TIMER_0);
}
One TIMER with many event
如果TIMER不够用的话,我想我们可以用一个TIMER设置不同的时间长度,触发不同的EVENT。但是,这些计时必须不是parallel的,而是顺序的,不然会混乱。
#include "DAVE.h"                 //Declarations from DAVE Code Generation (includes SFR declaration)

#define TIMER_SET_VAL1 	100000
#define TIMER_SET_VAL2 	200000
#define TIMER_SET_VAL3 	300000

uint16_t count=0;
uint8_t __Timer_Flag1=0,__Timer_Flag2=0,__Timer_Flag3=0;
uint8_t __Timer_Set1=0, __Timer_Set2=0, __Timer_Set3=0;
static int sw1_count=0;
#define SW1	XMC_GPIO_GetInput(XMC_GPIO_PORT0,8)
/**

 * @brief main() - Application entry point
 *
 * <b>Details of function</b><br>
 * This routine is the application entry point. It is invoked by the device startup code. It is responsible for
 * invoking the APP initialization dispatcher routine - DAVE_Init() and hosting the place-holder for user application
 * code.
 */
void Timer_Interrupt(void);
void read_switch(void);
void debounce_delay(uint16_t d);
int main(void)
{
  DAVE_STATUS_t status;

  status = DAVE_Init();           /* Initialization of DAVE APPs  */

  if (status != DAVE_STATUS_SUCCESS)
  {
    /* Placeholder for error handler code. The while loop below can be replaced with an user error handler. */
    XMC_DEBUG("DAVE APPs initialization failed\n");

    while(1U)
    {

    }
  }
  //TIMER_Start(&TIMER_0);
  /* Placeholder for user application code. The while loop below can be replaced with user application code. */
  while(1U)
  {
  	read_switch();
	  if(__Timer_Flag1 == 1)
	  {
		  __Timer_Flag1=0;
		  TIMER_SetTimeInterval(&TIMER_0,TIMER_SET_VAL1);
		  TIMER_Start(&TIMER_0);
	  }
	  else if(__Timer_Flag2 == 1 )
	  {
		  __Timer_Flag2=0;
		  TIMER_SetTimeInterval(&TIMER_0,TIMER_SET_VAL2);
		  TIMER_Start(&TIMER_0);
	  }
	  else if(__Timer_Flag3 == 1 )
	  {
		  __Timer_Flag3=0;
		  TIMER_SetTimeInterval(&TIMER_0,TIMER_SET_VAL3);
		  TIMER_Start(&TIMER_0);
	  }
  }
}
void Timer_Interrupt(void)
{
	__NOP();
	__NOP();
	__NOP();
	TIMER_Stop(&TIMER_0);
//	XMC_GPIO_ToggleOutput(XMC_GPIO_PORT0,6);
	if(count++ == 1000)
	{
		TIMER_Stop(&TIMER_0);
//		TIMER_SetTimeInterval(&TIMER_0,100);
//		TIMER_Start(&TIMER_0);
		XMC_GPIO_ToggleOutput(XMC_GPIO_PORT0,6);
		__Timer_Flag1=1;
	}
	else if(count==2000)
	{
		//count=0;
		XMC_GPIO_ToggleOutput(XMC_GPIO_PORT0,7);
		__Timer_Flag2=1;
	}
	else if(count==3000)
	{
		//count=0;
		XMC_GPIO_ToggleOutput(XMC_GPIO_PORT0,7);
		__Timer_Flag3=1;
	}
}
void read_switch(void)
{


	if(SW1 == 0)
	{
		sw1_count++;
		while(SW1 == 0);
		debounce_delay(0x1000);
		if(sw1_count >3)
		{
			sw1_count=0;
		}
		else
		{}
		if(sw1_count == 1)
		{
			__Timer_Flag1=1;
		}
		else if(sw1_count == 2)
		{
			__Timer_Flag2=1;
		}
		else if(sw1_count == 3)
		{
			__Timer_Flag3=1;
		}
	}
}
void debounce_delay(uint16_t d)
{
	while(d--)
	{}
}


 1458
1458

 被折叠的 条评论
为什么被折叠?
被折叠的 条评论
为什么被折叠?
 到【灌水乐园】发言


