


 本文介绍了如何在Eclipse中结合内置的管理式构建系统和makefile的优势,提供了一个模板,使用户能更好地控制构建过程,同时允许扩展到版本控制系统和自动化测试。作者强调了makefile的灵活性和使用makefile进行项目管理的好处。
The benefit of an IDE like Eclipse is: it makes working with projects very easy, as generates make files and it takes and automatically manages the make file(s). But sometimes this might not be what I want because I need greater flexibility and control, or I want to use the same make files for my continues integration and automated testing system. In that case a hand crafted make file is the way to go.
One thing does not exclude the other: This article explains how to use make files with Eclipse with similar comfort as the managed build system in Eclipse, but with the unlimited power of make files:
Outline
Eclipse comes with a built-in build system (managed make): I can configure the compiler linker settings, and Eclipse takes care about the rest. In this tutorial I’ll explain how I can create and use hand crafted make files with Eclipse. The proposed make file and template makes it easy to control the build system with make. The proposed approach requires that every new source file added to the project requires a extension of the make file, but the make file with auto-generate dependency files for all the included header files.
The benefit of using make files are:
- Easier to store and track in a version control system than the Eclipse .cproject files and settings
Complete control of the build and make process - Rather trivial to extend with other steps like working with a version control system or an automated test system as part of the build process
- Can use the same build (make) both inside the IDE and outside (e.g. on an automated build system)
- and writing make files is fun too 🙂
- The make file approach requires understanding the build process, and for this it is helpful to understand what is used with the managed make, so I can use it as a base or inspiration.
Preconditions
To use make files in Eclipse, I need the following:
- Eclipse IDE. I’m using the NXP MCUXpresso IDE v10.0.2 (Neon based), but any other Eclipse distribution would do it too.
- Installed GNU toolchain with make utility. Usually this comes with a bundled Eclipse IDE or you can use a DIY toolchain.
- Compiler and linker settings for your target device. Use the options from an existing example project.
- Startup and linker files. Here again you can borrow from an existing example project.
- Application source files. I recommend to start with an ’empty’ main first.
A good way to get the necessary files and options is to look at an existing example project which usually is using ‘manged make’.
💡 The Author has put the sources of this project on GitHub. Check the link to the GitHub project in the Links section at the end of this article.
Coming from Eclipse Managed Make
With the managed make system, Eclipse detects the files present in the project (e.g. *.c) and generates the make files automatically:
This generates make files:
With a build tool integration, I have a GUI where I can set the options for the tools:
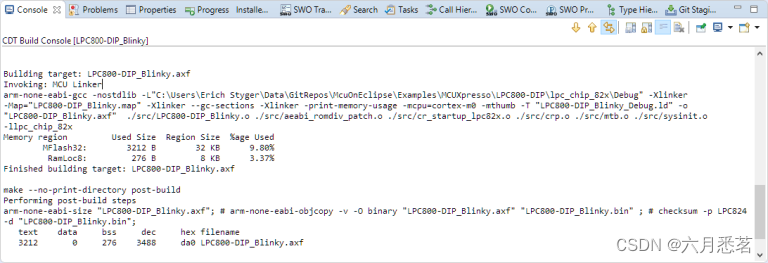
All this information gets added to the make files, and if I do a build, it calls the make utility (or builder) to build it with all the necessary command lines. I can can see what it does with checking the console view output:
With this, I should have everything to make a make file project.
Creating Make File Project
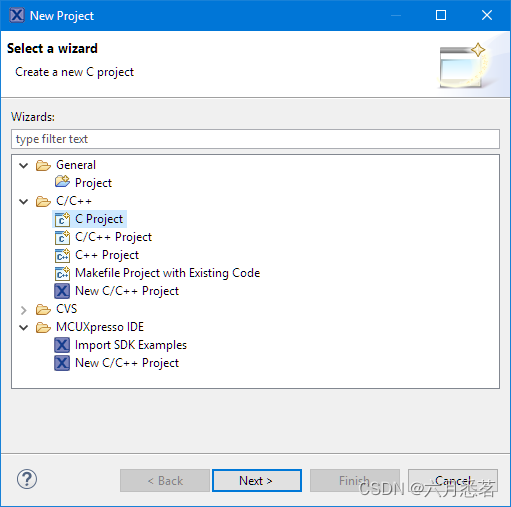
I’m creating a new make file project in Eclipse with the menu File > New Project:
As with many things in Eclipse, there are multiple ways to do things.
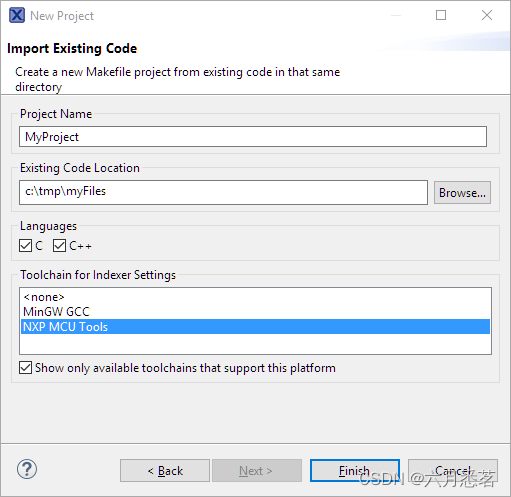
If I have existing code I want to add, I can use the ‘Makefile Project with Existing Code’. Then I can give a name and an existing code location (folder). It will then create the project inside that code location folder and add all the source files to the project:
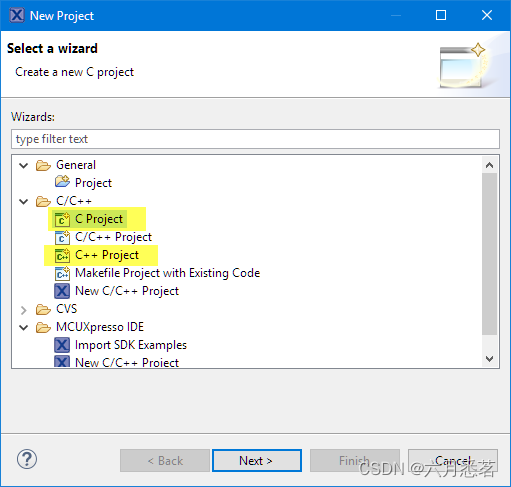
The generic way is to generate a C or C++ project:
Then give the project a name and select an empty make file project with the supported toolchain:
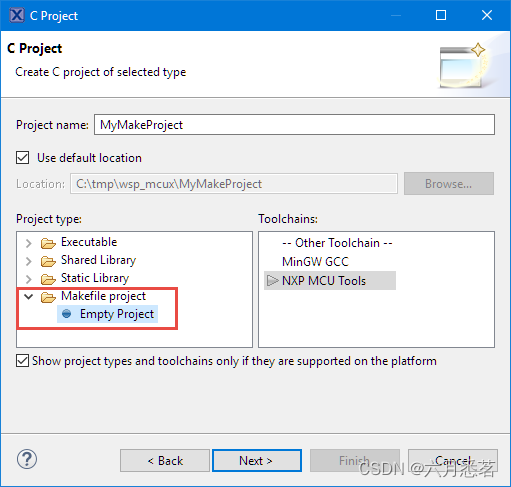
Then press ‘Next’ and go through the remaining dialogs depending on the selected toolchain. This creates an empty project like this:

Application File
To have something to compile, add a new source file:
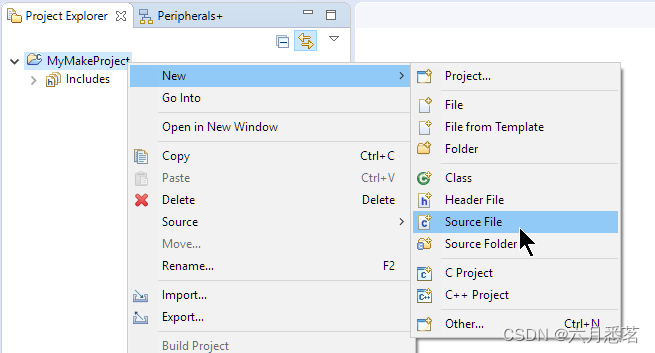
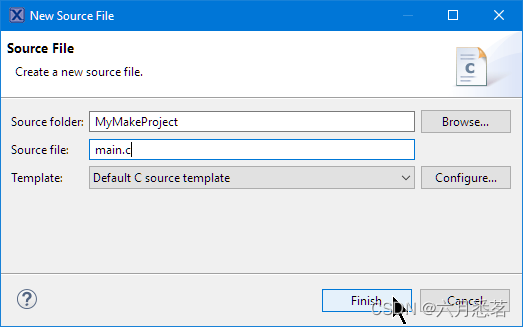
Name it main.c or whatever you like:
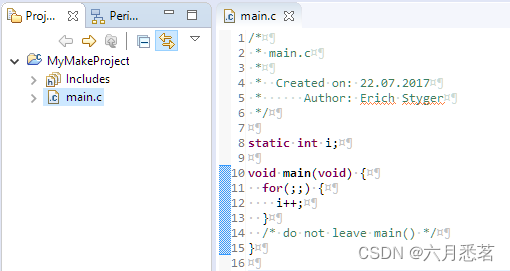
Then add a main() routine with some code, e.g.
static int i;

void main(void) {
  for(;;) {
    i++;
  }
  /* do not leave main() */
}
Makefile
Next, use the context menu New > File on the project folder:
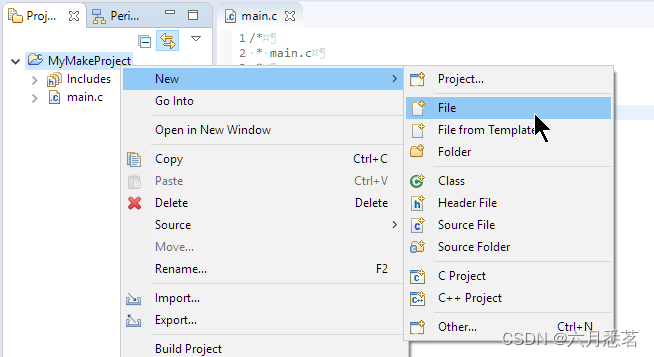
Create a file named ‘makefile’ in the project:
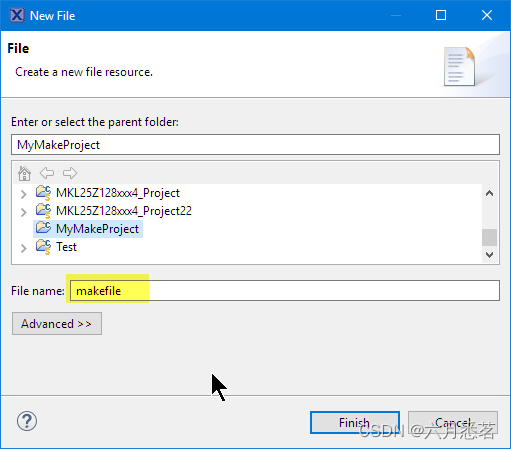
This adds an empty make file.
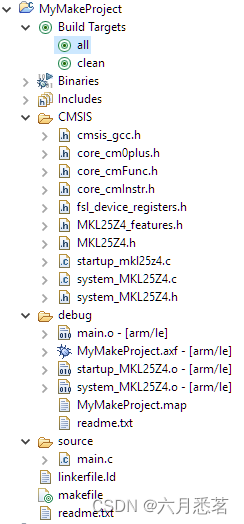
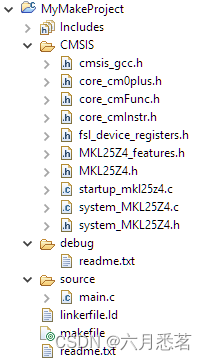
CMSIS, System Files and Startup
The next step heavily depends on the device used. I’m using in this example the NXP FRDM-KL25Z board. To structure things, I have created directories for the sources. The special ‘debug‘ folder will be used to place the object and executable files.
Make File Syntax
The next step is to implement the make file content. A generic make file looks like this:
all: hello.axf

clean:
 rm main.o hello.axf

hello.axf: main.o
 gcc -g -o hello main.o

main.o:
 gcc -c -g main.c
Each entry in the make file has the following syntax:
<target>: <list of dependencies>
<tab>Commands to execute
💡 Note that there needs to be a <TAB> character in front of each command!
There are two special targets named all an clean. ‘clean’ is used to delete all temporary files, and ‘all’ is used to build the application.
Makefile Content
In the makefile I define variables for deleting files, the compiler and the linker:
############################
# Command for removing files
RM := rm -rf

############################
# Compiler
CC := arm-none-eabi-gcc

############################
# Linker
LL := arm-none-eabi-gcc
Then I define a macro for the final executable I want to make:
############################
# Binary/exectable to build
EXE := \
 ./debug/MyMakeProject.axf
Next a list of all object files. Because the object files will be placed in the ‘debug’ folder, this is part of the name:
############################
# List of object files
OBJS := \
 ./debug/main.o \
 ./debug/startup_MKL25Z4.o \
 ./debug/system_MKL25Z4.o
The next thing is something really cool. If main.c includes the header file main.h, I would have to write a rule like
main.o: main.c main.h
  $(CC) -c main.c -o main.o
But this is very painful: I have to write the rule for each file and need to keep track of the header files. Instead, I let the compiler create dependency files later below with extension .d (for dependency). The dependency file main.d looks like this:
debug/main.o debug/main.d: source/main.c source/main.h
source/main.h:
I’m including the files as additional rule files if it is not the ‘clean’ target:
############################
# Include generated dependcy files (only if not clean target)
ifneq ($(MAKECMDGOALS),clean)
ifneq ($(strip $(C_DEPS)),)
-include $(C_DEPS)
endif
endif
The following is the set of compiler options which I can use later:
############################
# Compiler options
CC_OPTIONS := -c -std=gnu99 -O0 -g -ffunction-sections -fdata-sections -fno-builtin -mcpu=cortex-m0plus -mthumb -DCPU_MKL25Z128VLK4 -D__USE_CMSIS -I"CMSIS" -I"source"

Similar, the options for the linker:


############################
# Linker Options
LL_OPTIONS := -nostdlib -Xlinker -Map="debug/MyMakeProject.map" -Xlinker --gc-sections -Xlinker -print-memory-usage -mcpu=cortex-m0plus -mthumb -T linkerfile.ld -o $(EXE)

Next the target to build the application:


############################
# Main (all) target
all: $(EXE)
 @echo "*** finished building ***"

Followed by the target to do a ‘clean’:


############################
# Clean target
clean:
 -$(RM) $(EXECUTABLES) $(OBJS) $(EXE)
 -$(RM) ./debug/*.map
 -@echo ' '
Below is the rule to link the application with all the object files:
############################
# Rule to link the executable
$(EXE): $(OBJS) $(USER_OBJS) linkerfile.ld
 @echo 'Building target: $@'
 @echo 'Invoking: Linker'
 arm-none-eabi-gcc $(LL_OPTIONS) $(OBJS) $(LIBS)
 @echo 'Finished building target: $@'
 @echo ' '
Next, I specify rules to build the object files. I have to specify a rule for each subfolder I’m going to use:
############################
# Rule to build the files in the source folder
./debug/%.o: ./source/%.c
 @echo 'Building file:


lt;' $(CC) $(CC_OPTIONS) -MMD -MP -MF"$(@:%.o=%.d)" -MT"$(@:%.o=%.o)" -MT"$(@:%.o=%.d)" -o "$@" "


lt;" @echo 'Finished building:


lt;' @echo ' ' ############################ # Rule to build the files in the CMSIS folder ./debug/%.o: ./CMSIS/%.c @echo 'Building file:


lt;' $(CC) $(CC_OPTIONS) -MMD -MP -MF"$(@:%.o=%.d)" -MT"$(@:%.o=%.o)" -MT"$(@:%.o=%.d)" -o "$@" "

lt;" @echo 'Finished building:


lt;' @echo ' '
💡 The option -MMD -MP -MF”$(@:%.o=%.d)” -MT”$(@:%.o=%.o)” is generating the dependency .d file for each source file compiled.
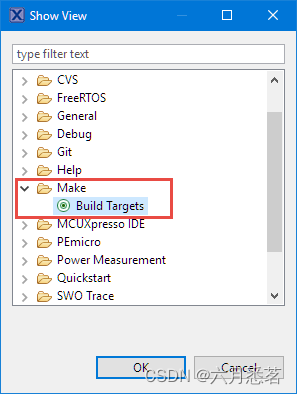
Make Build Targets
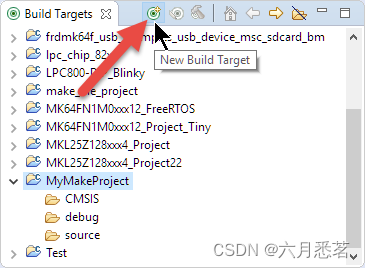
To build the project, the usual ‘make/build’ and ‘clean’ menu/commands in Eclipse can be used. But there is another cool way: Build targets!
For this, open the Build Targets view (menu Windows > Show Views > Other):
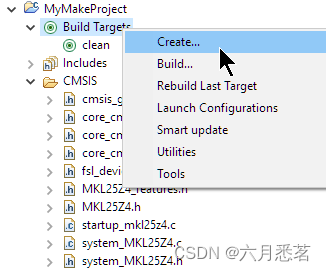
In that view, select the project and click the ‘New Build Target’ button:
Create a target for ‘clean’:

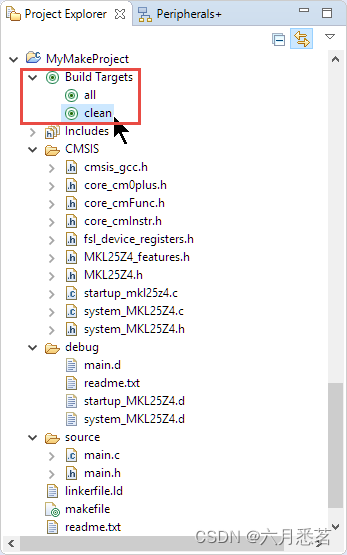
This adds a ‘Build Targets’ group to the project. Use the context menu to add a new target for ‘all’:
With this, I can double-click or use the context menu to execute a target in the makefile 😃.
Summary
Managed make and build in Eclipse is a great feature: it is simple and easy to use, and probably the right thing for 98% of the use cases with an IDE like Eclipse. But if I want to use normal make files with Eclipse, this is not hard. With the proposed make file template I have to extend the list of files if new sources get added to the project. Otherwise everything is taken care of. Writing make files requires a learning phase, but this can be a well invested effort.
Happy Making 🙂
LINKS
Project and files of this article on GitHub:
MyMakeProject
Make file tutorial:
make-with-eclipse
GNU Make:
https://www.gnu.org/software/make/
http://make.mad-scientist.net/papers/advanced-auto-dependency-generation/


 519
519

 被折叠的 条评论
为什么被折叠?
被折叠的 条评论
为什么被折叠?
 到【灌水乐园】发言


