


1.简单用法
先设置左边的布局文件
<?xml version="1.0" encoding="utf-8"?>
<LinearLayout xmlns:android="http://schemas.android.com/apk/res/android"
    android:layout_width="match_parent"
    android:layout_height="match_parent">
    <Button
        android:id="@+id/button"
        android:layout_width="wrap_content"
        android:layout_height="wrap_content"
        android:layout_gravity="center_horizontal"
        android:text="button"/>
</LinearLayout>
在设置右边的布局文件
<?xml version="1.0" encoding="utf-8"?>
<LinearLayout xmlns:android="http://schemas.android.com/apk/res/android"
    android:background="#00ff00"
    android:layout_width="match_parent" android:layout_height="match_parent">
    <TextView
        android:layout_width="wrap_content"
        android:layout_height="wrap_content"
        android:layout_gravity="center_horizontal"
        android:textSize="20sp"
        android:text="This is  right fragement"
        />
</LinearLayout>
2.分别新建两个类加载布局文件
加载左边的布局文件的类
public class LeftFragement extends Fragment {

    @Nullable
    @Override
    public View onCreateView(LayoutInflater inflater, ViewGroup container, Bundle savedInstanceState) {
        //加载布局并返回view
        View view =inflater.inflate(R.layout.left_fragement, container, false);
        return view;
    }
}
加载右边的布局文件的类
public class RightFragment extends Fragment {
    @Nullable
    @Override
    public View onCreateView(LayoutInflater inflater, ViewGroup container, Bundle savedInstanceState) {
        View view = inflater.inflate(R.layout.right_fragement,container,false);
        return view;
    }
}
在主窗口的布局中设置
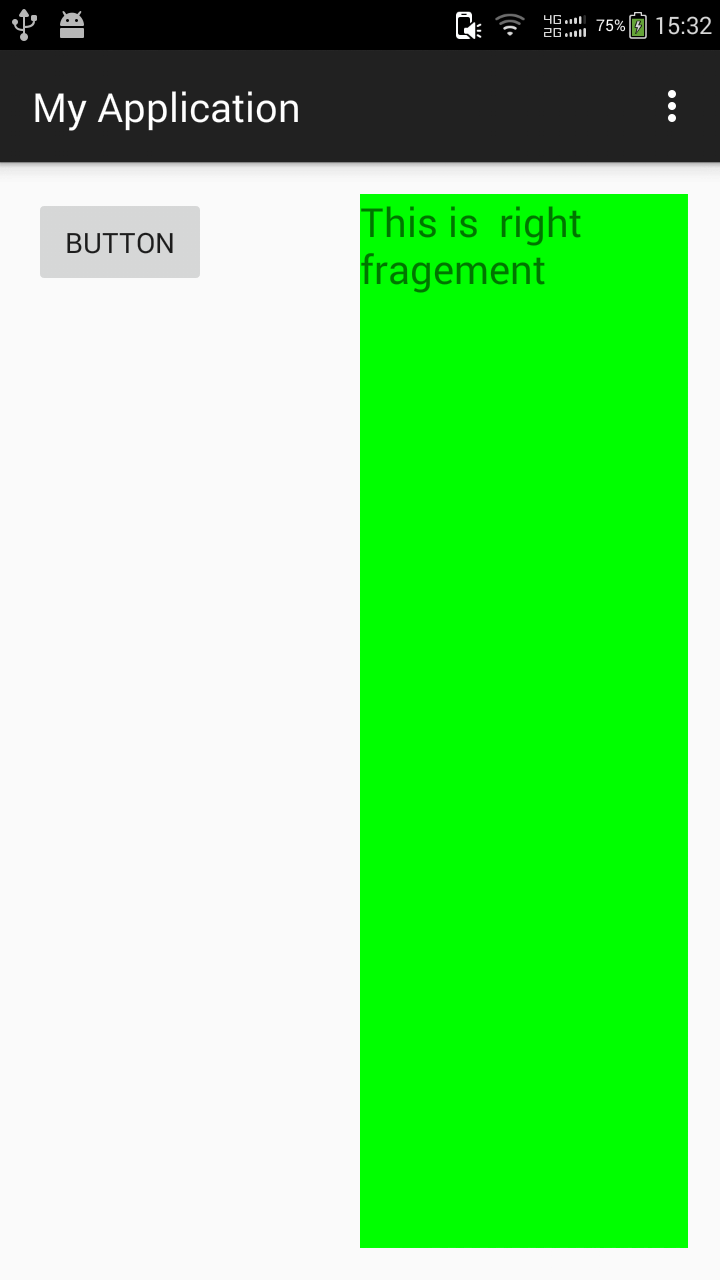
<LinearLayout xmlns:android="http://schemas.android.com/apk/res/android"
    xmlns:tools="http://schemas.android.com/tools" android:layout_width="match_parent"
    android:layout_height="match_parent" android:paddingLeft="@dimen/activity_horizontal_margin"
    android:paddingRight="@dimen/activity_horizontal_margin"
    android:paddingTop="@dimen/activity_vertical_margin"
    android:paddingBottom="@dimen/activity_vertical_margin" tools:context=".MainActivity">

   <fragment
       android:name="com.example.administrator.myapplication.LeftFragement"
       android:id="@+id/left_fragment"
       android:layout_width="0dp"
       android:layout_height="match_parent"
       android:layout_weight="1"/>
    <fragment
        android:name="com.example.administrator.myapplication.RightFragment"
        android:id="@+id/right_fragment"
        android:layout_width="0dp"
        android:layout_weight="1"
        android:layout_height="match_parent"/>
</LinearLayout>
关键是android:name这个属性这个属性是找到那个类(要带上包名)
在真机上的效果
动态添加碎片
新建一个布局文件
<LinearLayout xmlns:android="http://schemas.android.com/apk/res/android"
    android:background="#ffff00"
    android:layout_width="match_parent" android:layout_height="match_parent">
    <TextView
        android:text="This is another right fragment"
        android:textSize="20sp"
        android:layout_width="wrap_content"
        android:layout_height="wrap_content" />
</LinearLayout>
加载布局文件的类
public class AnotherRightFragment extends Fragment {
    @Nullable
    @Override
    public View onCreateView(LayoutInflater inflater, ViewGroup container, Bundle savedInstanceState) {
        View view = inflater.inflate(R.layout.another_right_fragment,container,false);
        return view;
    }
}
在主窗口的布局文件中
<LinearLayout xmlns:android="http://schemas.android.com/apk/res/android"
    xmlns:tools="http://schemas.android.com/tools" android:layout_width="match_parent"
    android:layout_height="match_parent" android:paddingLeft="@dimen/activity_horizontal_margin"
    android:orientation="horizontal"
    android:paddingRight="@dimen/activity_horizontal_margin"
    android:paddingTop="@dimen/activity_vertical_margin"
    android:paddingBottom="@dimen/activity_vertical_margin" tools:context=".MainActivity">
   <fragment
       android:name="com.example.administrator.myapplication.LeftFragement"
       android:id="@+id/left_fragment"
       android:layout_width="0dp"
       android:layout_height="match_parent"
       android:layout_weight="1"/>
  <FrameLayout
      android:id="@+id/right_layout"
      android:layout_weight="1"
      android:layout_width="0dp"
      android:layout_height="match_parent"></FrameLayout>
        <fragment
            android:name="com.example.administrator.myapplication.RightFragment"
            android:id="@+id/right_fragment"
            android:layout_width="0dp"
            android:layout_weight="1"
            android:layout_height="match_parent"/>
</LinearLayout>
在类中给button设置监听事件
button = (Button)this.findViewById(R.id.button);
button.setOnClickListener(new View.OnClickListener() {
    @Override
    public void onClick(View v) {
        //1.创建待添加的碎片实例
        AnotherRightFragment anotherRightFragment = new AnotherRightFragment();
        //2.获取FragmentManager
        FragmentManager fragmentManager = getFragmentManager();
        //3.开启一个事务
        FragmentTransaction fragmentTransaction = fragmentManager.beginTransaction();
        //4.向容器中添加碎片,一般使用replace()方法需要传入容器的id和待添加碎片的实例
        fragmentTransaction.replace(R.id.right_layout,anotherRightFragment);
        //这行代码是实现按手机的Back键后返回上一个碎片的内容这里的参数一般传入null
        fragmentTransaction.addToBackStack(null);
        //5.提交事务
        fragmentTransaction.commit();
    }
});
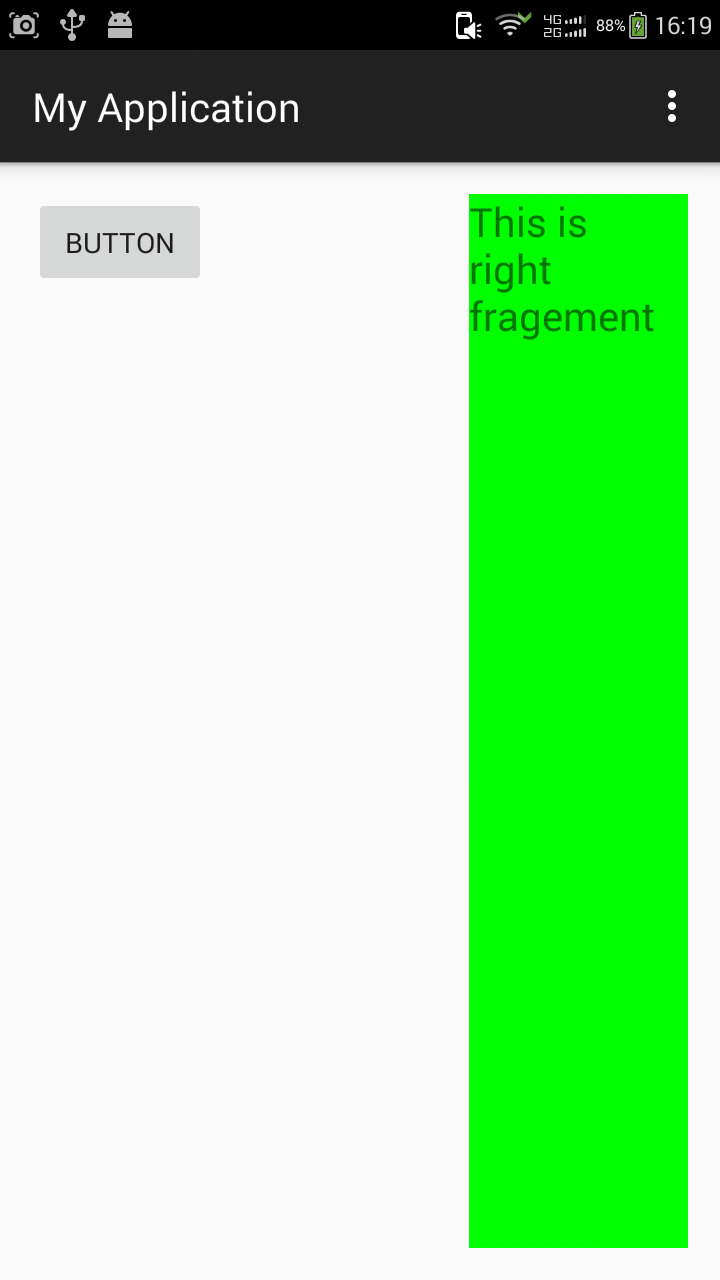
在真机上的效果
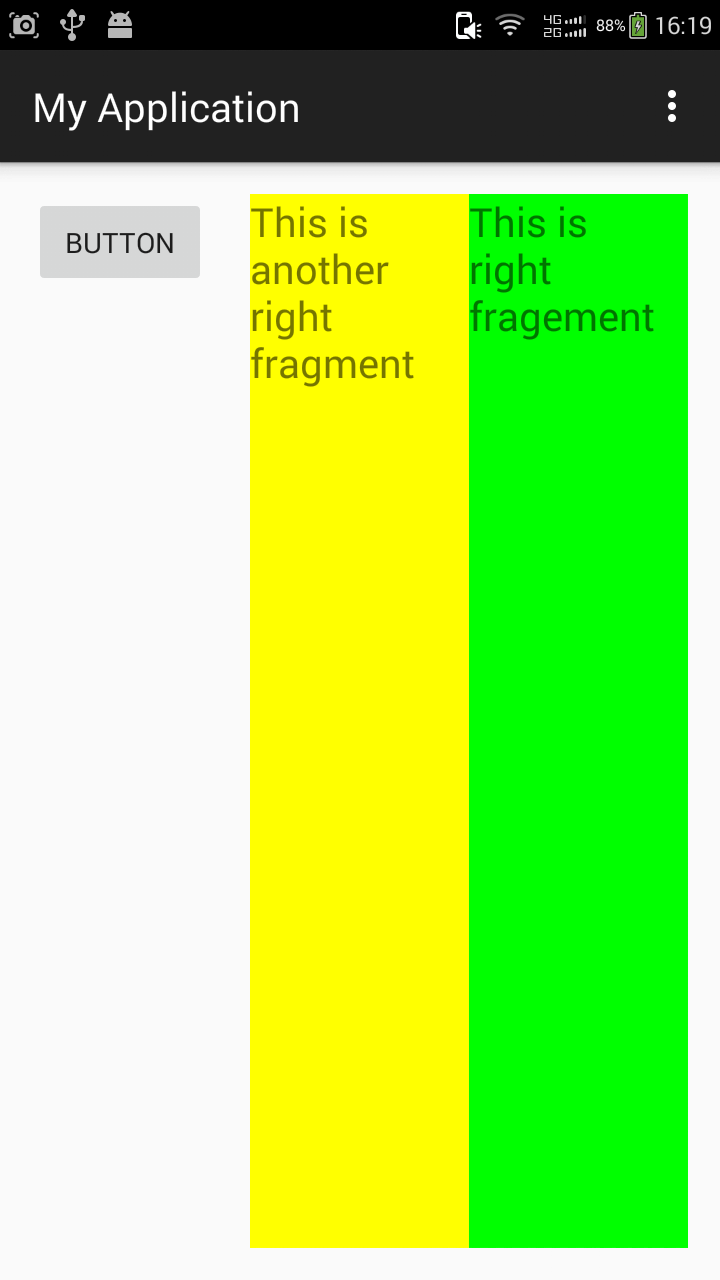
点击按钮后的效果
碎片和活动之间进行通信
在活动中调用碎片的方法 通过 RightFragment rightFragment = (RightFragment)getFragmentManager().findFragmentbyId(R.id.right_fragment);
在碎片中调用活动的方法 在每个碎片中可以通过getActivity() 方法来得到和当前碎片相关联的活动实例 MainActivity activity = (MainActivity)getActivity();
在碎片和碎片之间通信 在碎片A中获取和它相关联的活动,在通过这个活动去获取另外一个碎片的实例,这样就可以实现不同碎片之间的通信


 678
678

 被折叠的 条评论
为什么被折叠?
被折叠的 条评论
为什么被折叠?
 到【灌水乐园】发言


