


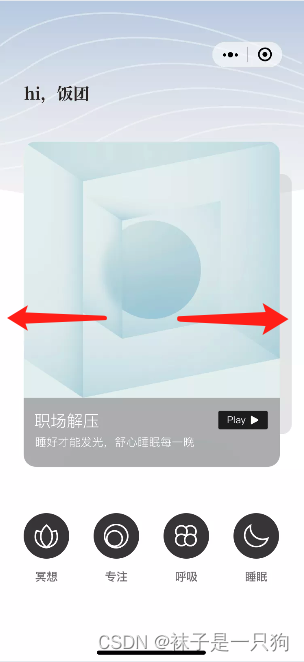
效果图是这样的,可以左右滑动
前言
动画:透明度 + 缩放
就是swiper的切换效果,那为什么不用swiper呢?
微信小程序内置的swiper组件,还是挺不友好的。像h5一样的swiper插件在小程序是没有的。
一、实现左滑右滑事件捕捉
// 滑动手势开始事件
  startEvent: function(event) {
    if (event.changedTouches[0].pageX) {
      this.data.startPageX = event.changedTouches[0].pageX
    } else {
      this.data.startPageX = event.changedTouches[0].x
    }
  },
  // 滑动手势结束事件
  endEvent: function(event) {
    let endPageX = 0
    if (event.changedTouches[0].pageX) {
      endPageX = event.changedTouches[0].pageX
    } else {
      endPageX = event.changedTouches[0].x
    }
    const moveX = endPageX - this.data.startPageX
    if (Math.abs(moveX) < 20) return
    if (moveX > 0) {
      // 右滑
      this.prev()  //这里写你的右滑方法
    } else {
      // 左滑
      this.next()  //这里写你的左滑方法
    }
  },
在卡片滑动区域绑定滑动方法
<!-- 中间的卡片 -->
		<div class="slider-container" bindtouchstart="startEvent" bindtouchend="endEvent">

		</div>
这时候左右滑动事件捕捉完毕,接下来开始写动画
二、左右滑动用wx.animation
1. 首先静态布局要完整,接下来才能实施自己的动画
<!-- 中间的卡片 -->
<div class="slider-container" bindtouchstart="startEvent" bindtouchend="endEvent">
<div class="{{card.isActive ? 'slide-item-active': card_index==cardsData.length-1? 'slide-item-last' : 'slide-item'}}" wx:for="{{cardsData}}" bindtap="cardLinkByType" data-type="{{card.type}}" data-index="{{card.index || 0}}" wx:for-item="card" wx:for-index="card_index" wx:key="unique" animation="{{card.animation}}" style="z-index:{{card.zIndex?card.zIndex:199 - card_index}}" data-idx="{{card_index}}" data-tittle="{{card.title}}">
	<!-- <image src="/images/page_index/缓解烦躁.jpg" mode='widthFix'></image> -->
	<image src="/images/page_index/card_{{card.image_name}}.jpg" mode='widthFix'></image>
	<div class="bottom-mask">
		<div class="title">{{card.title}}</div>
		<div class="desc">{{card.desc}}</div>
		<image src="/images/page_index/btn_play@2x.png" mode='widthFix'></image>
	</div>
</div>
</div>
.slider-container {
  margin-top: -65px;
  position: relative;
  display: flex;
  justify-content: center;
  align-items: center;
  z-index: 99;
  height: 800rpx;
  width: 100%;
}

.slide-item-active {
  width: 630rpx;
  height: 800rpx;
  border-radius: 20rpx;
  overflow: hidden;
  position: absolute;
  transform: translateX(0%);
}
.slide-item-last {  /* 注意: // 因为可以左右滑动 所以初始化左边就有一个隐藏的 (这里放的是最后一个,也就是至少有3个卡片)*/
  width: 630rpx;
  height: 800rpx;
  border-radius: 20rpx;
  overflow: hidden;
  position: absolute;
  transform: translateX(-500px);
}
.slide-item {
  border-radius: 20rpx;
  overflow: hidden;
  position: absolute;
  right: 30rpx;
  width: 550rpx;
  height: 640rpx;
}

.slide-item-active image ,.slide-item image,.slide-item-last image{
  width: 100%;
  height: auto;
  display: block;
}
2. 循环动画
原理: 将卡片对象的animation初始化为null , 在需要动画的时候用this.setData 给他赋值动画:
 prev: function() {
    this.animationCardRight()
  },
  next: function() {
    this.animationCardLeft()
  },
  animationCardLeft: function() {
    clearInterval(this.timer);
    let translateX = -500;
    let animation = wx.createAnimation({
      duration: 680,
      timingFunction: "ease",
    });
    animation.translateX(translateX).opacity(0.5).step();
    let animationNext = wx.createAnimation({
      duration: 680,
      timingFunction: "ease",
    });
    animationNext.width('630rpx').height('100%').right('60rpx').step();
    let _index = this.data.currentActiveCardIndex;
    let _nextIndex = this.data.currentActiveCardIndex + 1;
    let _preIndex = this.data.currentActiveCardIndex - 1;

    // 现在已经是最后一个 做交接
    if (this.data.currentActiveCardIndex == this.data.cardsData.length - 1) {
      _nextIndex = 0;
    }
    // 当下一个是最后一个的时候 把第一个移动到那里
    let _next_nextIndex = _nextIndex + 1;
    if (_nextIndex == this.data.cardsData.length - 1) {
      _next_nextIndex = 0;
    }

    // 把左边的移动到右边下面藏起来
    let animationNextNext = wx.createAnimation({
      duration: 0,
      timingFunction: "ease",
    });
    animationNextNext.width('550rpx').height('640rpx').opacity(1).translateX(0).right('30rpx').step();
    this.setData({
      ['cardsData['+ _index +'].animation']: animation.export(),
      ['cardsData['+ _nextIndex +'].animation']: animationNext.export(),
      ['cardsData['+ _next_nextIndex +'].animation']: animationNextNext.export(),
      ['cardsData['+ _index +'].zIndex']: this.data.zIndexInit,
      ['cardsData['+ _nextIndex +'].zIndex']: this.data.zIndexInit-2,
      ['cardsData['+ _next_nextIndex +'].zIndex']: this.data.zIndexInit-3,
    })
    this.data.zIndexInit--
    this.data.currentActiveCardIndex = _nextIndex
    setTimeout(()=>{
      this.createBanerTimer();
    },680)
  },
  animationCardRight: function() {
   // 略
  },
总结
可以在微信搜索【简单心理冥想睡眠】 小程序,首页即可看到效果


 999
999


 被折叠的 条评论
为什么被折叠?
被折叠的 条评论
为什么被折叠?
 到【灌水乐园】发言


