


 本文详细介绍了一个基于MVC架构的用户注册登录系统的设计与实现过程,涵盖前端验证、数据库操作及Servlet处理等内容。
前面的十一篇博客把JSP和Servlet基本都详细的介绍了一遍,终于,我们的MVC架构模式横空出世,这也是框架诞生前的古早味Web程序的基本设计方式,事实上,即使框架诞生后,也不过是基于MVC模式的扩充和强化,所以理解MVC思想以及MVC早期的实现方式对于后续的框架学习以及理解Web开发的历史有很大的帮助。这篇Blog我将以一个简单的【用户注册登录】实践为主来串联之前十一篇Blog里提到的全部知识,在使用层面为Java Web编程系列划上一个句号。
MVC思想
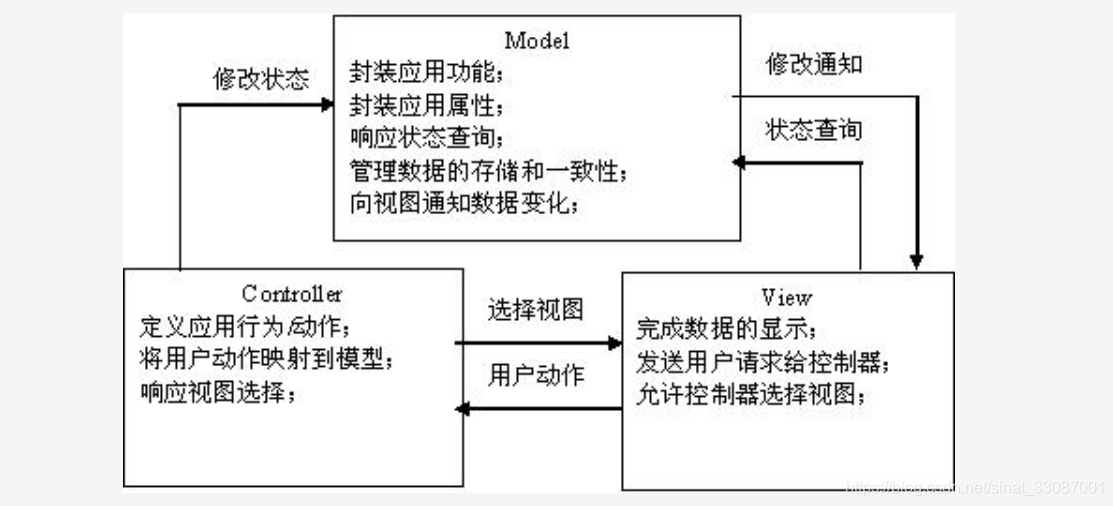
MVC 全名是 Model View Controller,一种软件设计典范,用一种业务数据、逻辑、界面显示分离的方法组织代码,各部分职责如下:
- 视图
视图是用户看到并与之交互的界面。对老式的Web应用程序来说,视图就是由HTML元素组成的界面,在新式的Web应用程序中,HTML依旧在视图中扮演着重要的角色,但是已经被一些能显示动态数据的JSP逐步取代了,MVC好处是它能为应用程序处理很多不同的视图。在视图中其实没有真正的处理发生,不管这些数据来源是什么,作为视图来讲,它只是作为一种输出数据并允许用户操纵的方式。 - 模型
模型表示企业数据和业务规则。在MVC的三个部件中,模型拥有最多的处理任务。被模型返回的数据是中立的,就是说模型与数据格式无关,这样一个模型能为多个视图提供数据,由于应用于模型的代码只需写一次就可以被多个视图重用,所以减少了代码的重复性。不能将模型看出一个只有数据的类,其实模型也包含数据和行为,可以认为是领域模型或JavaBean组件(包含数据和行为),现在一般会更加细分:Value Object(数据Dao) 和 服务层(行为Service)。也就是模型提供了模型数据查询和模型数据的状态更新等功能,包括数据和业务两部分 - 控制器
控制器接受用户的输入并调用模型和视图去完成用户的需求,所以当单击Web页面中的超链接和发送HTML表单时,控制器本身不输出任何东西和做任何处理。它只是接收请求并决定调用哪个模型构件去处理请求,然后再确定用哪个视图来显示返回的数据。
在前后端不分离的站点中,JSP充当了视图,Servlet充当了控制器,Model充当了模型。抽象意义上的职责如下图所示:
现在的MVC模型已经演化为如下操作过程,下面的整个项目就是依据这样的分层构建的
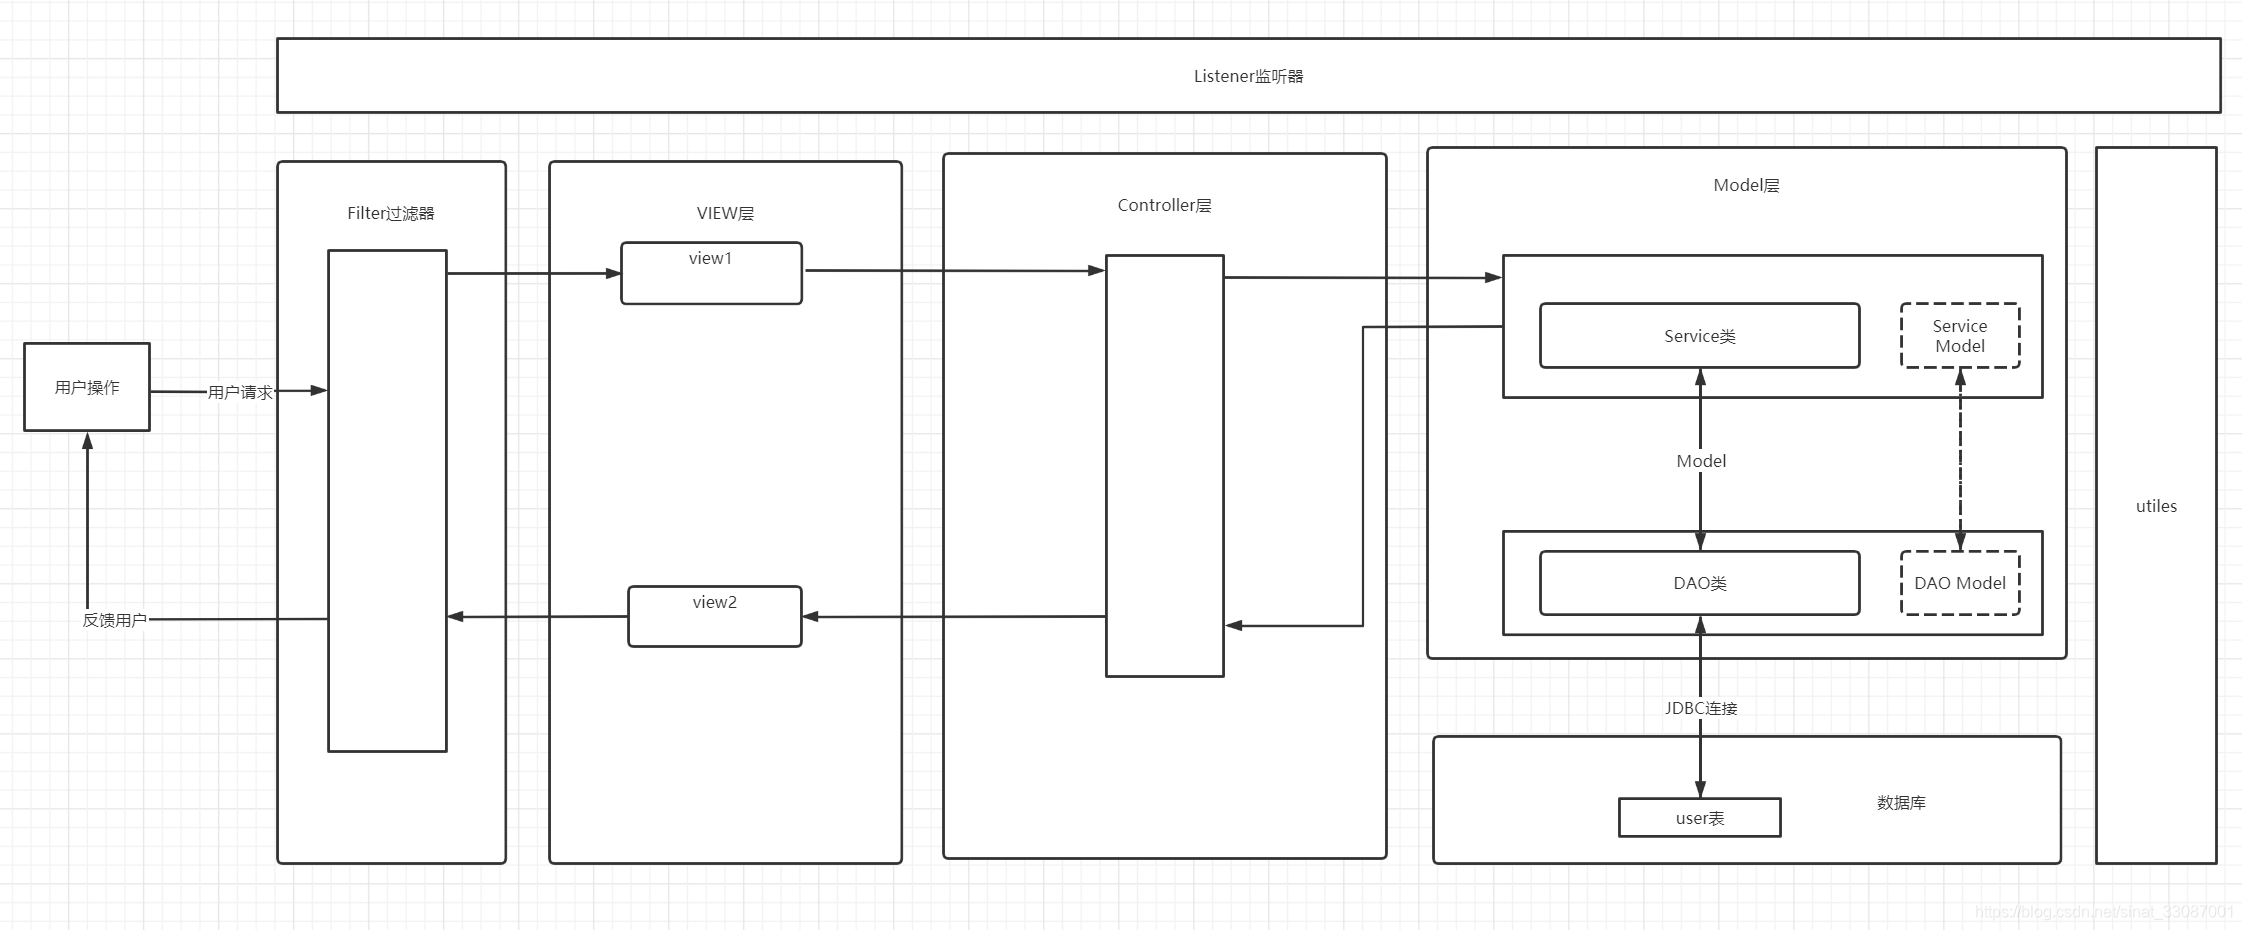
用户请求会先到达页面,填写信息后进入控制层流转,逻辑处理在Model层做,注意Model层也分两类:
- Service:处理业务逻辑,这里的Model会返回给前端
- Dao:处理持久化数据,这里的Model类似POJO,和数据库内的字段一一对应
当然对于我相对简单的一个系统,用一个贯穿的Model就可以了,但最后做解耦,因为落库的字段不一定和请求过来的字段完全一致。
项目构建
其实这个项目是5年前导师交给的一个任务,只完成了前端,当时用的是bootstrap实现的,后端完全没有,这次刚好学习完Java Web就把这部分补充上,项目名称为【黄金找矿网站】。
项目要求
在正式做之前先确定一下项目的要求,要求完成注册登录任务,任务需要满足如下几个要点:
- 未登录之前,除了注册登录页面,站点的其它页面均不能访问,请求时都自动跳转到登录页面
- 注册用户信息时,需要有前后端验证,对用户提交的表单进行表单验证
- 表单验证失败后收集错误信息跳转到错误页面,告知失败原因
- 注册成功后跳转到注册成功页面,告知用户的注册信息
- 登录时判断库里是否有该用户,只有存在且密码正确才可以登录成功
- 点击登出后当前用户恢复未登录状态
- 站点开启和关闭时需要加监控,监控服务的运行状态
其实这样一个注册登录项目就是我这两天设计出来用来将历史十一篇blog学习过的技术进行整合的,每个要求都涉及相关知识点。
技术要点
对照上边的实现要求,其实可以能抽象出所有的技术要点:
- 未登录之前,除了注册登录页面,站点的其它页面均不能访问,请求时都自动跳转到登录页面【Filter过滤器&重定向&Session作用域】
- 注册用户信息时,需要有前后端验证,对用户提交的表单进行表单验证【表单提交&表单验证&请求转发&Servlet常用对象】
- 表单验证失败后收集错误信息跳转到错误页面,告知失败原因【JSTL标签】
- 注册成功后跳转到注册成功页面,告知用户的注册信息【JSP语法&EL表达式&JavaBean】
- 登录时判断库里是否有该用户,只有存在且密码正确才可以登录成功【JDBC】
- 点击登出后当前用户恢复未登录状态【Session销毁】
- 站点开启和关闭时需要加监控,监控服务的运行状态【Listener监听器】
好的,也就是说这个项目可以帮助我和大家复习整体的古早Java Web实现方式。
整体布局
整个项目的整体布局和分层如下:
项目所需的Maven配置如下:
<?xml version="1.0" encoding="UTF-8"?>
<project xmlns="http://maven.apache.org/POM/4.0.0"
         xmlns:xsi="http://www.w3.org/2001/XMLSchema-instance"
         xsi:schemaLocation="http://maven.apache.org/POM/4.0.0 https://maven.apache.org/xsd/maven-4.0.0.xsd">
    <modelVersion>4.0.0</modelVersion>

    <groupId>com.example</groupId>
    <artifactId>GoldenManage</artifactId>
    <version>1.0-SNAPSHOT</version>
    <name>GoldenManage</name>
    <packaging>war</packaging>

    <properties>
        <maven.compiler.target>1.8</maven.compiler.target>
        <maven.compiler.source>1.8</maven.compiler.source>
        <junit.version>5.7.1</junit.version>
    </properties>

    <dependencies>
        <!--引入servlet相关依赖,https://repo.maven.apache.org/maven2/javax/servlet/servlet-api/-->
        <dependency>
            <groupId>javax.servlet</groupId>
            <artifactId>javax.servlet-api</artifactId>
            <version>4.0.1</version>
            <scope>provided</scope>
        </dependency>
        <!--引入jsp相关依赖,https://repo.maven.apache.org/maven2/javax/servlet/jsp/jsp-api/-->
        <dependency>
            <groupId>javax.servlet.jsp</groupId>
            <artifactId>javax.servlet.jsp-api</artifactId>
            <version>2.2.1</version>
            <scope>provided</scope>
        </dependency>
        <!--引入junit测试引擎相关依赖-->
        <dependency>
            <groupId>org.junit.jupiter</groupId>
            <artifactId>junit-jupiter-api</artifactId>
            <version>${junit.version}</version>
            <scope>test</scope>
        </dependency>
        <dependency>
            <groupId>org.junit.jupiter</groupId>
            <artifactId>junit-jupiter-engine</artifactId>
            <version>${junit.version}</version>
            <scope>test</scope>
        </dependency>
        <!-- https://mvnrepository.com/artifact/javax.servlet/jstl -->
        <dependency>
            <groupId>javax.servlet</groupId>
            <artifactId>jstl</artifactId>
            <version>1.2</version>
        </dependency>
        <!-- https://mvnrepository.com/artifact/taglibs/standard -->
        <dependency>
            <groupId>taglibs</groupId>
            <artifactId>standard</artifactId>
            <version>1.1.2</version>
        </dependency>
        <dependency>
            <groupId>mysql</groupId>
            <artifactId>mysql-connector-java</artifactId>
            <version>8.0.18</version>
        </dependency>

        <dependency>
            <groupId>org.projectlombok</groupId>
            <artifactId>lombok</artifactId>
            <version>RELEASE</version>
            <scope>compile</scope>
        </dependency>
        <dependency>
            <groupId>org.projectlombok</groupId>
            <artifactId>lombok</artifactId>
            <version>RELEASE</version>
            <scope>compile</scope>
        </dependency>
    </dependencies>

    <build>
        <plugins>
            <plugin>
                <groupId>org.apache.maven.plugins</groupId>
                <artifactId>maven-war-plugin</artifactId>
                <version>3.3.1</version>
            </plugin>
        </plugins>
    </build>
</project>
代码清单
罗列下整体项目实现的代码清单吧,其中JSP中用到了前端框架BootStrap,这个就不展开讲了,前端框架一般是在没有前端同学帮助下使用的好利器。
JSP代码清单
JSP分为如下几个页面:login.jsp用于登录,register.jsp用于注册,logout.jsp用于登出,还有两个显示结果的页面:success.jsp和error.jsp,以及显示首页的index.jsp页面
login.jsp
<%--
  Created by IntelliJ IDEA.
  User: 13304
  Date: 2021/7/31
  Time: 16:41
  To change this template use File | Settings | File Templates.
--%>
<%@ page contentType="text/html;charset=UTF-8" language="java" %>
<html xmlns="http://www.w3.org/1999/xhtml">
<head>
    <meta http-equiv="Content-Type" content="text/html; charset=utf-8" />
    <meta name="viewport" content="width=device-width, initial-scale=1, maximum-scale=1, user-scalable=no">
    <title>用户登录</title>
    <link rel="shortcut icon" type="image/x-icon" href="images/cugbIcon.ico"/>
    <link rel="stylesheet" href="css/style.css" />

<body>

<div class="login-container">
    <h1>黄金矿工</h1>

    <div class="connect">
        <p>welcome to cugb</p>
    </div>

    <form action="ControlServlet" method="post" id="loginForm">
        <div>
            <input type="text" name="username" class="username" placeholder="用户名" autocomplete="off"/>
        </div>
        <div>
            <input type="password" name="password" class="password" placeholder="密码" oncontextmenu="return false" onpaste="return false" />
        </div>
        <button id="submit" type="submit">登 陆</button>
    </form>

    <a href="register.jsp">
        <button type="button" class="register-tis">注册</button>
    </a>

</div>

<script src="js/jquery.min.js"></script>
<script src="js/common.js"></script>
<!--背景图片自动更换-->
<script src="js/supersized.3.2.7.min.js"></script>
<script src="js/supersized-init.js"></script>
<!--表单验证-->
<script src="js/jquery.validate.min.js?var1.14.0"></script>

</body>
</html>
logout.jsp
<%--
  Created by IntelliJ IDEA.
  User: 13304
  Date: 2021/7/31
  Time: 17:22
  To change this template use File | Settings | File Templates.
--%>
<%@ page contentType="text/html;charset=UTF-8" language="java" %>
<%@ page contentType="text/html;charset=UTF-8" language="java" %>
<html xmlns="http://www.w3.org/1999/xhtml">
<head>
  <meta http-equiv="Content-Type" content="text/html; charset=utf-8" />
  <meta name="viewport" content="width=device-width, initial-scale=1, maximum-scale=1, user-scalable=no">
  <title>退出登录</title>
  <link rel="shortcut icon" type="image/x-icon" href="images/cugbIcon.ico"/>
  <link rel="stylesheet" href="css/style.css" />

<body>

<div class="login-container">
  <h1>黄金矿工</h1>

  <div class="connect">
    <p>welcome to cugb</p>
  </div>

  <form action="StopServlet" method="get" id="loginForm">
    <button id="submit" type="submit">确认登出</button>
  </form>


</div>

<script src="js/jquery.min.js"></script>
<script src="js/common.js"></script>
<!--背景图片自动更换-->
<script src="js/supersized.3.2.7.min.js"></script>
<script src="js/supersized-init.js"></script>
<!--表单验证-->
<script src="js/jquery.validate.min.js?var1.14.0"></script>

</body>
</html>
register.jsp
<%@ page contentType="text/html; charset=UTF-8" pageEncoding="UTF-8" %>
<!DOCTYPE html>
<html xmlns="http://www.w3.org/1999/xhtml">
<head>
    <meta http-equiv="Content-Type" content="text/html; charset=utf-8" />
    <meta name="viewport" content="width=device-width, initial-scale=1, maximum-scale=1, user-scalable=no">
    <title>用户注册</title>
    <link rel="stylesheet" href="css/style.css" />
    <link rel="shortcut icon" type="image/x-icon" href="images/cugbIcon.ico"/>
<body>

<div class="register-container">
    <h1>黄金矿工</h1>

    <div class="connect">
        <p>welcome to cugb</p>
    </div>
    <%--onpaste是否运行粘贴;oncontextmenu 是否允许展开右键菜单;placeholder 输入提示;autocomplete是否允许浏览器自动补齐--%>
    <form action="GetPermission" method="post" id="registerForm">
        <div>
            <input type="text" name="name"  placeholder="您的用户名" autocomplete="off" />
        </div>
        <div>
            <input type="password" name="password" class="password" placeholder="输入密码" oncontextmenu="return false" onpaste="return false" />
        </div>
        <div>
            <input type="password" name="confirm_password" class="confirm_password" placeholder="再次输入密码" oncontextmenu="return false" onpaste="return false" />
        </div>
        <div>
            <input type="text" name="phone_number" class="phone_number" placeholder="输入手机号码" autocomplete="off" id="number"/>
        </div>
        <div>
            <input type="email" name="email" class="email" placeholder="输入邮箱地址" oncontextmenu="return false" onpaste="return false" />
        </div>

        <button id="submit" type="submit" style="width: 332px">注 册</button>
    </form>
    <a href="login.jsp">
        <button type="button" class="register-tis" style="width: 332px">返回登录</button>
    </a>

</div>


<script src="js/jquery.min.js"></script>

<!--背景图片自动更换-->
<script src="js/supersized.3.2.7.min.js"></script>
<script src="js/supersized-init.js"></script>
<!--表单验证-->
<script src="js/jquery.validate.min.js?var1.14.0"></script>
<script src="js/common.js"></script>
</body>
</html>
success.jsp
<%--
  Created by IntelliJ IDEA.
  User: 13304
  Date: 2021/7/31
  Time: 17:43
  To change this template use File | Settings | File Templates.
--%>
<%@ page contentType="text/html;charset=UTF-8" language="java" %>
<%@ page import="com.example.GoldenManage.model.UserModel" %>
<jsp:useBean id="userModel" class="com.example.GoldenManage.model.UserModel" scope="request"></jsp:useBean>
<html xmlns="http://www.w3.org/1999/xhtml">
<head>
    <meta http-equiv="Content-Type" content="text/html; charset=utf-8" />
    <meta name="viewport" content="width=device-width, initial-scale=1, maximum-scale=1, user-scalable=no">
    <title>用户注册成功</title>
    <link rel="stylesheet" href="css/style.css" />
    <link rel="shortcut icon" type="image/x-icon" href="images/cugbIcon.ico"/>
<body>

<div class="register-container">
    <h1>黄金矿工</h1>

    <div class="connect">
        <p>welcome to cugb</p>
    </div>
    <%--onpaste是否运行粘贴;oncontextmenu 是否允许展开右键菜单;placeholder 输入提示;autocomplete是否允许浏览器自动补齐--%>
    <form action="" method="post" id="registerForm">
        恭喜您注册成功,您的注册信息如下,请牢记:
        <div>
            <input type="text" name="name" class="name" placeholder="您的用户名:    ${userModel.username}" autocomplete="off" readonly="readonly"/>
        </div>
        <div>
            <input type="password" name="password" class="password" placeholder="您的密码:    ${userModel.password}" oncontextmenu="return false" onpaste="return false"  readonly="readonly" />
        </div>

        <div>
            <input type="text" name="phone_number" class="phone_number" placeholder="您的手机号: ${userModel.phone}" autocomplete="off" id="number"  readonly="readonly"/>
        </div>
        <div>
            <input type="email" name="email" class="email" placeholder="您的邮箱地址: ${userModel.email}" oncontextmenu="return false" onpaste="return false"  readonly="readonly" />
        </div>
    </form>
    <a href="login.jsp">
        <button type="button" class="register-tis" style="width: 300px">返回登录</button>
    </a>

</div>


<script src="js/jquery.min.js"></script>

<!--背景图片自动更换-->
<script src="js/supersized.3.2.7.min.js"></script>
<script src="js/supersized-init.js"></script>
<!--表单验证-->
<script src="js/jquery.validate.min.js?var1.14.0"></script>
<script src="js/common.js"></script>
</body>
</html>
error.jsp
<%@ page import="java.util.ArrayList" %><%--
  Created by IntelliJ IDEA.
  User: 13304
  Date: 2021/7/31
  Time: 17:44
  To change this template use File | Settings | File Templates.
--%>
<%@ page contentType="text/html;charset=UTF-8" language="java" %>
<%@ page import="java.util.ArrayList" %>
<%@ taglib uri="http://java.sun.com/jsp/jstl/core" prefix="c" %>
<html>
<head>
    <title>Title</title>
</head>
<body>
<% ArrayList<String> list=(ArrayList<String>)request.getAttribute("error") ;%>
<c:forEach items="${list}" var="item" varStatus="varIndex">
    <c:if test="${varIndex.count%2==0 }">
        <tr bgcolor=red>
    </c:if>
    <c:if test="${varIndex.count%2!=0 }">
        <tr bgcolor=yellow>
    </c:if>

    <td>${item}</td>
    </tr>
</c:forEach>


</body>
</html>
index.jsp
<%--
Created by IntelliJ IDEA.
User: 13304
Date: 2021/7/31
Time: 16:46
To change this template use File | Settings | File Templates.
--%>
<%@ page contentType="text/html;charset=UTF-8" language="java" %>
<html lang="zh-cn">
<head>
<meta charset="UTF-8">
<meta name="viewport"
content="width=device-width, initial-scale=1,maximum-scale=1, user-scalable=no">
<title>首页</title>
<link rel="stylesheet" href="css/bootstrap.min.css">
<link rel="shortcut icon" type="image/x-icon" href="images/cugbIcon.ico" />
<link rel="stylesheet" href="css/index.css">
</head>
<body>
<!--描述:导航条部分:用于放置重要的页面导航------------------------------------- -->
<nav class="navbar navbar-inverse navbar-fixed-top">
<div class="navbar-header">
<!--
作者:1330465864@qq.com
时间:2016-04-09
描述:按钮绑定导航栏要显示的东西,屏幕缩小时
-->
<!--导航栏与隐藏按钮绑定,屏幕缩小时导航栏隐藏-->
<button type="button" class="navbar-toggle" data-toggle="collapse"
data-target="#navbar-info">
<span class="icon-bar"></span> <span class="icon-bar"></span> <span
class="icon-bar"></span>
</button>
<div>
<a href="##" class="navbar-brand"> Welcome to
CUGB </a>
</div>
</div>
<!--导航栏设置显示-->
<div class="collapse navbar-collapse navbar-responsive-collapse"
id="navbar-info">
<div>
<ul class="nav navbar-nav navbar-left">
<li class="active"><a href="index.jsp"><span
class="glyphicon glyphicon-home"></span> 首页</a></li>
</ul>
</div>
<div>
<ul class="nav navbar-nav navbar-right" style="margin-right: 10px;" >
<li class="active"><a href="loginout.jsp"><span
class="glyphicon glyphicon-globe"></span> 退出登录</a></li>
</ul>
</div>
</div>
</div>
</nav>
<div id="myCarousel" class="carousel slide">
<ol class="carousel-indicators">
<li data-target="#myCarousel" data-slide-to="0" class="active"></li>
<li data-target="#myCarousel" data-slide-to="1"></li>
<li data-target="#myCarousel" data-slide-to="2"></li>
<li data-target="#myCarousel" data-slide-to="3"></li>
<li data-target="#myCarousel" data-slide-to="4"></li>
<li data-target="#myCarousel" data-slide-to="5"></li>
</ol>
<div class="carousel-inner">
<div class="item active" style="background:#223240">
<img src="images/slide1.jpg" alt="第一张" width="100%" height="">
</div>
<div class="item" style="background:#F5E4DC;">
<img src="images/slide2.jpg" alt="第二张" width="100%" height="">
</div>
<div class="item" style="background:#DE2A2D;">
<img src="images/slide3.jpg" alt="第三张" width="100%" height="">
</div>
<div class="item" style="background:#DE2A2D;">
<img src="images/slide4.jpg" alt="第四张" width="100%" height="">
</div>
<div class="item" style="background:#DE2A2D;">
<img src="images/slide5.jpg" alt="第五张" width="100%" height="">
</div>
<div class="item" style="background:#DE2A2D;">
<img src="images/slide6.jpg" alt="第六张" width="100%" height="">
</div>
</div>
<!--
作者:1330465864@qq.com
时间:2016-04-09
描述:轮播左右控制组建
-->
<a href="#myCarousel" data-slide="prev" class="carousel-control left">
<span class="glyphicon glyphicon-chevron-left"></span> </a> <a
href="#myCarousel" data-slide="next" class="carousel-control right">
<span class="glyphicon glyphicon-chevron-right"></span> </a>
</div>
<div class="container " id="timg">
<div class="row ">
<div class="col-md-3 col-sm-6 col-xs-12 img_box"
style="margin-top: 15px ; ">
<a href="" class="thumbnail"> <img src="images/thumbnail1.jpg " />
</a>
<div class="well well-lg ">
<p align="center">
<b>按照地质类型</b>
</p>
<p style="color:gray; "> 您可以选择按照地质地区类型的方式查找该区域所有金矿说明,我们为您提供我们提供该区域金矿的产量,品位,等金矿参数以及已在该区域发表过的论文集。</p>
</div>
</div>
<div class="col-md-3 col-sm-6 col-xs-12 img_box "
style="margin-top: 15px ; ">
<a href="map.html" class="thumbnail "> <img
src="images/thumbnail2.jpg " /> </a>
<div class="well well-lg ">
<p align="center">
<b>按照行政区域</b>
</p>
<p style="color:gray; "> 您可以选择按照行政区域查找的方式,查找中华人民共和国33个行政区域(除上海市外)黄金矿产资源的数据,我们提供该区域金矿的产量,提交量等详细信息。</p>
</div>
</div>
<div class="col-md-3 col-sm-6 col-xs-12 img_box "
style="margin-top: 15px ; ">
<a href=" " class="thumbnail "> <img
src="images/thumbnail3.jpg " /> </a>
<div class="well well-lg ">
<p align="center">
<b>按照地质区域</b>
</p>
<p style="color:gray; "> 您可以选择按照地质区域查找的方式查找我国主要矿区东北北部砂金矿区,燕辽金矿区,山东金矿区,东南地区金矿区,秦岭-祁连山金矿区等重要矿区的信息。</p>
</div>
</div>
<div class="col-md-3 col-sm-6 col-xs-12 img_box "
style="margin-top: 15px ; ">
<a href=" " class="thumbnail "> <img
src="images/thumbnail4.jpg " /> </a>
<div class="well well-lg ">
<p align="center">
<b>按照开采技术</b>
</p>
<p style="color:gray; "> 您可以选择按照开采技术分类查找的方法如(矿体测伏规律,分支符合规律,地球化学叠加晕,大功率机电法,电磁技术等)查找采用该方法开采的所有矿区。</p>
</div>
</div>
</div>
</div>
<!--
作者:1330465864@qq.com
时间:2016-04-11
描述:第二行的四个元素
-->
<div class="container" id="timg2">
<div class="row ">
<div class="col-md-3 col-sm-6 col-xs-12 img_box"
style="margin-top: 5px ; ">
<a href=" " class="thumbnail "> <img
src="images/thumbnail5.jpg " /> </a>
<div class="well well-lg ">
<p align="center">
<b>按照期刊选编</b>
</p>
<p style="color:gray; "> 您可以选择按照期刊选编查找的方式,查找我们为您收录的各大重要期刊及论文检索机构已发表的截止至今所有该期刊收录的论文,并且会持续更新该项内容。</p>
</div>
</div>
<div class="col-md-3 col-sm-6 col-xs-12 img_box"
style="margin-top: 5px ; ">
<a href=" " class="thumbnail "> <img
src="images/thumbnail6.jpg " /> </a>
<div class="well well-lg ">
<p align="center">
<b>按照矿石类别</b>
</p>
<p style="color:gray; "> 您可以选择按照金矿类别查找的方式,查找我们为您收录的包括自然金,金银矿,银金矿,自然银主要四种类别在内的金矿类别集,并且会持续更新该项内容。</p>
</div>
</div>
<div class="col-md-3 col-sm-6 col-xs-12 img_box"
style="margin-top: 5px ; ">
<a href=" " class="thumbnail "> <img
src="images/thumbnail7.jpg " /> </a>
<div class="well well-lg ">
<p align="center">
<b>按照矿床类型</b>
</p>
<p style="color:gray; "> 您可以选择按照矿床类型查找的方式,查找我们为您已分类的地球各个主要地质年代的多种类型金矿(如卡林型)的详细信息集合,并且会持续更新该项内容。</p>
</div>
</div>
<div class="col-md-3 col-sm-6 col-xs-12 img_box"
style="margin-top: 5px ; ">
<a href=" " class="thumbnail "> <img
src="images/thumbnail8.jpg " /> </a>
<div class="well well-lg ">
<p align="center">
<b>按照国际矿脉</b>
</p>
<p style="color:gray; "> 您可以选择按照国际矿脉查找的方式,查找我们为您收录的国际上一些比较著名的大型金矿,包括其详细开采信息和涉及论文集合,并且会持续更新该项内容。</p>
</div>
</div>
</div>
</div>
</div>
</div>
<footer id="footer">
<div class="container" style="margin-top: 1px;">
<div class="row">
<div class="contact col-lg-1 col-sm-1 hidden-xs img_box">
<a href="" class="thumbnail"><img src="images/weixin.png" /> </a>
</div>
<div class="contact col-lg-1 col-sm-1 hidden-xs img_box">
<a href="" class="thumbnail"><img src="images/weixin.jpg" /> </a>
</div>
<div class="col-lg-8 col-sm-8 col-xs-12" style="margin-top: 25px;">
<p>
<a href="http://www.cugb.edu.cn/index.action "
style="color:lightblue; ">中国地质大学(北京) </a>|<a
href="http://www.cnki.net/ " style="color: lightblue; "> 中国知网
</a> | <a href="http://www.mlr.gov.cn/ " style="color:lightblue; ">中华人民共和国国土资源部</a>
</p>
<p>中国地质大学(北京)资源数据库</p>
</div>
<div class="contact col-lg-1 col-sm-1 hidden-xs hidden-xs img_box">
<a href="" class="thumbnail"><img src="images/qq.png" /> </a>
</div>
<div class="contact col-lg-1 col-sm-1 hidden-xs img_box">
<a href="" class="thumbnail"><img src="images/qq.jpg" /> </a>
</div>
</div>
</div>
</footer>
<script src="js/jquery.min.js "></script>
<script src="js/bootstrap.min.js "></script>
<script src="js/index.js "></script>
</body>
</html>
Lisenter代码清单
监听器主要用来处理服务器启动和关闭时候的监听操作:
package com.example.GoldenManage.listener;

import javax.servlet.*;
import javax.servlet.http.*;
import javax.servlet.annotation.*;
import java.time.LocalDate;
import java.util.Date;

@WebListener
public class CountListener implements HttpSessionListener,ServletContextListener,HttpSessionAttributeListener {

    public CountListener() {
    }
    //监听application销毁事件--即服务器关闭
    @Override
    public void contextDestroyed(ServletContextEvent sce) {
        System.out.println("application销毁, 服务停止,停止时间:"+ LocalDate.now());

    }

    //监听application创建事件--即服务器开启
    @Override
    public void contextInitialized(ServletContextEvent sce) {
        System.out.println("application创建,服务启动,启动时间:"+ LocalDate.now());
    }

}
Filter代码清单
过滤器主要为了完成请求的拦截,只有登录后才会绕过拦截:
package com.example.GoldenManage.filter;

import javax.servlet.*;
import javax.servlet.annotation.*;
import javax.servlet.http.HttpServletRequest;
import javax.servlet.http.HttpServletResponse;
import javax.servlet.http.HttpSession;
import java.io.IOException;

@WebFilter(filterName = "LoginFilter",urlPatterns= "*.jsp")
public class LoginFilter implements Filter {
    public void init(FilterConfig config) throws ServletException {
    }

    public void destroy() {
    }

    @Override
    public void doFilter(ServletRequest request, ServletResponse response, FilterChain chain) throws ServletException, IOException {
        HttpServletRequest requestServlet = (HttpServletRequest) request;
        HttpServletResponse responseServlet = (HttpServletResponse) response;
        HttpSession session=((HttpServletRequest) request).getSession();
        String loginStatus=(String)session.getAttribute("loginStatus");
        String url=requestServlet.getRequestURI();

        //登录和注册页面无需跳转登录页面,否则会一直报重定向的错误
        if(url.endsWith("login.jsp")||url.endsWith("register.jsp")){
            chain.doFilter(request, response);
            return;
        }
        if(loginStatus==null || !loginStatus.equals("true")){
            responseServlet.sendRedirect("login.jsp");
            return;
        }else{
            chain.doFilter(request, response);
        }
    }
}
Servlet代码清单
Servlet比较简单,只需要处理登录请求的LoginServlet和处理注册请求的RegisterServlet以及处理登出请求的StopServlet
LoginServlet
package com.example.GoldenManage.controller;

import com.example.GoldenManage.service.UserService;

import javax.servlet.*;
import javax.servlet.http.*;
import javax.servlet.annotation.*;
import java.io.IOException;

@WebServlet(name = "ControlServlet", value = "/ControlServlet")
public class LoginServlet extends HttpServlet {
    @Override
    protected void doGet(HttpServletRequest request, HttpServletResponse response) throws ServletException, IOException {

    }

    @Override
    protected void doPost(HttpServletRequest request, HttpServletResponse response) throws ServletException, IOException {
        response.setContentType("text/html");
        response.setCharacterEncoding("utf-8");
        String username = request.getParameter("username");
        String password = request.getParameter("password");
        //满足如下条件则认为登录成功
        if (UserService.LoginStatus(username, password)) {
            //重置登录session
            HttpSession session = request.getSession();
            session.setAttribute("username", username);
            session.setAttribute("password", password);
            session.setAttribute("loginStatus", "true");
            //登录成功跳转到首页
            request.getRequestDispatcher("index.jsp").forward(request, response);
        }else{
            request.getRequestDispatcher("login.jsp").forward(request, response);        //页面转向登录继续登录
        }
    }
}
RegisterServlet
package com.example.GoldenManage.controller;

import com.example.GoldenManage.model.UserModel;
import com.example.GoldenManage.service.UserService;

import javax.servlet.*;
import javax.servlet.http.*;
import javax.servlet.annotation.*;
import java.io.IOException;
import java.util.ArrayList;

@WebServlet(name = "RegisterServlet", value = "/GetPermission")
public class RegisterServlet extends HttpServlet {
    @Override
    protected void doGet(HttpServletRequest request, HttpServletResponse response) throws ServletException, IOException {

    }

    @Override
    protected void doPost(HttpServletRequest request, HttpServletResponse response) throws ServletException, IOException {
        response.setContentType("text/html");
        response.setCharacterEncoding("utf-8");
        String username = request.getParameter("name");
        String password = request.getParameter("password");
        String email = request.getParameter("email");
        String confirm_password = request.getParameter("confirm_password");
        String phone_number = request.getParameter("phone_number");
        UserModel userModel=new UserModel();
        userModel.setEmail(email);
        userModel.setUsername(username);
        userModel.setPassword(password);
        userModel.setPhone(phone_number);
        userModel.setRePassword(confirm_password);

        ArrayList<String> errorList=UserService.CheckFormDate(userModel);

        if(errorList.isEmpty()){
            //插入数据库成功则证明注册成功
            if( UserService.regiserUser(userModel)==1){
                request.setAttribute("userModel", userModel);
                request.getRequestDispatcher("success.jsp").forward(request, response);      //页面转向成功显示
            }


        }else{
            request.setAttribute("error", errorList);
            request.getRequestDispatcher("error.jsp").forward(request, response);        //页面转向错误信息
        }

    }
}
StopServlet
package com.example.GoldenManage.controller;

import javax.servlet.*;
import javax.servlet.http.*;
import javax.servlet.annotation.*;
import java.io.IOException;

@WebServlet(name = "StopServlet", value = "/StopServlet")
public class StopServlet extends HttpServlet {
    @Override
    protected void doGet(HttpServletRequest request, HttpServletResponse response) throws ServletException, IOException {
        //假设退出成功
        HttpSession session = request.getSession();
        session.invalidate();
        request.getRequestDispatcher("login.jsp").forward(request, response);        //退出后页面跳转回登录页面
    }

    @Override
    protected void doPost(HttpServletRequest request, HttpServletResponse response) throws ServletException, IOException {

    }
}
Service代码清单
Servlet是不处理具体业务逻辑的,它只是依据结果返回进行页面选择,所以业务逻辑依赖Service:
package com.example.GoldenManage.service;

import com.example.GoldenManage.dao.UserDao;
import com.example.GoldenManage.model.UserModel;

import java.util.ArrayList;

public class UserService {
    /**
     * 判断当前的用户登录状态
     * @return
     */
    public static Boolean LoginStatus(String username,String password) {
        //使用当前用户从数据库中查数据
        String realpassword= UserDao.getPasswordByUserName(username);
        //满足如下条件则认为登录成功
        if (password.equals(realpassword) ) {
           return true;
        }
        return false;

    }

    /**
     * 表单提交验证
     * @return
     */
    public static ArrayList<String> CheckFormDate(UserModel userModel) {

        ArrayList<String> errorList=new ArrayList<>();           //错误信息都放到集合里,通过集合去反馈
        if(null==userModel.getUsername()||"".equals(userModel.getUsername())){
            errorList.add("username is empty");
        }
        if(userModel.getPassword()==null||userModel.getPassword().length()<6||userModel.getPassword().length()>11){
            errorList.add("password must between 6 and 11");
        }

        if(userModel.getPassword()!=null&&userModel.getPassword()!=null&&!userModel.getPassword().equals(userModel.getRePassword())){
            errorList.add("password !=repassword");
        }
        if(userModel.getPhone()==null||userModel.getPhone().length()!=11){
            errorList.add("phone_number is not valid");
        }

        if(userModel.getEmail()==null||!userModel.getEmail().endsWith("com")){
            errorList.add("email is not valid");
        }
        return errorList;

    }

    /**
     * 注册数据
     * @return
     */
    public static int regiserUser(UserModel userModel) {
        int flag=UserDao.regiserUser(userModel);
        return flag;

    }
}
Dao代码清单
Service不与持久化数据打交道,那么这个任务就落到了Dao身上,注意Dao的粒度一定要细,并且不掺杂任何业务逻辑,就是增删改查即可:
package com.example.GoldenManage.dao;

import com.example.GoldenManage.model.UserModel;
import com.example.GoldenManage.utils.JdbcUtil;

import javax.xml.crypto.Data;
import java.sql.*;
import java.time.LocalDate;


public class UserDao {


    /**
     * 通过用户名到数据库中获取凭证密码
     * @param userName
     * @return
     */
    public static String getPasswordByUserName(String userName) {
        //SQL语句
        String sql = "select password from user where username = " +"'" + userName+"'";
        Connection connection = JdbcUtil.getConnection();
        Statement statement=null;
        ResultSet resultSet = null;
        String password=null;
        try {
            statement = connection.createStatement();
            //执行语句,得到结果集
            resultSet = statement.executeQuery(sql);
            while (resultSet.next()) {
                //这里只查询的密码
                password = resultSet.getString(1);
            }
            resultSet.close();
            connection.close();//关闭连接
        } catch (SQLException e1) {
            e1.printStackTrace();
        }
        return password;

    }

    /**
     * 插入數據
     * @return
     */
    public static int regiserUser(UserModel userModel) {
        int flag=0;
        //SQL语句
        String sql = "insert into user values (?,?,?,?)";
        Connection connection = JdbcUtil.getConnection();
        PreparedStatement statement=null;

        try {
            statement = connection.prepareStatement(sql);
            statement.setString(1, userModel.getUsername());
            statement.setString(2, userModel.getPhone());
            statement.setString(3, userModel.getPassword());
            statement.setString(4, userModel.getEmail());
            //执行语句,得到结果集
            flag = statement.executeUpdate();
            connection.close();//关闭连接
        } catch (SQLException e1) {
            e1.printStackTrace();
        }

        return flag;
    }

}
Utils代码清单
像建立数据库连接这种操作,如果每进行一次查询都写一遍代码显然很冗余,所以这种可以抽出来作为工具类:
package com.example.GoldenManage.utils;

import java.sql.Connection;
import java.sql.DriverManager;
import java.sql.SQLException;

public class JdbcUtil {
    public static  Connection getConnection() {
        Connection connection;
        //jdbc驱动
        String driver = "com.mysql.cj.jdbc.Driver";
        //数据库url
        String url = "jdbc:mysql://localhost:3306/test?&useSSL=false&serverTimezone=UTC";
        String user = "root";
        String password = "root";
        try {
            //注册JDBC驱动程序
            Class.forName(driver);
            //建立连接
            connection = DriverManager.getConnection(url, user, password);
            if (!connection.isClosed()) {
                System.out.println("数据库连接成功");
            }
            return connection;

        } catch (ClassNotFoundException e) {
            System.out.println("数据库驱动没有安装");

        } catch (SQLException e) {
            e.printStackTrace();
            System.out.println("数据库连接失败");
        }

       return null;

    }

}
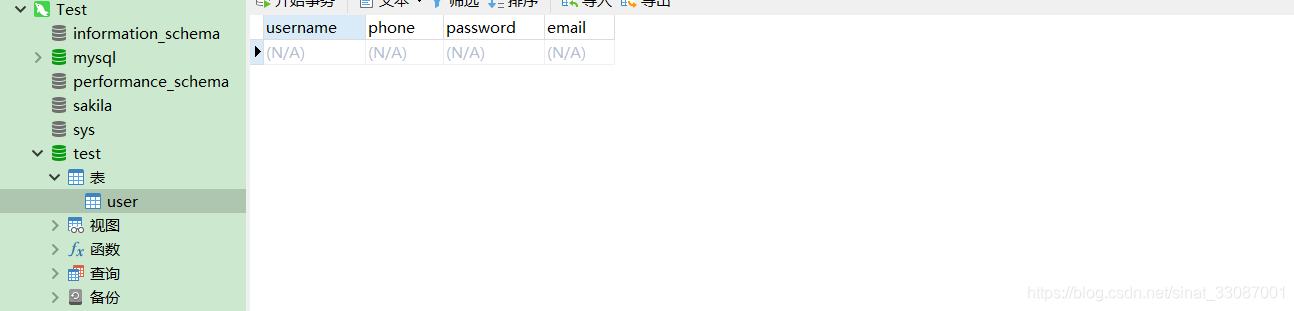
数据库表
在数据库中创建数据库和表即可,然后通过JDBC进行操作。
Model代码清单
这个Model并不是指Model层,而是一个Model对象,可以理解为一个JavaBean,事实上如我前文所提,业务层面的Model和数据层面的Model其实应该区分开,比如重复确认密码这个字段,业务层面需要,而数据层面并不需要。当然我们这里这个项目比较小就暂时用一个:
package com.example.GoldenManage.model;

import lombok.Data;

/*
* JavaBean,也就是Model数据
* */
@Data
public class UserModel {
    //用户名
    private String username;
    //密码
    private String password;
    //确认密码
    private String rePassword;
    //邮箱号
    private String email;
    //手机号
    private String phone;
}
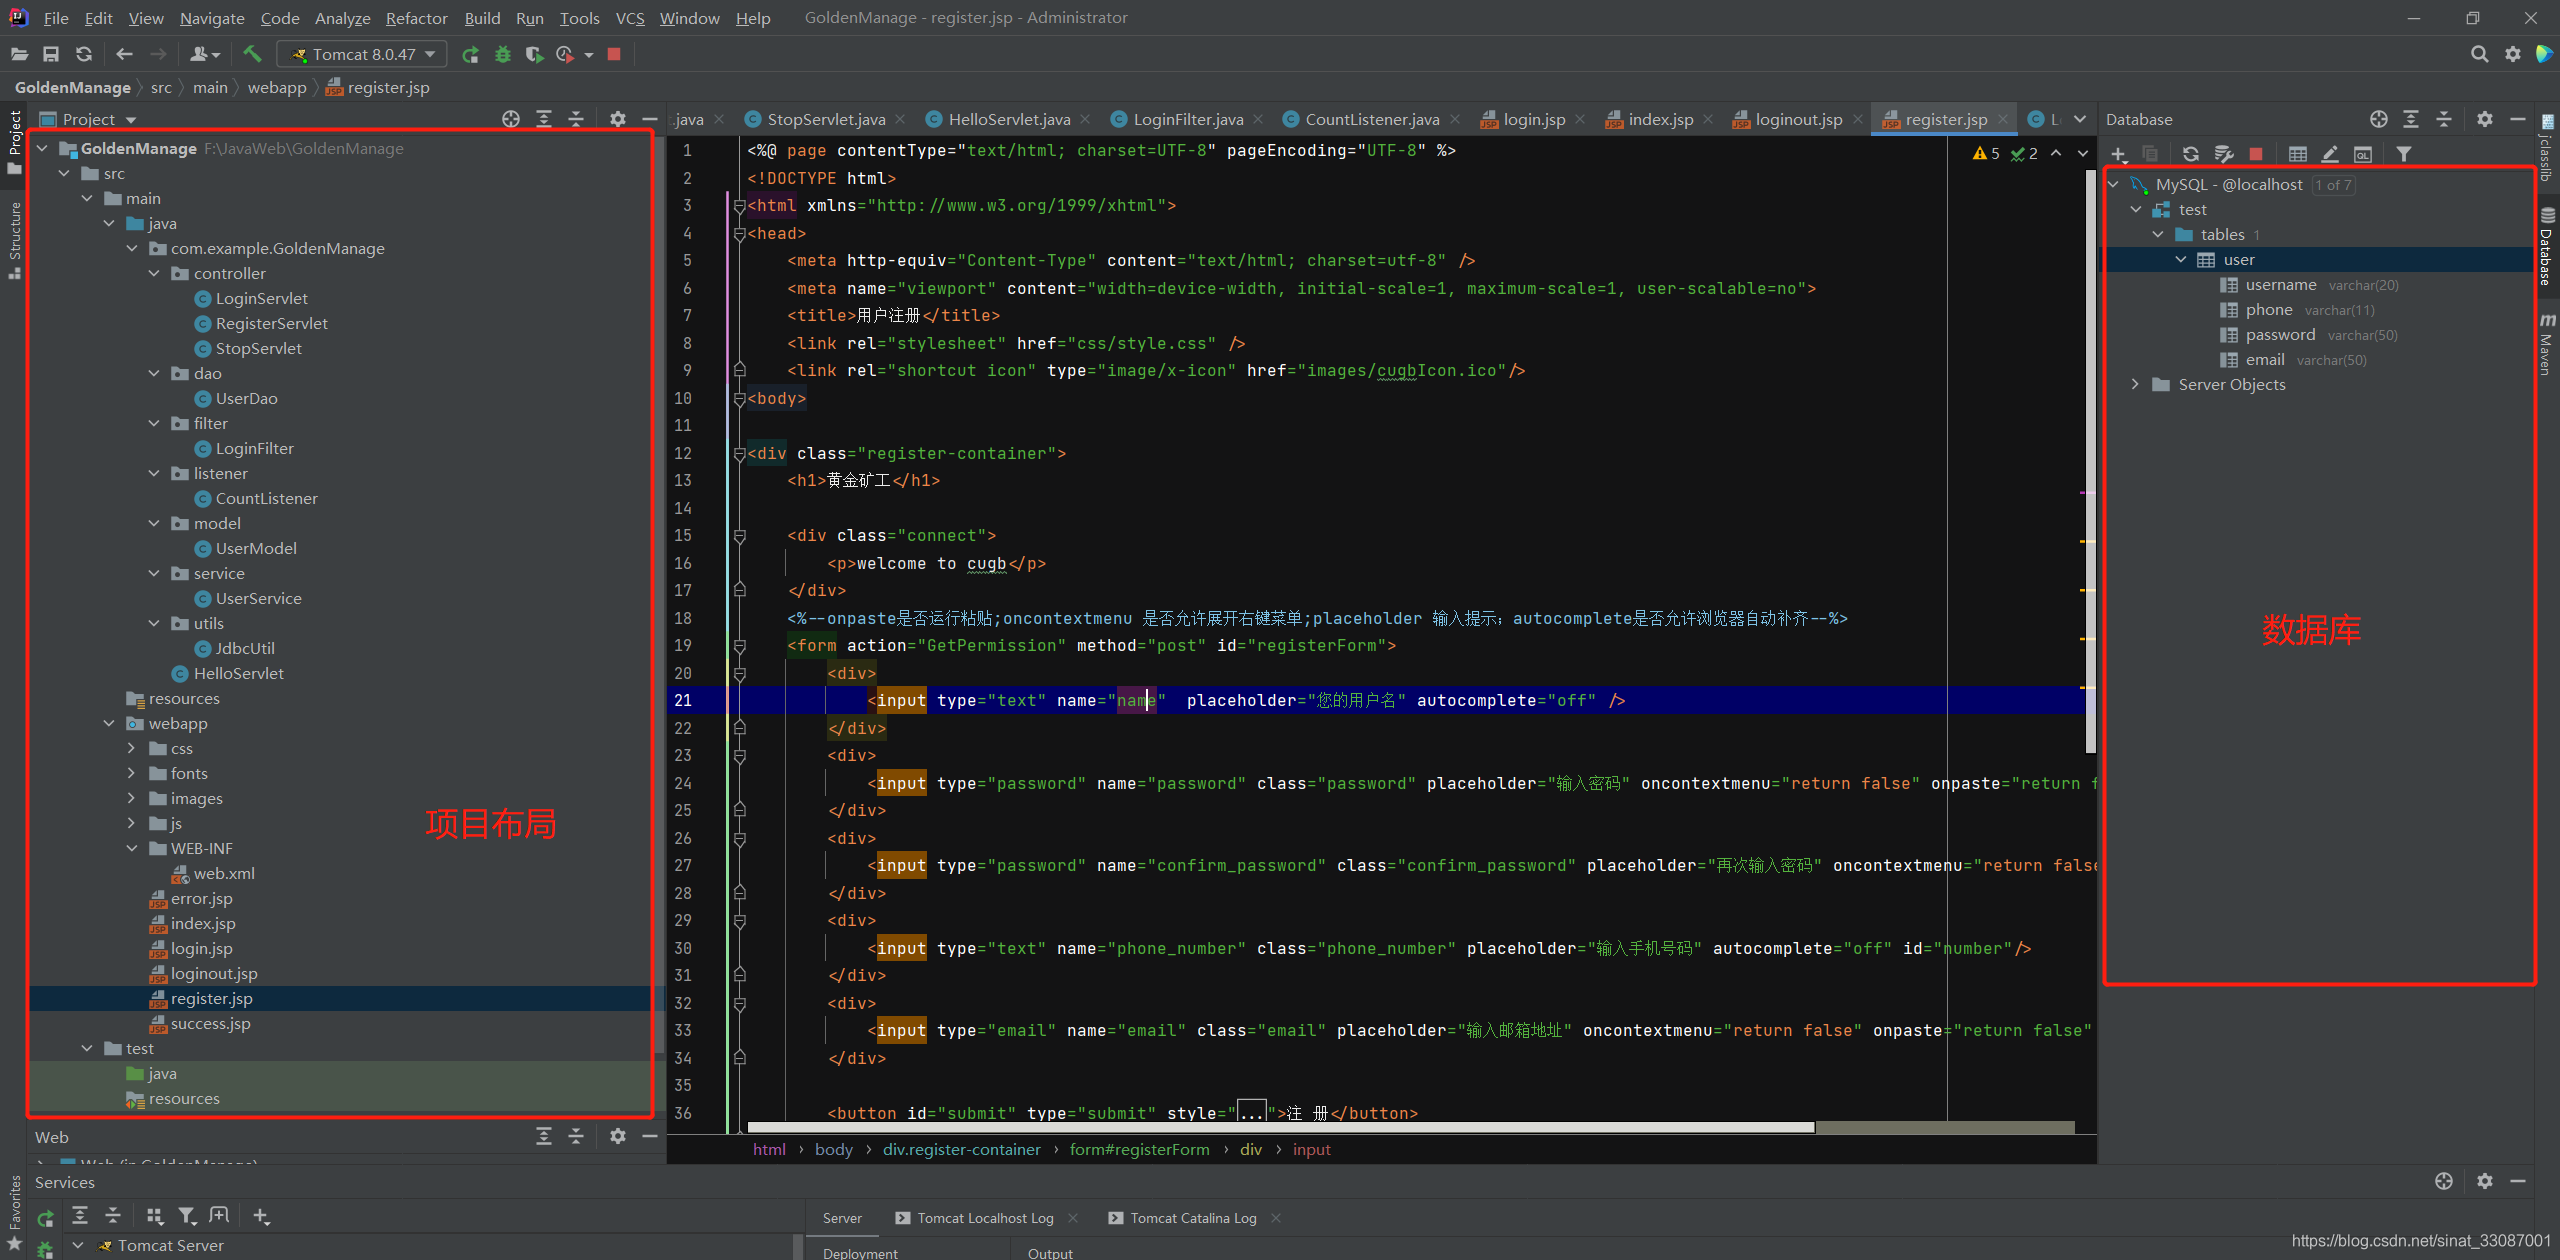
项目展示
整个项目贯穿了所有之前学习的知识点,所以其实认真阅读我之前的博客再结合代码清单看就知道是怎么实现的了,这里我就不再讲一遍了,直接来看下项目实现,首先服务器启动时被监听打印出了启动信息:

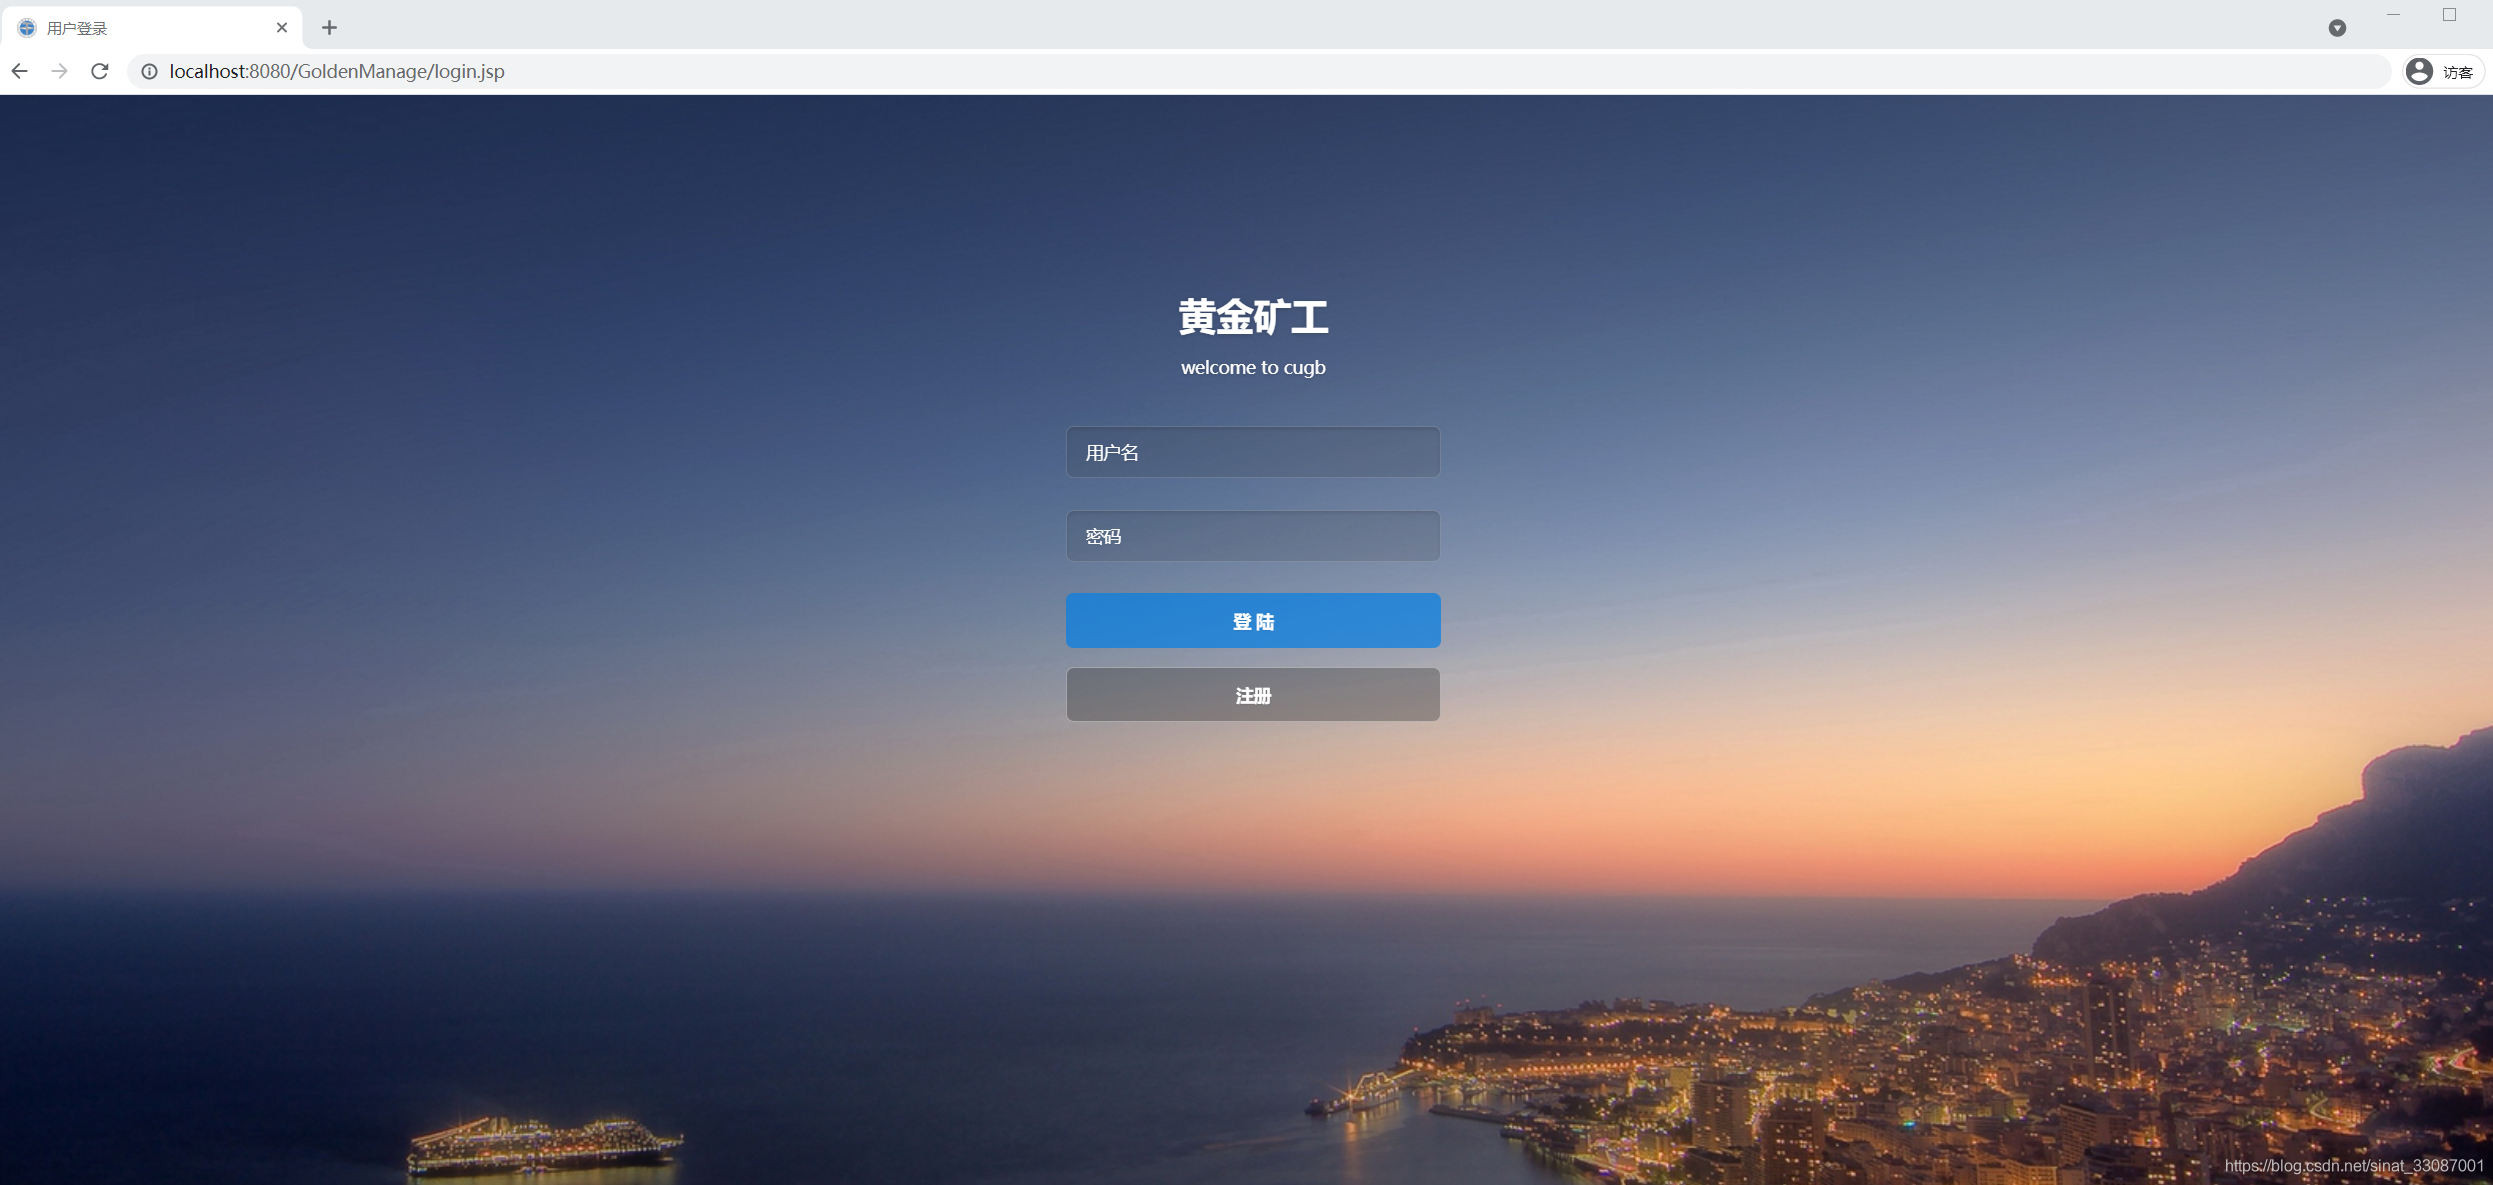
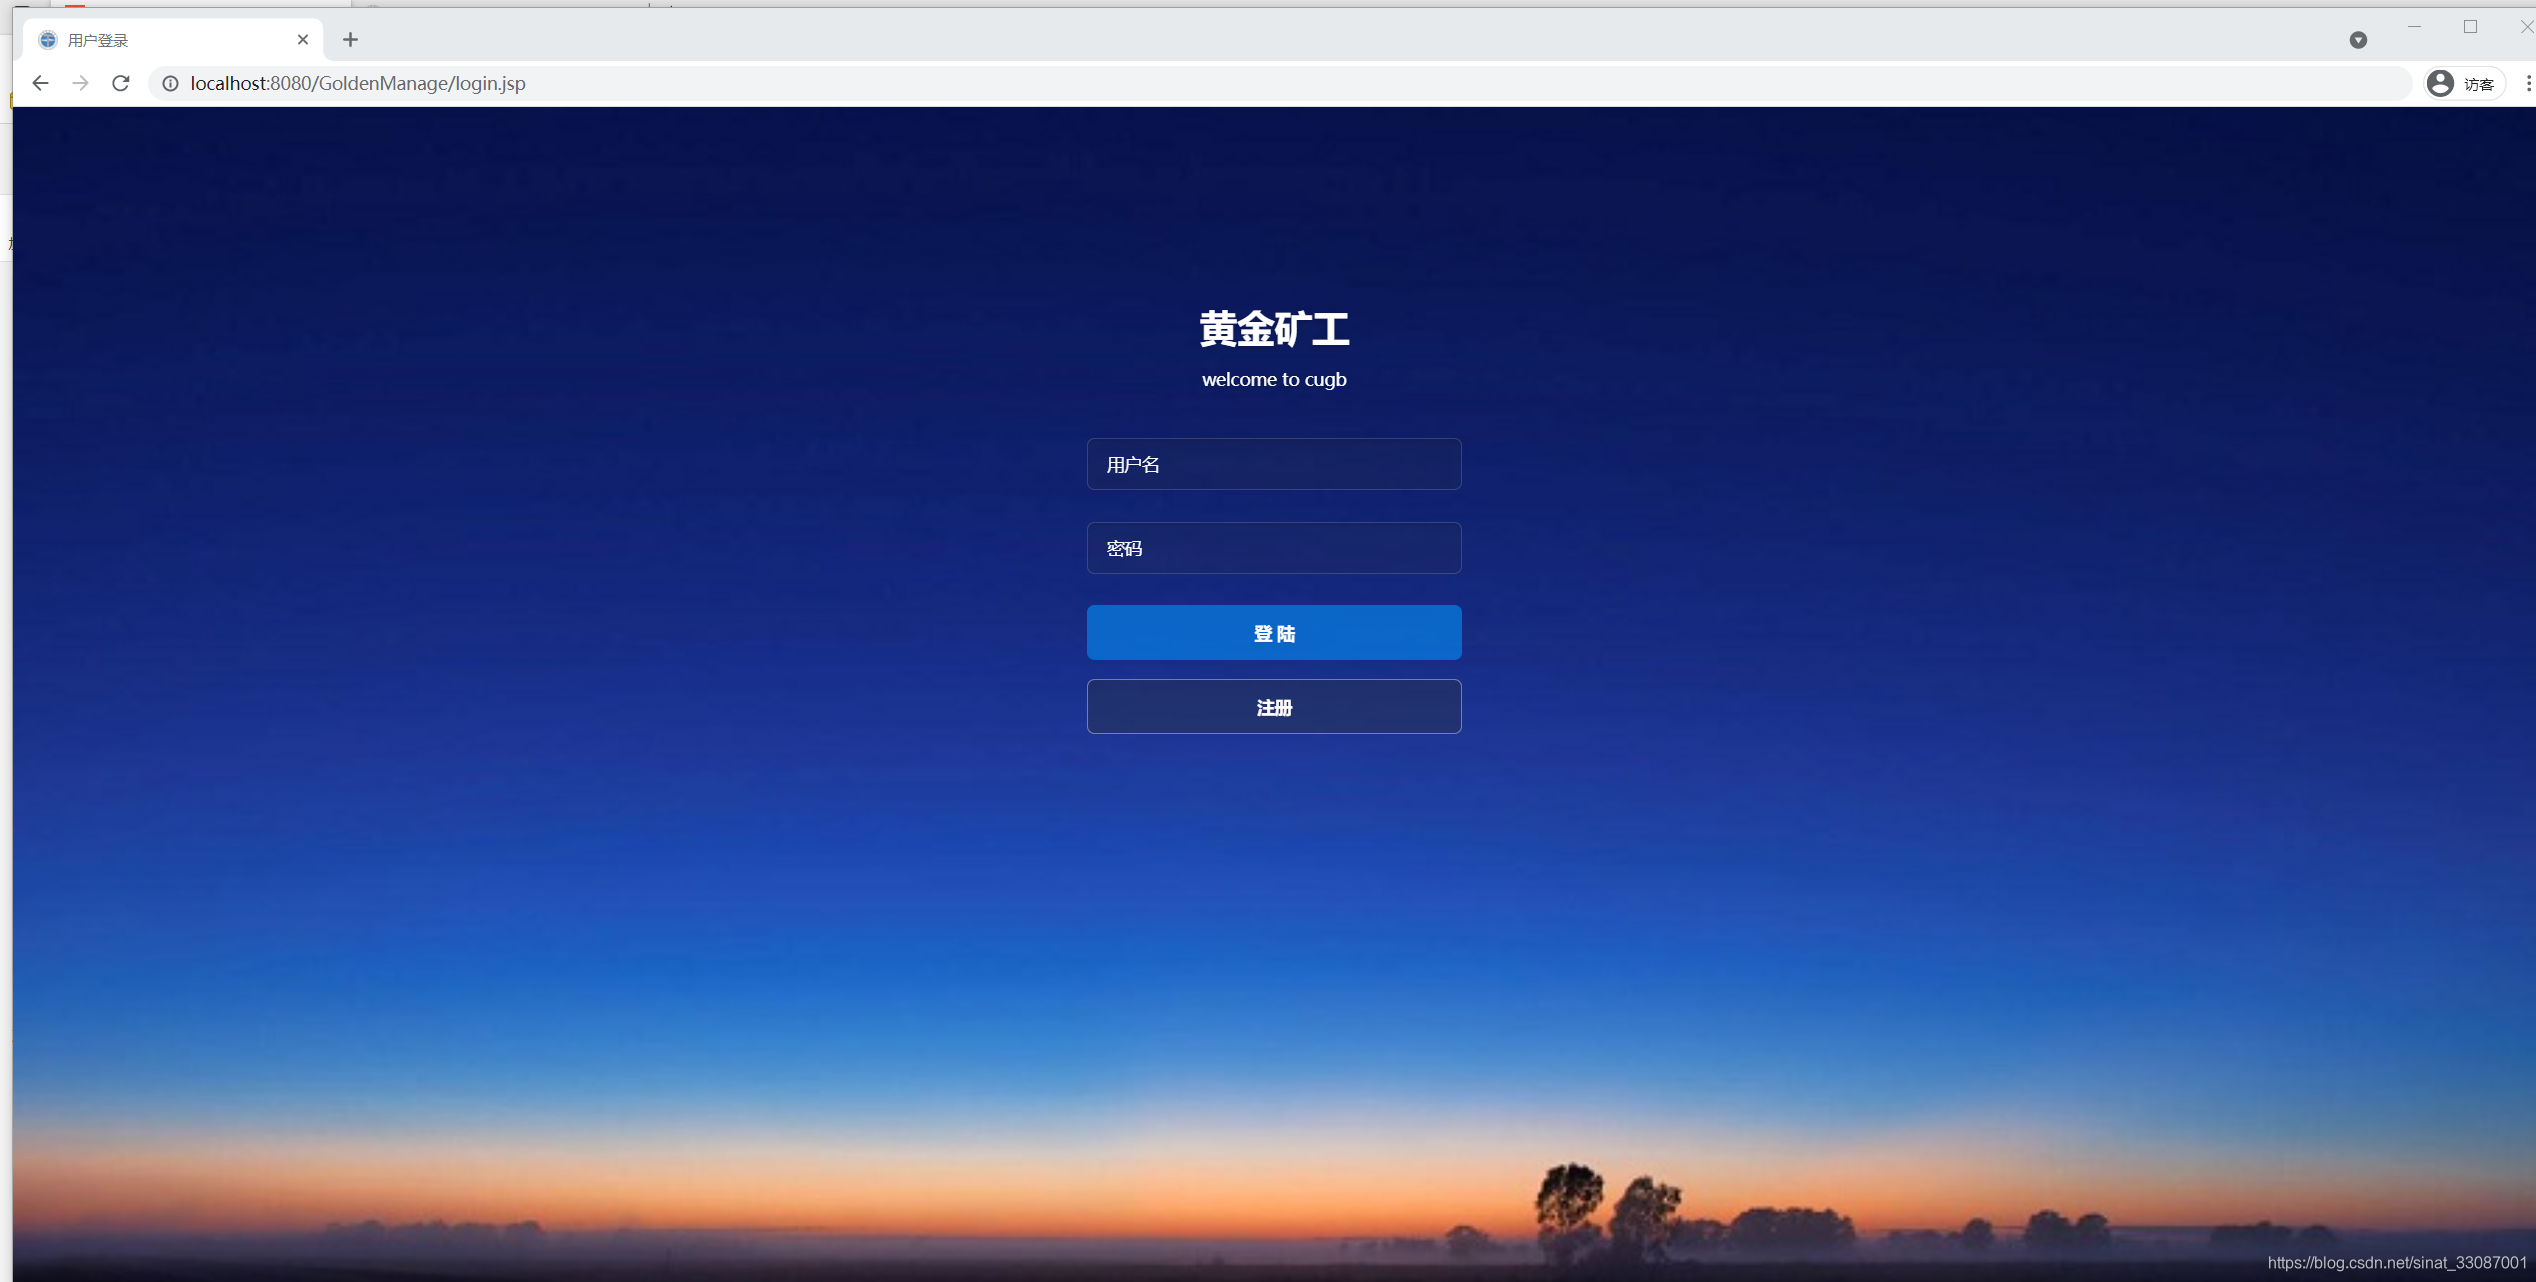
然后我们默认请求的首页被过滤器拦截重定向到了登录页面:
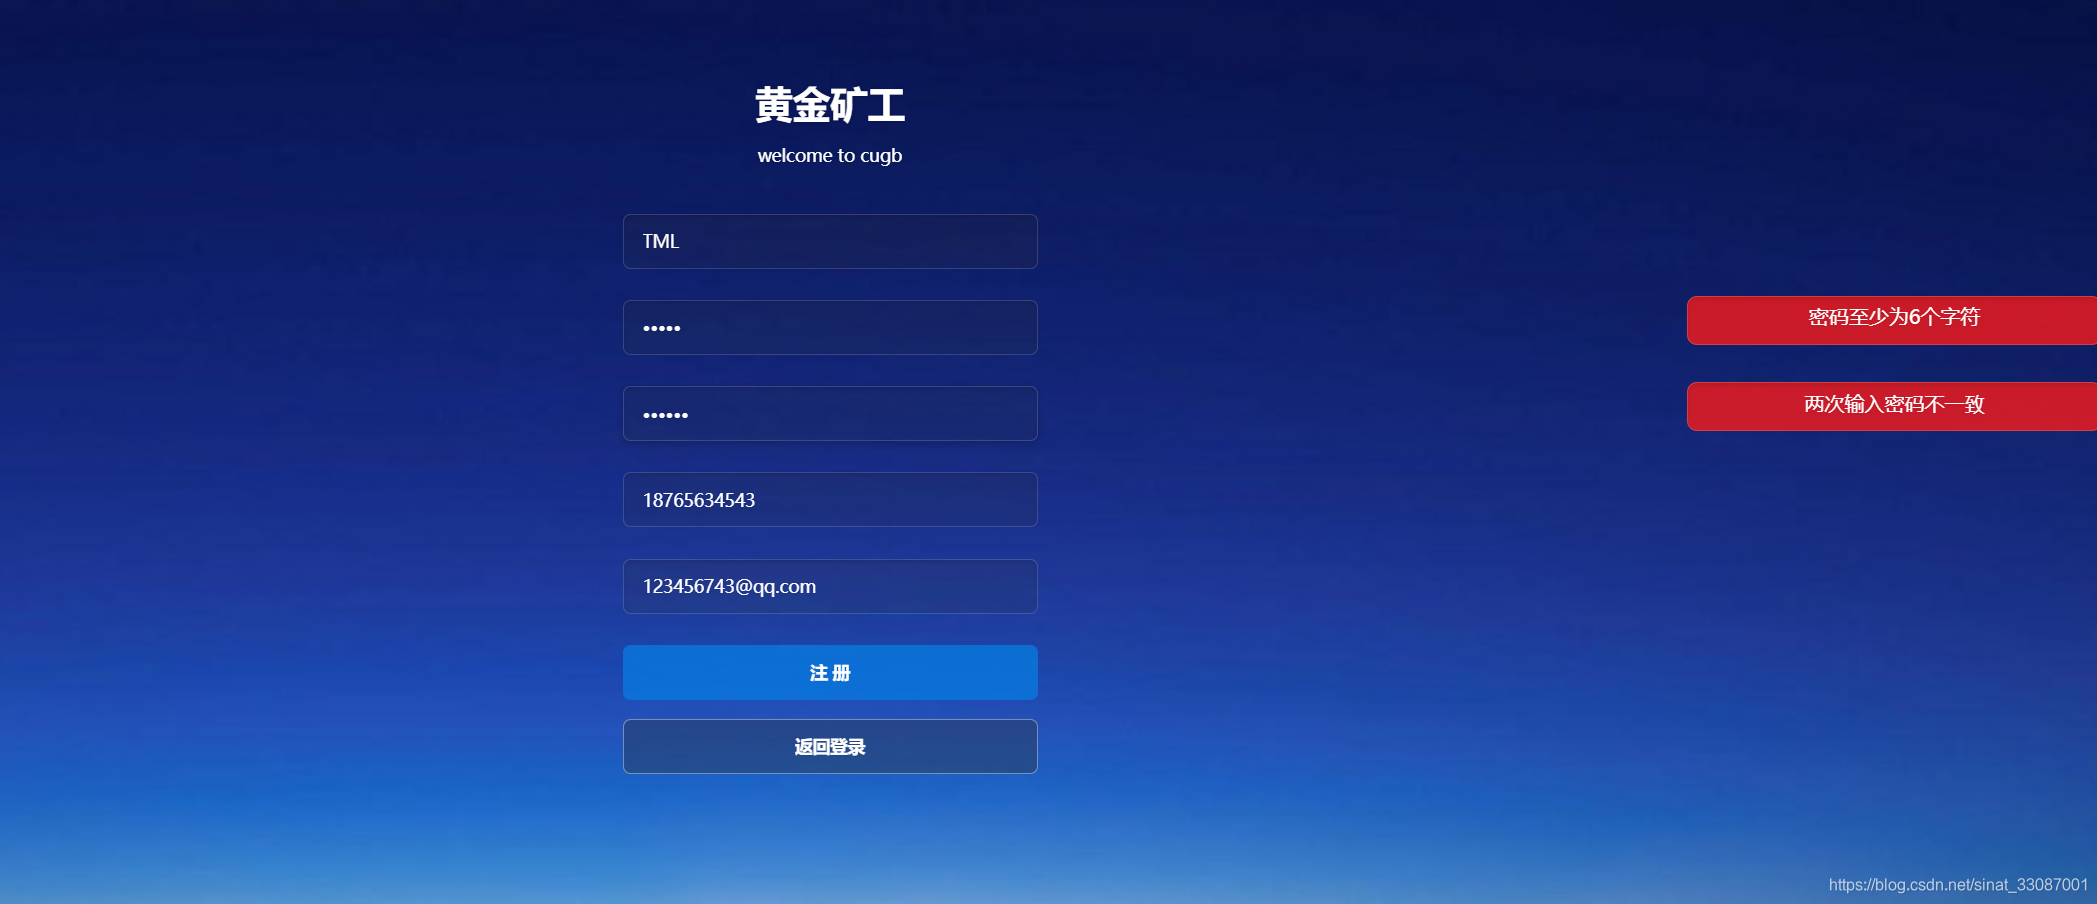
用户注册
这时我们点击注册去进行注册,用户注册时填写相关注册信息即可,如果填写错误有前端JS校验:
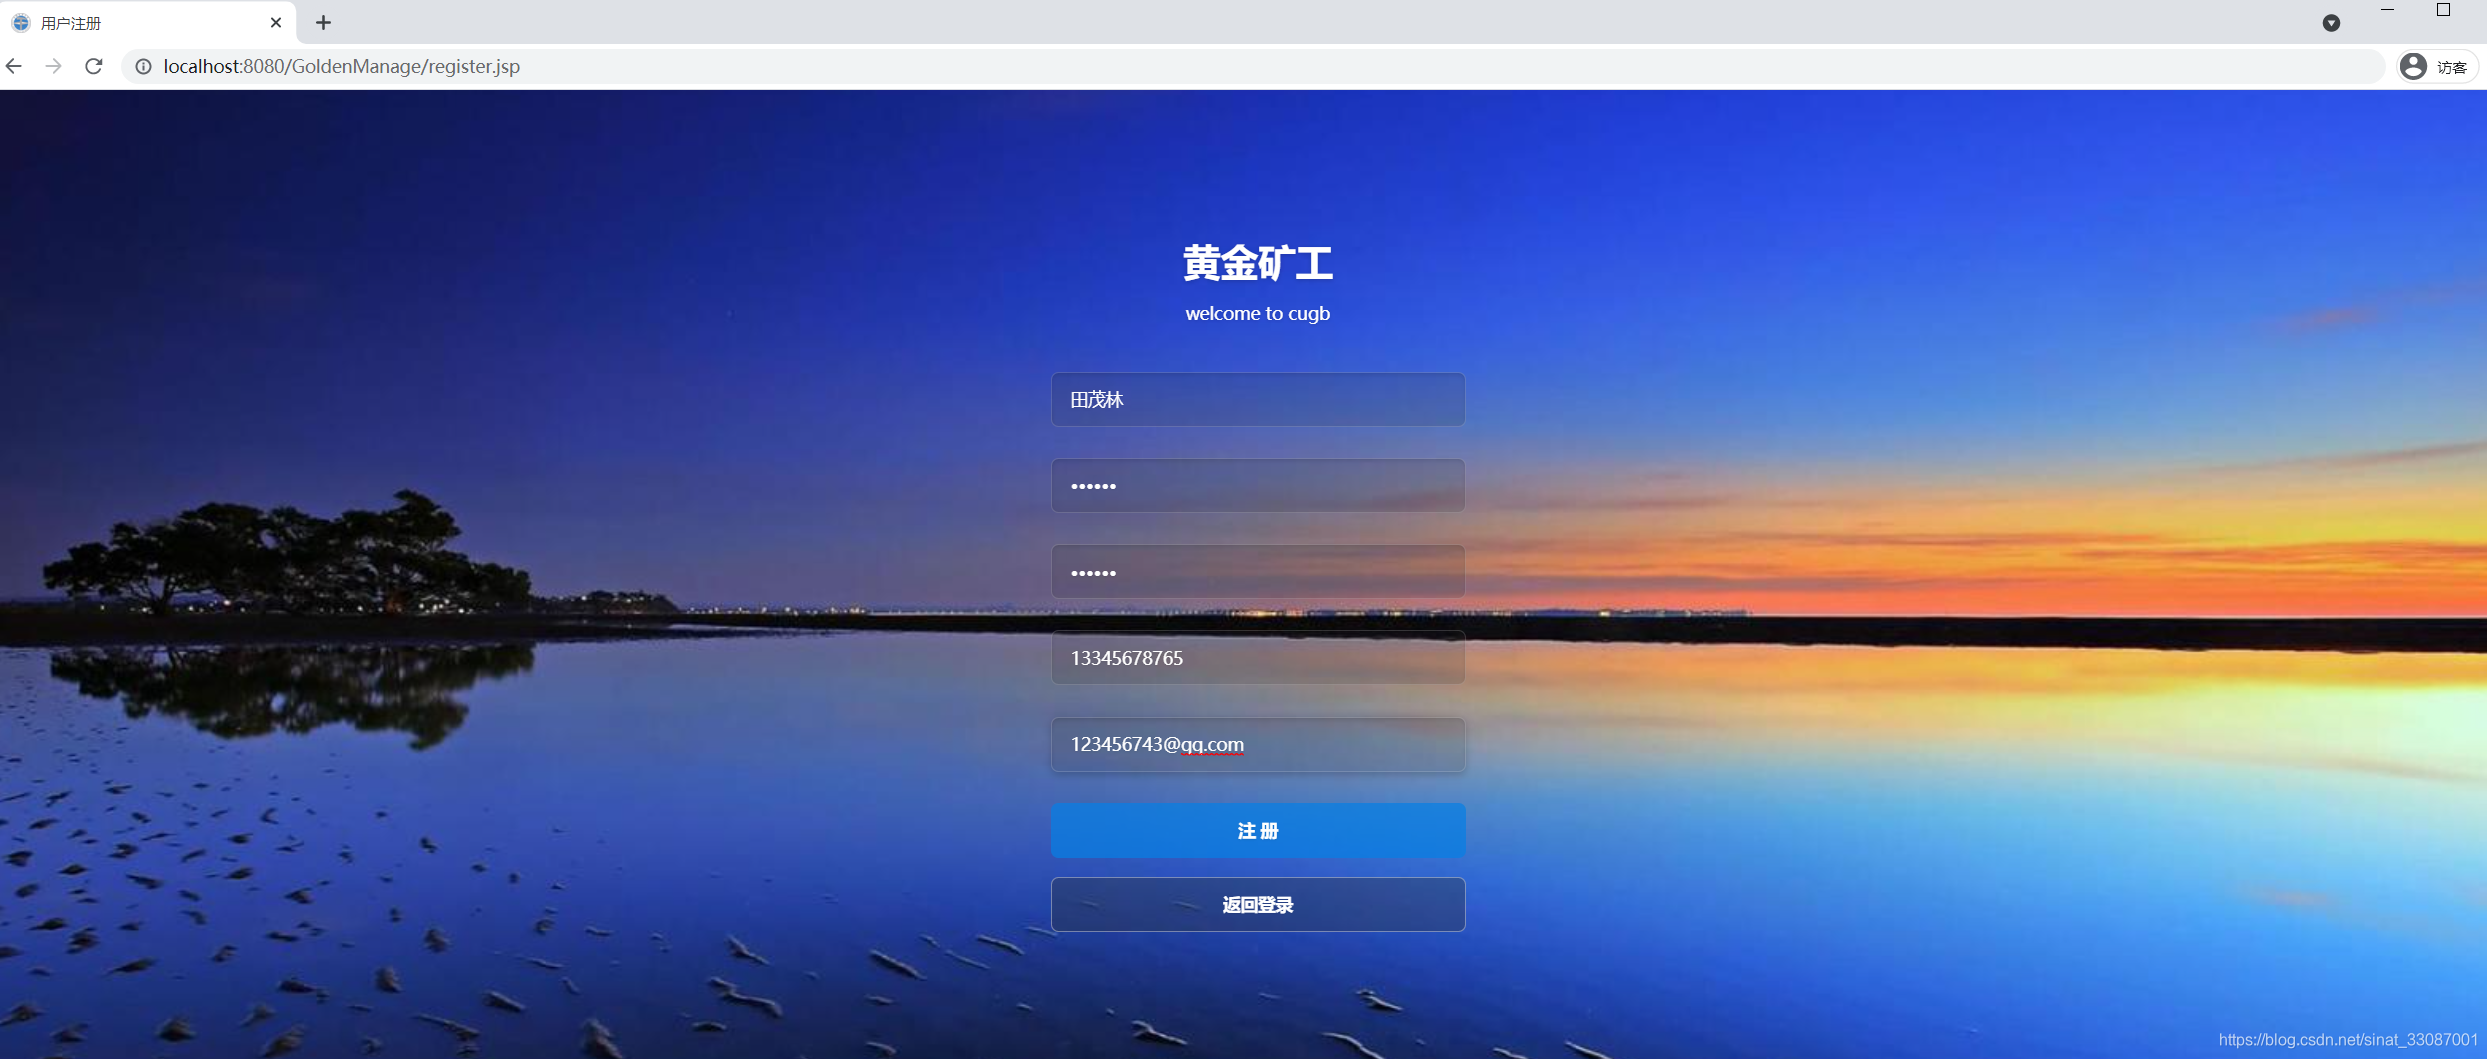
这里我们正确输入信息:
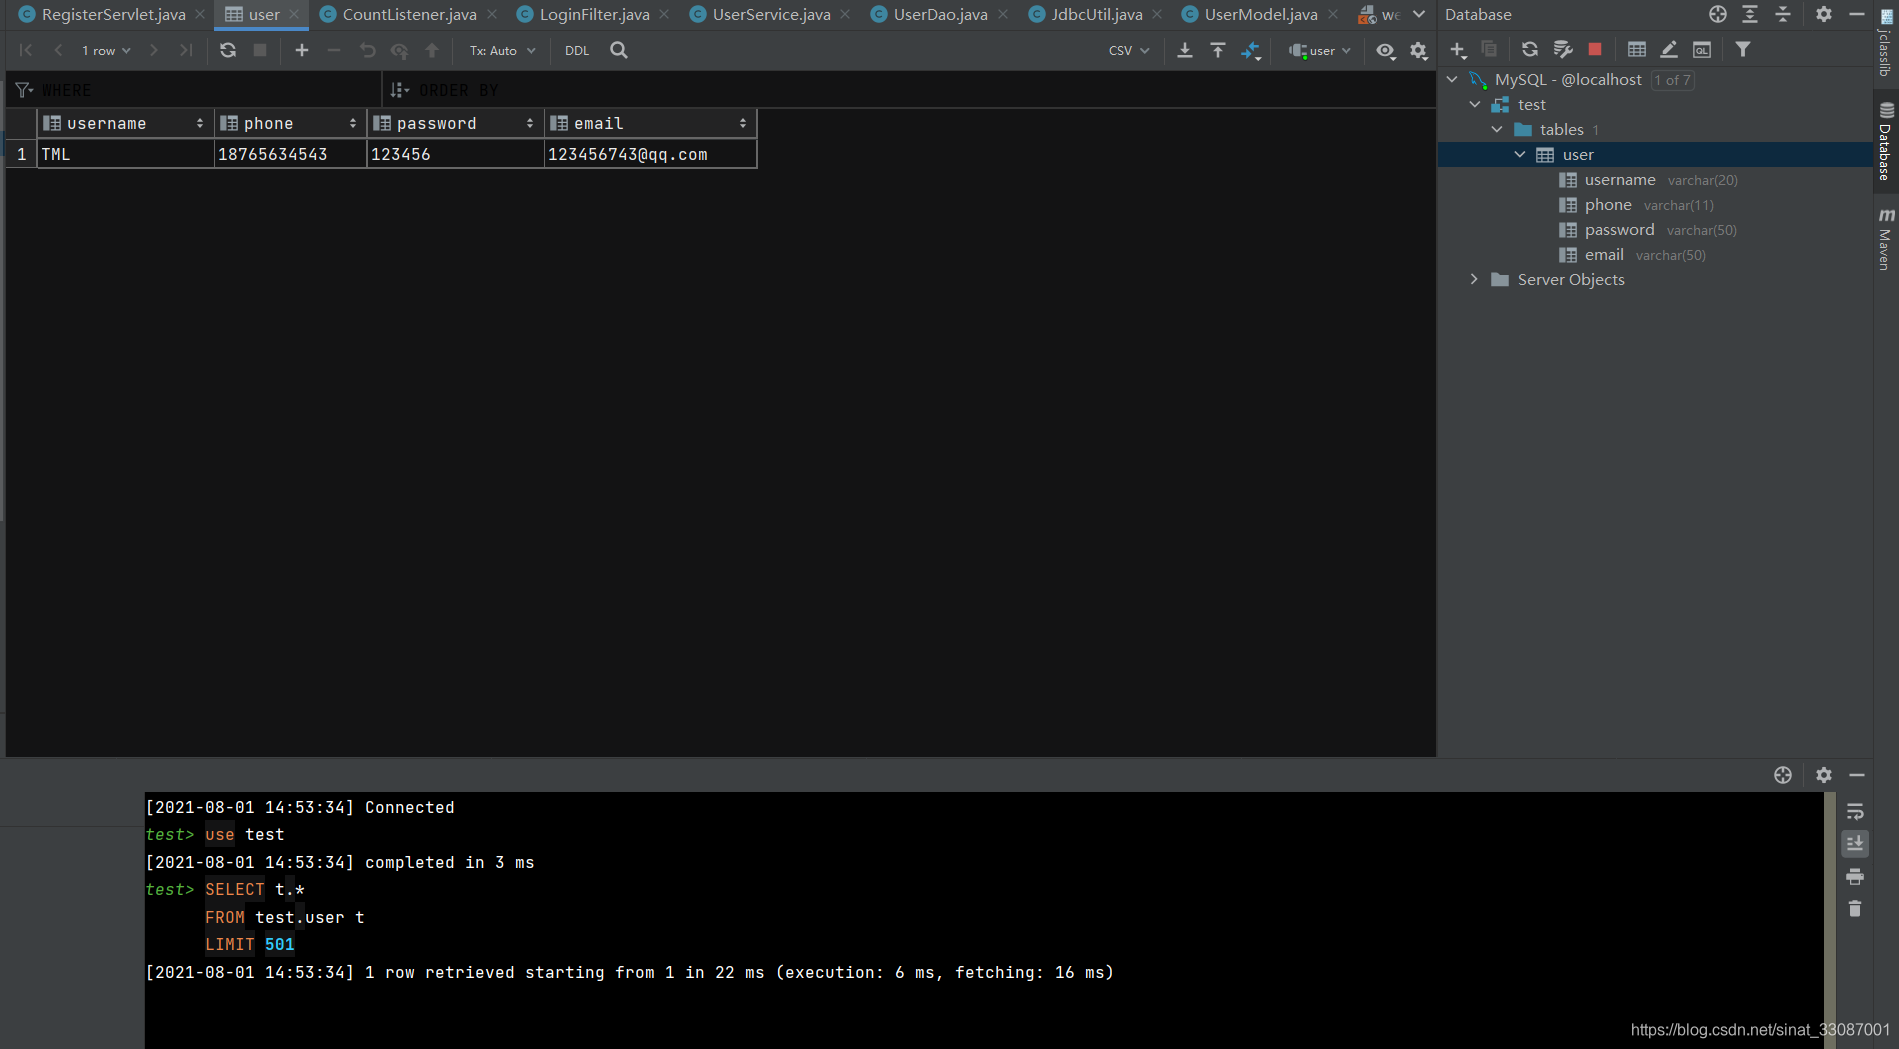
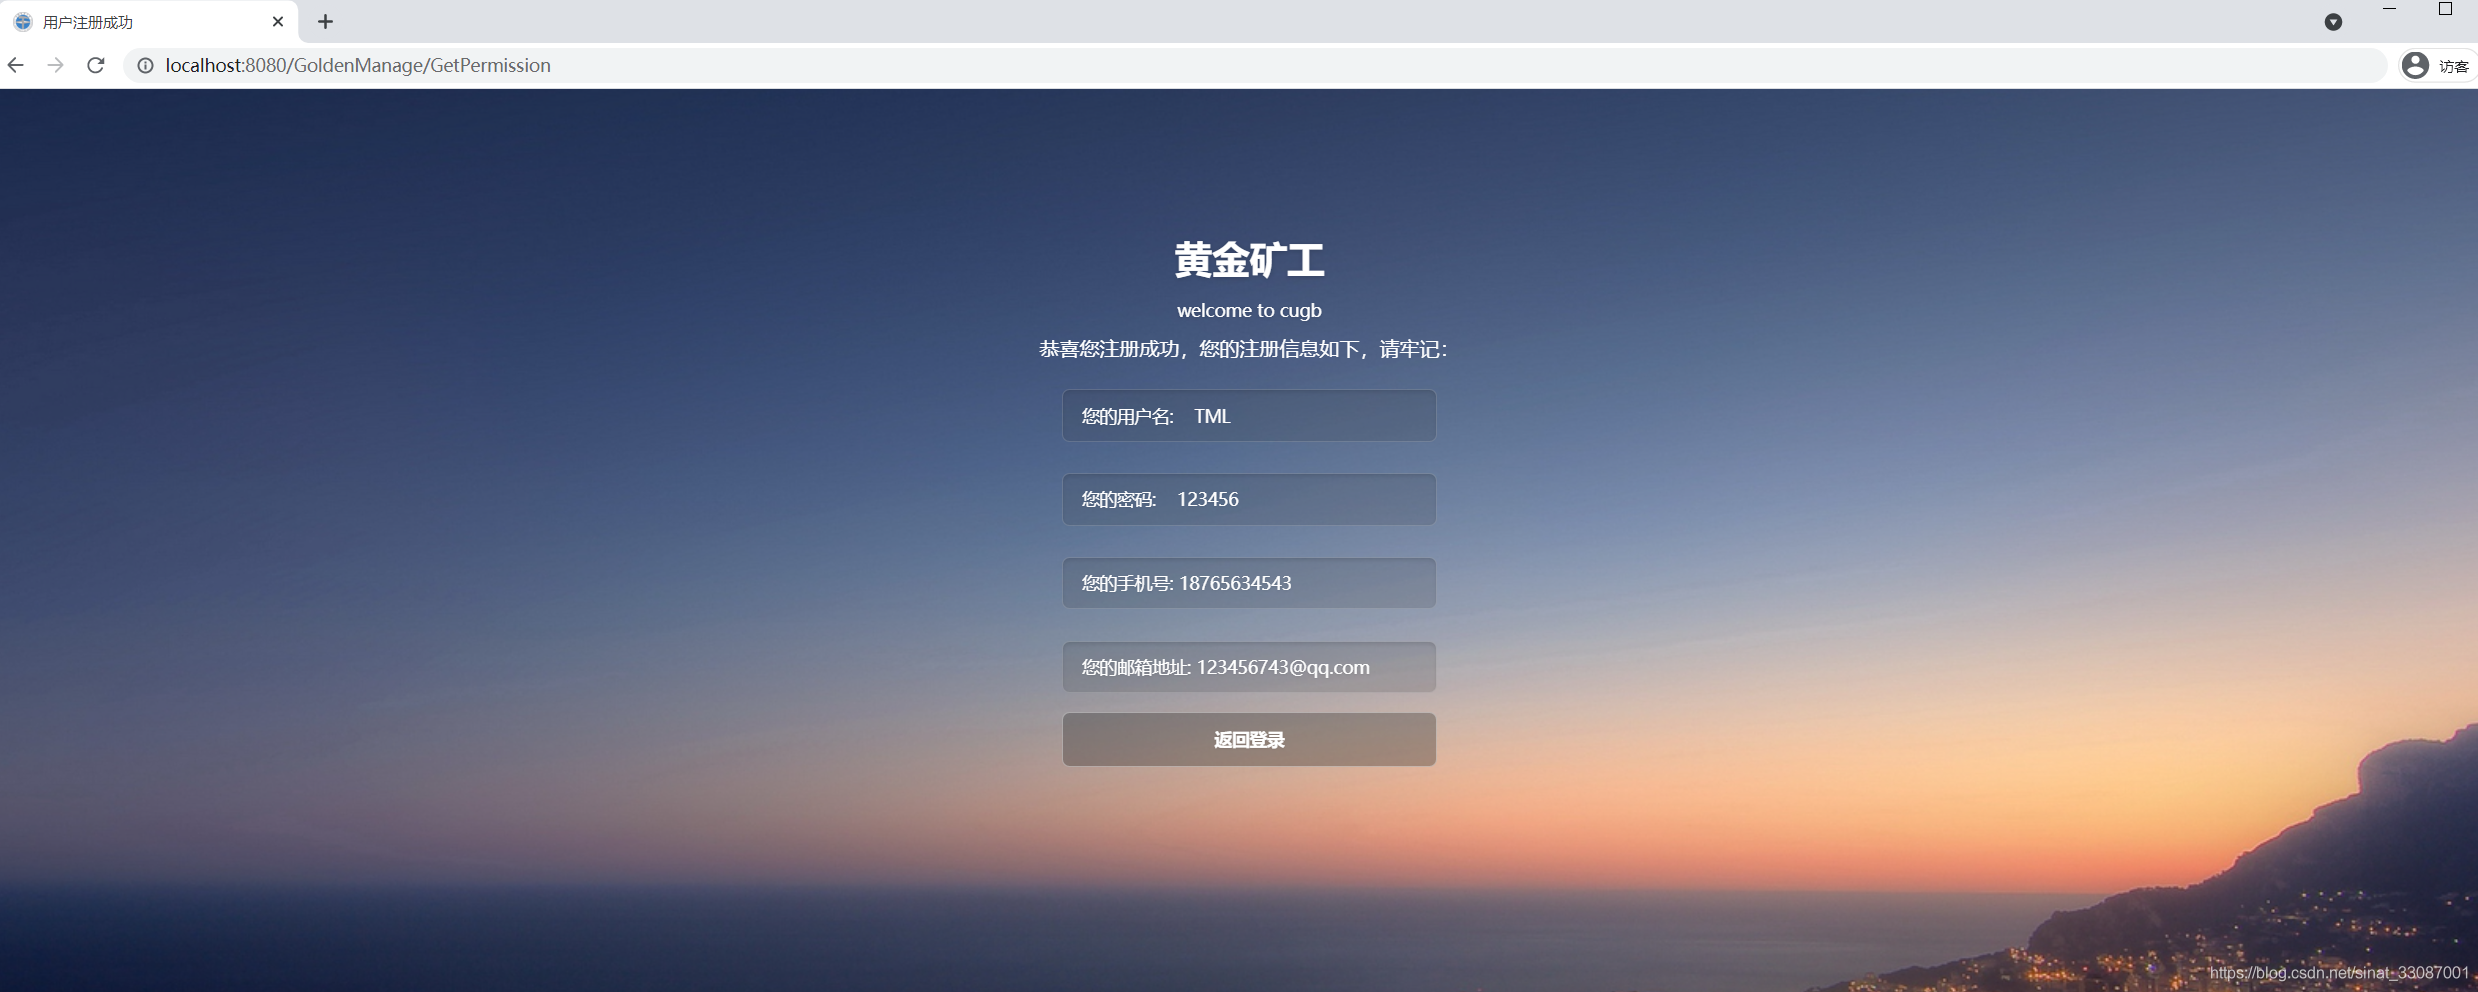
注册成功
输入正确注册信息验证通过后,数据首先会落库:
然后转发到success.jsp页面展示出来:
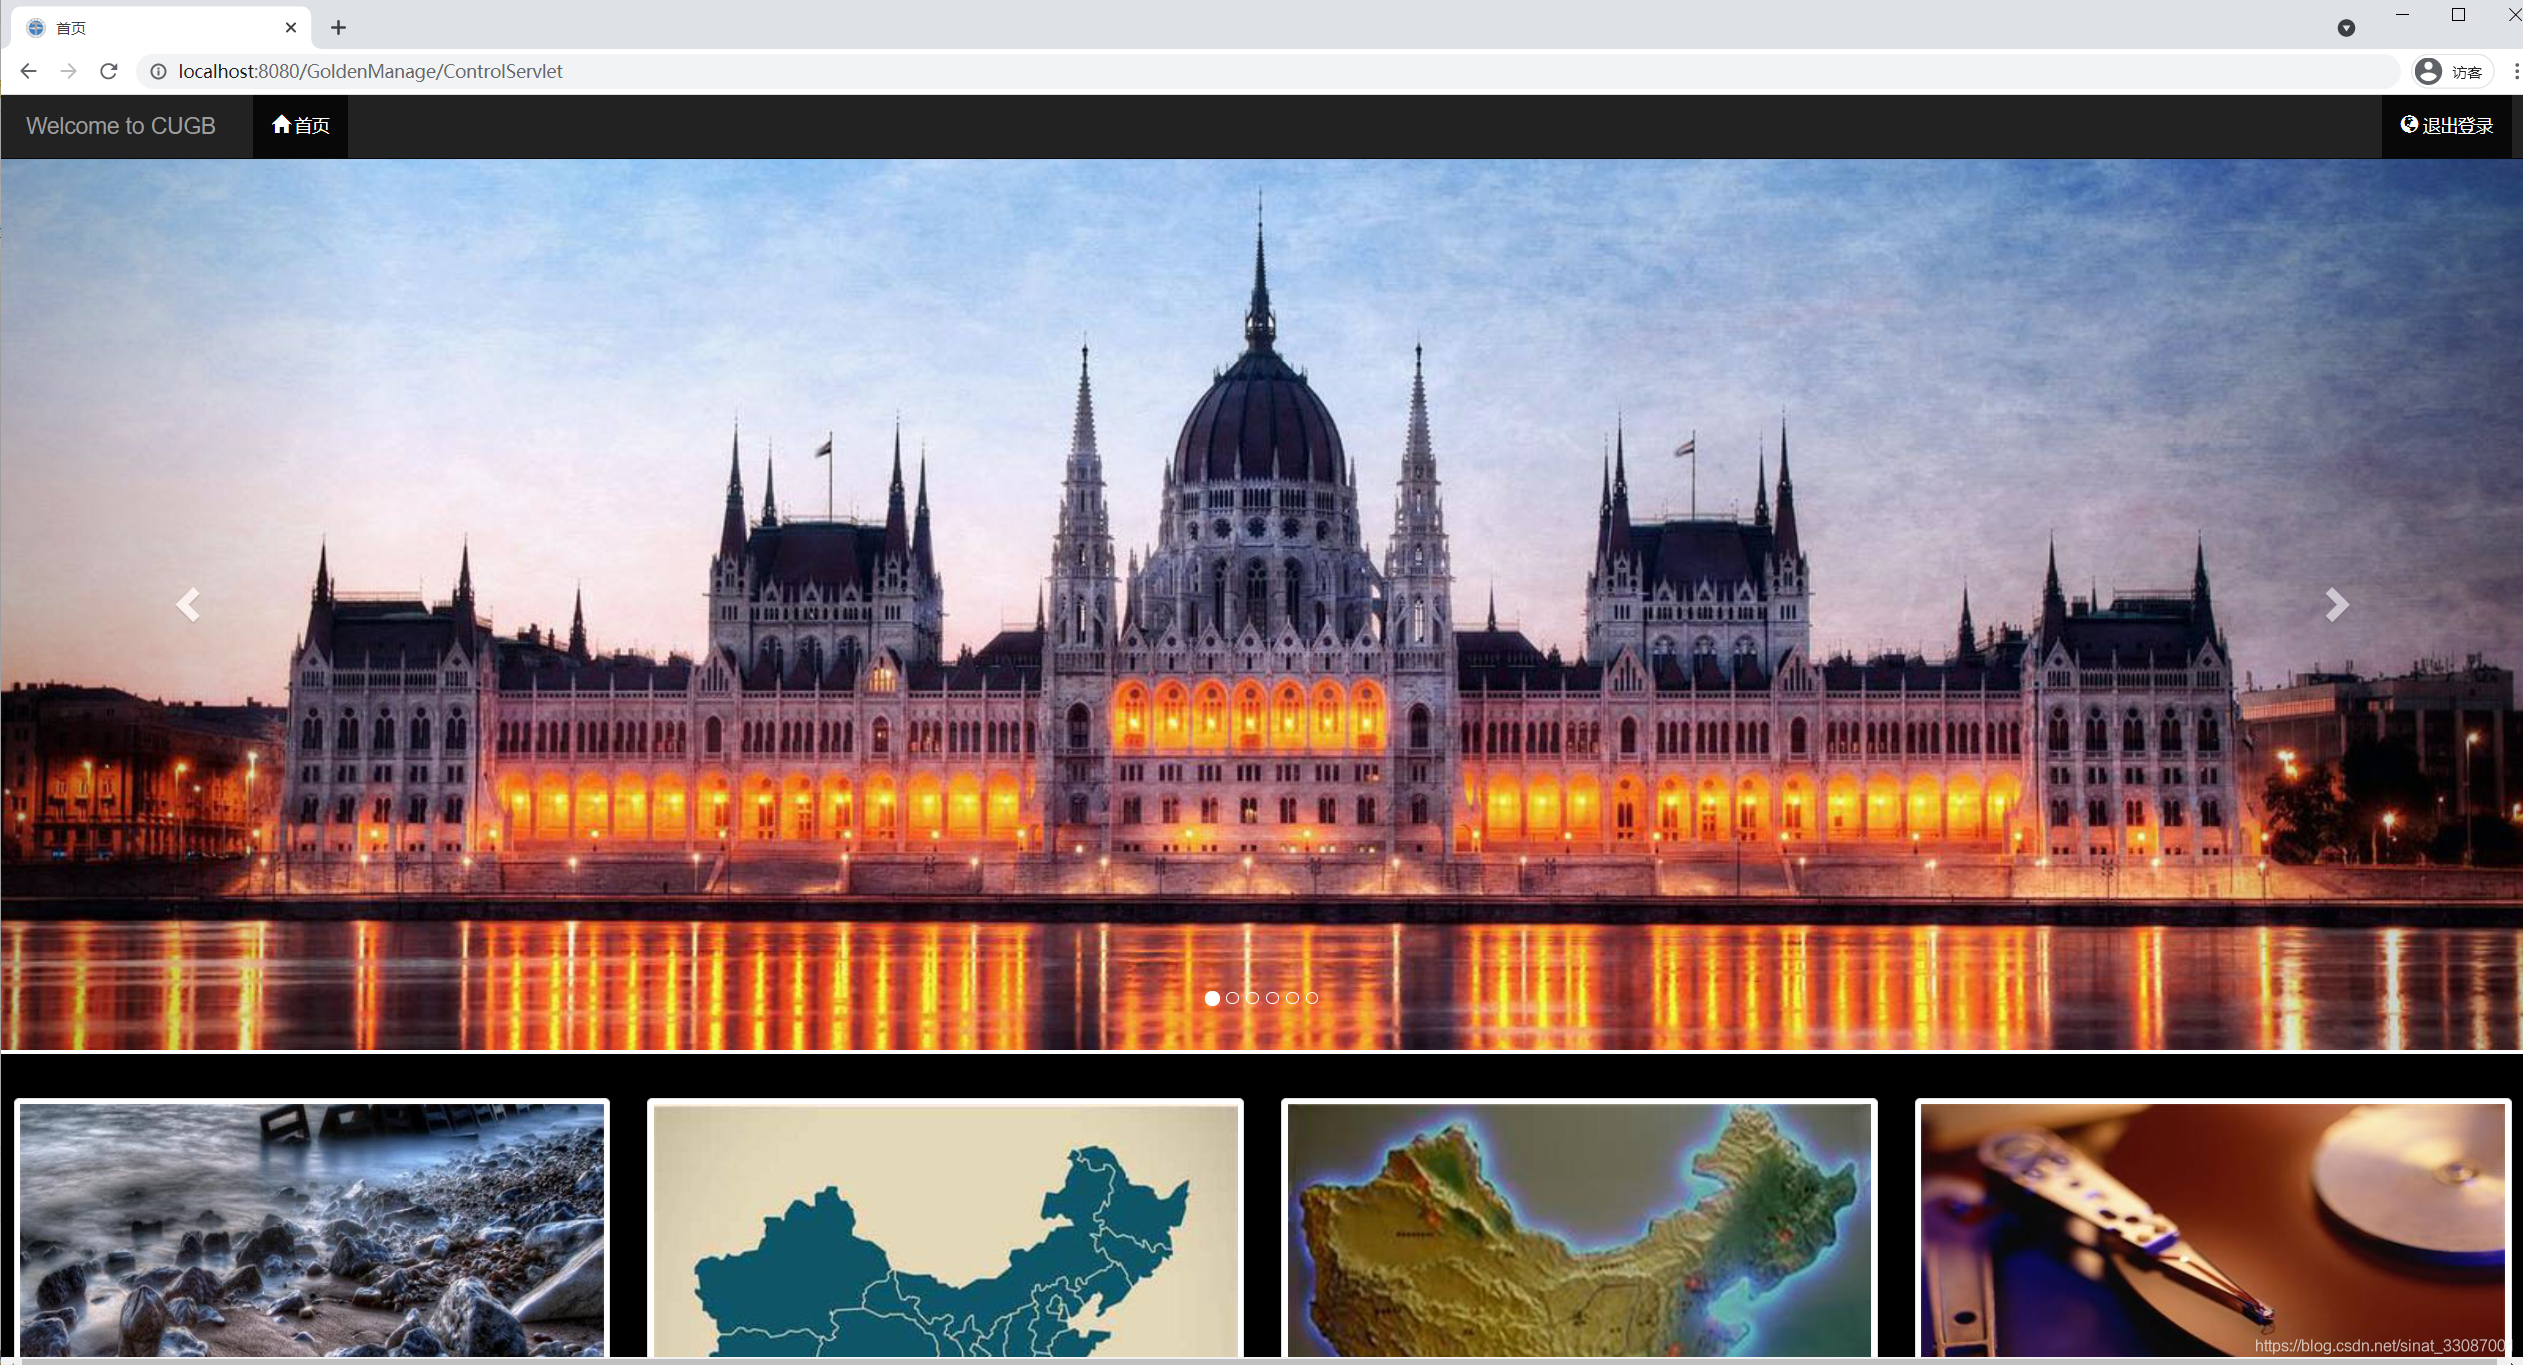
用户登录
注册完之后用户就可以登录了,登录时输入正确的用户名和密码后即会被转发到首页:
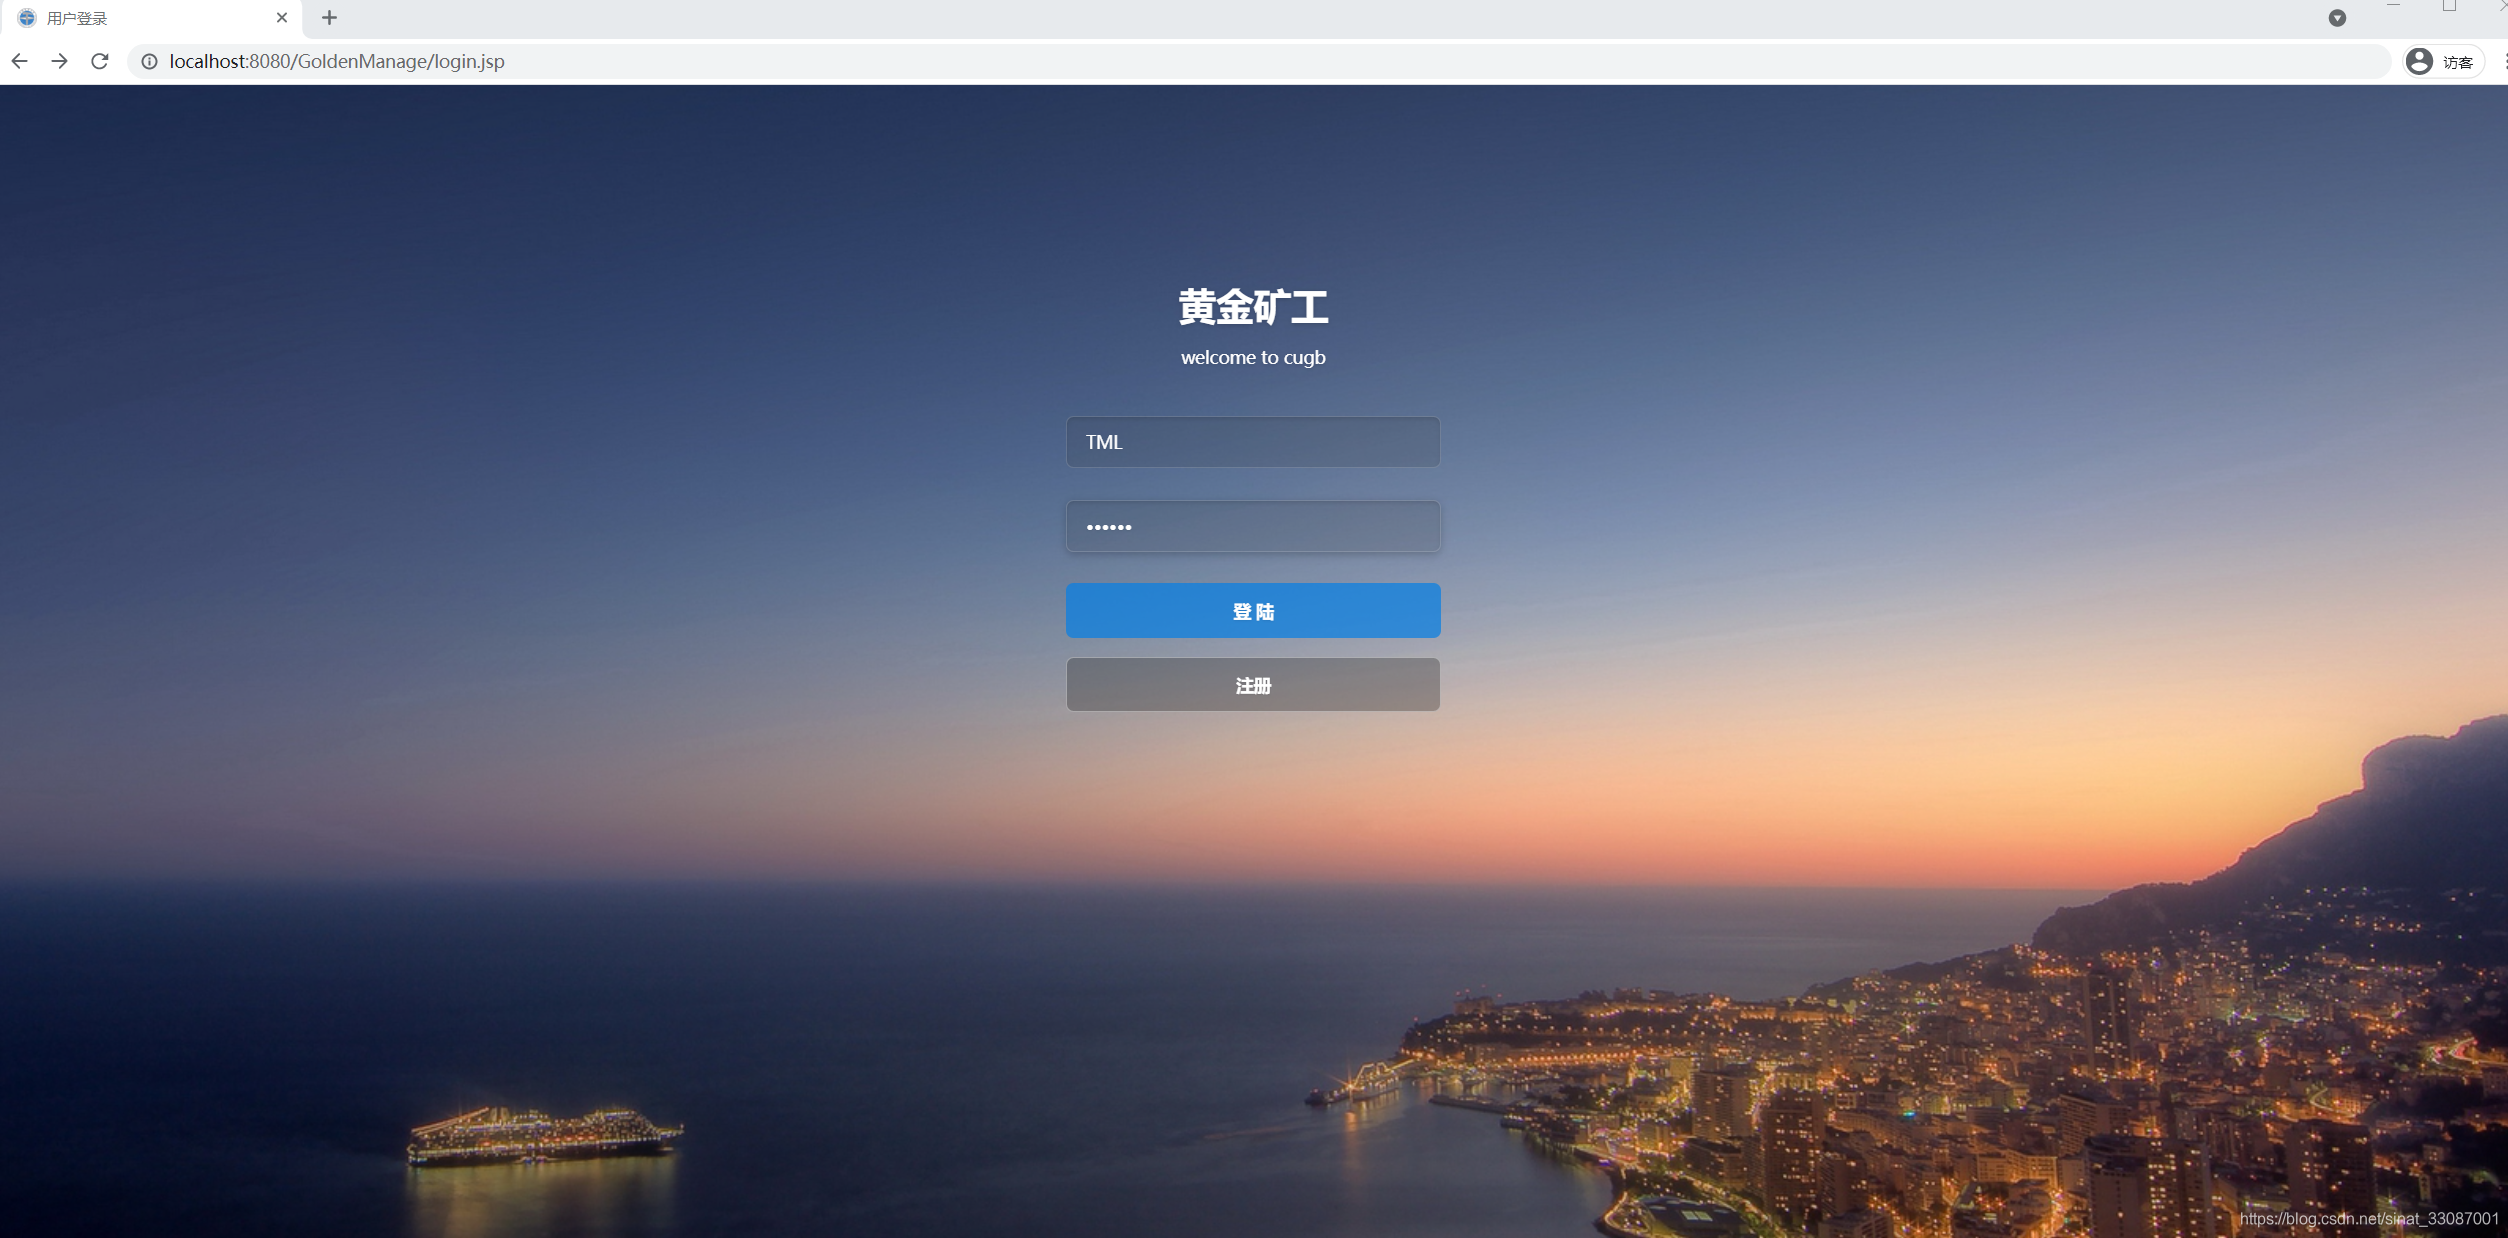
请求转发到首页,可以看到地址还是登录的Servlet。
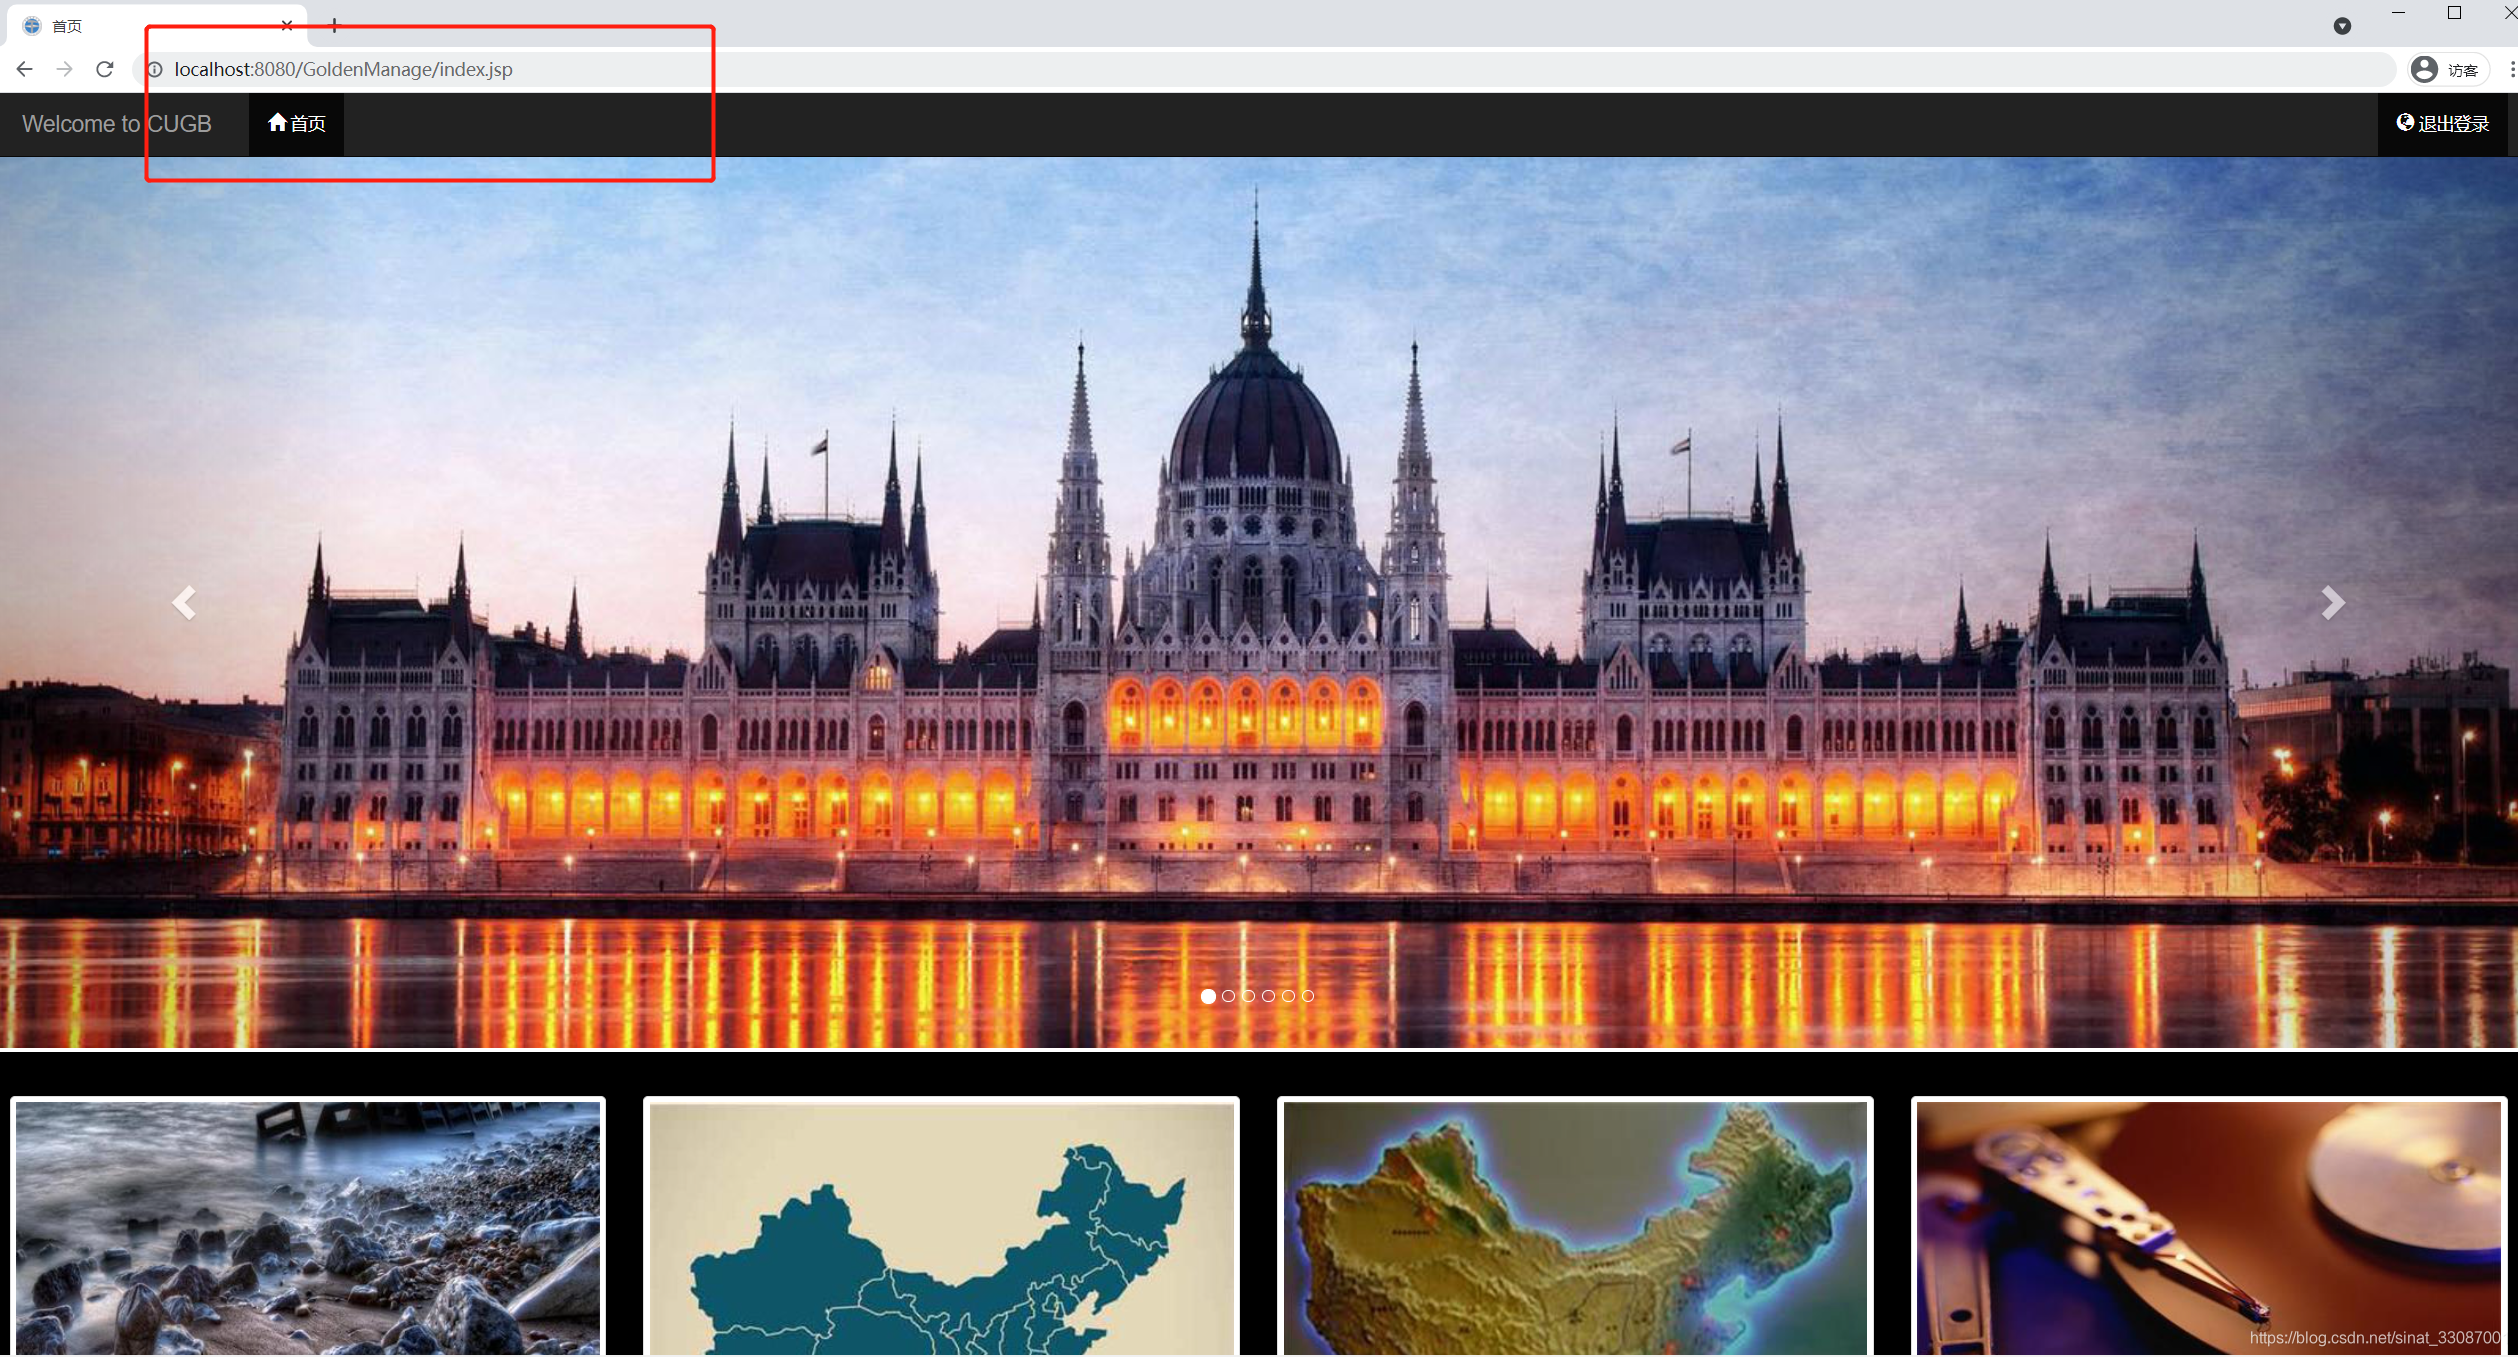
访问首页
登录之后由于有了Session,所以我们就可以通过index.jsp直接访问首页了:
用户登出
当点击【退出登录】时会跳转到退出登录确认页面,确认后销毁session,则过滤器又会对页面进行过滤了:
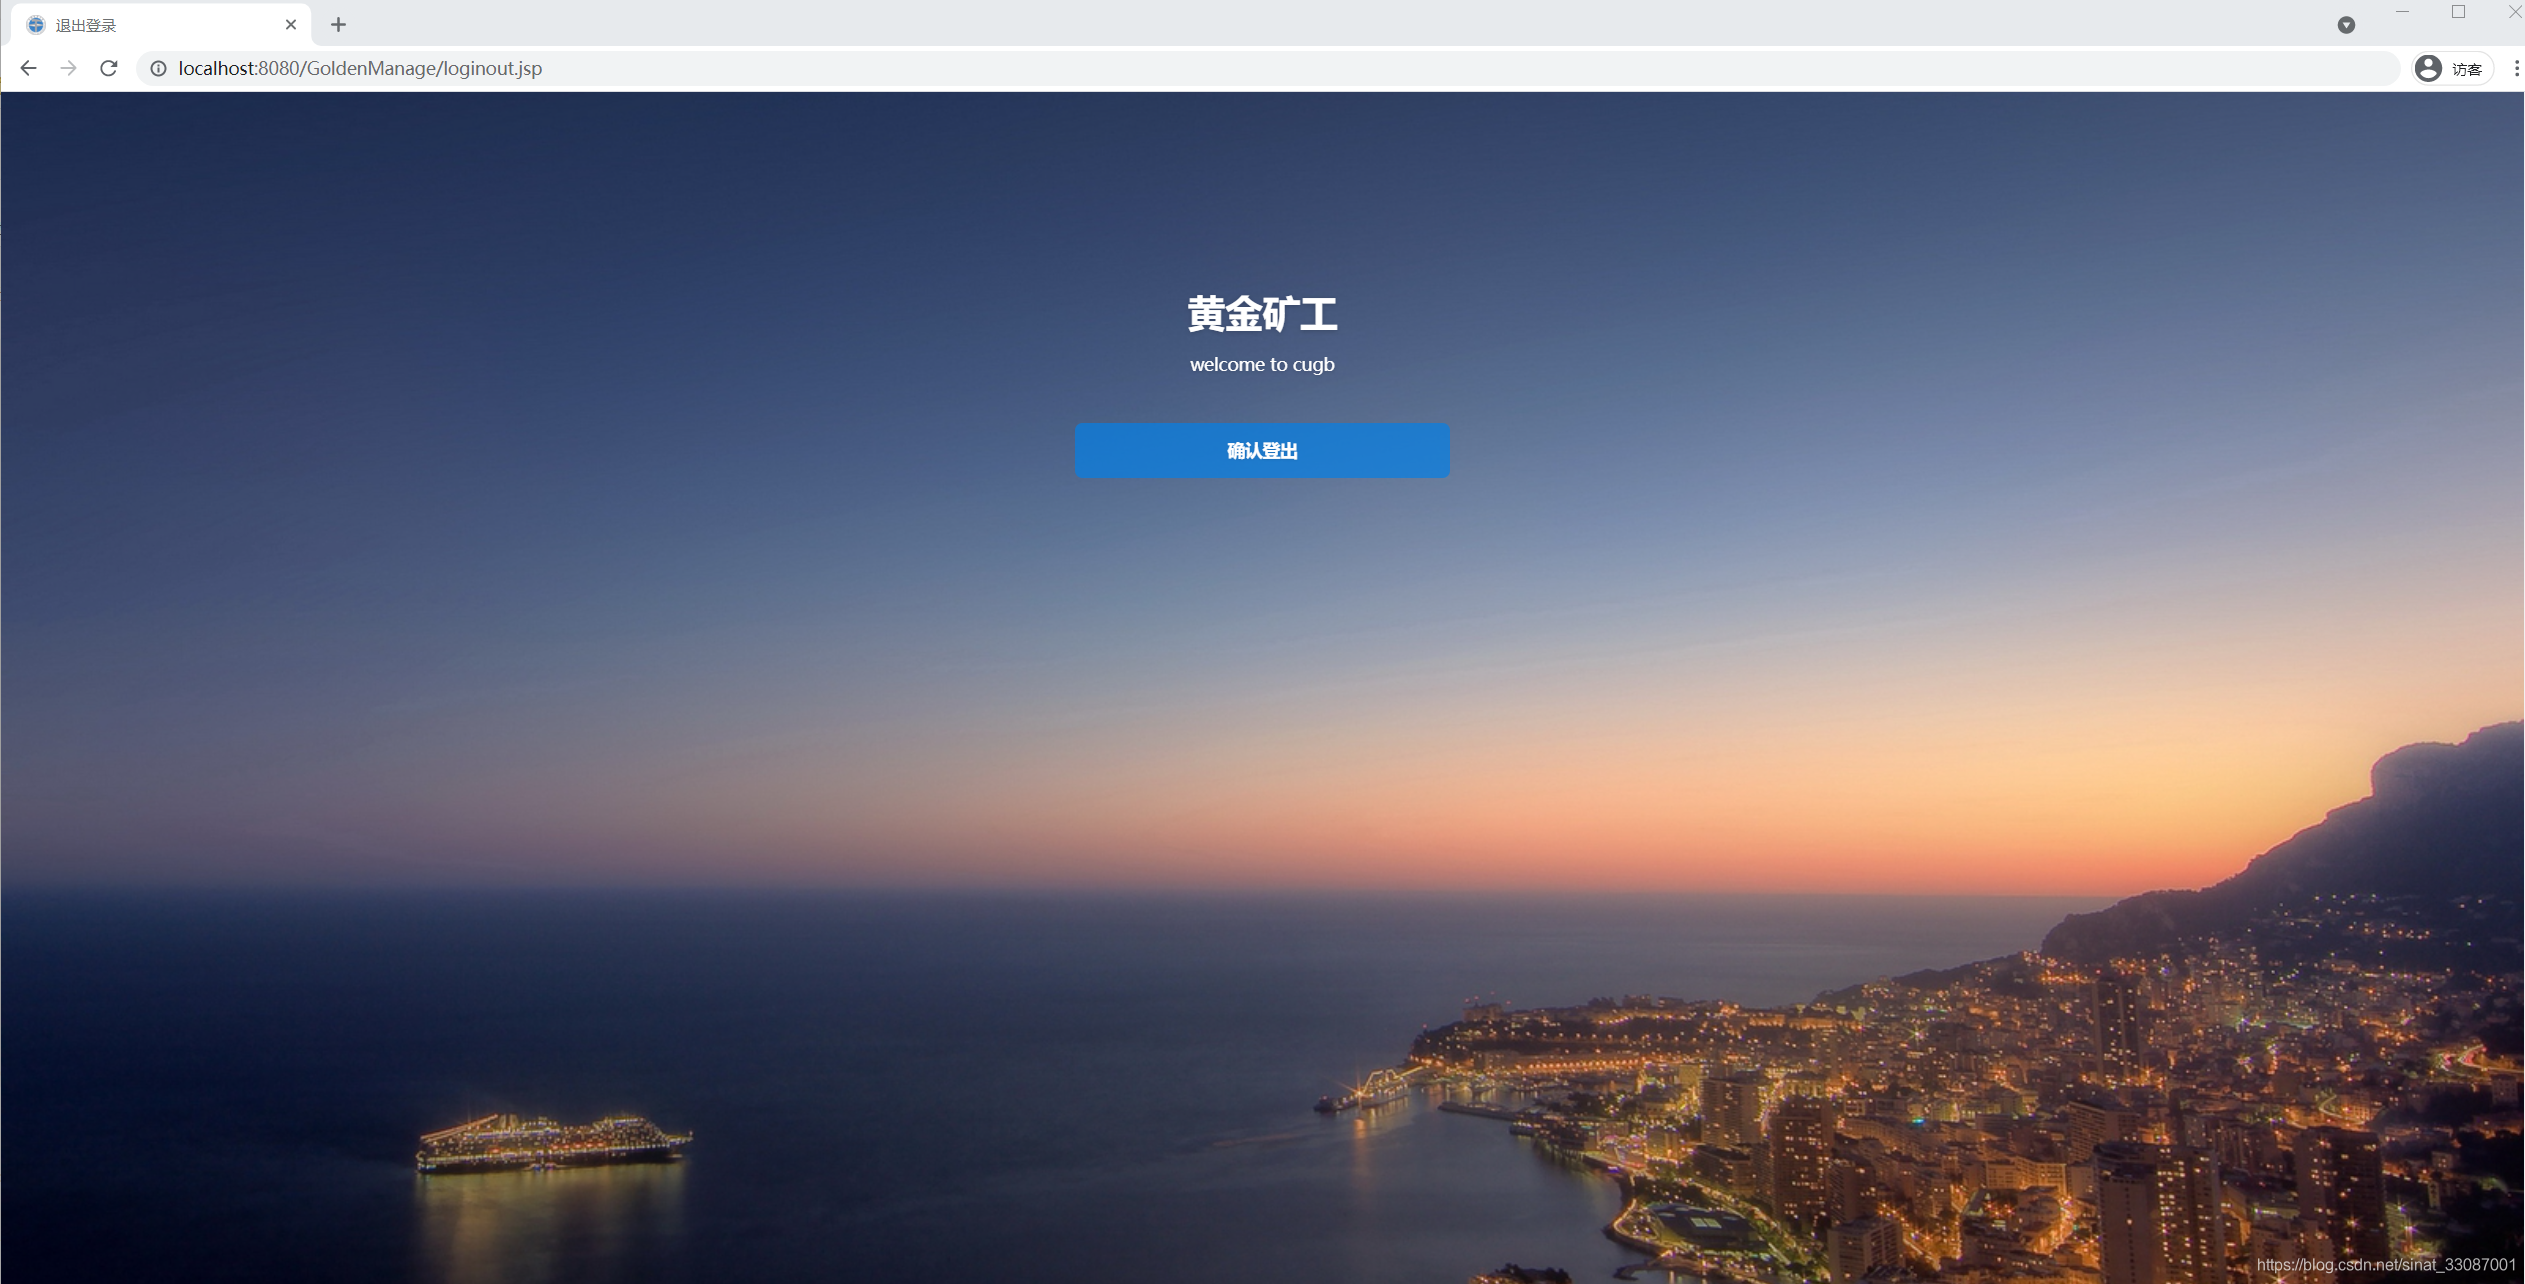
退出后自动跳转到用户登录页面:
总结一下
从重新编写代码设计项目到blog完成大概花了一天时间,有点长但很有价值,对古早味的Web实现和MVC架构思想有了比较深刻的理解,之后再学习框架的时候相信会如鱼得水,毕竟思想摆在那里,框架只是简化思想的落地而已,例如mybatis是对DAO的优化,springMVC是对JSP的优化,Spring是对Servlet的优化,当然不尽准确,但也可以得知,技术的演进过程是因为需求,技术会变化,但思想会一直保留,以后有时间得好好学习设计模式,那些才是干货呀。


 4186
4186

 被折叠的 条评论
为什么被折叠?
被折叠的 条评论
为什么被折叠?
 到【灌水乐园】发言


