


资料
工具
aws命令行saml和webidentity认证
# samlresponse获取参考-如何在浏览器中查看 SAML 响应以排查问题
$ aws sts assume-role-with-saml \
	--role-arn arn:aws:iam::ACCOUNTNUMBER:role/IAM_ROLE \
	--principal-arn arn:aws:iam::ACCOUNTNUMBER:saml-provider/SAML_PROVIDER \
	--saml-assertion file://samlresponse.log

$ aws sts assume-role-with-web-identity \
	--role-arn arn:aws:iam::123456789012:role/FederatedWebIdentityRole --role-session-name ExampleSession \
	--web-identity-token
Atza%7CIQEBLjAsAhRFiXuWpUXuRvQ9PZL3GMFcYexxxxxxxxxG7PrtLZtj_dfCTj92xNGed-CrKqjG7nPBjNIL0xxxxxxxxxHhFOzTQxod27L9CqnOLio7N3gZAGpsp6n1-AJBOCJckcyXe2c6uDxxxx87Vd_cVMQ
获取结果
{
    "Issuer": "https://integ.example.com/idp/shibboleth</Issuer",
    "AssumedRoleUser": {
        "Arn": "arn:aws:sts::123456789012:assumed-role/TestSaml",
        "AssumedRoleId": "ARO456EXAMPLE789:TestSaml"
    },
    "Credentials": {
        "AccessKeyId": "ASIAxxxxxxxEXAMPLE",
        "SecretAccessKey": "8P+SQvWIxxxxxxxxxxvNEXAMPLEKEY",
        "SessionToken": "IQoxxxxxxxxxxxX2VjEOzxxxxxxxxxxxxx",
        "Expiration": "2019-11-01T20:26:47Z"
    },
    "Audience": "https://signin.aws.amazon.com/saml ",
    "SubjectType": "transient",
    "PackedPolicySize": "6",
    "NameQualifier": "SbdGOnUkh1i4+EXAMPLExL/jEvs=",
    "Subject": "SamlExample"
}
修改aws config文件
$ cat ~/.aws/credentials
[default]
aws_access_key_id = xxxxxxxxxxxxxxxxxxxxxxxx
aws_secret_access_key = xxxxxxxxxxxxxxxxxxxxxxxx
aws_session_token = IQoJb3JpZ2luX2VjEOzxxxxxxxxxxxxx
查看配置结果
$ aws sts get-caller-identity
创建keycloak集成sso
Keycloak是RedHat开源的广泛使用的用户身份管理与授权解决方案,支持多种 SSO协议,包括:SAML,OpenID和OAuth2等
生成pem格式的证书
openssl genrsa -out privkey.pem 2048
openssl req -new -key privkey.pem -out cert.csr
openssl req -new -x509 -key privkey.pem -out pubcert.pem -days 1000
使用docker启动keycloak
Keycloak comes with its own database embedded Java-based relational database called H2. The H2 database is not very viable in high concurrency situations and should not be used in a cluster either.
docker run -p 8090:8080 -p 8443:8443 -d --restart always -e KEYCLOAK_ADMIN=admin -e KEYCLOAK_ADMIN_PASSWORD=admin -v /home/ec2-user/ca/keycloak:/etc/x509/https quay.io/keycloak/keycloak:20.0.1 start-dev --https-certificate-file=/etc/x509/https/pubcert.pem --https-certificate-key-file=/etc/x509/https/privkey.pem

# 可以配置的参数如下
# Possible solutions: --http-enabled, --http-host, --http-port, --https-port, --https-client-auth, --https-cipher-suites, --https-protocols, --https-certificate-file, --https-certificate-key-file, --https-key-store-file, --https-key-store-password, --https-key-store-type, --https-trust-store-file, --https-trust-store-password, --https-trust-store-type, --http-relative-path
Try 'kc.sh build --help' for more information on the available options.
参考资料中的版本和我用的镜像不一样,所以配置配置参数也有区别,经过不懈努力最终配上了tls,为keycloak配置tls
keycloak内网访问可以通过http访问,但是公网访问必须通过https,因此需要生成证书和密钥
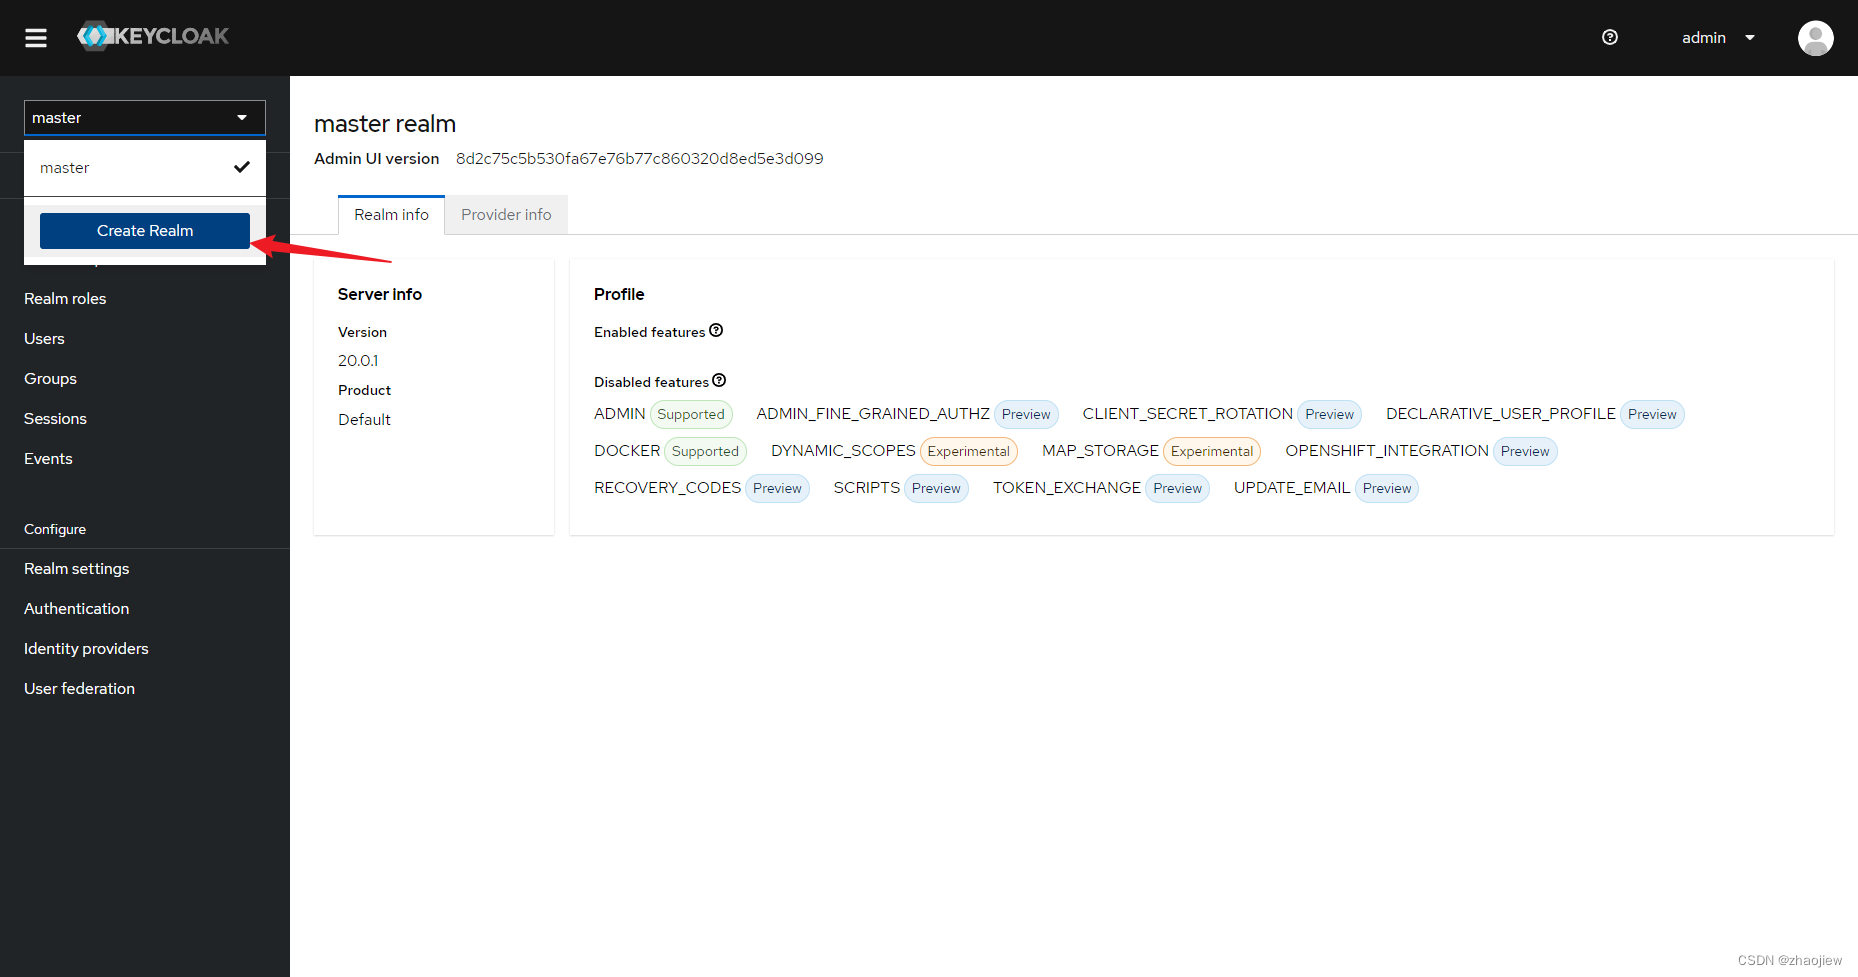
创建新realm
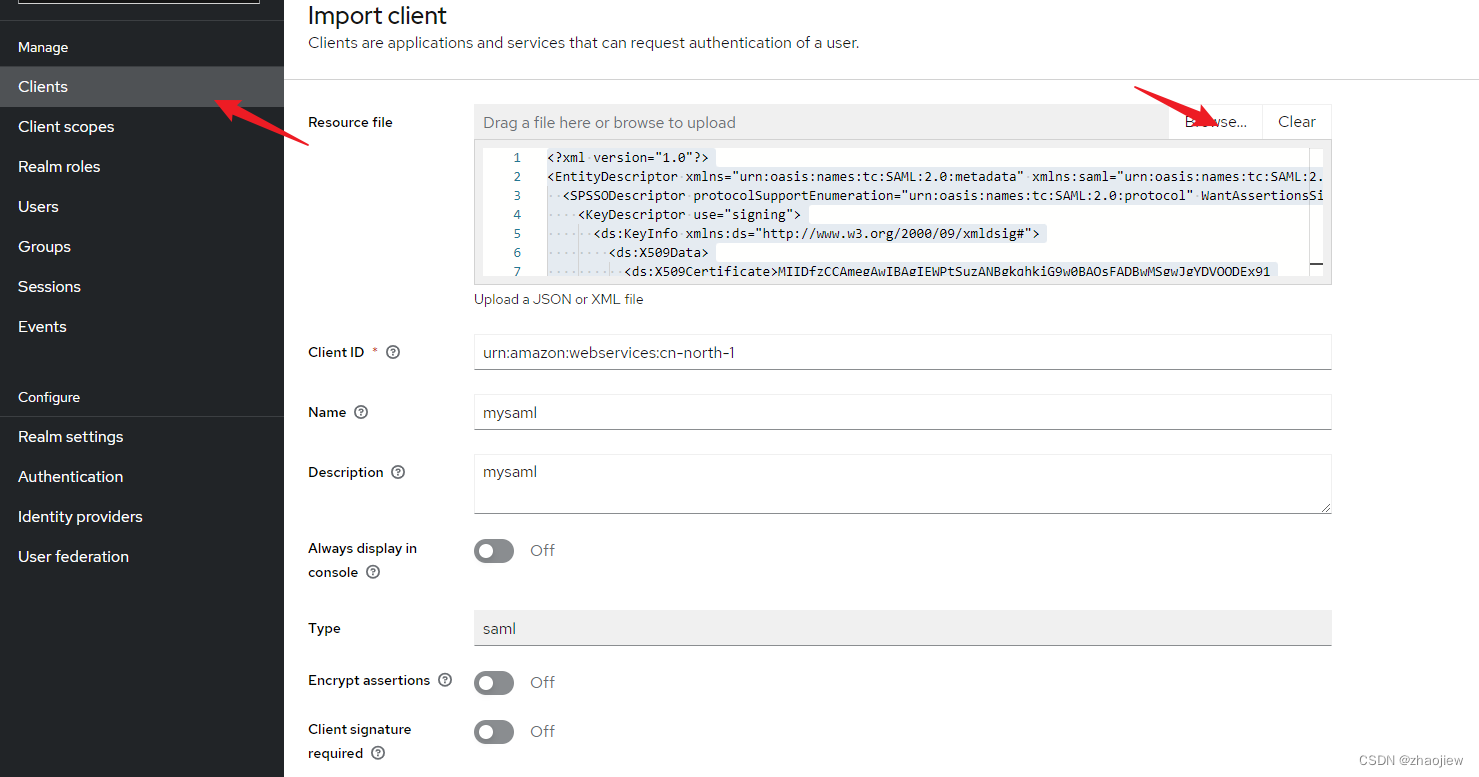
下载saml-mate.xml,https://signin.amazonaws.cn/static/saml-metadata.xml
创建client,上传之前下载的saml文件
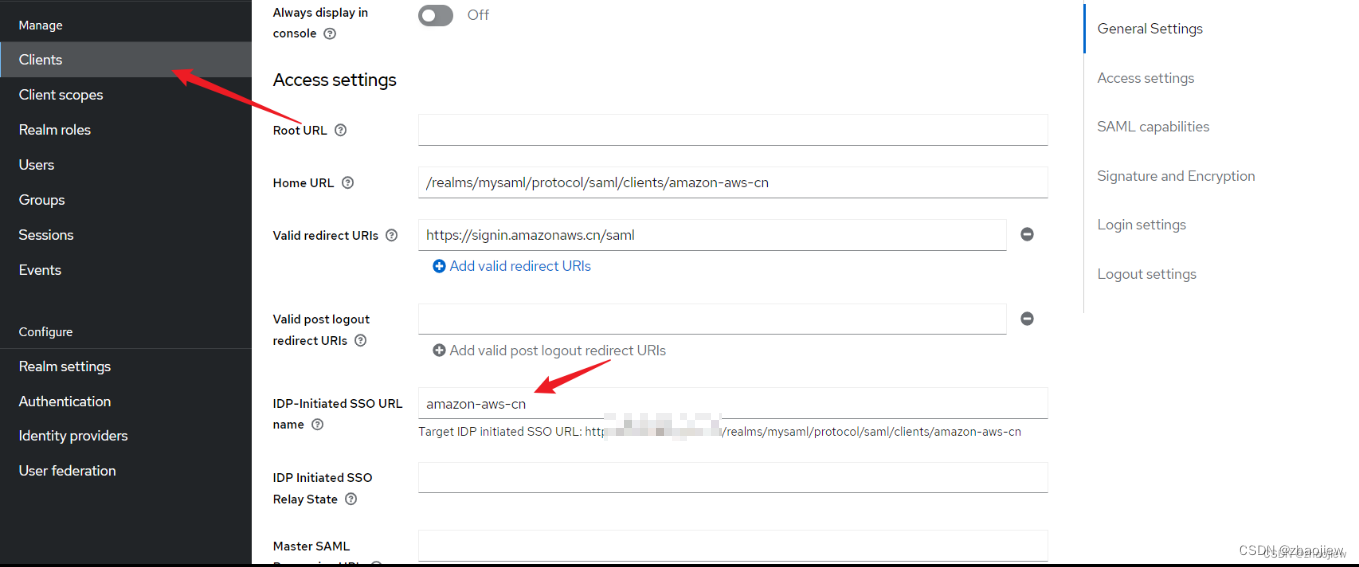
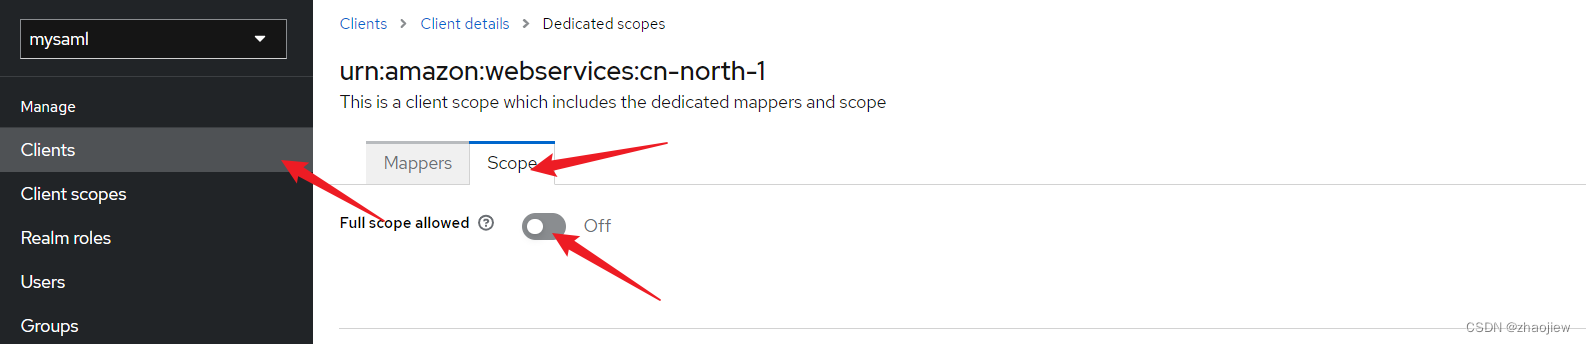
在client中配置
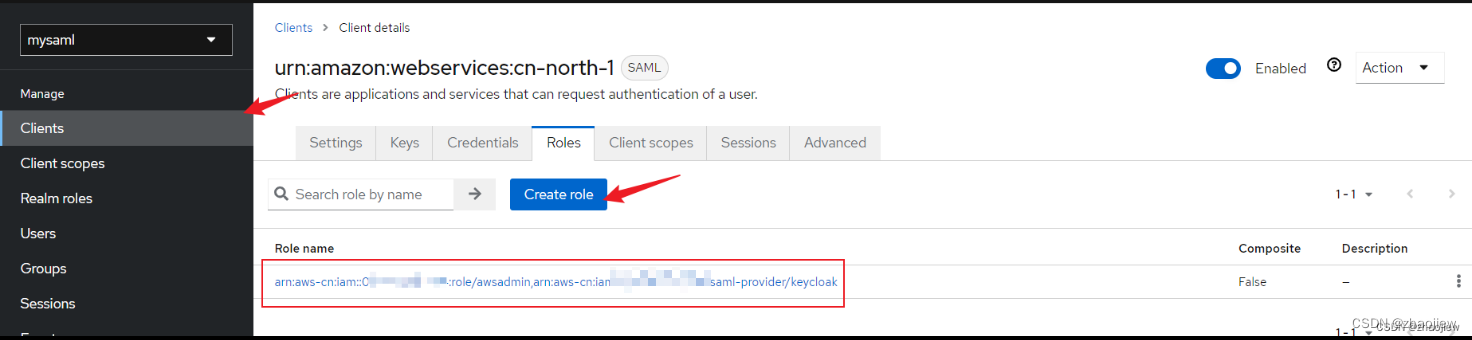
在client下创建role
将Full Scope Allowed设置成OFF
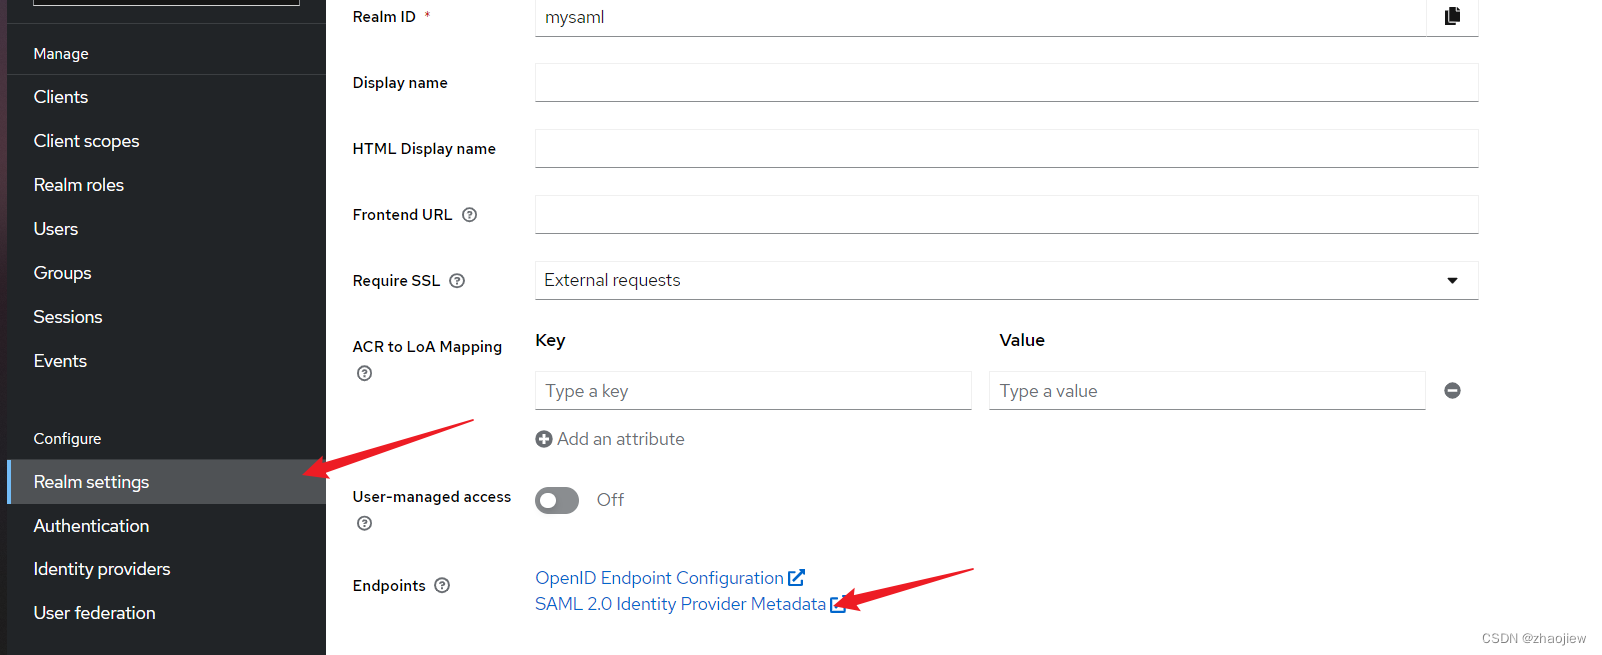
下载saml 描述文件
在aws端配置saml,创建角色信任saml,给权限,这步比较简单跳过
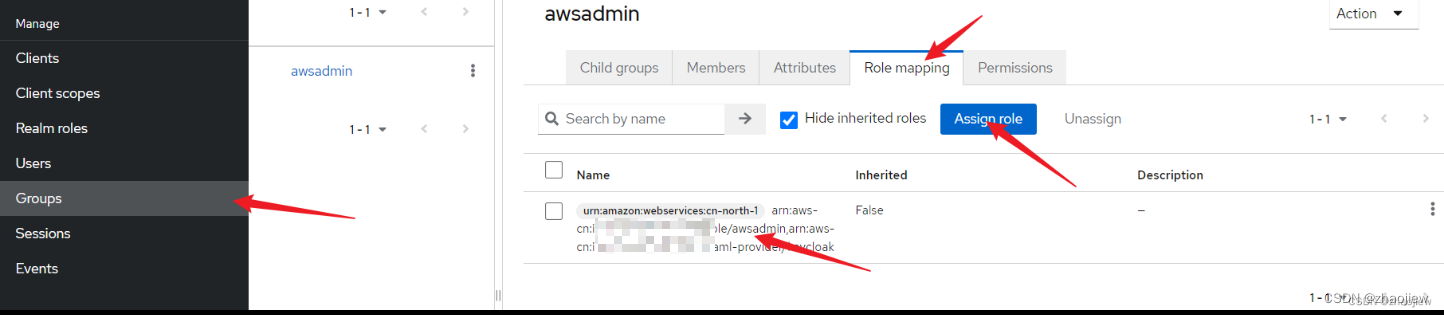
创建用户和用户组,将用户加入用户组,配置用户组绑定client角色(和realm role区分),在rolemapping选项卡中。给用户创建密码
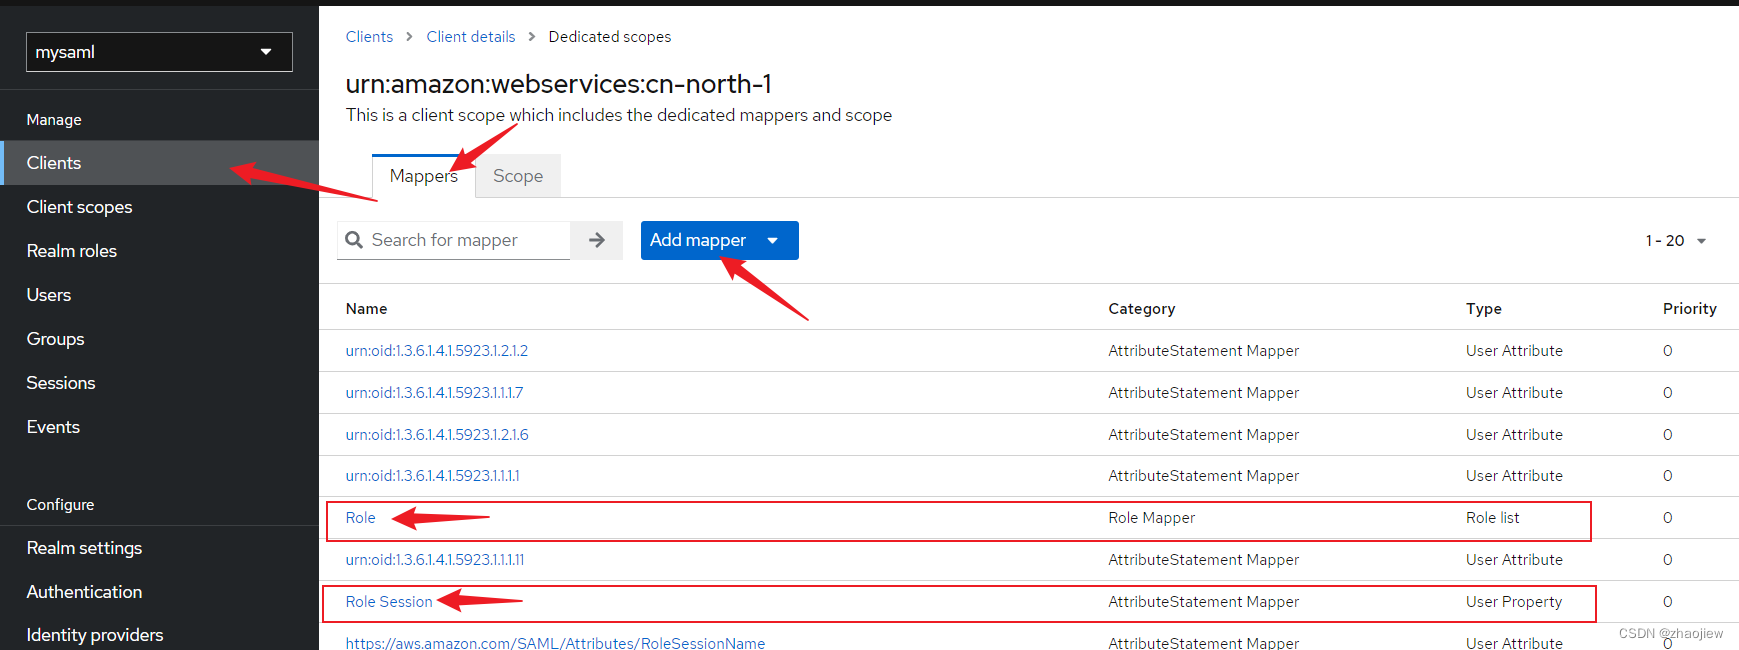
为role增加mapping
添加映射信息如下
Name: Role
Mapper Type: Role list
Role attribute name: https://aws.amazon.com/SAML/Attributes/Role

Name: Role Session
Mapper Type: User Property
Property: username
Role attribute name: https://aws.amazon.com/SAML/Attributes/RoleSessionName
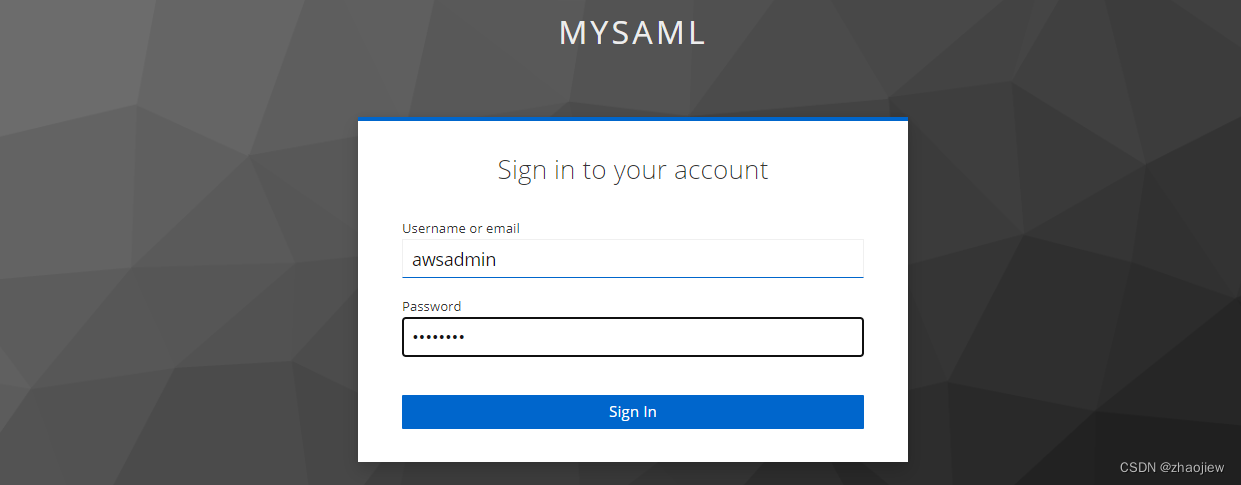
测试登录
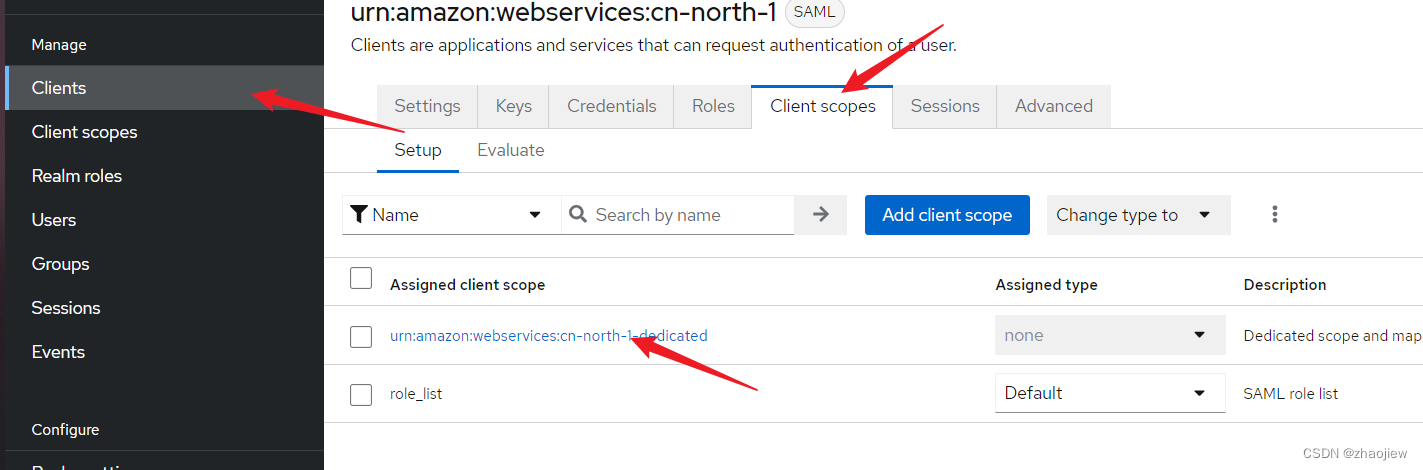
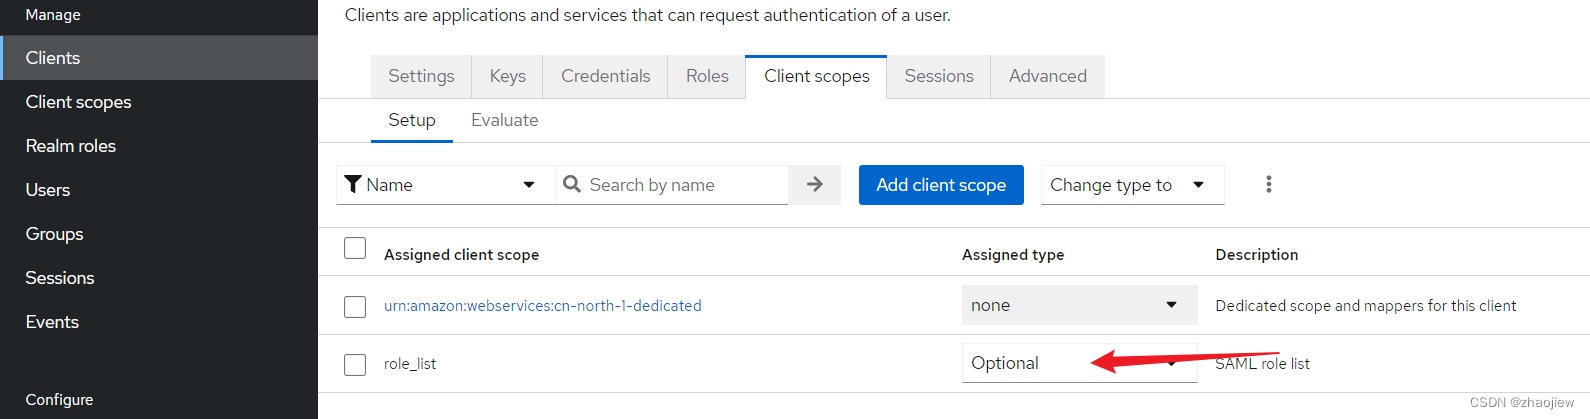
坑,需要把自带的role list取消默认
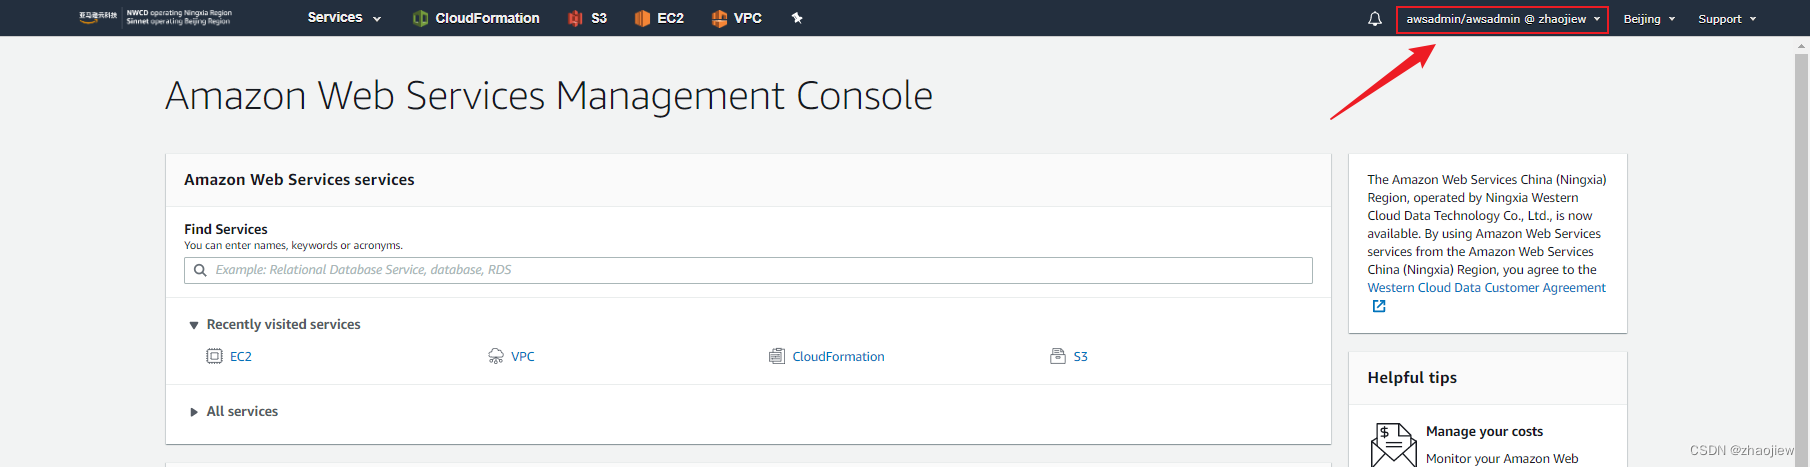
成功登录
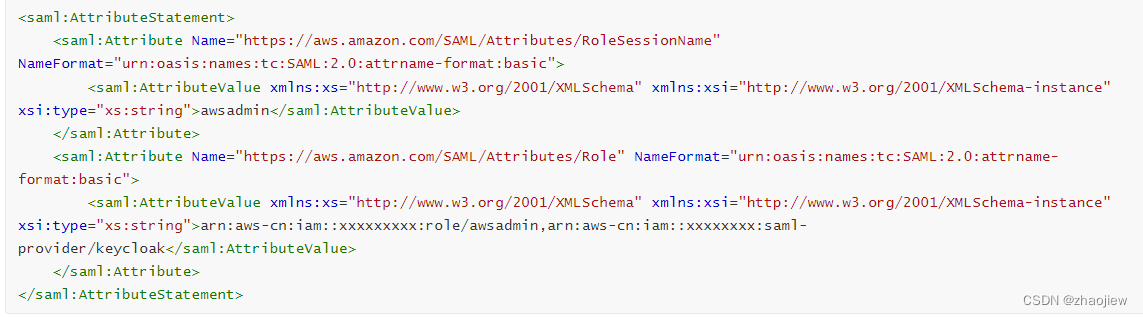
通过devtools查看saml解码之后的信息,主要看后半段字段role能不能对上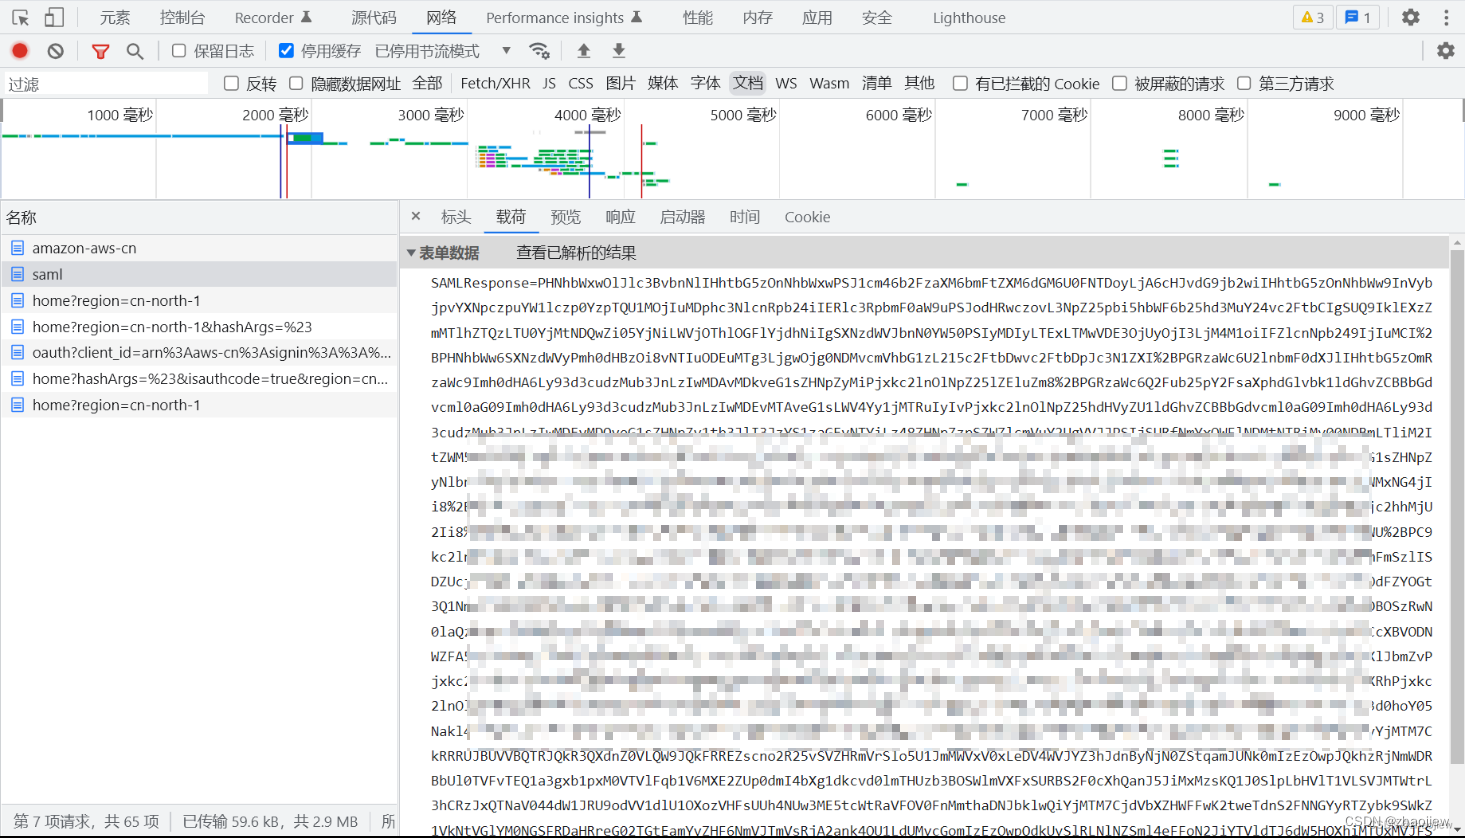
解码之后的信息,主要看后半段字段role能不能对上
整个流程还是挺复杂的,多试几次吧
使用saml2aws 工具简化命令行认证
配置
$ saml2aws configure
? Please choose a provider: KeyCloak
? AWS Profile saml
? URL https://xxxxxxxxx:8443/realms/mysaml/protocol/saml/clients/amazon-aws-cn
? Username awsadmin
在证书中需要包含一些信息,比如国家、机构等等,否则不予认证,使用--skip-verify跳过客户端认证,注意需要添加--region参数
$ saml2aws login --credential-process --disable-keychain --skip-verify --username=awsadmin --region cn-
Authenticating as awsadmin ...
Selected role: arn:aws-cn:iam::xxxxxxxxxxx:role/awsadmin
Requesting AWS credentials using SAML assertion.
Logged in as: arn:aws-cn:sts::xxxxxxxxxxx:assumed-role/awsadmin/awsadmin
查看config文件,已经配置了saml profile
[saml]
aws_access_key_id        = ASIAxxxxxxxxxxxx3A4HPK
aws_secret_access_key    = mOphnxxxxxxxxxxxxxxxTtdxxxxxxxxxxxxYjsr
aws_session_token        = xxxxxxxxxxxxxxxxxx
region                   = cn-north-1
查看当前已经能够拿到
$ aws sts get-caller-identity --profile saml
{
    "UserId": "xxxxxxxxxxxxxxxx:awsadmin",
    "Account": "xxxxxxxxx",
    "Arn": "arn:aws-cn:sts::xxxxxxxx:assumed-role/awsadmin/awsadmin"
}


 1131
1131


 被折叠的 条评论
为什么被折叠?
被折叠的 条评论
为什么被折叠?
 到【灌水乐园】发言


