


下载Miniconda(Python3版本)
下载地址:https://repo.anaconda.com/miniconda/Miniconda3-latest-Linux-x86_64.sh
安装Miniconda(需要连网)
(1)将Miniconda3-latest-Linux-x86_64.sh上传到/opt/software/路径
(2)执行以下命令进行安装,并按照提示操作,直到安装完成。
bash Miniconda3-latest-Linux-x86_64.sh 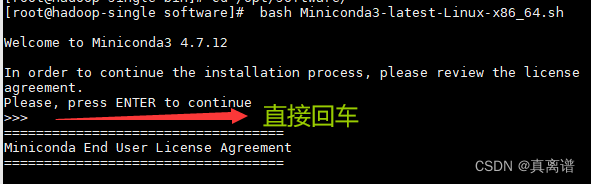
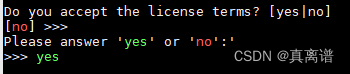
(3)一直按回车键,直到出现Please answer 'yes' or 'no':'
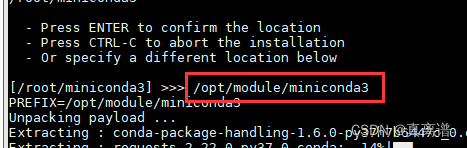
(4)指定安装路径(根据用户需求指定):/opt/module/miniconda3
(5)是否初始化Miniconda3,输入yes

(6)出现以下字样,即为安装完成
Thank you for installing Miniconda3!
加载环境变量配置文件,使之生效
(1)配置环境变量
vim /etc/profile.d/my_env.sh(2)添加如下内容
#Miniconda
export CONDA_HOME=/opt/module/miniconda3
export PATH=$PATH:$CONDA_HOME/bin
(3)source一下环境变量或者重启一下连接虚拟机的客户端
source /etc/profile.d/my_env.sh加载环境变量配置文件
source ~/.bashrc4)取消激活base环境
Miniconda安装完成后,每次打开终端都会激活其默认的base环境,我们可通过以下命令,禁止激活默认base环境。
conda config --set auto_activate_base false有的人可能会遇到conda激活错误
报错信息:See 'conda init --help' for more information and options.
IMPORTANT: You may need to close and restart your shell after running 'conda init'.
解决方法:

# 重新进入虚拟环境

source activate

# 退出当前虚拟环境

conda deactivate
创建Python3.9环境
配置conda国内镜像(清华)
[root@hadoop-single software]#
一个一个去复制执行
conda config --add channels https://mirrors.tuna.tsinghua.edu.cn/anaconda/pkgs/free

conda config --add channels https://mirrors.tuna.tsinghua.edu.cn/anaconda/pkgs/main

conda config --set show_channel_urls yes
Warning: 'https://mirrors.tuna.tsinghua.edu.cn/anaconda/pkgs/free'
already in 'channels' list, moving to the top如果报这个错误,说明已经添加过了
我存储镜像的文件在
[root@hadoop-single software]# vim /root/.condarc
把第四第五行删掉
查看conda的镜像channel配置
conda config --show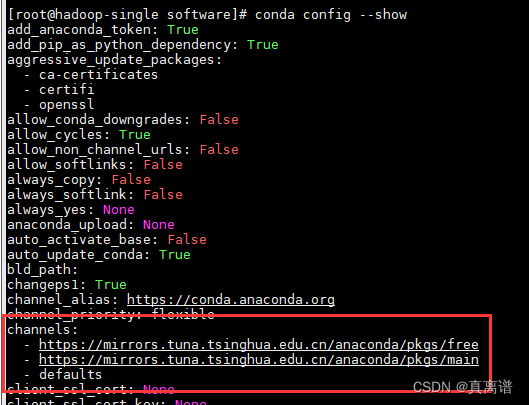
2)创建Python3.9环境
conda create --name superset python=3.9

说明:
- conda环境管理常用命令
- 创建环境:conda create -n env_name
- 查看所有环境:conda info --envs
- 删除一个环境:conda remove -n env_name --all
Superset部署
安装Superset
激活superset环境
conda activate superset
安装Superset之前,需安装以下所需依赖
(superset) [root@hadoop-single software]# sudo yum install -y python-setuptools(superset) [root@hadoop-single software]# sudo yum install -y gcc gcc-c++ libffi-devel python-devel python-pip python-wheel openssl-devel cyrus-sasl-devel openldap-devel2)安装(更新)setuptools和pip(用豆瓣镜像)
(superset) [root@hadoop-single software]#
pip install --upgrade setuptools pip -i https://pypi.douban.com/simple/说明:pip是python的包管理工具,可以和centos中的yum类比
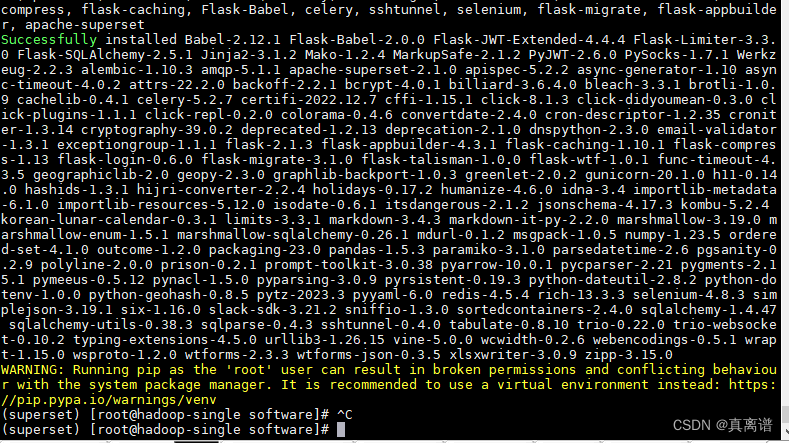
3)安装Supetset
(superset) [root@hadoop-single software]#
pip install apache-superset -i https://pypi.douban.com/simple/说明:-i的作用是指定镜像,这里选择国内镜像(豆瓣)
4)初始化Supetset数据库(Supetset是一个web应用,自带数
(superset) [root@hadoop-single software]# superset db upgradeError: Could not locate a Flask application. You did not provide the "FLASK_APP" environment variable, and a "wsgi.py" or "app.py" module was not found in the current directory.
出现这种错误是因为没有配置管理员用户
(superset) [root@hadoop-single software]# export FLASK_APP=superset接下来就会出现如下报错
--------------------------------------------------------------------------------
WARNING
--------------------------------------------------------------------------------
A Default SECRET_KEY was detected, please use superset_config.py to override it.
Use a strong complex alphanumeric string and use a tool to help you generate
a sufficiently random sequence, ex: openssl rand -base64 42
--------------------------------------------------------------------------------
--------------------------------------------------------------------------------
Refusing to start due to insecure SECRET_KEY
- 进入自己的python安装目录
cd /opt/module/miniconda3/envs/superset/lib/python3.9
- 创建一个配置文件
vim superset_config.py
# Superset specific config
# SS 相关的配置
# 行数限制 5000 行
ROW_LIMIT = 5000

# 网站服务器端口 8088
SUPERSET_WEBSERVER_PORT = 8088

# Flask App Builder configuration
# Your App secret key will be used for securely signing the session cookie
# and encrypting sensitive information on the database
# Make sure you are changing this key for your deployment with a strong key.
# You can generate a strong key using `openssl rand -base64 42`
# Flask 应用构建器配置
# 应用密钥用来保护会话 cookie 的安全签名
# 并且用来加密数据库中的敏感信息
# 请确保在你的部署环境选择一个强密钥
# 可以使用命令 openssl rand -base64 42 来生成一个强密钥

SECRET_KEY = 'YOUR_OWN_RANDOM_GENERATED_SECRET_KEY'

# The SQLAlchemy connection string to your database backend
# This connection defines the path to the database that stores your
# superset metadata (slices, connections, tables, dashboards, ...).
# Note that the connection information to connect to the datasources
# you want to explore are managed directly in the web UI
# SQLAlchemy 数据库连接信息
# 这个连接信息定义了 SS 元数据库的路径(切片、连接、表、数据面板等等)
# 注意:需要探索的数据源连接及数据库连接直接通过网页界面进行管理
SQLALCHEMY_DATABASE_URI = 'sqlite:path/to/superset.db'

# Flask-WTF flag for CSRF
# 跨域请求攻击标识
WTF_CSRF_ENABLED = True

# Add endpoints that need to be exempt from CSRF protection
# CSRF 白名单
WTF_CSRF_EXEMPT_LIST = []

# A CSRF token that expires in 1 year
# CSFR 令牌过期时间 1 年
WTF_CSRF_TIME_LIMIT = 60 * 60 * 24 * 365

# Set this API key to enable Mapbox visualizations
# 接口密钥用来启用 Mapbox 可视化
MAPBOX_API_KEY = ''
使用命令 openssl rand -base64 42 来生成一个强密钥

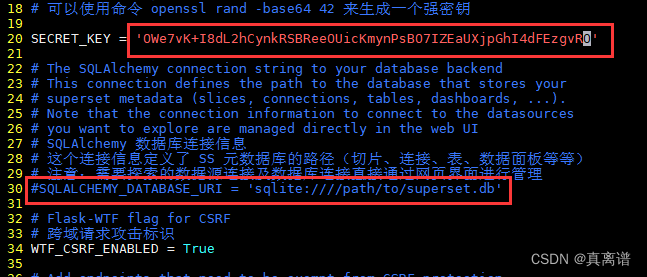
20行换成自己生成的强密钥,30行注释掉
继续执行 superset db upgrade 出现以下报错
sqlalchemy.exc.OperationalError: (sqlite3.OperationalError) duplicate column name: uuid
[SQL: ALTER TABLE dbs ADD COLUMN uuid BINARY(16)]
执行 rm -rf /root/.superset/superset.db
继续执行 superset db upgrade
初始化数据库成功
5)创建管理员用户
(superset) [root@hadoop-single python3.9]# flask fab create-admin
Username [admin]: root
User first name [admin]: root
User last name [user]: root
Email [admin@fab.org]:
Password:
Repeat for confirmation:
启动Superset
1)安装gunicorn
(superset) [root@hadoop-single python3.9]# pip install gunicorn -i https://pypi.douban.com/simple/说明:gunicorn是一个Python Web Server,可以和java中的TomCat类比
2)启动Superset
第一步:确保当前conda环境为superset
第二步:启动
(superset) [root@hadoop-single python3.9]# gunicorn --workers 5 --timeout 120 --bind hadoop-single:8787 "superset.app:create_app()" --daemon说明:
- workers:指定进程个数
- timeout:worker进程超时时间,超时会自动重启
- bind:绑定本机地址,即为Superset访问地址
- daemon:后台运行
3)停止superset
(1)停掉gunicorn进程
(superset) [root@hadoop-single python3.9]# ps -ef | awk '/gunicorn/ && !/awk/{print $2}' | xargs kill -9(2)退出superset环境
(superset) [root@hadoop-single python3.9]# conda deactivate4)superset启停脚本
(1)创建superset.sh文件
[root@hadoop-single bin]# vim superset.sh#!/bin/bash
superset_status(){
result=`ps -ef | awk '/gunicorn/ && !/awk/{print $2}' | wc -l`
if [[ $result -eq 0 ]]; then
return 0
else
return 1
fi
}
superset_start(){
# 该段内容取自~/.bashrc,所用是进行conda初始化
# >>> conda initialize >>>
# !! Contents within this block are managed by 'conda init' !!
__conda_setup="$('/opt/module/miniconda3/bin/conda' 'shell.bash' 'hook' 2> /dev/null)"
if [ $? -eq 0 ]; then
eval "$__conda_setup"
else
if [ -f "/opt/module/miniconda3/etc/profile.d/conda.sh" ]; then
. "/opt/module/miniconda3/etc/profile.d/conda.sh"
else
export PATH="/opt/module/miniconda3/bin:$PATH"
fi
fi
unset __conda_setup
# <<< conda initialize <<<
superset_status >/dev/null 2>&1
if [[ $? -eq 0 ]]; then
conda activate superset ; gunicorn --workers 5 --timeout 120 --bind hadoop-single:8787 --daemon 'superset.app:create_app()'
else
echo "superset正在运行"
fi
}
superset_stop(){
superset_status >/dev/null 2>&1
if [[ $? -eq 0 ]]; then
echo "superset未在运行"
else
ps -ef | awk '/gunicorn/ && !/awk/{print $2}' | xargs kill -9
fi
}
case $1 in
start )
echo "启动Superset"
superset_start
;;
stop )
echo "停止Superset"
superset_stop
;;
restart )
echo "重启Superset"
superset_stop
superset_start
;;
status )
superset_status >/dev/null 2>&1
if [[ $? -eq 0 ]]; then
echo "superset未在运行"
else
echo "superset正在运行"
fi
esac


 1815
1815


 被折叠的 条评论
为什么被折叠?
被折叠的 条评论
为什么被折叠?
 到【灌水乐园】发言


