


这篇文章和小伙伴分享的是,iOS8以后新添加的"BlurEffect"和"UIVisualEffectView"两个类,在iOS8以前我们经常会用到是 gitHub 上 FXBlurView 封好的View类,而iOS8以后苹果自带了3种毛玻璃特效的效果,供我们使用。
2016-09-08 UIBlurEffect、UIVisualEffectView以及UIVisualEffect的了解。
UIBlurEffect技术是从iOS8之后引进的,比CoreImage性能上要优秀,原理是在图片上方生成一个蒙层,若最低适配iOS8的话可以考虑采取这个方法。
Visual Effects是一整套的视觉特效,包括了UIBlurEffect和UIVibrancyEffect。这两者都是UIVisualEffect的子类,前者允许在你App中动态地创建实时的雾玻璃效果,而后者则允许你在雾玻璃上“写字”。
更深的弄东西没有研究,从网上找个一个详细的.h说明共享给大家
#import <UIKit/UIKit.h>

NS_ASSUME_NONNULL_BEGIN

 //3种不同的模糊效果:很亮、亮、暗色。
typedef NS_ENUM(NSInteger, UIBlurEffectStyle) {
    UIBlurEffectStyleExtraLight, //偏白色
    UIBlurEffectStyleLight,//模糊
    UIBlurEffectStyleDark //偏黑色
} NS_ENUM_AVAILABLE_IOS(8_0);

//*****************UIVisualEffect类*******************
NS_CLASS_AVAILABLE_IOS(8_0)@interface UIVisualEffect :NSObject <NSCopying,NSSecureCoding> @end

//*********UIBlurEffect类(继承于UIVisualEffect,允许在你App中动态地创建实时的雾玻璃效果)*******
NS_CLASS_AVAILABLE_IOS(8_0)@interface UIBlurEffect :UIVisualEffect
+ (UIBlurEffect *)effectWithStyle:(UIBlurEffectStyle)style;//模糊效果
@end

//**********UIVibrancyEffect类(继承于UIVisualEffect,允许你在雾玻璃上“写字”)*********
NS_CLASS_AVAILABLE_IOS(8_0)@interface UIVibrancyEffect : UIVisualEffect
+ (UIVibrancyEffect *)effectForBlurEffect:(UIBlurEffect *)blurEffect;
@end

//*********UIVisualEffectView类(UIVisualEffectView控件实现模糊特效)*************

NS_CLASS_AVAILABLE_IOS(8_0)@interface UIVisualEffectView : UIView <NSSecureCoding>
@property (nonatomic,strong, readonly) UIView *contentView;// Do not add subviews directly to UIVisualEffectView, use this view instead.
@property (nonatomic,copy, nullable)UIVisualEffect *effect;
- (instancetype)initWithEffect:(nullableUIVisualEffect *)effect NS_DESIGNATED_INITIALIZER;
- (nullable instancetype)initWithCoder:(NSCoder *)aDecoderNS_DESIGNATED_INITIALIZER;
@end

NS_ASSUME_NONNULL_END
------------------------------------------------------------------------------------------
既然的系统的方法肯定调用是很简单的,苹果用了一个枚举来区分三种效果分别是 :
"UIBlurEffectStyleExtraLight"
"UIBlurEffectStyleLight"
"UIBlurEffectStyleDark"
下面直接上代码:
- (void)makeUI{
    UIImageView *imgView = [[UIImageView alloc] initWithFrame:CGRectMake((self.view.frame.size.width - 320)/2 , (self.view.frame.size.height - 225)/2, 320, 225)];
    imgView.image = [UIImage imageNamed:@"0b21cb.jpeg"];
    [self.view addSubview:imgView];


    //创建需要的特效
    UIBlurEffect *blur = [UIBlurEffect effectWithStyle:UIBlurEffectStyleDark];
    //实例化UIVisualEffectView
    UIVisualEffectView *effectview = [[UIVisualEffectView alloc] initWithEffect:blur];
    //模糊特效View的frame
    effectview.frame = imgView.bounds;
    //模糊特效View的透明度
    effectview.alpha = 0.8f;
    [imgView addSubview:effectview];
}
除了代码,当然少不了效果图了:
原图:

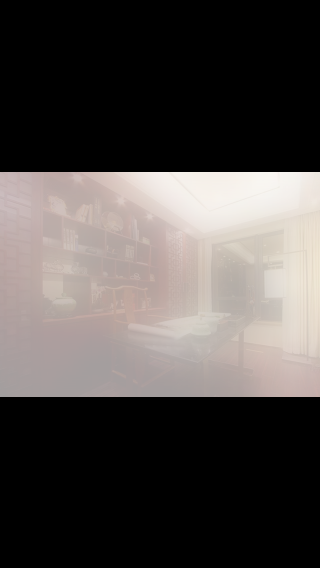
UIBlurEffectStyleExtraLight :
UIBlurEffectStyleLight:

UIBlurEffectStyleDark:

提示:一般我们在项目中会使用 "UIBlurEffectStyleLight"来展示,因为三种里他的效果更为友好。
感谢观看,学以致用更感谢~


 4688
4688

 被折叠的 条评论
为什么被折叠?
被折叠的 条评论
为什么被折叠?
 到【灌水乐园】发言


