


项目需求,需要自定义材质球,方便使用封装成了类,可以使用在各种项目
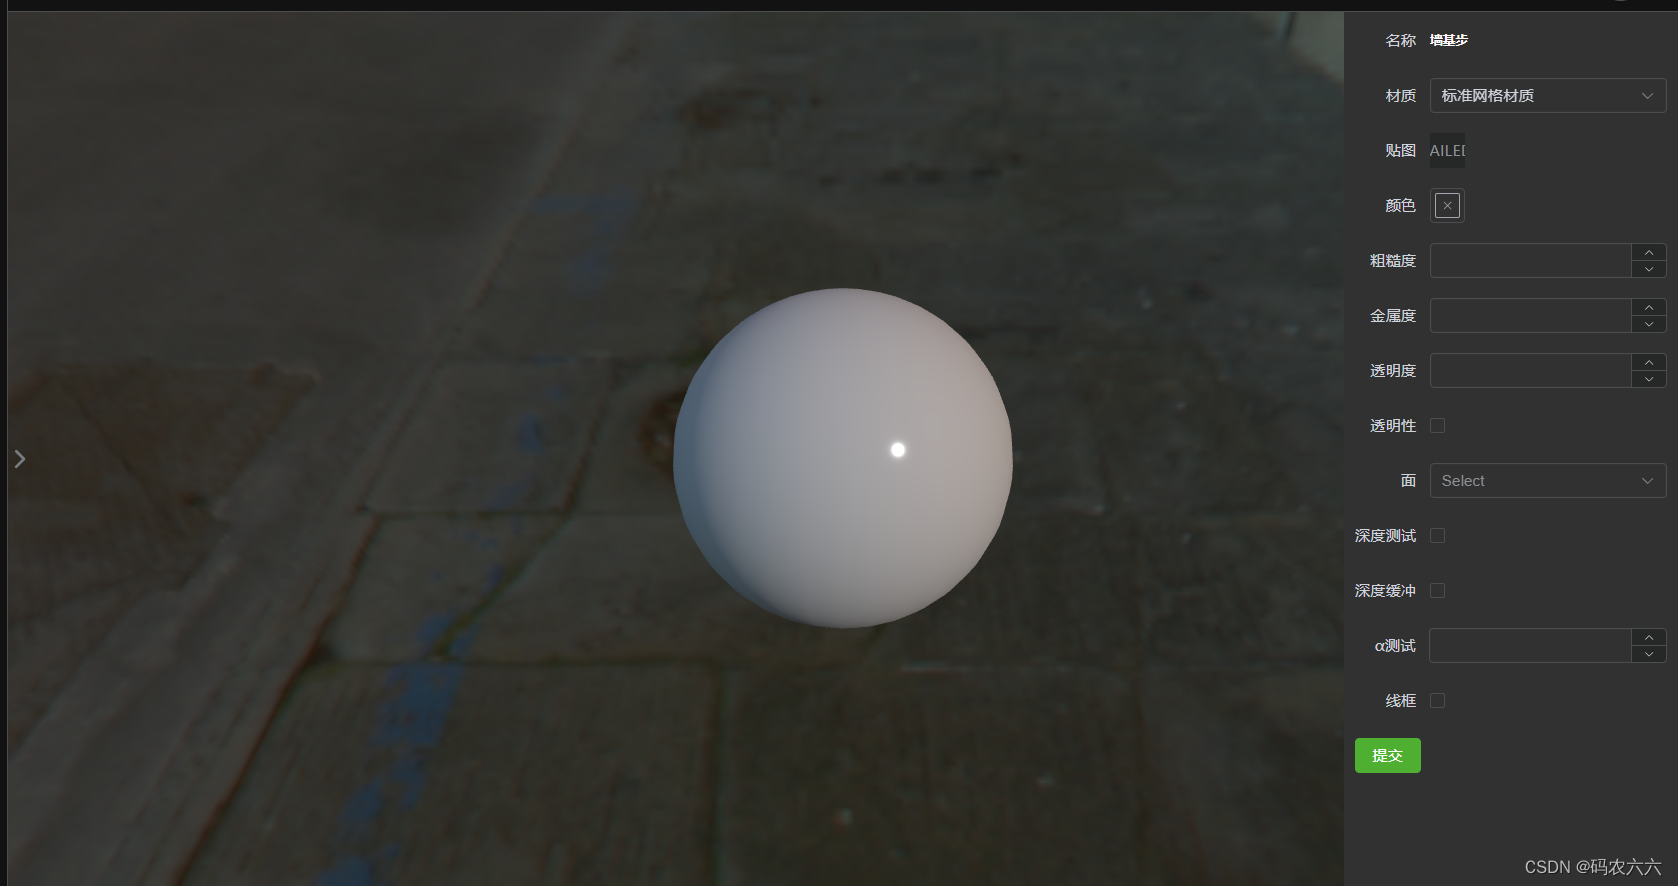
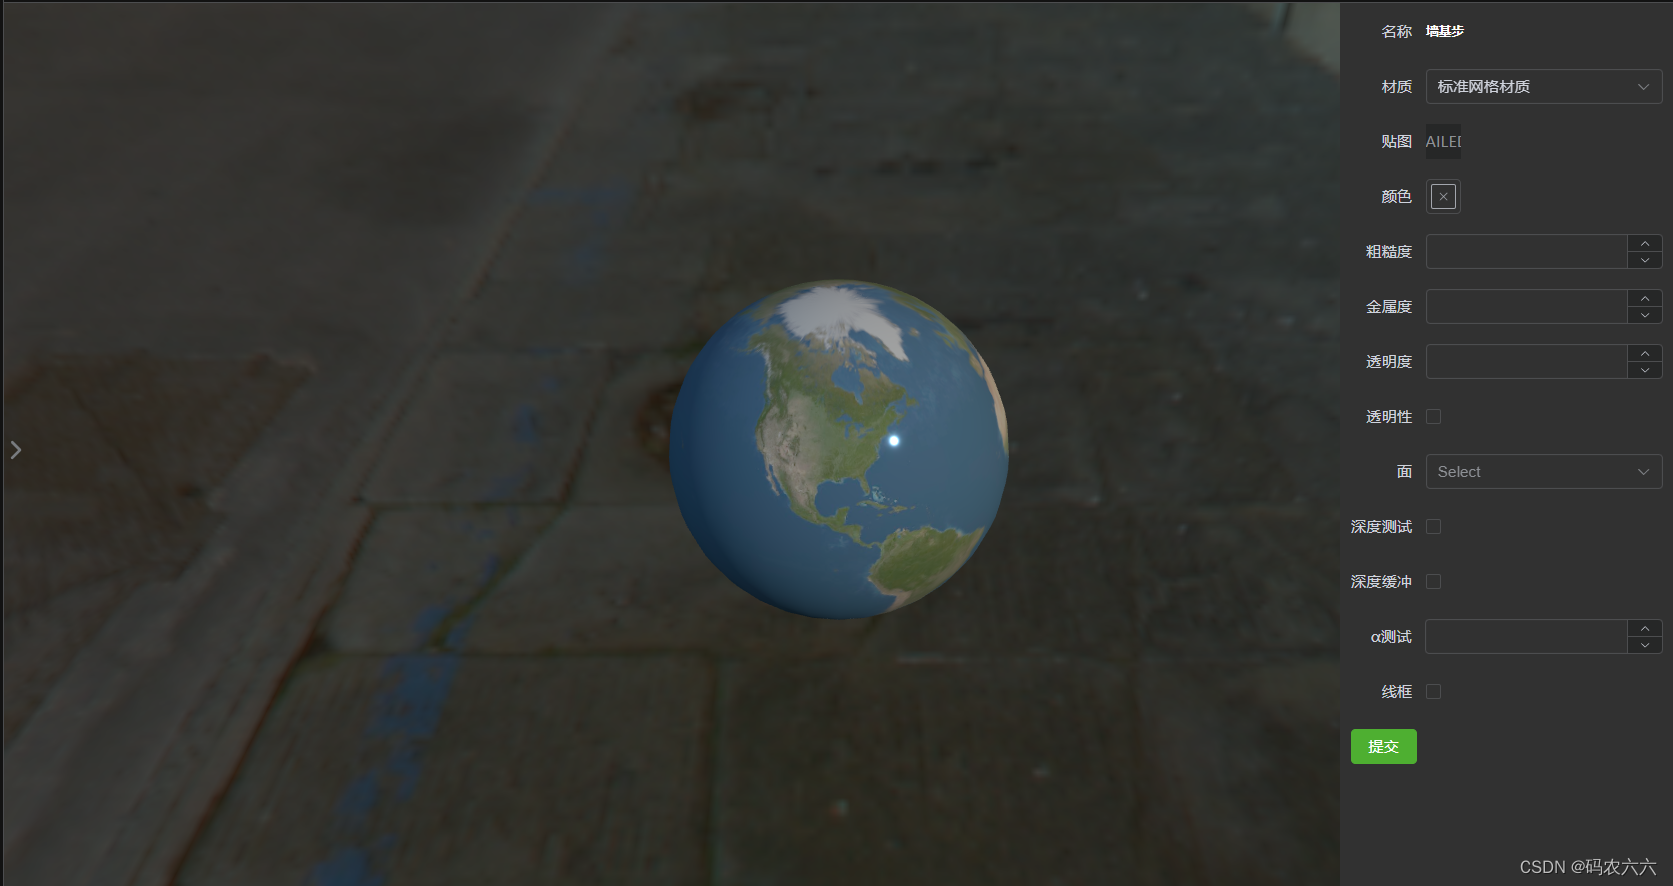
1.效果展示
 2:实现代码
使用方式,传入初始化DOM,和初始化材质配置即可
import * as THREE from "three";
import { OrbitControls } from "three/examples/jsm/controls/OrbitControls";
import { LightProbeGenerator } from "three/addons/lights/LightProbeGenerator.js";

class AdvancedMaterialSphere {
  constructor(dom, materialOptions = {}, materialType = "MeshStandardMaterial") {
    this.dom = dom; // 保存DOM引用
    this.materialOptions = materialOptions; // 保存初始材质选项
    this.materialType = materialType; // 保存初始材质类型

    // 创建场景
    this.scene = new THREE.Scene();

    // 确保DOM元素有正确的宽高
    if (!dom || dom.clientWidth === 0 || dom.clientHeight === 0) {
      throw new Error("无效的DOM元素或尺寸。");
    }

    // 计算相机的长宽比
    const aspectRatio = dom.clientWidth / dom.clientHeight;

    // 创建相机
    this.camera = new THREE.PerspectiveCamera(45, aspectRatio, 0.1, 10000);
    // 设置相机位置
    this.camera.position.set(10, 0, 0);
    this.camera.lookAt(0, 0, 0);

    // 创建渲染器
    this.renderer = new THREE.WebGLRenderer({ antialias: true }); // 启用抗锯齿
    this.renderer.setSize(dom.clientWidth, dom.clientHeight); // 设置渲染器大小
    this.renderer.setPixelRatio(window.devicePixelRatio); // 设置像素比
    this.renderer.toneMapping = THREE.NoToneMapping; // 色调映射
    dom.appendChild(this.renderer.domElement); // 将渲染器的DOM元素添加到文档中

    // 光探测器
    this.lightProbe = new THREE.LightProbe();
    this.scene.add(this.lightProbe);

    // 添加方向光
    this.directionalLight = new THREE.DirectionalLight(0xffffff, 0.6);
    this.directionalLight.position.set(800, 800, 800); // 设置平行光的位置
    this.scene.add(this.directionalLight);

    // 纹理贴图加载器
    this.texLoader = new THREE.TextureLoader();
    this.cubeTexLoader = new THREE.CubeTextureLoader();

    // 加载环境贴图
    this.loadEnvironmentMap("/pisa/", ["px.png", "nx.png", "py.png", "ny.png", "pz.png", "nz.png"], () => {
      this.createSphere(); // 加载完成后创建球体
    });

    // 设置相机控件轨道控制器
    const controls = new OrbitControls(this.camera, this.renderer.domElement);
    controls.target.set(0, 0, 0); // 设置轨道控制器的观察目标为球体
    controls.update(); // 更新控件
    controls.minDistance = 10; // 设置最小距离
    controls.maxDistance = 50; // 设置最大距离
    controls.enablePan = false; // 禁用平移

    // 如果OrbitControls改变了相机参数,重新调用渲染器渲染三维场景
    controls.addEventListener("change", () => {
      this.renderer.render(this.scene, this.camera);
    });

    // 绑定resize事件处理器以适应窗口大小变化
    window.addEventListener("resize", () => this.onWindowResize(), false);

    // 立即调用一次以适应初始大小
    this.onWindowResize();

    // 开始渲染循环
    this.animate();
  }

  // 加载环境贴图
  loadEnvironmentMap(path, files, onLoad) {
    this.scene.background = this.cubeTexLoader.setPath(path).load(files, (cubeTexture) => {
      this.scene.background = cubeTexture; // 设置场景背景为加载的立方体贴图
      this.lightProbe.copy(LightProbeGenerator.fromCubeTexture(cubeTexture)); // 从立方体贴图生成光探测器
      if (onLoad) onLoad();
    });
  }

  // 创建球体
  createSphere() {
    const geometry = new THREE.SphereGeometry(1, 32, 32); // 创建球体几何体
    this.sphere = new THREE.Mesh(geometry, this.initMaterial(this.materialOptions)); // 创建球体网格并加入场景
    this.sphere.position.set(0, 0, 0); // 设置球体位置
    this.scene.add(this.sphere); // 将球体加入场景
  }

  // 初始化材质
  initMaterial(matOptions) {
    const materialParams = { envMapIntensity: 0.5, ...matOptions };

    // 动态检查并设置材质贴图
    this.setMaterialMap(matOptions, materialParams, "map");
    this.setMaterialMap(matOptions, materialParams, "metalnessMap");
    this.setMaterialMap(matOptions, materialParams, "roughnessMap");
    this.setMaterialMap(matOptions, materialParams, "normalMap");
    this.setMaterialMap(matOptions, materialParams, "bumpMap");
    this.setMaterialMap(matOptions, materialParams, "displacementMap");
    this.setMaterialMap(matOptions, materialParams, "emissiveMap");
    this.setMaterialMap(matOptions, materialParams, "alphaMap");
    this.setMaterialMap(matOptions, materialParams, "lightMap");
    this.setMaterialMap(matOptions, materialParams, "aoMap");

    // 根据指定的材质类型创建材质
    this.material = new THREE[this.materialType](materialParams);
    return this.material;
  }

  // 设置材质贴图
  setMaterialMap(matOptions, materialParams, mapType) {
    if (matOptions[mapType]) {
      materialParams[mapType] = this.setMap(matOptions[mapType]);
    }
  }

  // 设置纹理贴图
  setMap(file) {
    if (!file) return null; // 如果文件不存在,返回null
    return this.texLoader.load(file); // 加载并返回纹理
  }

  // 更新材质
  updateMaterial() {
    if (this.sphere) {
      this.sphere.material.dispose(); // 释放旧材质
      this.sphere.material = this.initMaterial(this.materialOptions); // 创建新材质
      this.sphere.material.needsUpdate = true; // 确保材质更新
    }
  }

  // 更新材质选项
  updateMaterialOptions(newOptions) {
    this.materialOptions = { ...this.materialOptions, ...newOptions };
    this.updateMaterial();
  }

  // 更新材质类型
  updateMaterialType(newType) {
    this.materialType = newType;
    this.updateMaterial();
  }

  // 处理窗口大小调整
  onWindowResize() {
    this.camera.aspect = this.dom.clientWidth / this.dom.clientHeight; // 更新相机的长宽比
    this.camera.updateProjectionMatrix(); // 更新相机的投影矩阵
    this.renderer.setSize(this.dom.clientWidth, this.dom.clientHeight); // 更新渲染器的大小
  }

  // 创建网格地面
  createGridFloor() {
    const size = 20; // 网格的尺寸
    const divisions = 20; // 网格的分割数
    const gridHelper = new THREE.GridHelper(size, divisions);
    this.scene.add(gridHelper);
  }

  // 更新纹理贴图
  updateTextureMap(file, key) {
    if (this.sphere) {
      const newMap = this.setMap(file); // 设置新的纹理
      this.sphere.material[key] = newMap; // 更新材质的对应属性
      this.sphere.material.needsUpdate = true; // 确保材质更新
    } else {
      console.error("球体尚未初始化。");
    }
  }

  // 设置材质颜色
  setColor(hexColor) {
    if (this.material) {
      this.material.color.set(hexColor); // 设置材质颜色
    }
  }

  // 设置材质属性
  setProperty(property, value) {
    if (this.material) {
      this.material[property] = value; // 设置材质属性
      this.material.needsUpdate = true; // 确保材质更新
    }
  }

  // 获取所有材质属性
  getAllProperties() {
    return this.material; // 获取材质所有属性
  }

  // 动画渲染循环
  animate() {
    requestAnimationFrame(() => this.animate()); // 请求下一帧动画
    this.renderer.render(this.scene, this.camera); // 渲染场景
  }
}

export default AdvancedMaterialSphere;
3.使用实例
import * as THREE from "three";
import AdvancedMaterialSphere from "./AdvancedMaterialSphere.js";

// 获取容器元素
const container = document.getElementById('container');

// 定义材质选项
const materialOptions = {
  color: 0x0077ff, // 蓝色
  roughness: 0.5, // 粗糙度
  metalness: 0.5, // 金属度
  normalMap: '/path/to/normalMap.jpg', // 正常贴图路径
  roughnessMap: '/path/to/roughnessMap.jpg', // 粗糙度贴图路径
};

// 创建AdvancedMaterialSphere实例
const sphere = new AdvancedMaterialSphere(container, materialOptions, "MeshStandardMaterial");

// 示例:更新材质选项
setTimeout(() => {
  sphere.updateMaterialOptions({
    color: 0xff0000, // 红色
  });
}, 3000);

// 示例:更新材质类型
setTimeout(() => {
  sphere.updateMaterialType("MeshPhongMaterial");
}, 6000);

// 示例:更新纹理贴图
setTimeout(() => {
  sphere.updateTextureMap('/path/to/newTexture.jpg', 'map');
}, 9000);

// 示例:设置材质颜色
setTimeout(() => {
  sphere.setColor(0x00ff00); // 绿色
}, 12000);
详细说明
- container: 容器元素的 DOM 引用,用于初始化 WebGLRenderer 并将其附加到 DOM。
- materialOptions: 一个包含材质属性的对象,可用于设置颜色、粗糙度、金属度等属性。
- materialType: 材质类型的字符串值,例如
"MeshStandardMaterial"、"MeshPhongMaterial"等。
动态更新
AdvancedMaterialSphere 类支持动态更新材质属性、材质类型和纹理贴图。你可以使用以下方法进行更新:
updateMaterialOptions(newOptions): 更新材质选项。updateMaterialType(newType): 更新材质类型。updateTextureMap(file, key): 更新材质的纹理贴图。setColor(hexColor): 设置材质颜色。
示例代码解释
- 创建实例: 创建
AdvancedMaterialSphere实例时,传递容器元素、材质选项和材质类型。 - 动态更新: 使用
setTimeout演示如何在不同时间点动态更新材质选项、类型和贴图。
通过以上步骤,你应该能够成功创建并使用 AdvancedMaterialSphere 类,渲染一个可定制的材质球体,并能够动态更新其属性。


 3688
3688

 被折叠的 条评论
为什么被折叠?
被折叠的 条评论
为什么被折叠?
 到【灌水乐园】发言


