


nRF52832技术交流群:680723714
nRF52832-Bluefruit52核心板详细介绍:
https://blog.csdn.net/solar_Lan/article/details/88688451
github仓库地址:https://github.com/Afantor/Bluefruit52_Arduino.git

Arduino例程目前分为6大部分:Central、DualRoles、Display、Hardware、Peripheral、Project。
一、Central:主设备与其他设备通信例程

二、DualRoles:从设备与主设备通信例程
![]()
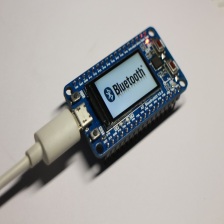
本篇讲解蓝牙组网一拖8实验,本实验展示了以一个nRF52382为中心,其他nRF52832模块为外围设备,进行级联通信控制的过程。示例中演示串口打印连接状态和接收到数据,通过数据收发控制板载LED灯。主机中心为一个主模式设备,检测按键发送控制LED的字符。从设备检测接收到的数据,控制LED灯的状态。
下面直接讲解代码:
Dual Roles BLEUART双重角色BLEUART
如果不熟悉中心角色,建议先查看“Central BLEUART”示例,和上一篇博文然后再继续。
此示例演示了如何使用nRF52832同时使用bleuart(AKA'NUS')服务连接其他7个Bluefruit或BLE设备,同时设备在外围设备和中心设备上运行。
此双重角色示例充当BLE中继站,它位于中央和外围转发前端消息之间来回,如下图所示:

Server & Client Service Setup服务端和客户端设置
由于Bluefruit设备将充当中心和外围设备,因此我们需要声明bleuart帮助程序类的服务器和客户端实例:
// Peripheral uart service
BLEUart bleuart;

// Central uart client
BLEClientUart clientUart;
在我们配置客户端服务之前,必须至少调用Bluefruit.begin(),以获得外围和中央模式的并发连接数:
// Initialize Bluefruit with max concurrent connections as Peripheral = 1, Central = 1
Bluefruit.begin(1, 1);
在此之后,必须通过调用其begin()函数初始化客户端服务,然后调用您希望连接的任何回调:
// Configure and Start BLE Uart Service
bleuart.begin();
bleuart.setRxCallback(prph_bleuart_rx_callback);

// Init BLE Central Uart Serivce
clientUart.begin();
clientUart.setRxCallback(cent_bleuart_rx_callback);
然后我们准备使用回调将数据从中央转发到外围,反之亦然:
void cent_bleuart_rx_callback(BLEClientUart& cent_uart)
{
  char str[20+1] = { 0 };
  cent_uart.read(str, 20);

  Serial.print("[Cent] RX: ");
  Serial.println(str);

  if ( bleuart.notifyEnabled() )
  {
    // Forward data from our peripheral to Mobile
    bleuart.print( str );
  }else
  {
    // response with no prph message
    clientUart.println("[Cent] Peripheral role not connected");
  }
}

void prph_bleuart_rx_callback(void)
{
  // Forward data from Mobile to our peripheral
  char str[20+1] = { 0 };
  bleuart.read(str, 20);

  Serial.print("[Prph] RX: ");
  Serial.println(str);

  if ( clientUart.discovered() )
  {
    clientUart.print(str);
  }else
  {
    bleuart.println("[Prph] Central role not connected");
  }
}
Peripheral Role外设角色
我们代码的外围部分要做的第一件事就是设置连接回调,当与中心建立/断开连接时,它会触发。 或者,您可以使用connected()轮询连接状态,但回调有助于显着简化代码:
// Callbacks for Peripheral
Bluefruit.setConnectCallback(prph_connect_callback);
Bluefruit.setDisconnectCallback(prph_disconnect_callback);
Central Role中心角色
接下来,我们设置中央模式连接回调,当与外围设备建立/断开连接时将触发:
// Callbacks for Central
Bluefruit.Central.setConnectCallback(cent_connect_callback);
Bluefruit.Central.setDisconnectCallback(cent_disconnect_callback);
Advertising and Scanner广播和扫描
可以同时启动扫描仪和广告,以便我们可以发现并被其他BLE设备发现。 对于扫描程序,如果在对等设备的广告数据中找到特定的UUID,我们使用仅触发回调的过滤器:
/* Start Central Scanning
 * - Enable auto scan if disconnected
 * - Interval = 100 ms, window = 80 ms
 * - Filter only accept bleuart service
 * - Don't use active scan
 * - Start(timeout) with timeout = 0 will scan forever (until connected)
 */
Bluefruit.Scanner.setRxCallback(scan_callback);
Bluefruit.Scanner.restartOnDisconnect(true);
Bluefruit.Scanner.setInterval(160, 80); // in unit of 0.625 ms
Bluefruit.Scanner.filterUuid(bleuart.uuid);
Bluefruit.Scanner.useActiveScan(false);
Bluefruit.Scanner.start(0);                   // 0 = Don't stop scanning after n seconds

// Advertising packet
Bluefruit.Advertising.addFlags(BLE_GAP_ADV_FLAGS_LE_ONLY_GENERAL_DISC_MODE);
Bluefruit.Advertising.addTxPower();

// Include bleuart 128-bit uuid
Bluefruit.Advertising.addService(bleuart);

// Secondary Scan Response packet (optional)
// Since there is no room for 'Name' in Advertising packet
Bluefruit.ScanResponse.addName();

/* Start Advertising
 * - Enable auto advertising if disconnected
 * - Interval:  fast mode = 20 ms, slow mode = 152.5 ms
 * - Timeout for fast mode is 30 seconds
 * - Start(timeout) with timeout = 0 will advertise forever (until connected)
 *
 * For recommended advertising interval
 * https://developer.apple.com/library/content/qa/qa1931/_index.html
 */
Bluefruit.Advertising.restartOnDisconnect(true);
Bluefruit.Advertising.setInterval(32, 244);    // in unit of 0.625 ms
Bluefruit.Advertising.setFastTimeout(30);      // number of seconds in fast mode
Bluefruit.Advertising.start(0);                // 0 = Don't stop advertising after n seconds
例程的完整代码:
/*********************************************************************
 This is an example for our nRF52 based Bluefruit LE modules

 Pick one up today in the adafruit shop!

 Adafruit invests time and resources providing this open source code,
 please support Adafruit and open-source hardware by purchasing
 products from Adafruit!

 MIT license, check LICENSE for more information
 All text above, and the splash screen below must be included in
 any redistribution
*********************************************************************/

/*
 * This sketch demonstrate how to run both Central and Peripheral roles
 * at the same time. It will act as a relay between an central (mobile)
 * to another peripheral using bleuart service.
 *
 * Mobile <--> DualRole <--> peripheral Ble Uart
 */
#include <bluefruit.h>

// OTA DFU service
BLEDfu bledfu;

// Peripheral uart service
BLEUart bleuart;

// Central uart client
BLEClientUart clientUart;

void setup()
{
  Serial.begin(115200);
  while ( !Serial ) delay(10);   // for nrf52840 with native usb

  Serial.println("Bluefruit52 Dual Role BLEUART Example");
  Serial.println("-------------------------------------\n");

  // Initialize Bluefruit with max concurrent connections as Peripheral = 1, Central = 1
  // SRAM usage required by SoftDevice will increase with number of connections
  Bluefruit.begin(1, 1);
  Bluefruit.setTxPower(4);    // Check bluefruit.h for supported values
  Bluefruit.setName("Bluefruit52 duo");

  // Callbacks for Peripheral
  Bluefruit.Periph.setConnectCallback(prph_connect_callback);
  Bluefruit.Periph.setDisconnectCallback(prph_disconnect_callback);

  // Callbacks for Central
  Bluefruit.Central.setConnectCallback(cent_connect_callback);
  Bluefruit.Central.setDisconnectCallback(cent_disconnect_callback);

  // To be consistent OTA DFU should be added first if it exists
  bledfu.begin();

  // Configure and Start BLE Uart Service
  bleuart.begin();
  bleuart.setRxCallback(prph_bleuart_rx_callback);

  // Init BLE Central Uart Serivce
  clientUart.begin();
  clientUart.setRxCallback(cent_bleuart_rx_callback);


  /* Start Central Scanning
   * - Enable auto scan if disconnected
   * - Interval = 100 ms, window = 80 ms
   * - Filter only accept bleuart service
   * - Don't use active scan
   * - Start(timeout) with timeout = 0 will scan forever (until connected)
   */
  Bluefruit.Scanner.setRxCallback(scan_callback);
  Bluefruit.Scanner.restartOnDisconnect(true);
  Bluefruit.Scanner.setInterval(160, 80); // in unit of 0.625 ms
  Bluefruit.Scanner.filterUuid(bleuart.uuid);
  Bluefruit.Scanner.useActiveScan(false);
  Bluefruit.Scanner.start(0);                   // 0 = Don't stop scanning after n seconds

  // Set up and start advertising
  startAdv();
}

void startAdv(void)
{
  // Advertising packet
  Bluefruit.Advertising.addFlags(BLE_GAP_ADV_FLAGS_LE_ONLY_GENERAL_DISC_MODE);
  Bluefruit.Advertising.addTxPower();

  // Include bleuart 128-bit uuid
  Bluefruit.Advertising.addService(bleuart);

  // Secondary Scan Response packet (optional)
  // Since there is no room for 'Name' in Advertising packet
  Bluefruit.ScanResponse.addName();

  /* Start Advertising
   * - Enable auto advertising if disconnected
   * - Interval:  fast mode = 20 ms, slow mode = 152.5 ms
   * - Timeout for fast mode is 30 seconds
   * - Start(timeout) with timeout = 0 will advertise forever (until connected)
   *
   * For recommended advertising interval
   * https://developer.apple.com/library/content/qa/qa1931/_index.html
   */
  Bluefruit.Advertising.restartOnDisconnect(true);
  Bluefruit.Advertising.setInterval(32, 244);    // in unit of 0.625 ms
  Bluefruit.Advertising.setFastTimeout(30);      // number of seconds in fast mode
  Bluefruit.Advertising.start(0);                // 0 = Don't stop advertising after n seconds
}

void loop()
{
  // do nothing, all the work is done in callback
}

/*------------------------------------------------------------------*/
/* Peripheral
 *------------------------------------------------------------------*/
void prph_connect_callback(uint16_t conn_handle)
{
  // Get the reference to current connection
  BLEConnection* connection = Bluefruit.Connection(conn_handle);

  char peer_name[32] = { 0 };
  connection->getPeerName(peer_name, sizeof(peer_name));

  Serial.print("[Prph] Connected to ");
  Serial.println(peer_name);
}

void prph_disconnect_callback(uint16_t conn_handle, uint8_t reason)
{
  (void) conn_handle;
  (void) reason;

  Serial.println();
  Serial.println("[Prph] Disconnected");
}

void prph_bleuart_rx_callback(uint16_t conn_handle)
{
  (void) conn_handle;

  // Forward data from Mobile to our peripheral
  char str[20+1] = { 0 };
  bleuart.read(str, 20);

  Serial.print("[Prph] RX: ");
  Serial.println(str);

  if ( clientUart.discovered() )
  {
    clientUart.print(str);
  }else
  {
    bleuart.println("[Prph] Central role not connected");
  }
}

/*------------------------------------------------------------------*/
/* Central
 *------------------------------------------------------------------*/
void scan_callback(ble_gap_evt_adv_report_t* report)
{
  // Since we configure the scanner with filterUuid()
  // Scan callback only invoked for device with bleuart service advertised
  // Connect to the device with bleuart service in advertising packet
  Bluefruit.Central.connect(report);
}

void cent_connect_callback(uint16_t conn_handle)
{
  // Get the reference to current connection
  BLEConnection* connection = Bluefruit.Connection(conn_handle);

  char peer_name[32] = { 0 };
  connection->getPeerName(peer_name, sizeof(peer_name));

  Serial.print("[Cent] Connected to ");
  Serial.println(peer_name);;

  if ( clientUart.discover(conn_handle) )
  {
    // Enable TXD's notify
    clientUart.enableTXD();
  }else
  {
    // disconnect since we couldn't find bleuart service
    Bluefruit.disconnect(conn_handle);
  }
}

void cent_disconnect_callback(uint16_t conn_handle, uint8_t reason)
{
  (void) conn_handle;
  (void) reason;

  Serial.println("[Cent] Disconnected");
}

/**
 * Callback invoked when uart received data
 * @param cent_uart Reference object to the service where the data
 * arrived. In this example it is clientUart
 */
void cent_bleuart_rx_callback(BLEClientUart& cent_uart)
{
  char str[20+1] = { 0 };
  cent_uart.read(str, 20);

  Serial.print("[Cent] RX: ");
  Serial.println(str);

  if ( bleuart.notifyEnabled() )
  {
    // Forward data from our peripheral to Mobile
    bleuart.print( str );
  }else
  {
    // response with no prph message
    clientUart.println("[Cent] Peripheral role not connected");
  }
}


 1173
1173

 被折叠的 条评论
为什么被折叠?
被折叠的 条评论
为什么被折叠?
 到【灌水乐园】发言


