


最近在做中央高校的项目,设计UI的时候往往觉得Android自带的按钮和输入框看着太挫了,特地从网上搜刮了点资源,用到现在看着还是挺舒服的,这里做一下整合。写这篇文章是防止我以后再用的时候忘记用法了,虽然资源是别人的,但是使用心得和一些注意点都是我自己总结的。
转载请注明出处,请尊重他人的劳动成果。
1、带阴影效果的彩色按钮
实质上就是一个自定义的View,继承了Android本身定义的空间类型,比如Button、EditView等,这里就是继承的Button类,懂的都懂。
下载地址:https://github.com/hoang8f/android-flat-button
使用方法:
1、在你的Android工程里新建包,我的包名是info.hoang8f.widget ,把FButton.java放进去
2、这三个文件复制进来
          res/values/attrs.xml

          res/values/colors.xml

          res/values/dimens.xml
3、原本xml里的Button控件是 Button,改成info.hoang8f.widget.FButton
4、修改属性参数:
例如:
(1)直接在xml里修改:(我就是这么干的,比较习惯布局的东西尽量只在布局里弄)
先在开头处添加
xmlns:fbutton=”http://schemas.android.com/apk/res-auto”
fbutton:buttonColor="@color/fbutton_color_orange"
fbutton:cornerRadius="5dp"
fbutton:shadowColor="@color/fbutton_color_carrot"
fbutton:shadowEnabled="true"
fbutton:shadowHeight="5dp"
(2)在Activity里面通过代码修改
disabledBtn.setButtonColor(getResources().getColor(R.color.fbutton_color_concrete));
disabledBtn.setShadowColor(getResources().getColor(R.color.fbutton_color_asbestos));
disabledBtn.setShadowEnabled(true);
disabledBtn.setShadowHeight(5);
disabledBtn.setCornerRadius(5);
这里的颜色是可以改的,资源的作者已经给了不少好看的颜色,在color里面自己试,注意按钮和阴影颜色的搭配性。
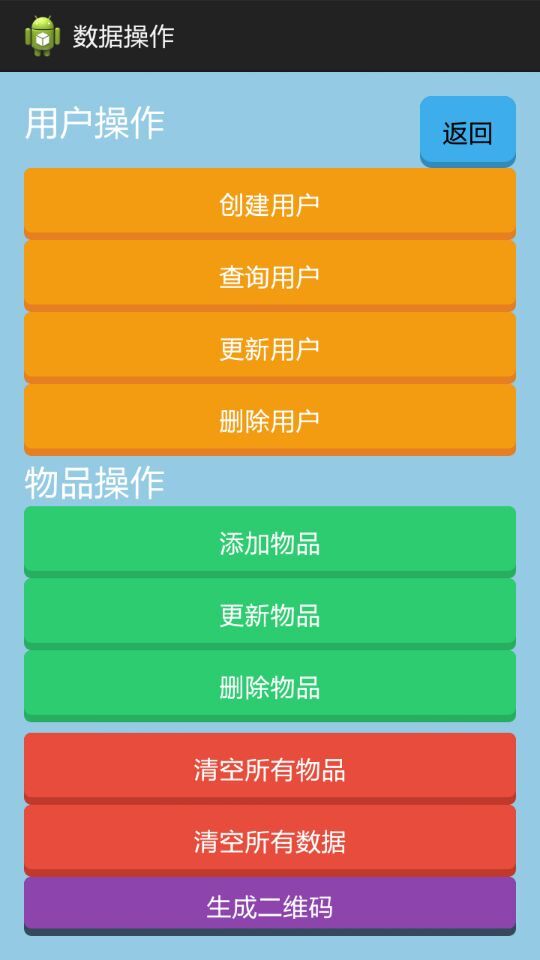
例如:在xml里把按钮定义成这样的话
<info.hoang8f.widget.FButton
 android:id="@+id/buttona"
 android:layout_width="fill_parent"
 android:layout_height="wrap_content"
 android:text="创建用户"
 android:textColor = "#ffffff"

 fbutton:buttonColor="@color/fbutton_color_orange"
 fbutton:cornerRadius="5dp"
 fbutton:shadowColor="@color/fbutton_color_carrot"
 fbutton:shadowEnabled="true"
 fbutton:shadowHeight="5dp"/>
所以按钮都这么做,就会有这样的效果:


 1800
1800

 被折叠的 条评论
为什么被折叠?
被折叠的 条评论
为什么被折叠?
 到【灌水乐园】发言


