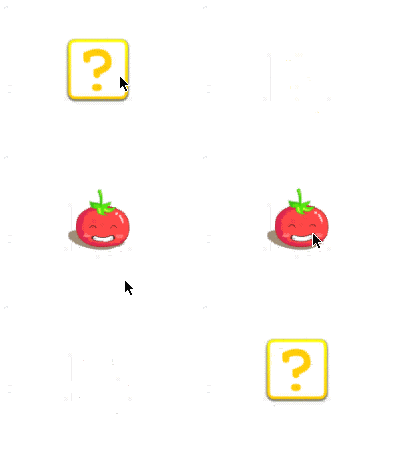
效果如下(gif1):
怎么做呢?文章有点长,看官请静下心来好好看看。碰到不懂的地方查查API。
Android中并没有提供直接做3D翻转的动画,所以关于3D翻转的动画效果需要我们自己实现,那么我们首先来分析一下Animation 和 Transformation。
Animation动画的主要接口,其中主要定义了动画的一些属性比如开始时间,持续时间,是否重复播放等等。
而Transformation中则包含一个矩阵和alpha值,矩阵是用来做平移,旋转和缩放动画的,而alpha值是用来做alpha动画的,
要实现3D旋转动画我们需要继承自Animation类来实现,我们需要重载getTransformation和applyTransformation,
在getTransformation中Animation会根据动画的属性来产生一系列的差值点,然后将这些差值点传给applyTransformation,
这个函数将根据这些点来生成不同的Transformation。下面是具体实现:
public class Rotate3dAnimation extends Animation {
    //开始角度
    private final float mFromDegrees;
    //结束角度
    private final float mToDegrees;
    //中心点
    private final float mCenterX;
    private final float mCenterY;
    private final float mDepthZ;
    //是否需要扭曲
    private final boolean mReverse;
    //摄像头
    private Camera mCamera;
    public Rotate3dAnimation(float fromDegrees, float toDegrees,
            float centerX, float centerY, float depthZ, boolean reverse) {
        mFromDegrees = fromDegrees;
        mToDegrees = toDegrees;
        mCenterX = centerX;
        mCenterY = centerY;
        mDepthZ = depthZ;
        mReverse = reverse;
    }

    @Override
    public void initialize(int width, int height, int parentWidth, int parentHeight) {
        super.initialize(width, height, parentWidth, parentHeight);
        mCamera = new Camera();
    }
    //生成Transformation
    @Override
    protected void applyTransformation(float interpolatedTime, Transformation t) {
        final float fromDegrees = mFromDegrees;
        //生成中间角度
        float degrees = fromDegrees + ((mToDegrees - fromDegrees) * interpolatedTime);

        final float centerX = mCenterX;
        final float centerY = mCenterY;
        final Camera camera = mCamera;

        final Matrix matrix = t.getMatrix();

        camera.save();
        if (mReverse) {
            camera.translate(0.0f, 0.0f, mDepthZ * interpolatedTime);
        } else {
            camera.translate(0.0f, 0.0f, mDepthZ * (1.0f - interpolatedTime));
        }
        camera.rotateY(degrees);
        //取得变换后的矩阵
        camera.getMatrix(matrix);
        camera.restore();

        matrix.preTranslate(-centerX, -centerY);
        matrix.postTranslate(centerX, centerY);
    }
}
其中包括了旋转的开始和结束角度,中心点、是否扭曲、和一个Camera,这里我们主要分析applyTransformation函数,
其中第一个参数就是通过getTransformation函数传递的差指点,然后我们根据这个差值通过线性差值算法计算出一个中间角度degrees,
Camera类是用来实现绕Y轴旋转后透视投影的,因此我们首先通过t.getMatrix()取得当前的矩阵,然后通过camera.translate来对
矩阵进行平移变换操作,camera.rotateY进行旋转。这样我们就可以很轻松的实现3D旋转效果了。
以上摘自:http://wenku.baidu.com/view/3cd46cfc0242a8956bece4fa.html
看过以上文章的会知道作者接下来是贴上了API上的代码,那个代码实现的是图片和listview的旋转。那如果我们想实现的是
文章开头处的两张图片旋转怎么做呢?首先列出布局文件:
<RelativeLayout xmlns:android="http://schemas.android.com/apk/res/android"
    xmlns:tools="http://schemas.android.com/tools"
    android:layout_width="match_parent"
    android:layout_height="match_parent"
    android:paddingBottom="@dimen/activity_vertical_margin"
    android:paddingLeft="@dimen/activity_horizontal_margin"
    android:paddingRight="@dimen/activity_horizontal_margin"
    android:paddingTop="@dimen/activity_vertical_margin"
    android:id="@+id/rl"
    tools:context=".MainActivity" >
    <FrameLayout
         android:layout_width="50dp"
            android:layout_height="50dp"
            android:layout_marginLeft="103dp"
            android:layout_marginTop="135dp"
            android:id="@+id/fl" >
        <ImageView
            android:id="@+id/imageView1"
            android:layout_width="match_parent"
            android:layout_height="match_parent"
            android:scaleType="fitXY"
            android:src="@drawable/contrary" />
    </FrameLayout>
</RelativeLayout>
public class MainActivity extends Activity {
	ImageView img;
	ViewGroup mContainer;
	private boolean which=false;//which用于区别当前图片的状态,为false表示点击前显示的是问号,为true表示是蔬菜
	 private static final int IMAGE1 = R.drawable.contrary;
	 private static final int IMAGE2 = R.drawable.fruit11;
	@Override
	protected void onCreate(Bundle savedInstanceState) {
		super.onCreate(savedInstanceState);
		setContentView(R.layout.activity_main);
		img=(ImageView)findViewById(R.id.imageView1);
		mContainer = (ViewGroup) findViewById(R.id.fl);//找到FrameLayout
		 img.setClickable(true);
	        img.setFocusable(true);
		img.setOnClickListener(new OnClickListener() {
			@Override
			public void onClick(View v) {
				// TODO 点击图片后的事件
				if(!which)
				{
					applyRotation(0,0,-90);//左旋90度
				}
				else
				{
					applyRotation(0,0,90);//右旋90度
				}
		}});
	}
	/*
	 * 应用变换的方法,里面将会使用之前写好的Rotate3d类
	 */
	 private void applyRotation(int position, float start, float end) {
	        // Find the center of the container
		 //获取FrameLayout的x、y值。这样图片在翻转的时候会以这个x、y值为中心翻转。
		 //这就是为什么我要用FrameLayout的原因。如果直接使用的是父容器RelativeLayout将会以RelativeLayout的中心为轴心
		 //翻转。由于我的图片不是处于RelativeLayout的中心,翻转时就会有差错.效果可以看看下面的图片。
		 //当然,有时候你就想要那样的效果。你也可以在自行调整centerX和centerY的值来达到你想要的效果
	        final float centerX = mContainer.getWidth() / 2.0f;
	        final float centerY = mContainer.getHeight() / 2.0f;
	        final Rotate3d rotation =
	                new Rotate3d(start, end, centerX, centerY, 310.0f, true);
	        rotation.setDuration(1000);  //可设置翻转的时间,以ms为单位
	        rotation.setFillAfter(true);
	        rotation.setInterpolator(new AccelerateInterpolator());
	        rotation.setAnimationListener(new DisplayNextView());
	        mContainer.startAnimation(rotation);  //开始翻转前90度
	    }
	 /*
	  * 这个类用于监听前90度翻转完成
	  */
	private final class DisplayNextView implements Animation.AnimationListener {
        private DisplayNextView() {
        }
        public void onAnimationStart(Animation animation) {
        }
        public void onAnimationEnd(Animation animation) {
        	//前90度翻转完成后,根据图片的状态翻转剩下的90度
        	if(!which)
        	{
        		 img.setImageResource(IMAGE2);
        		 mContainer.post(new SwapViews(0));
        	}
        	else
        	{
        		img.setImageResource(IMAGE1);
        		 mContainer.post(new SwapViews(1));
        	}
        }
        public void onAnimationRepeat(Animation animation) {
        }
    }
    /**
     * 这个类用于翻转剩下的90度
     */
    private final class SwapViews implements Runnable {
        private final int mdirection;
        //我把API的例子改了,这里用一个方向变量来指明剩下的90度应该怎么翻转。
        public SwapViews(int direction) {
            mdirection=direction;
        }
        public void run() {
            final float centerX = mContainer.getWidth() / 2.0f;
            final float centerY = mContainer.getHeight() / 2.0f;
            Rotate3d rotation;
            if(mdirection==0)
            {
            	rotation = new Rotate3d(90, 0, centerX, centerY, 310.0f, false);
            	which=true;//待翻转完成后,修改图片状态
            }
            else
            {
            	rotation = new Rotate3d(-90, 0, centerX, centerY, 310.0f, false);
            	which=false;
            }
            rotation.setDuration(1000);
            rotation.setFillAfter(true);
            rotation.setInterpolator(new DecelerateInterpolator());
            mContainer.startAnimation(rotation);  //开始翻转余下的90度
        }
    }
}代码中提到的如果以父容器RelativeLayout为中心的翻转效果如下(gif2):
我们再来关注一下角度问题。细心的朋友应该已经知道:applyRotation(0,0,-90);是完成左旋0到90度
rotation = new Rotate3d(90, 0, centerX, centerY, 310.0f, false);是完成左旋90度到180度,
而applyRotation(0,0,90);完成右旋0到90度 rotation = new Rotate3d(-90, 0, centerX, centerY, 310.0f, false);是完成90度到180度
那角度为什么要这么设置呢?为什么不是applyRotation(0,0,-90);rotation = new Rotate3d(-90, -180, centerX, centerY, 310.0f, false);
和applyRotation(0,0,90);rotation = new Rotate3d(90, 180, centerX, centerY, 310.0f, false);。好,我们来看看这么设置的效果你就会明白了(gif3):
关键在于角度是以顺时针规定的。好好想想吧,这一点只可意会,很难表达出来。也可以下载源码去自己试试。
好了,就说到这里,效果千千万,看你想怎么做了。欢迎指正!
源码地址:http://download.csdn.net/detail/songxueyu/5456043


 1071
1071


 被折叠的 条评论
为什么被折叠?


