


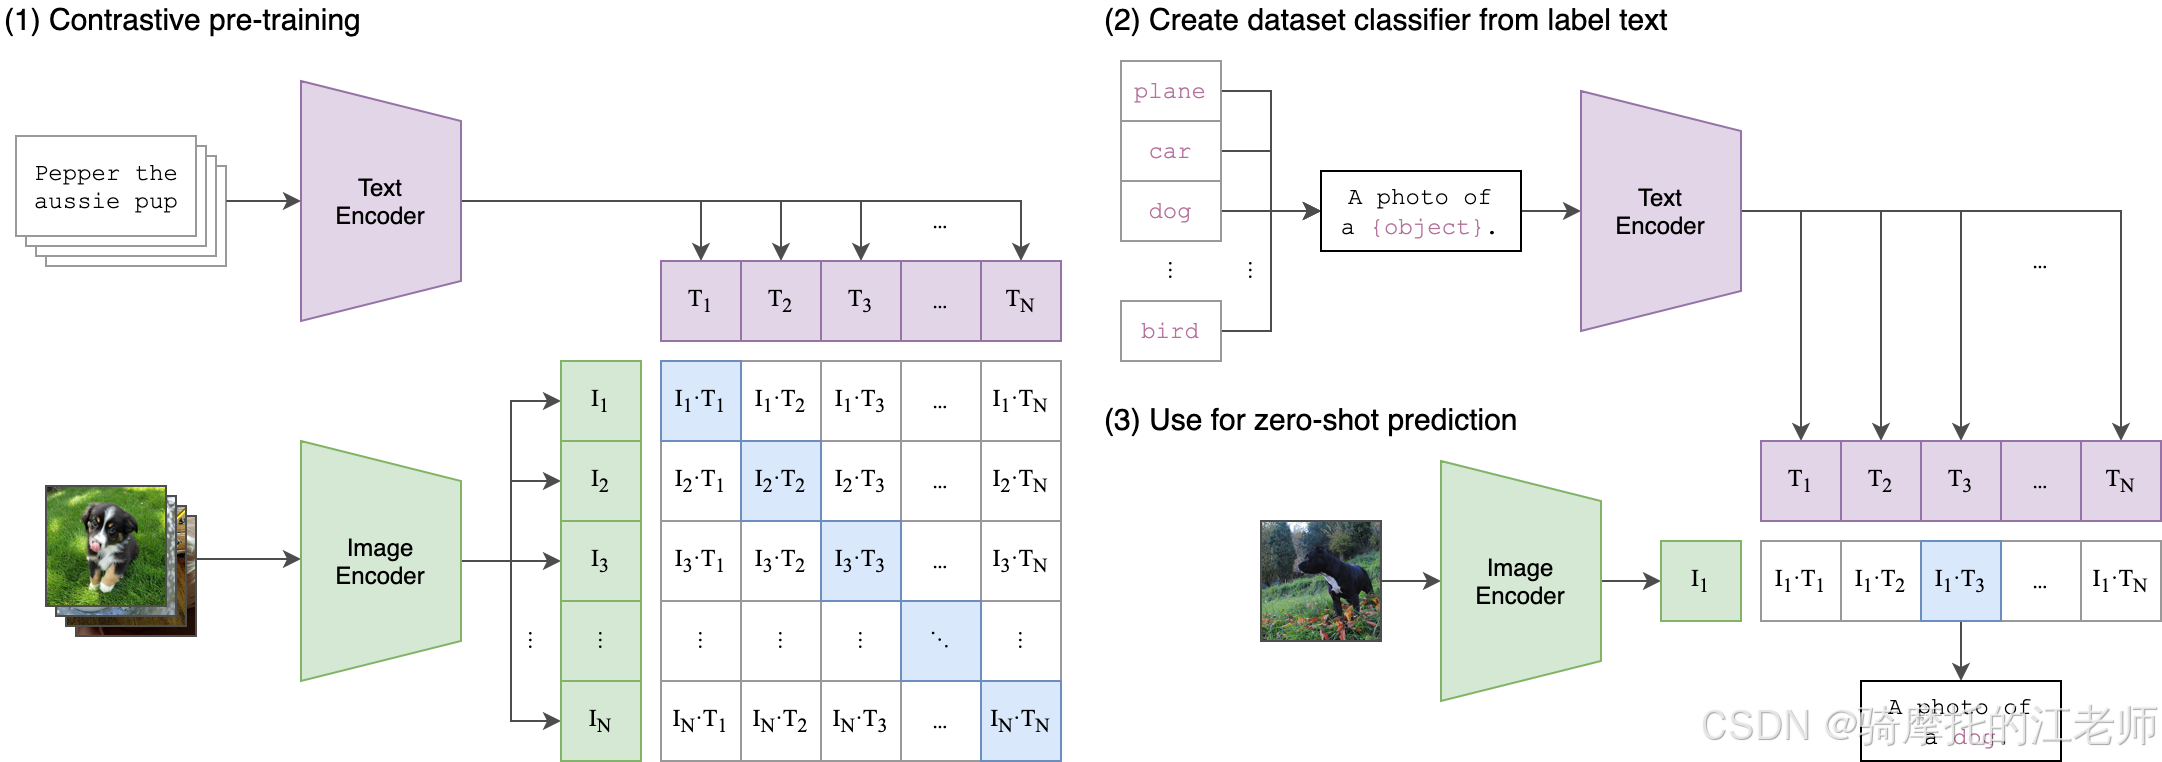
CLIP(Contrastive Language-Image Pre-Training)是用大量的语义相同的(图片,文字)结对预训练的神经网络,它由文字编码器Text Encoder和图片编码器Image Encoder组成。训练过程基本原理是让Text Encoder和Image Encoder输出的数字向量在语义空间上靠近,例如用Text Encoder把文字“可爱的小狗”生成向量emb_t1,把文字“可爱的小猫”生成向量emb_t2,用Image Encoder把一张小狗照片生成向量emb_i1,则在向量空间里面,与emb_i1(即小狗图片的向量表示)距离更近的是emb_t1,而不是emb_t2。模型原理下图(来自官网)。
官网的应用DEMO利用clip实现了zero-shot(零训练)的图片分类,在图片集ImageNet上获得了和模型ResNet50差不多的成绩。Github上的官方项目链接:https://github.com/openai/CLIP
利用CLIP的Image Encoder对图片集生成embedding,再利用K临近算法查找向量空间中相似的向量,即可实现相似图片检索(以图找图)。
基本思路:
- 用Image Encoder对图片集中所有照片生成embedding
- 用hnswlib库将1生成的embedding创建索引index
- 用Image Encoder对被检索照片生成embedding,记为emb_q
- 在index中用knn算法找出top_k个与emb_q最相似的embedding(即相似图片的索引编号)
demo代码如下,建议在jupyter notebook中运行。clip库安装,参考官网:https://github.com/openai/CLIP 安装完clip库后,pillow库修改为9.0.0,否则PIL库加载出错。demo代码依赖的其它库建议版本: matplotlib==3.4.3 hnswlib:最新版即可。
input_path = r'D:\mike\test3'#图片库文件夹,任意数量的jpg文件

#生成所有图片文件的embedding
from tqdm import tqdm
import os
from PIL import Image

# 遍历目录下的所有文件(不含子目录),并显示进度
embeddings = []
files = [f for f in os.listdir(input_path) if f.lower().endswith(('.png', '.jpg', '.jpeg','.bmp', '.tiff','.jfif'))]
for filename in tqdm(files, desc='encoding img files'):
    file_path = os.path.join(input_path, filename)

    #过滤小于10k的文件
    #if os.path.getsize(file_path) < 10240:
    #    continue

    image = preprocess(Image.open(file_path)).unsqueeze(0).to(device)

    with torch.no_grad():
        image_features = model.encode_image(image).squeeze()

    embeddings.append(image_features.cpu().numpy())

    #break #test run, encode only 1 image

assert len(embeddings)==len(files)

#prepare image encoder
import torch
import clip

device = "cuda" if torch.cuda.is_available() else "cpu"

#首次运行会自动下载模型文件,大小300M+
model, preprocess = clip.load("ViT-B/32", device=device)

#创建索引
import hnswlib

index = hnswlib.Index(space='cosine', dim=512)#clip model生成的embedding长度是512
index.init_index(max_elements=len(embeddings), ef_construction=512, M=64)
index.add_items(embeddings, list(range(len(embeddings))))

top_k = 8 # 返回top n个相似的图片

#要查询的图片文件名,默认在图库目录中
#如果要用图库之外的图片来查询,需要单独为target图片生成embedding
query_jpg_filename = 'target.jpg'

#检索出图片文件名对应的embedding index
jpg_idx = files.index(query_jpg_filename)

##查询
query_emb = embeddings[jpg_idx]
simi_jpg_ids,distances = index.knn_query(query_emb, k=top_k)

#print(simi_jpg_ids)
#print(distances)

#显示前8张图片
import matplotlib.pyplot as plt

images_paths=[]

for idx in simi_jpg_ids[0]:
    images_paths.append(os.path.join(input_path, files[idx]))

# 创建一个2行4列的布局
fig, axs = plt.subplots(2, 4, figsize=(12, 8))  # 设置整个figure的大小

# 循环遍历图片路径列表
for i, image_path in enumerate(images_paths):
    # 加载图片
    image = plt.imread(image_path)

    # 根据索引确定放置图片的位置
    row, col = divmod(i, 4)

    # 在相应的位置显示图片
    axs[row, col].imshow(image)
    axs[row, col].axis('off')  # 关闭坐标轴

    # 在图片下方添加文字(不支持汉字),写上knn算法返回的向量距离
    axs[row, col].text(0, 0, f'{distances[0][i]:.4f}',
                       fontsize=16, color='red', ha='center', va='center')

# 调整布局以适应所有图片
plt.tight_layout()

# 显示图像
plt.show()
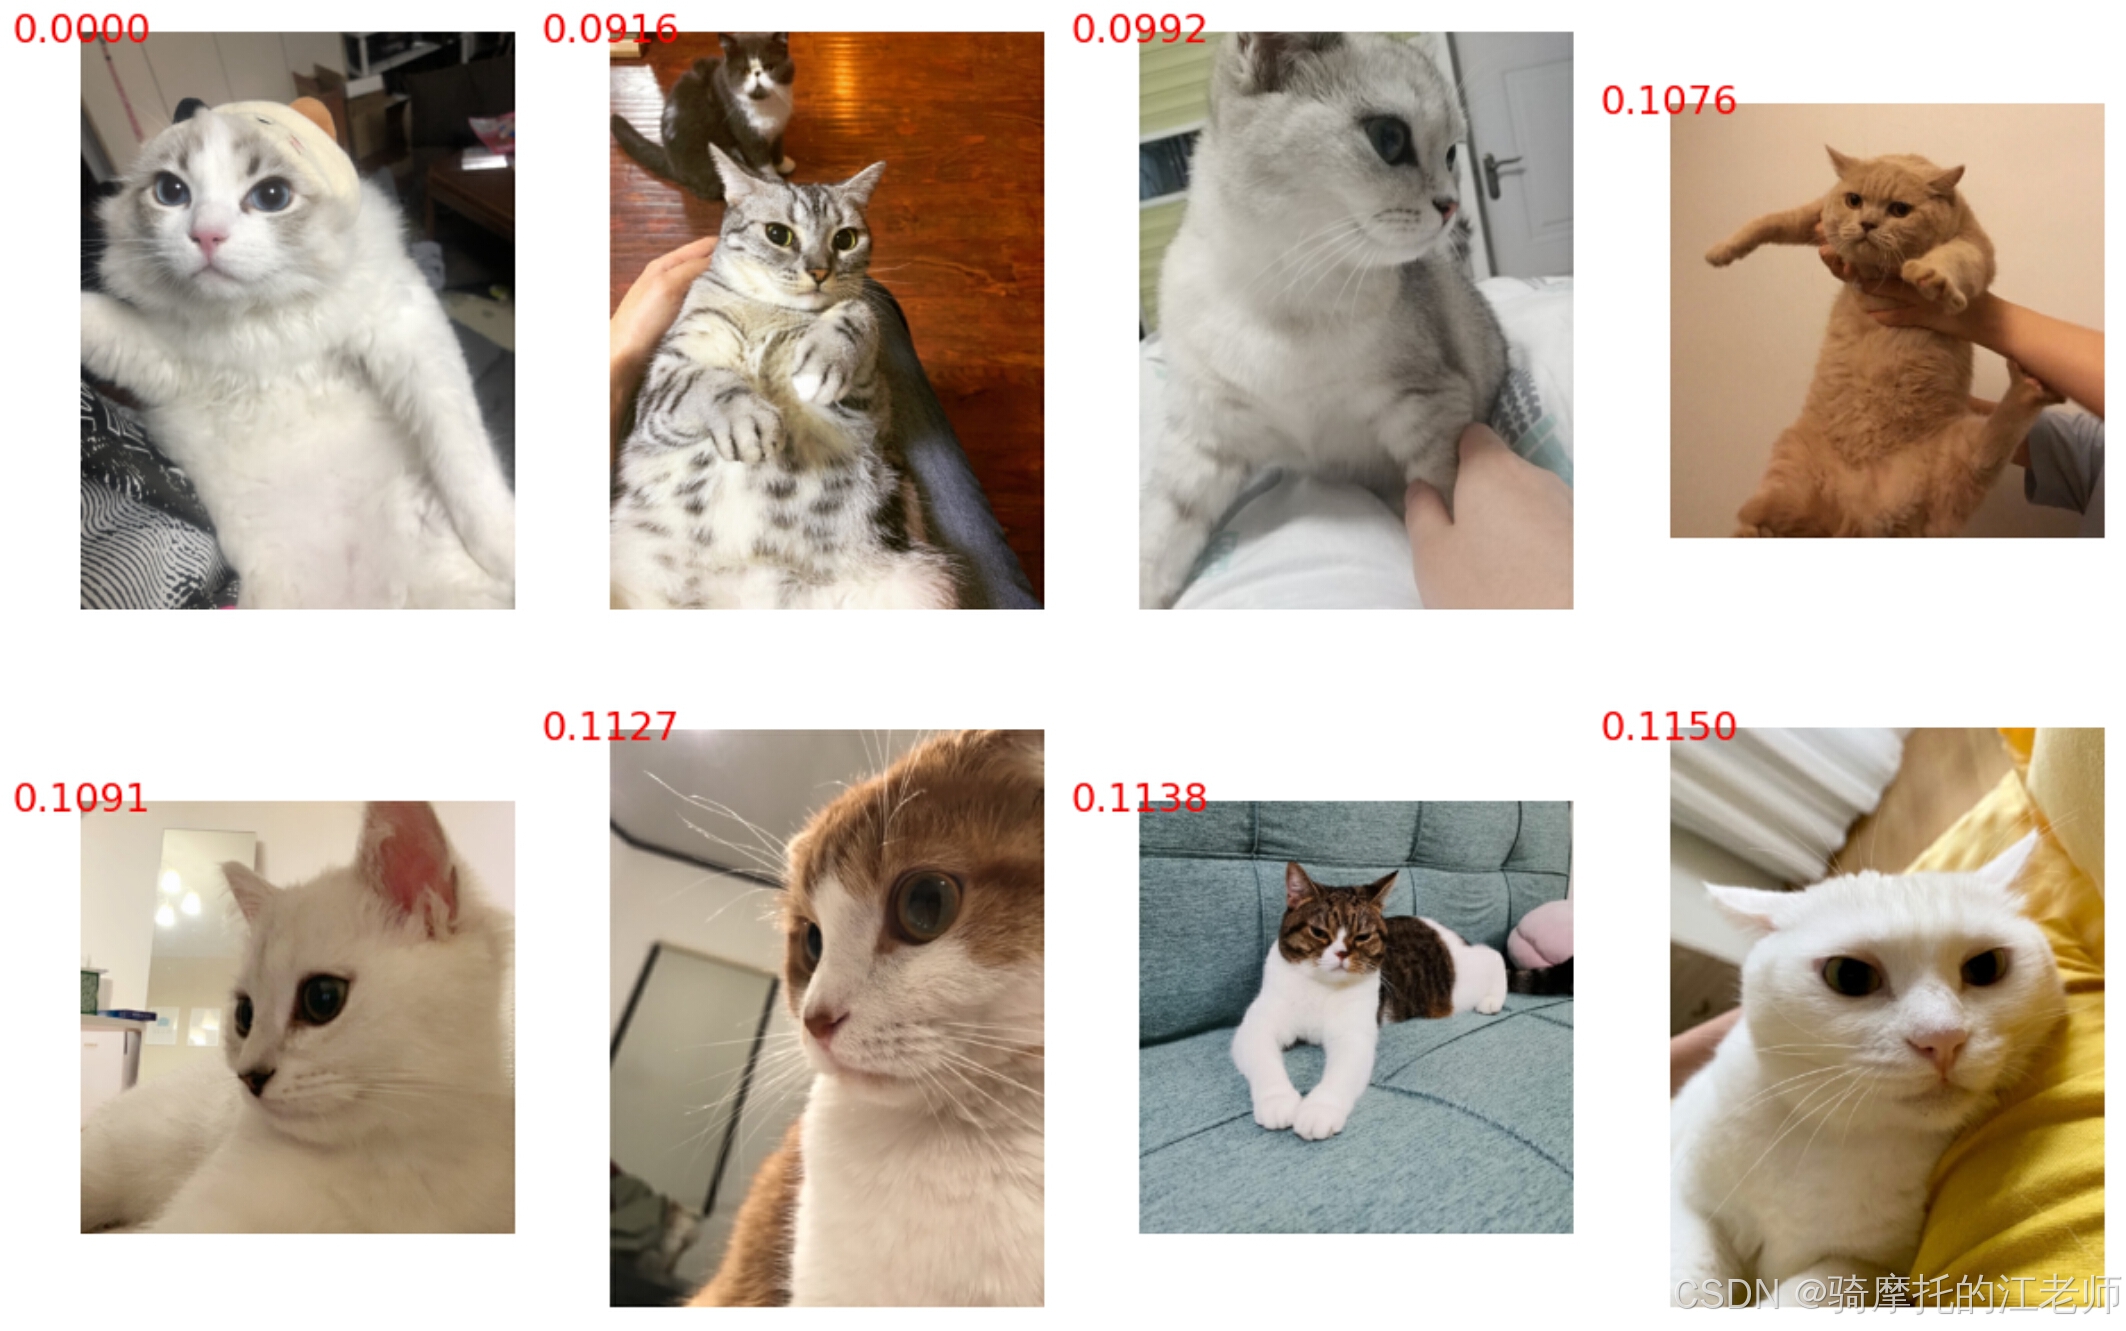
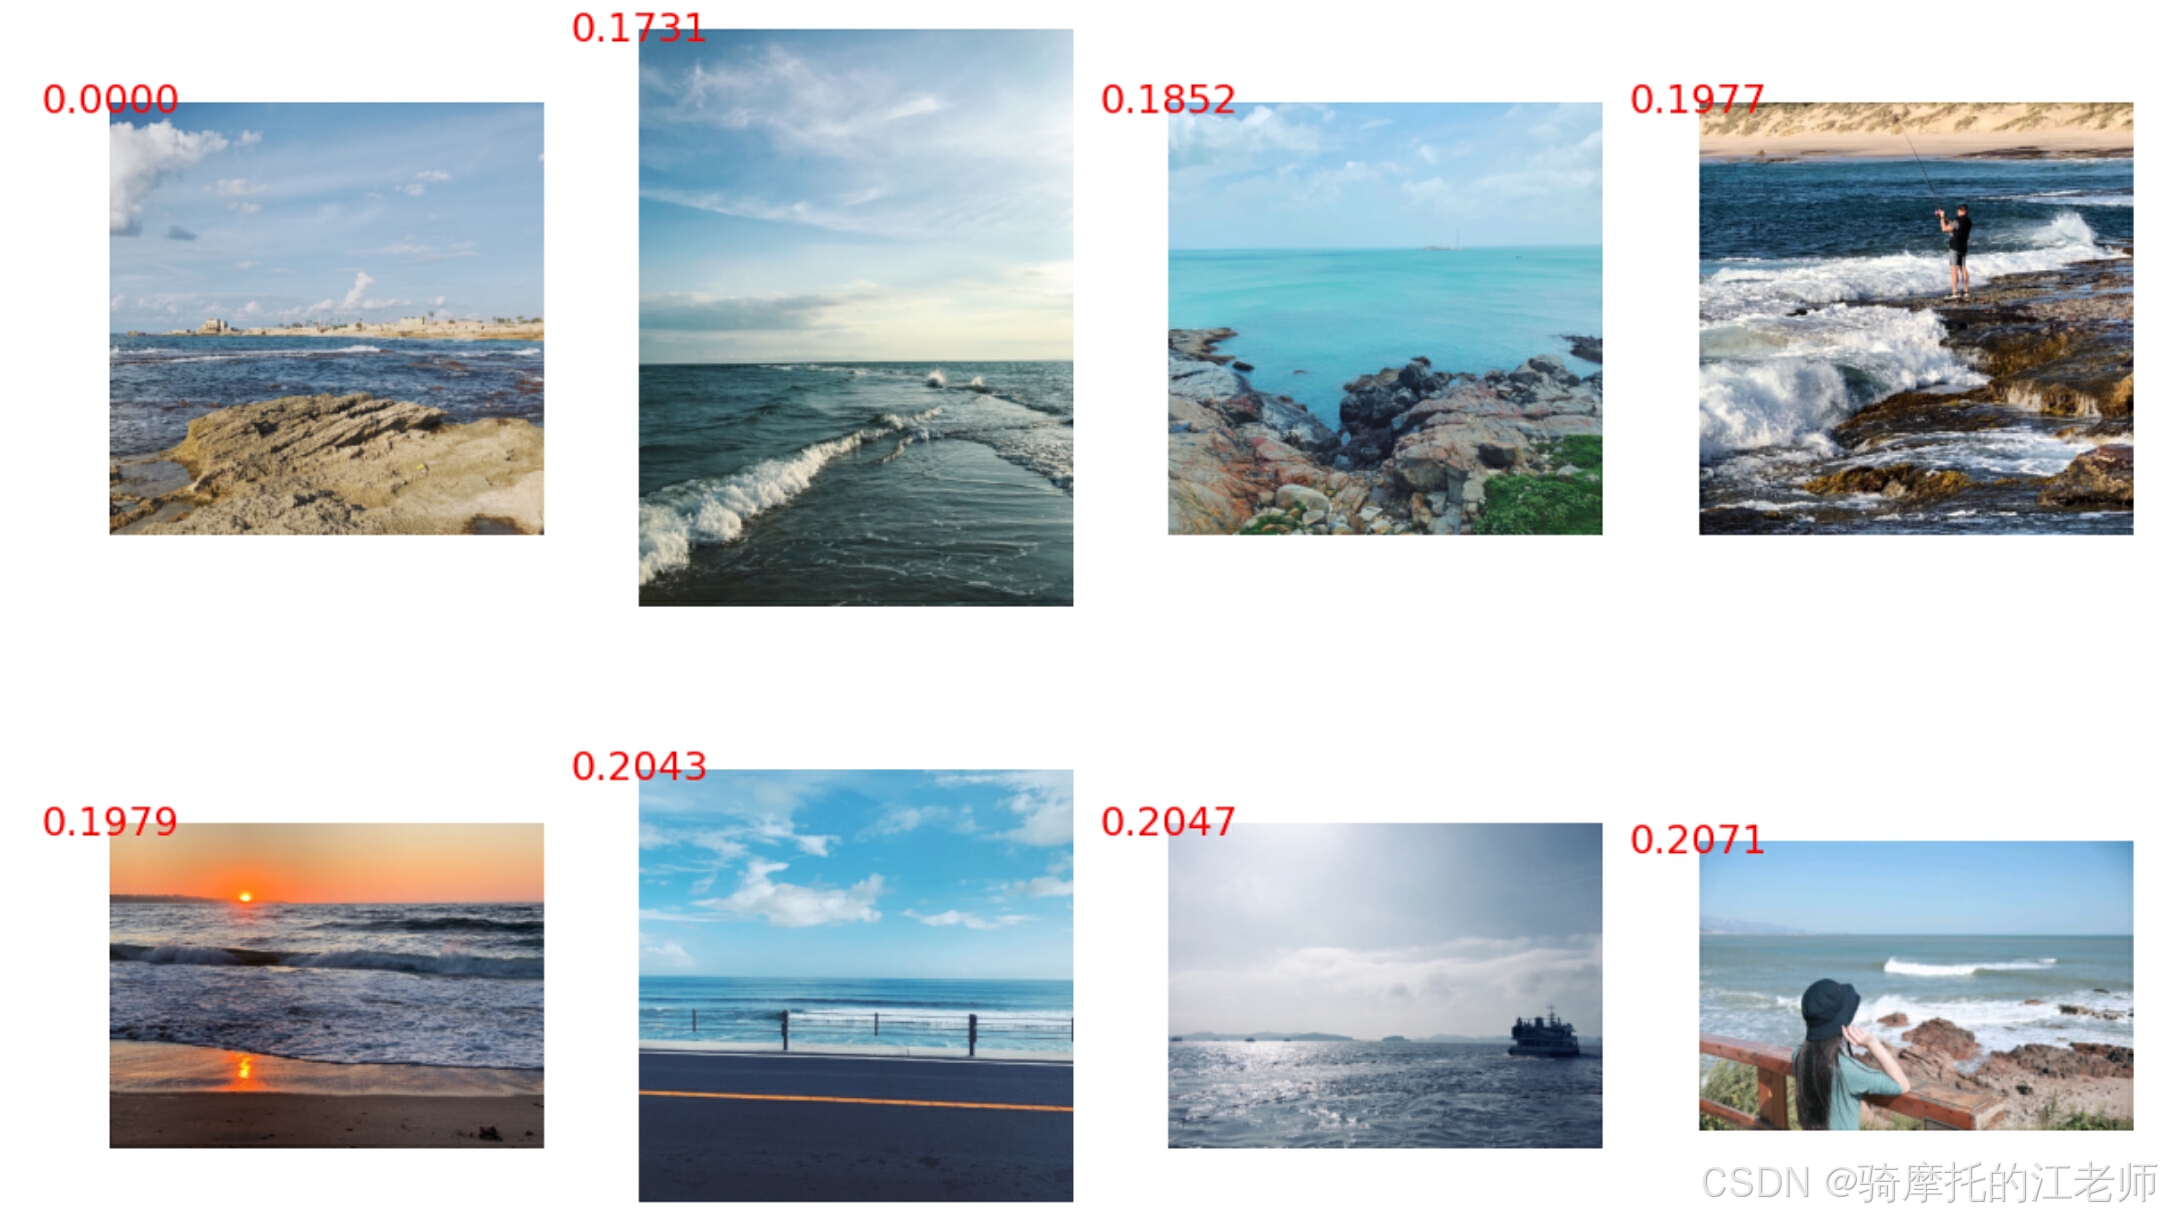
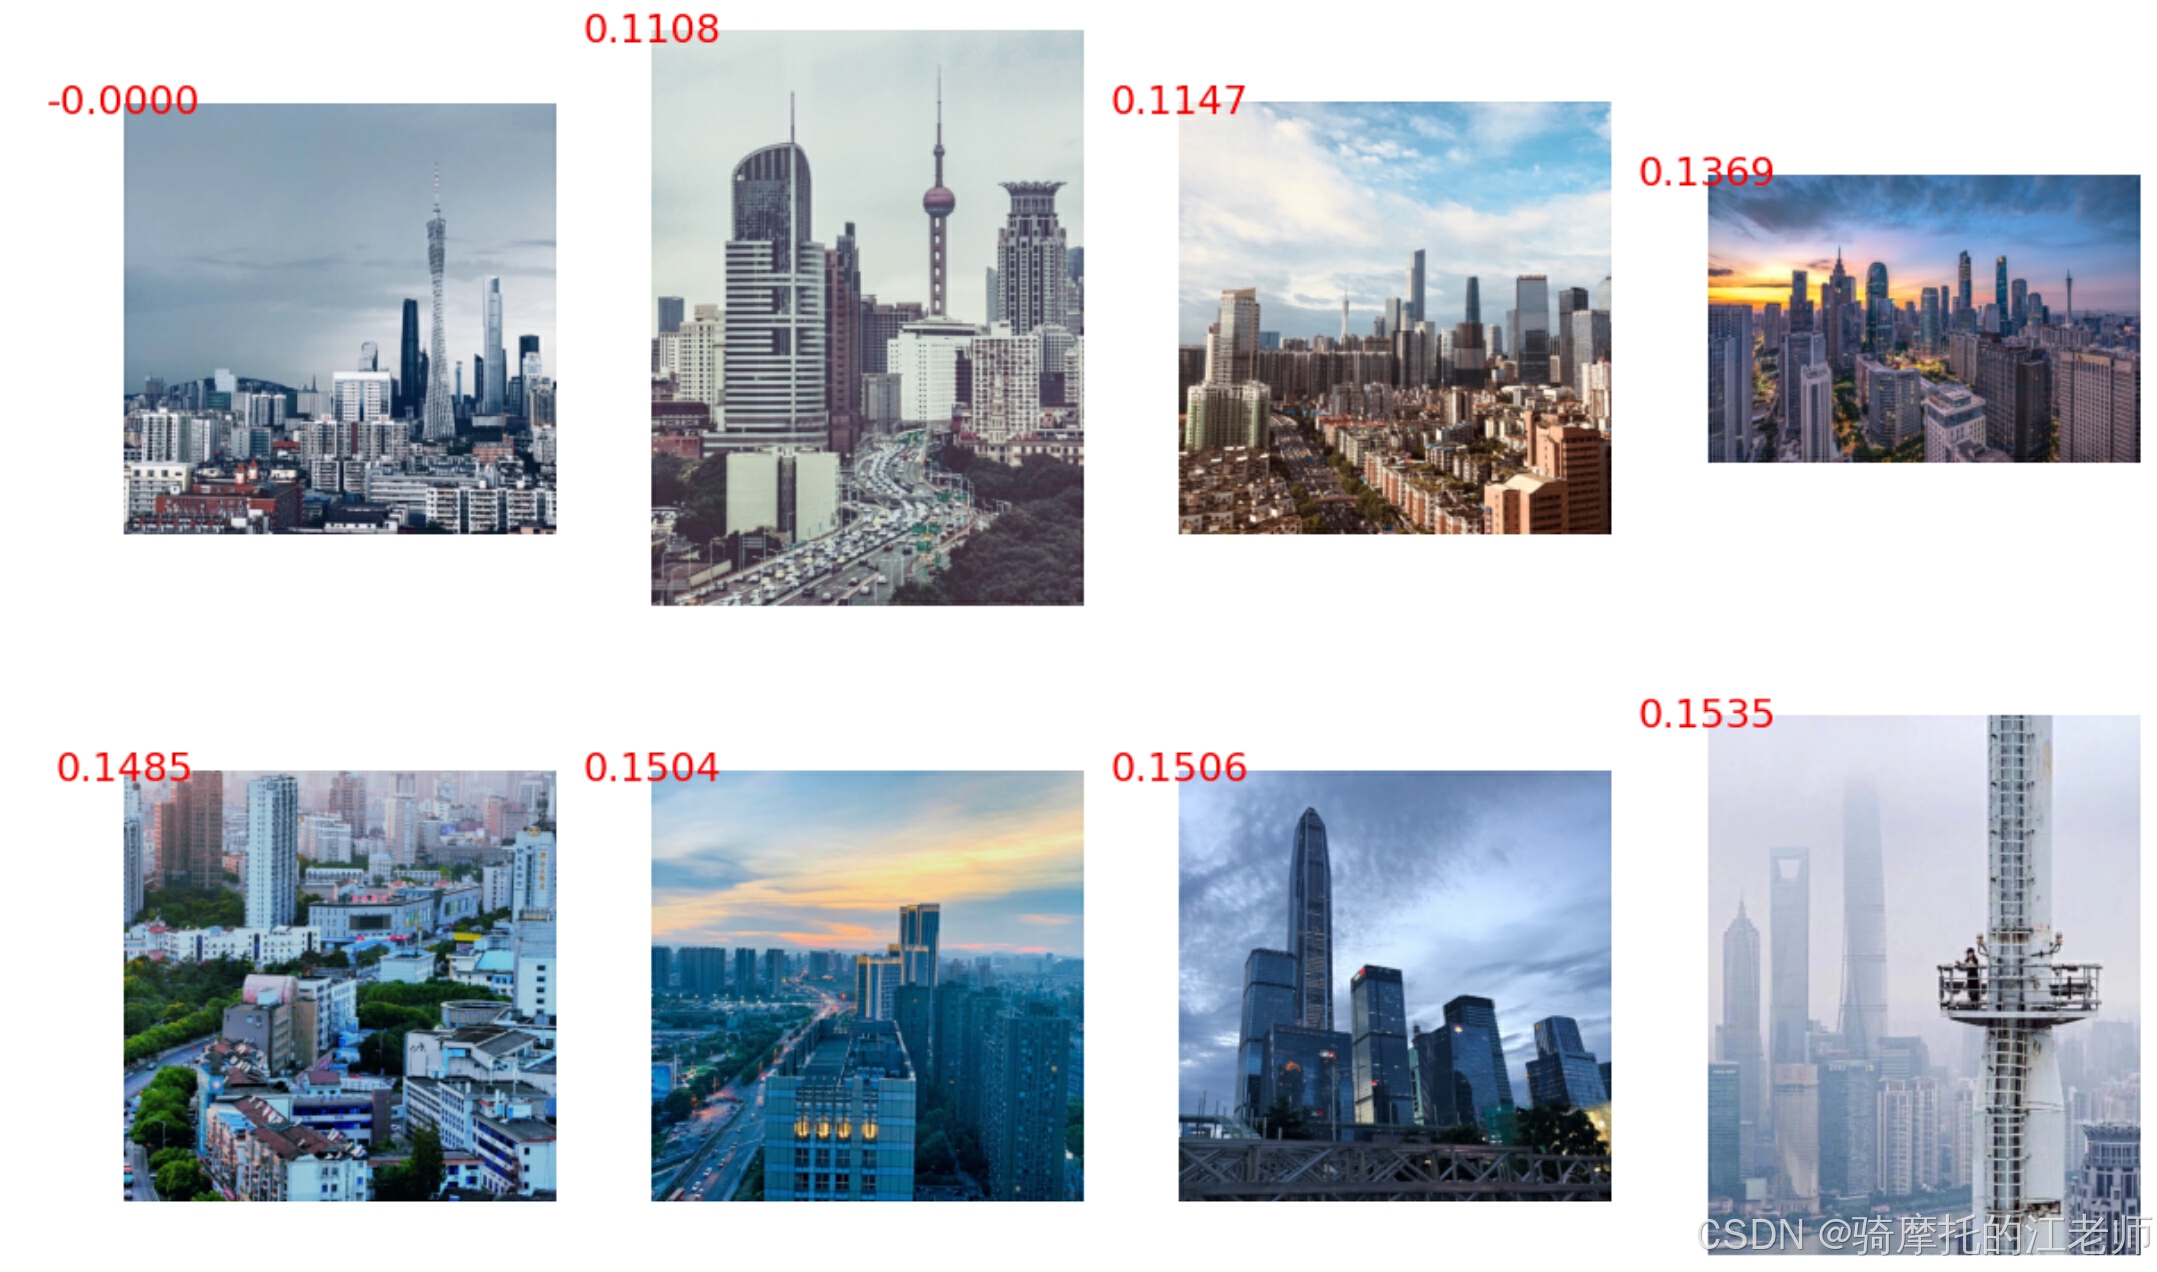
实际应用效果见下面图片,每组图片的第1张是被检索的图片,另外7张是找出的相似的图片。
总结:利用CLIP的图片编码器,可实现图片查重的小工具,用于整理图片集,也可应用在图文社区产品中实现基于图片语义的内容推荐。类似的模型还有Open Clip,效果与CLIP相近,最近两年多模态开源模型发展迅猛,利用多模态LLM也可实现图片embedding,并且在语义上更精准,例如可认出图片中的明星是谁,但这些模型动则需要10多G显存,不如CLIP短小精悍。


 534
534

 被折叠的 条评论
为什么被折叠?
被折叠的 条评论
为什么被折叠?
 到【灌水乐园】发言


