


博客原文地址(http://blog.163.com/benbenfafa_88/blog/static/6493016220130451915187/)
1、 为什么使用Nexus
如果没有私服,我们所需的所有构件都需要通过maven的中央仓库和第三方的Maven仓库下载到本地,而一个团队中的所有人都重复的从maven仓库下 载构件无疑加大了仓库的负载和浪费了外网带宽,如果网速慢的话,还会影响项目的进程。很多情况下项目的开发都是在内网进行的,连接不到maven仓库怎么 办呢?开发的公共构件怎么让其它项目使用?这个时候我们不得不为自己的团队搭建属于自己的maven私服,这样既节省了网络带宽也会加速项目搭建的进程, 当然前提条件就是你的私服中拥有项目所需的所有构件。
2、Nexus下载
nexus 下载地址
3、Nexus启动
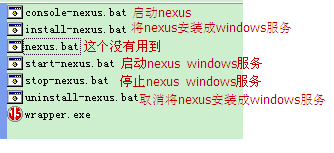
我下载的是zip包,解压后进入\nexus-2.1.2-bundle\nexus-2.1.2\bin\jsw\,根据操作系统类型选择文件夹,我选的是windows-x86-32文件夹,进入后可看到如下所示bat文件。
图(1)
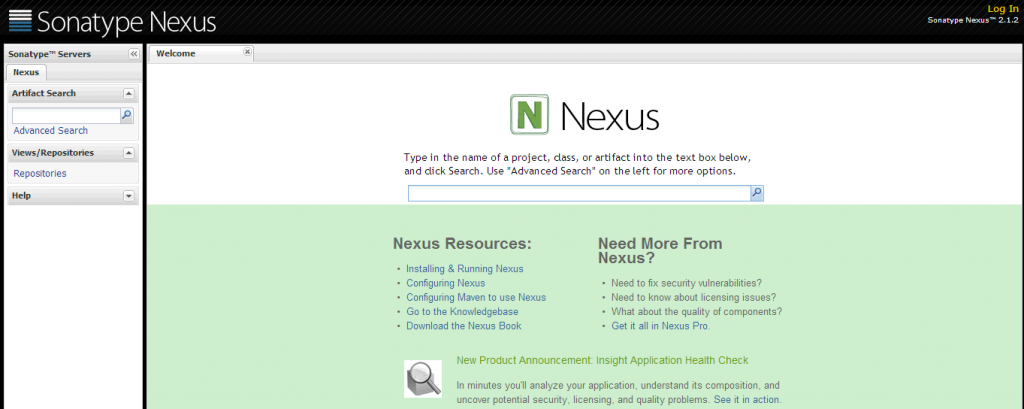
双击console-nexus.bat运行。游览器中输入http://127.0.0.1:8081/nexus/,出现图(2)所示就代表nexus已经启动成功。
图(2)
8081为默认的端口号,要修改端口号可进入nexus-2.1.2-bundle\nexus-2.1.2\conf\打开nexus.properties文件,修改application-port属性值就可以了。
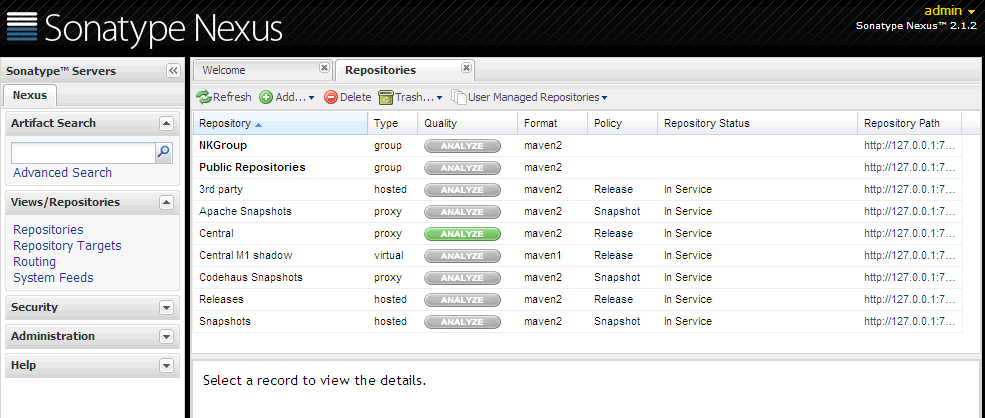
默认的用户名和密码:admin/admin123,登录后看到图(3)所示:
图(3)
4、Nexus仓库
nexus的仓库类型分为以下四种:
           group: 仓库组

           hosted:宿主

          proxy:代理

          virtual:虚拟


        首次登陆nexus后可以看到以下一个仓库组和多个仓库。
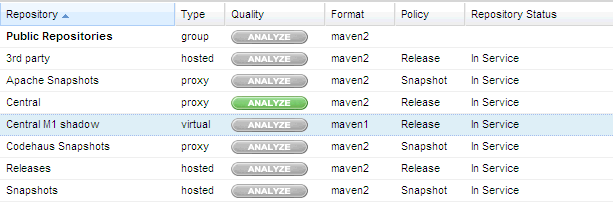
                        图(4)

                   Public Repositories:  仓库组

                  3rd party: 无法从公共仓库获得的第三方发布版本的构件仓库

                  Apache Snapshots: 用了代理ApacheMaven仓库快照版本的构件仓库

                  Central: 用来代理maven中央仓库中发布版本构件的仓库

                  Central M1 shadow: 用于提供中央仓库中M1格式的发布版本的构件镜像仓库

                  Codehaus Snapshots: 用来代理CodehausMaven 仓库的快照版本构件的仓库

                  Releases: 用来部署管理内部的发布版本构件的宿主类型仓库

                  Snapshots:用来部署管理内部的快照版本构件的宿主类型仓库
4.1、创建Nexus宿主仓库
在Repositories选项页的菜单栏上点击Add按钮会出现如下所示,选择要添加的仓库类型。
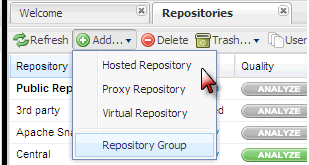
图(5)
这里我点击添加宿主类型的仓库,在仓库列表的下方会出现新增仓库的配置,如下所示:
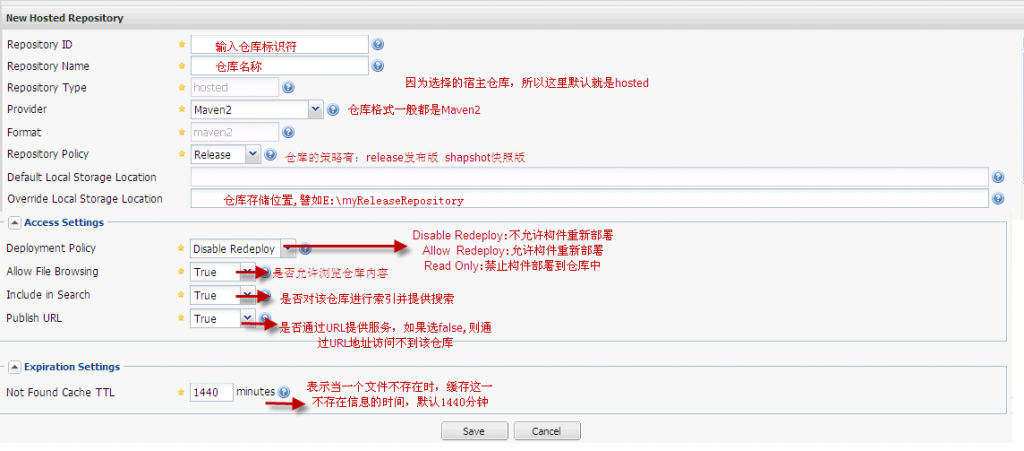
图(6)
点击save按钮后就会在仓库列表中看到刚才新增的仓库。
4.2、创建Nexus代理仓库
点击菜单栏上的Add按钮后选择Proxy Repository,看到如下所示配置界面:

图(7)
4.3、创建Nexus仓库组
仓库组和仓库关系是一对多的关系,一个仓库组可以指向多个仓库。
点击菜单栏上的Add按钮选择Repository Group就可以看到仓库组的配置界面,如下所示:
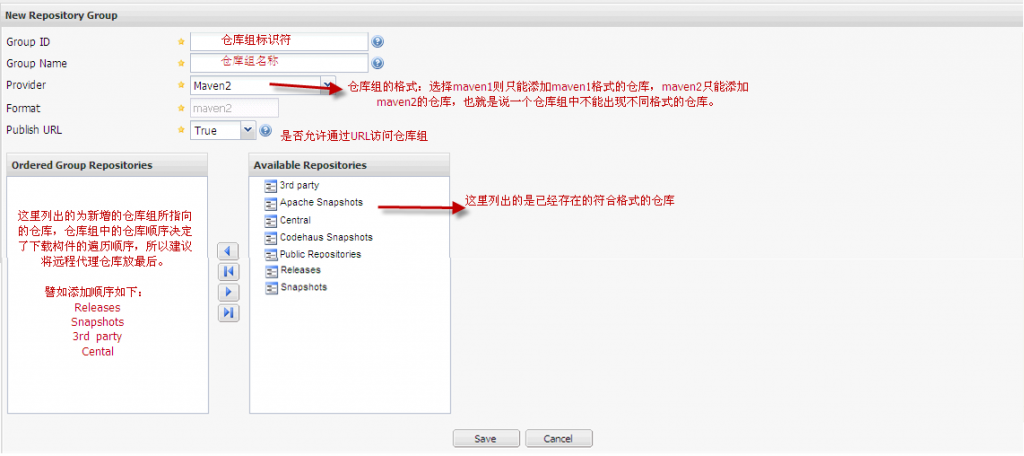
图(8)
点击save后就可在仓库列表中看到新增的仓库组了,项目中如果要下载构件的话,配置文件中一般都用仓库组的URL。
5、修改Maven配置文件从Nexus下载构件
1)如果想对操作系统的所有用户统一配置maven,则只需修改maven\conf\setting.xml 文件就可以了,如果只想对用户单独配置maven,只需将conf\setting.xml文件复制到C:\Documents and Settings\Administrator.m2文件夹下(我这里假设系统装在c盘,用户为Administrator)。
2) 打开setting.xml文件,可以看到如下代码:
[html] view plaincopy
<!-- localRepository
   | The path to the local repository maven will use to store artifacts.
   |
   | Default: ~/.m2/repository
  <localRepository></localRepository>
 -->
表示如果不设置localRepository,maven会默认将本地仓库建到/.m2/repository文件夹下。
设置localRepository如下代码所示:
[html] view plaincopy
F:\myCenterRepository
表示在myCenterRepository文件夹下建立本地仓库。个人建议不要采用默认的仓库地址,因为项目如果很多的话,那么本地仓库所占的磁盘空间就比较多了,所以指定仓库地址到其他盘符,更方便管理。
5.2、在POM文件中配置Nexus仓库
在项目的pom文件中添加如下代码:
[html] view plaincopy
<repositories>
    <repository>
      <id>nexus</id>
      <name>my-nexus-repository</name>
      <url>http://127.0.0.1:7788/nexus/content/groups/public/</url>
      <releases>
        <enabled>true</enabled>
      </releases>
      <snapshots>
        <enabled>false</enabled>
      </snapshots>
    </repository>
  </repositories>
  <pluginRepositories>
    <pluginRepository>
      <id>nexus</id>
      <name>my-nexus-repository</name>
      <url>http://127.0.0.1:7788/nexus/content/groups/public/</url>
      <releases>
        <enabled>true</enabled>
      </releases>
      <snapshots>
        <enabled>false</enabled>
      </snapshots>
    </pluginRepository>
  </pluginRepositories>
在pom文件中配置只对当前项目有效,而实际开发中不可能在每个项目中重复配置信息,所以不建议在pom文件中配置。
5.3、在setting.xml文件中配置Nexus仓库
1)maven提供了profile来配置仓库信息,如下所示:
[html] view plaincopy
<profiles>
    <profile>
      <id>myprofile</id>
      <repositories>
            <repository>
                <id>central</id>
                <url>http://central</url>
                <releases>
                    <enabled>true</enabled>
                </releases>
                <snapshots>
                    <enabled>true</enabled>
                </snapshots>
            </repository>
        </repositories>
         <pluginRepositories>
            <pluginRepository>
              <id>central</id>
              <url>http://central</url>
              <releases>
                <enabled>true</enabled>
              </releases>
              <snapshots>
                <enabled>false</enabled>
              </snapshots>
            </pluginRepository>
        </pluginRepositories>
    </profile>
</profiles>
2) 激活profile
[html] view plaincopy
<activeProfiles>
    <activeProfile>myprofile</activeProfile>
  </activeProfiles>
3)配置镜像
[html] view plaincopy
<mirrors>
    <mirror>
     <id>nexus</id>
     <url>http://127.0.0.1:7788/nexus/content/groups/public/</url>
     <mirrorOf>*</mirrorOf>
   </mirror>
 </mirrors>
这里配置mirrorOf的值为*,代表maven的所有访问请求都会指向到Nexus仓库组。
6、部署构件到Nexus仓库
6.1、maven部署
1) 修改pom文件
在pom文件中添加如下配置:
[html] view plaincopy
<distributionManagement>
       <repository>
           <id>my-nexus-releases</id>
           <url>http://127.0.0.1:7788/nexus/content/repositories/releases/</url>
       </repository>

       <snapshotRepository>
           <id>my-nexus-snapshot</id>
           <url>http://127.0.0.1:7788/nexus/content/repositories/snapshots/</url>
       </snapshotRepository>
  </distributionManagement>
2)在setting.xml文件中添加认证信息:
[html] view plaincopy
<servers>
     <server>
      <id>my-nexus-releases</id>
      <username>admin</username>
      <password>admin123</password>
    </server>
    <server>
      <id>my-nexus-snapshot</id>
      <username>admin</username>
      <password>admin123</password>
    </server>
</servers>
上面的配置中我用的是超级管理员的账户,开发项目中可以改为具有部署构件权限的用户就可以了。
3)执行部署
测试的构件项目信息如下:
[html] view plaincopy
<groupId>com.ez</groupId>
  <artifactId>TestJar</artifactId>
  <version>1.0</version>
  <packaging>jar</packaging>
  <name>TestJar</name>
从上面的信息中可以看出构件为发布版本,所以部署构件的话会自动部署至releases仓库中。
在命令行中执行:mvn clean deploy
如果之前没用执行过该命令,maven会自动到中央仓库中下载部署所需的插件。最后在命令行中看到如下所示就代表构件已经部署成功。
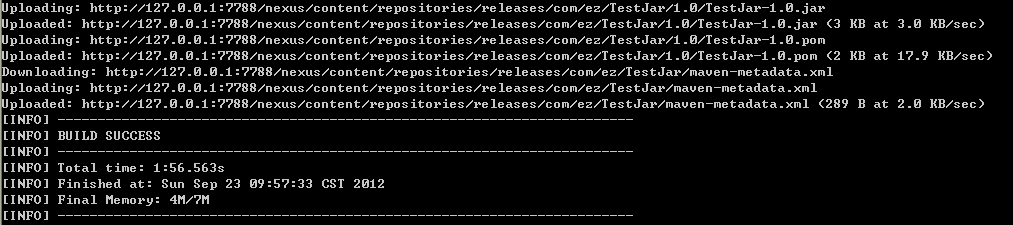
图(9)
到nexus的releases仓库中查看刚刚部署好的构件信息如下所示:
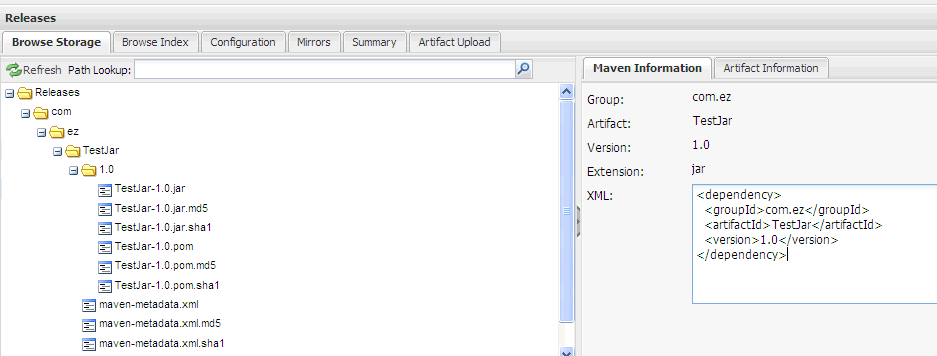
图(10)
如果部署失败的要检查一下用户是否有部署的权限,目标仓库是否允许部署,是否缺少部署所需的构件。
6.2、手动部署
手动部署构件则更为简单了,在nexus的仓库列表中点击要部署的目标仓库,然后点击Artifact Upload选项卡看到下图所示:

图(11)
通过以上配置运用Nexus搭建的私服基本上可以用了,更多配置需求可参考Nexus book.
Nexus book下载地址:http://download.csdn.net/detail/yaoqinzhou1943/4589583


 225
225


 被折叠的 条评论
为什么被折叠?
被折叠的 条评论
为什么被折叠?
 到【灌水乐园】发言


