


组件通信
概念:组件通信就是组件之间的数据传递,根据组件嵌套关系的不同,又不同的通信方法。
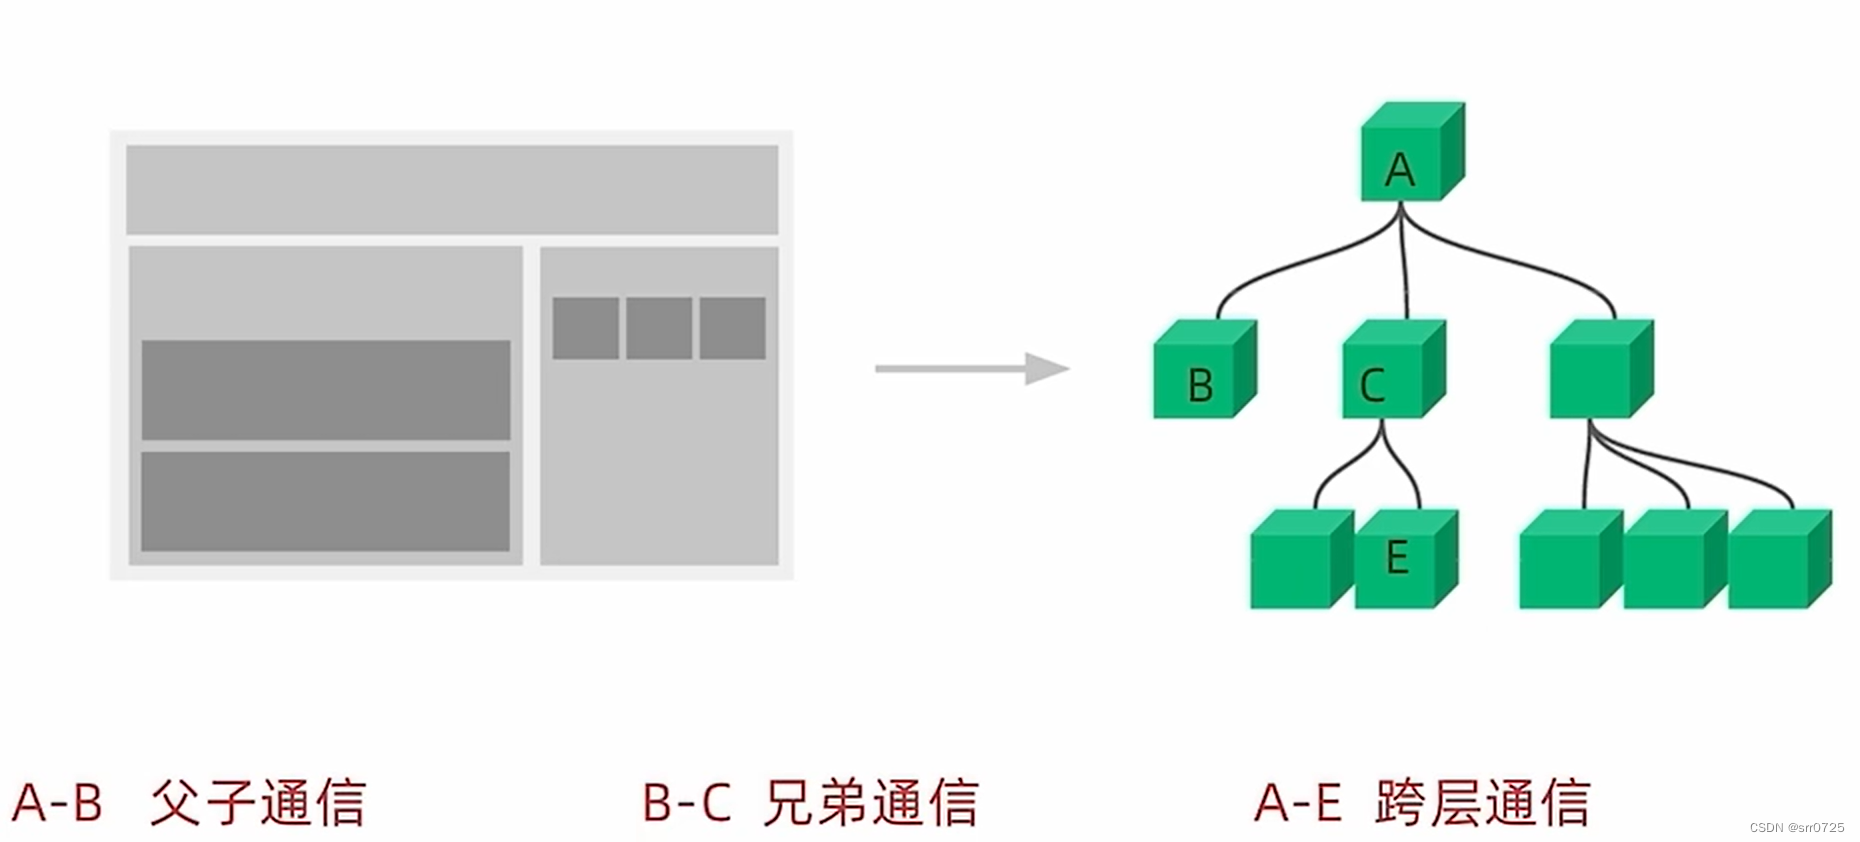
父传子
代码测试
//父传子
//1.父组件传递数据  子组件标签身上绑定属性
//2.子组件接收数据 props的参数

function Son(props) {
  //props:对象里面包含了父组件传递过来的所有的数据
  //{name:'父组件中的数据'}
  console.log(props)
  return <div>this is son,{props.name}</div>
}
function App() {
  const name = 'this is APP name'
  return (
    <div>
      <Son name={name} />
    </div>
  );
}

父传子——props说明
- props可传递任意的数据
数字、字符串、布尔值、数组、对象、函数、JSX
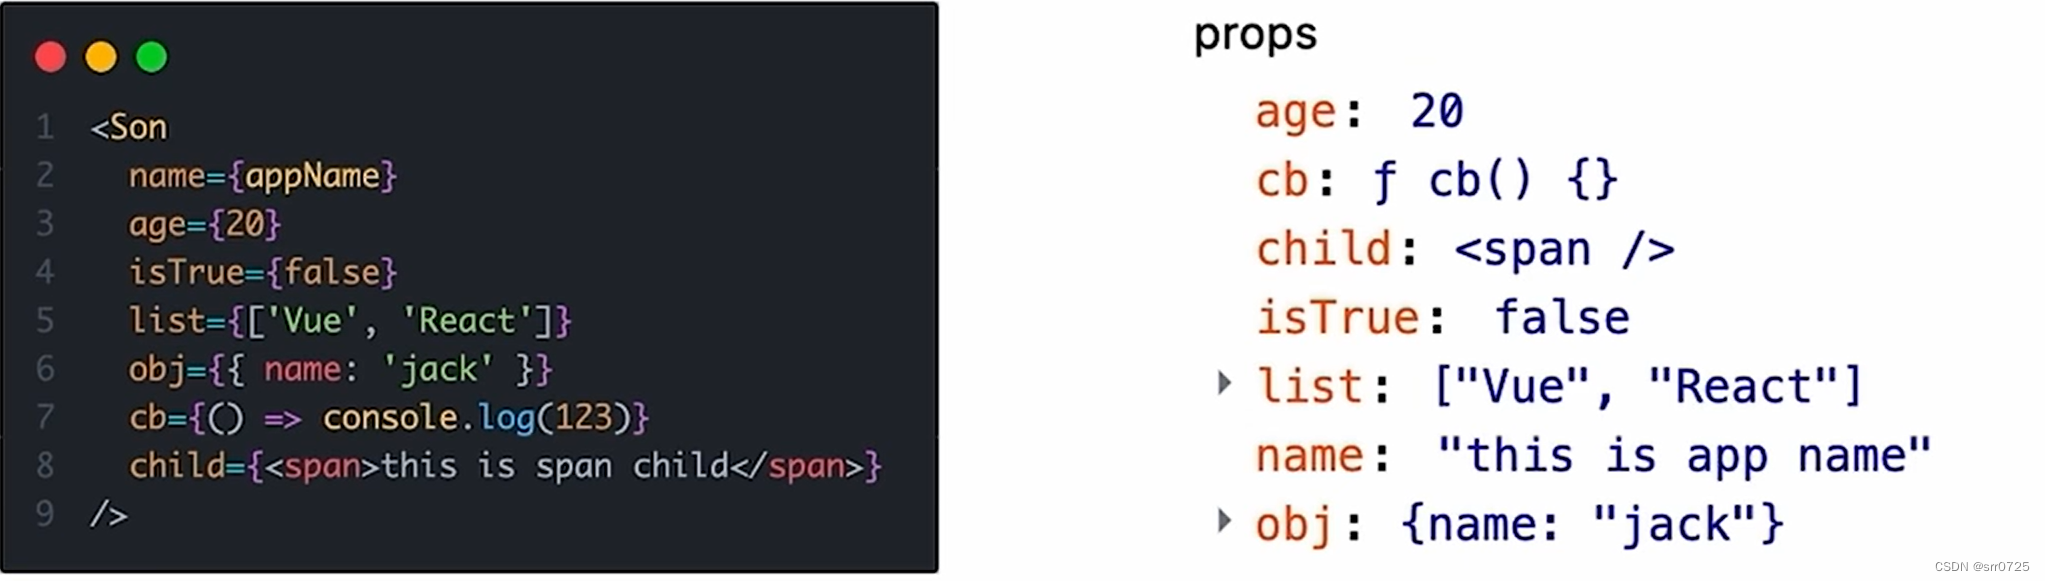
- props是只读对象
子组件只能读取props中的数据,不能直接进行修改,父组件的数据只能由父组件修改
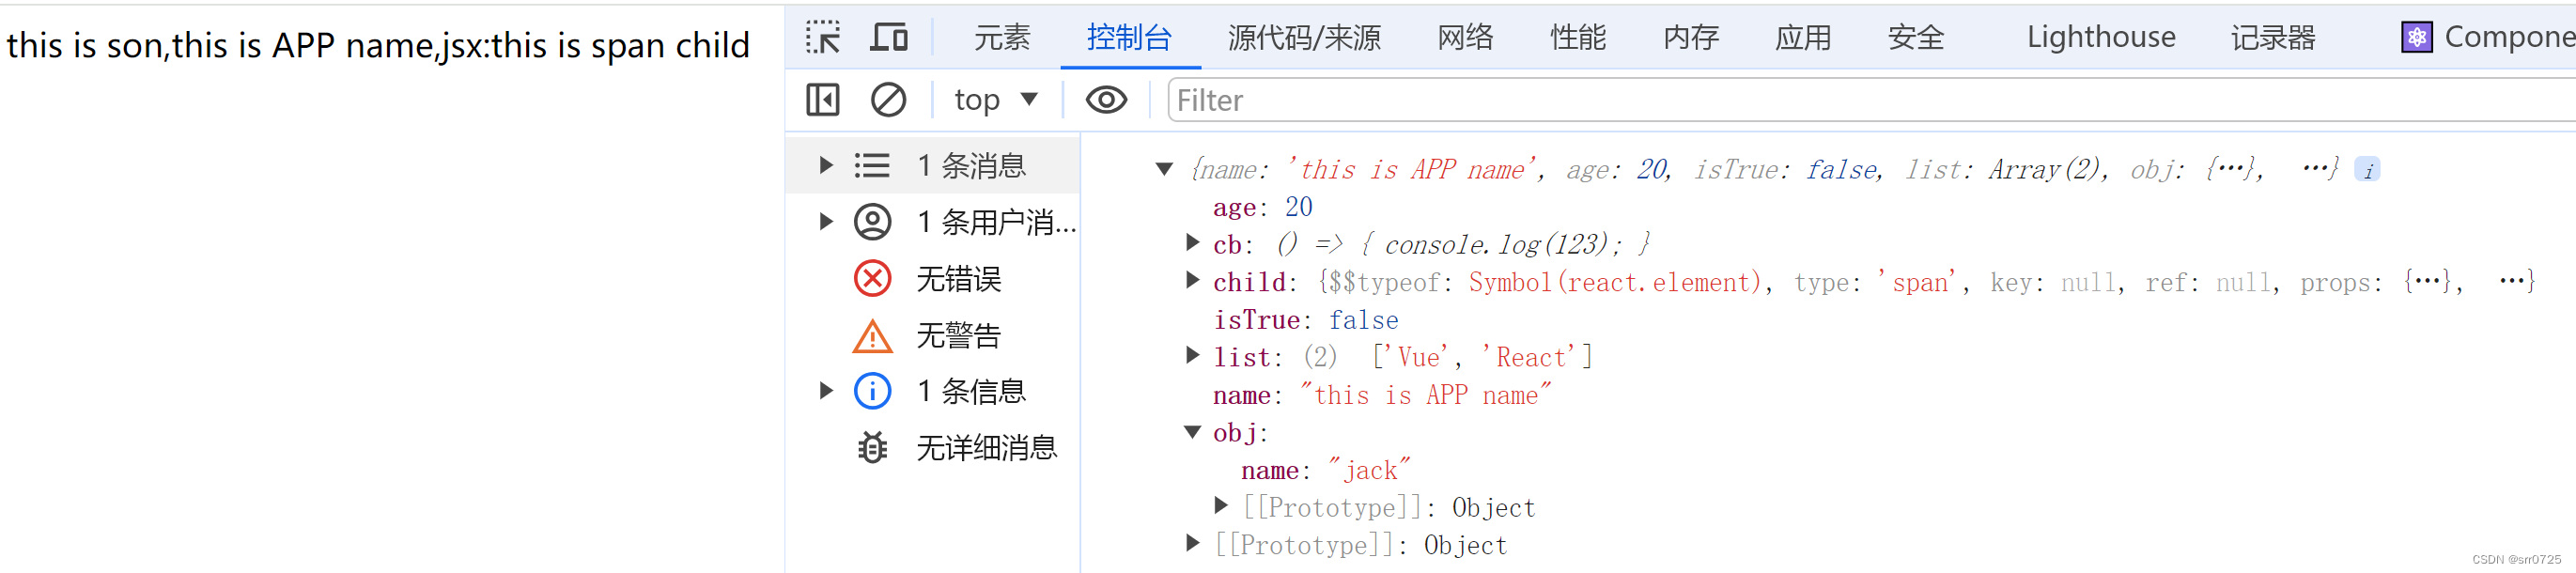
代码测试:
function Son(props) {
  //props:对象里面包含了父组件传递过来的所有的数据
  //{name:'父组件中的数据'}
  console.log(props)
  return <div>this is son,{props.name},jsx:{props.child}</div>
}
function App() {
  const name = 'this is APP name'
  return (
    <div>
      <Son name={name}
        age={20}
        isTrue={false}
        list={['Vue', 'React']}
        obj={{ name: 'jack' }}
        cb={() => { console.log(123) }}
        child={<span>this is span child</span>} />

    </div>
  );
}
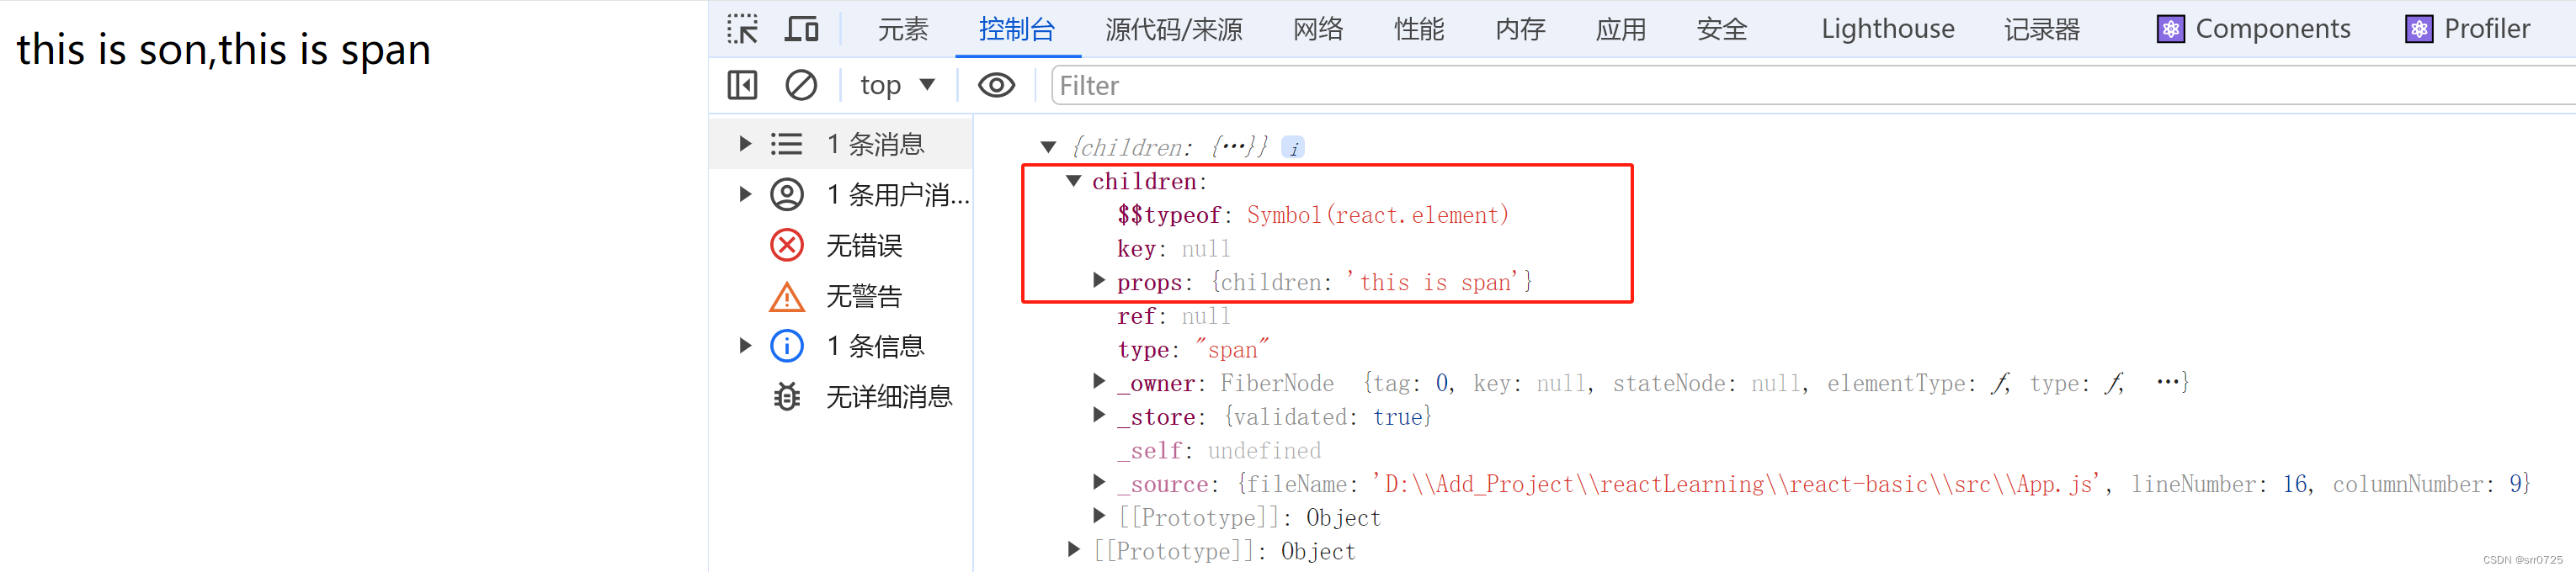
父传子——特殊的prop children
场景:当我们把内容嵌套在子组件标签中时,父组件会自动在名为children的prop属性中接收该内容。
代码测试
function Son(props) {
  console.log(props)
  return <div>this is son,{props.children}</div>
}
function App() {
  return (
    <div>
      <Son>
        <span>this is span</span>
      </Son>

    </div>
  );
}
父子组件通信—子传父
核心思路:在子组件中调用父组件中的函数并传递参数。
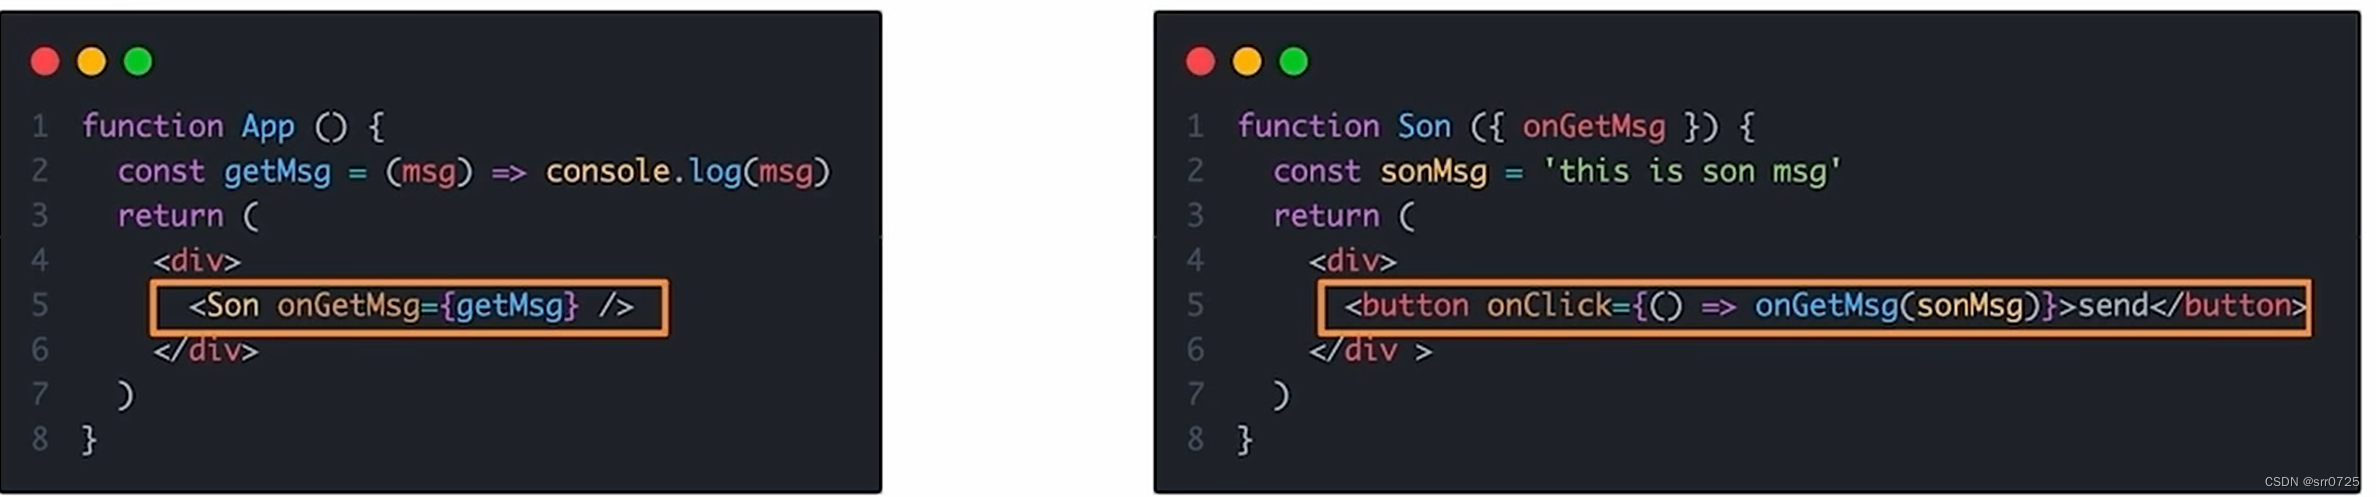
代码测试:
//核心:在子组件中调用度组件中的函数并传递实参
import { useState } from "react"
function Son({ onGetSonMsg }) {
//Son组件中的数据
const sonMsg = 'this is son msg'
return (
<div>
this is son
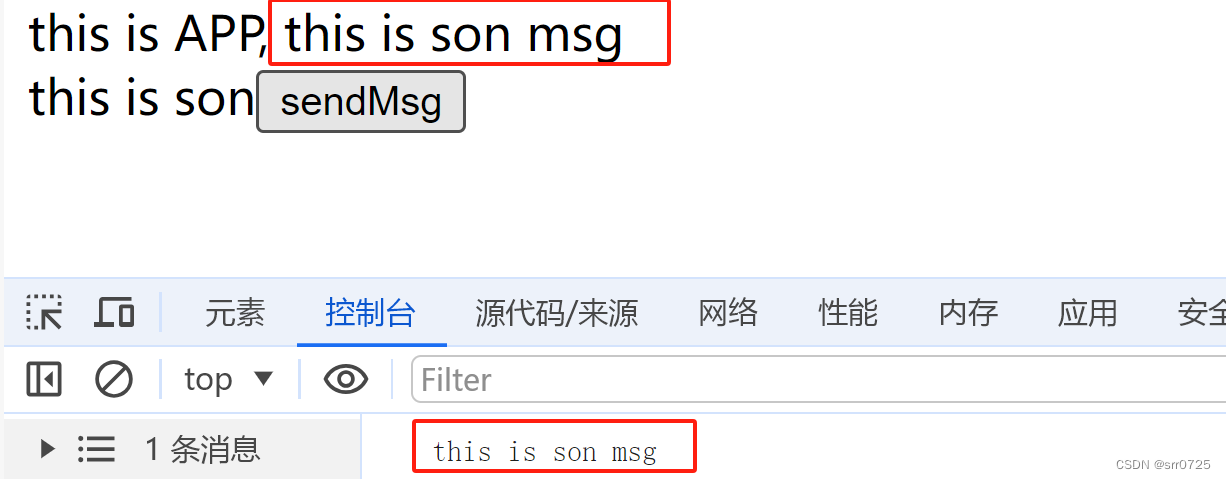
<button onClick={() => onGetSonMsg(sonMsg)}>sendMsg</button>
</div>
)
}
function App() {
const [msg, setMsg] = useState('')
const getMsg = (msg) => {
console.log(msg)
setMsg(msg)
}
return (
<div>
this is APP, {msg}
<Son onGetSonMsg={getMsg} />
</div>
);
}

使用状态提升实现兄弟组件通信
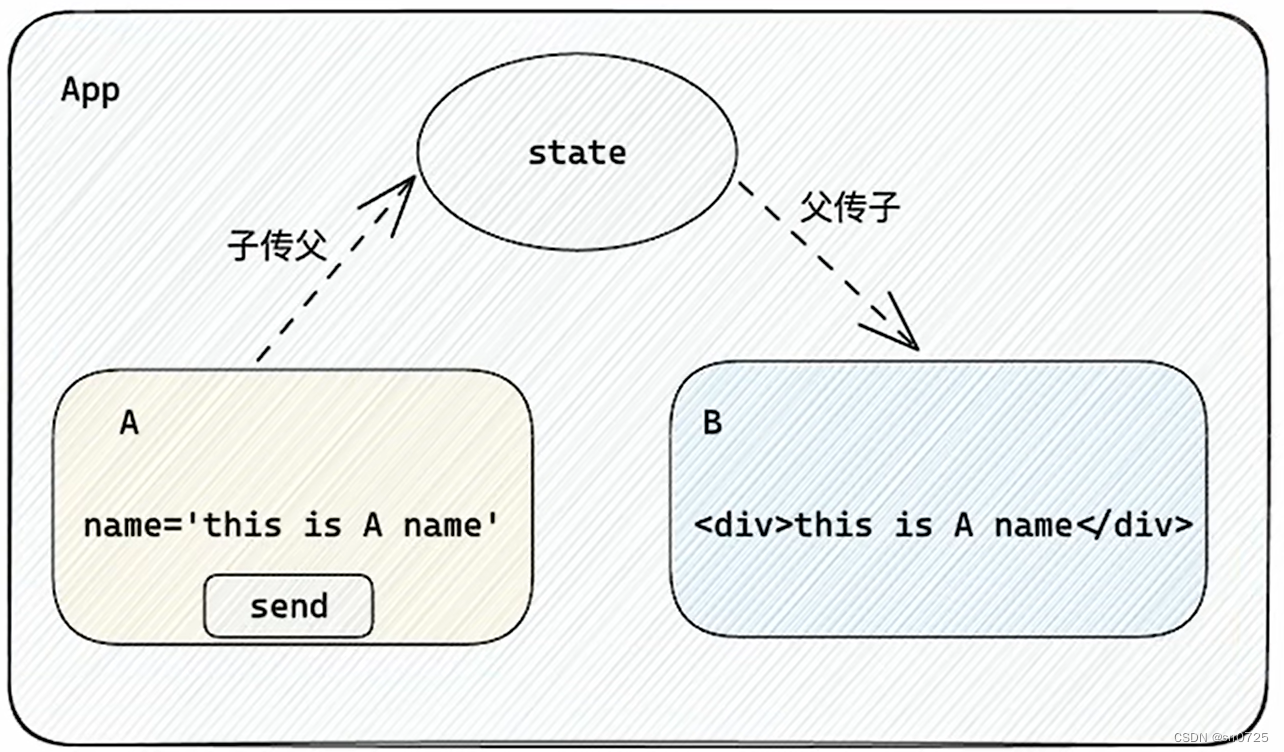
实现思路:借助“状态提升”机制,通过父组件进行兄弟组件之间的数据传递
- A组件西安通过子传父的方式把数据传给父组件App
- App拿到数据后通过父串子的方式再传递给B组件
代码测试
//1.通过子传父 A -> App
//2.通过父传子 App -> B
import { useState } from "react"
function A({ onGetAName }) {
  //Son组件中的数据
  const name = 'this is A name'
  return (
    <div>
      this is A component
      <button onClick={() => onGetAName(name)}>send</button>
    </div>
  )
}
function B({ name }) {
  return (
    <div>
      this is B component
      {name}
    </div>
  )
}
function App() {
  const [name, setName] = useState('')
  const getAName = (name) => {
    console.log(name)
    setName(name)
  }
  return (
    <div>
      this is App
      <A onGetAName={getAName} />
      <B name={name} />
    </div>
  );
}

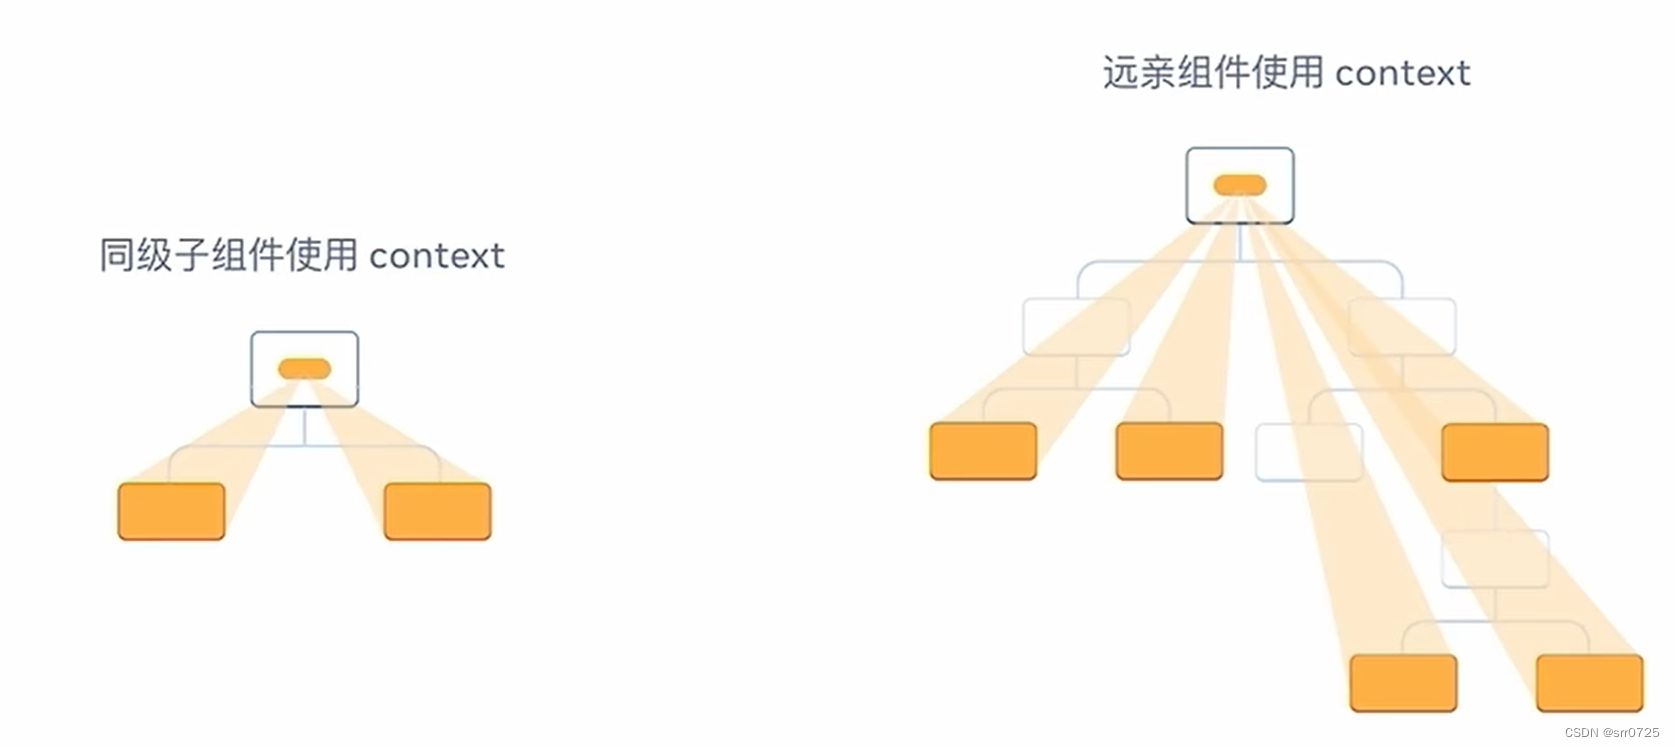
使用Context机制跨层级组件通信
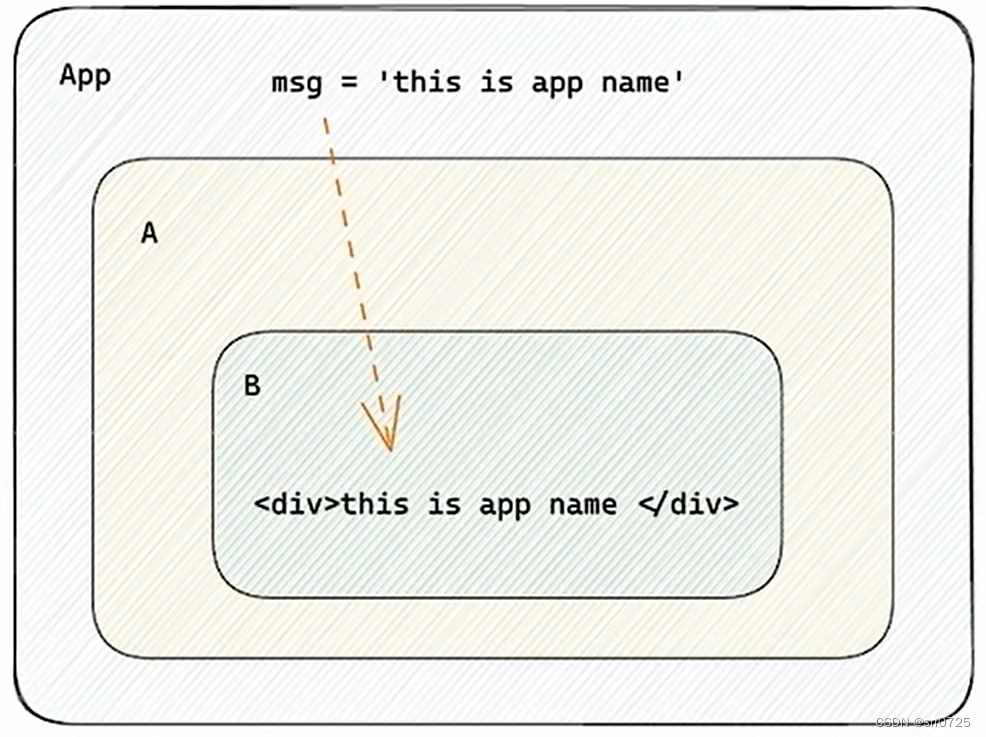
实现步骤
- 使用createContext方法创建一个上下文对象Ctx
- 在顶层组件(App)中通过
Ctx.Provider组件提供数据 - 在底层组件(B)中通过useContext钩子函数获取消费数据
代码测试
//App -> A -> B
import { createContext, useContext } from "react"
//1.createContext方法创建一个上下文对象
const MsgContext = createContext()

//2.在顶层组件 通过Provider组件提供数据

//3.在底层组件 通过useContext钩子函数使用数据

function A() {
  //Son组件中的数据
  return (
    <div>
      this is A component
      <B />
    </div>
  )
}
function B() {
  const msg = useContext(MsgContext)
  return (
    <div>
      this is B component,{msg}
    </div>
  )
}
function App() {
  const msg = 'this is app msg'
  return (
    <div>
      <MsgContext.Provider value={msg}>
        this is App
        <A />
      </MsgContext.Provider>
    </div>
  );
}


 843
843

 被折叠的 条评论
为什么被折叠?
被折叠的 条评论
为什么被折叠?
 到【灌水乐园】发言


