


java
Elasticsearch 要求至少是Java 7。更推荐使用 Oracle JDK version 1.8.0_25。
java -version
java version "1.7.0_75"
Java(TM) SE Runtime Environment (build 1.7.0_75-b13)
Java HotSpot(TM) 64-Bit Server VM (build 24.75-b04, mixed mode)
下载 elasticsearch1.7.2
 wget https://download.elastic.co/elasticsearch/elasticsearch/elasticsearch-1.7.2.tar.gz
 or
 curl -L -O https://download.elastic.co/elasticsearch/elasticsearch/elasticsearch-1.7.2.tar.gz
解压
tar -xzvf elasticsearch-1.7.2.tar.gz 安装Marvel
Marvel是elasticsearch 一个管理和监控工具,
Elasticsearch Marvel是一个管理和监视工具,免费供开发使用。它带有一个交互式控制台称为意义上,这使得它很容易跟Elasticsearch直接从您的浏览器。
Marvel 可作为插件使用。在elasticsearch目录执行如下命令即可下载和安装marvel:
./bin/plugin -i elasticsearch/marvel/latest你可能不想要marvel 去监控你的本地集群,因此你可以执行如下命令:
echo 'marvel.agent.enabled: false' >> ./config/elasticsearch.yml启动
- 默认启动(不指定集群名和节点名)
bin/elasticsearch
[2015-09-28 16:29:24,500][INFO ][node                     ] [Thog] version[1.7.2], pid[8688], build[e43676b/2015-09-14T09:49:53Z]
[2015-09-28 16:29:24,501][INFO ][node                     ] [Thog] initializing ...
[2015-09-28 16:29:24,631][INFO ][plugins                  ] [Thog] loaded [marvel], sites [marvel]
[2015-09-28 16:29:24,722][INFO ][env                      ] [Thog] using [1] data paths, mounts [[/ (/dev/sda1)]], net usable_space [348.5gb], net total_space [450.5gb], types [ext4]
[2015-09-28 16:29:27,722][INFO ][node                     ] [Thog] initialized
[2015-09-28 16:29:27,722][INFO ][node                     ] [Thog] starting ...
[2015-09-28 16:29:27,779][INFO ][transport                ] [Thog] bound_address {inet[/0:0:0:0:0:0:0:0:9300]}, publish_address {inet[/10.32.24.78:9300]}
[2015-09-28 16:29:27,813][INFO ][discovery                ] [Thog] elasticsearch/fnn8XFTJTJeDEX3az4ylbQ
[2015-09-28 16:29:31,587][INFO ][cluster.service          ] [Thog] new_master [Thog][fnn8XFTJTJeDEX3az4ylbQ][wangyue-um][inet[/10.32.24.78:9300]], reason: zen-disco-join (elected_as_master)
[2015-09-28 16:29:31,616][INFO ][http                     ] [Thog] bound_address {inet[/0:0:0:0:0:0:0:0:9200]}, publish_address {inet[/10.32.24.78:9200]}
[2015-09-28 16:29:31,616][INFO ][node                     ] [Thog] started
[2015-09-28 16:29:31,685][INFO ][gateway                  ] [Thog] recovered [0] indices into cluster_state
[2015-09-28 16:29:38,607][INFO ][cluster.metadata         ] [Thog] [.marvel-2015.09.28] creating index, cause [auto(bulk api)], templates [marvel], shards [1]/[1], mappings [indices_stats, cluster_stats, node_stats, shard_event, node_event, index_event, index_stats, _default_, cluster_state, cluster_event, routing_event]
[2015-09-28 16:29:39,307][INFO ][cluster.metadata         ] [Thog] [.marvel-2015.09.28] update_mapping [node_stats] (dynamic)
[2015-09-28 16:29:39,363][INFO ][cluster.metadata         ] [Thog] [.marvel-2015.09.28] update_mapping [node_event] (dynamic)
[2015-09-28 16:29:39,371][INFO ][cluster.metadata         ] [Thog] [.marvel-2015.09.28] update_mapping [index_event] (dynamic)
[2015-09-28 16:29:39,384][INFO ][cluster.metadata         ] [Thog] [.marvel-2015.09.28] update_mapping [routing_event] (dynamic)
[2015-09-28 16:29:39,394][INFO ][cluster.metadata         ] [Thog] [.marvel-2015.09.28] update_mapping [cluster_event] (dynamic)
[2015-09-28 16:29:39,401][INFO ][cluster.metadata         ] [Thog] [.marvel-2015.09.28] update_mapping [cluster_state] (dynamic)
[2015-09-28 16:29:39,481][INFO ][cluster.metadata         ] [Thog] [.marvel-2015.09.28] update_mapping [indices_stats] (dynamic)
[2015-09-28 16:29:39,563][INFO ][cluster.metadata         ] [Thog] [.marvel-2015.09.28] update_mapping [index_stats] (dynamic)
[2015-09-28 16:29:39,581][INFO ][cluster.metadata         ] [Thog] [.marvel-2015.09.28] update_mapping [cluster_stats] (dynamic)
- 指定集群名和节点名
bin/elasticsearch --cluster .name cluster-1 --node .name node-1 &
默认,elasticsearch 使用9200端口 提供REST API 访问服务。这个端口是可配置的
验证
浏览器 打开web ui:localhost:9200
{
  "status" : 200,
  "name" : "White Tiger",
  "cluster_name" : "elasticsearch",
  "version" : {
    "number" : "1.7.2",
    "build_hash" : "e43676b1385b8125d647f593f7202acbd816e8ec",
    "build_timestamp" : "2015-09-14T09:49:53Z",
    "build_snapshot" : false,
    "lucene_version" : "4.10.4"
  },
  "tagline" : "You Know, for Search"
}
curl
curl 'http://localhost:9200/?pretty'
{
  "status" : 200,
  "name" : "White Tiger",
  "cluster_name" : "elasticsearch",
  "version" : {
    "number" : "1.7.2",
    "build_hash" : "e43676b1385b8125d647f593f7202acbd816e8ec",
    "build_timestamp" : "2015-09-14T09:49:53Z",
    "build_snapshot" : false,
    "lucene_version" : "4.10.4"
  },
  "tagline" : "You Know, for Search"
}
health
curl 'localhost:9200/_cat/health?v'
epoch      timestamp cluster       status node.total node.data shards pri relo init unassign pending_tasks
1443429741 16:42:21  elasticsearch yellow          1         1      1   1    0    0        1             0
每当我们问集群健康,我们要么得到绿色,黄色和红色。绿色意味着一切是好的(集群功能齐全),黄色意味着所有数据是可用的,但是一些副本尚未分配(集群功能齐全),和红色意味着一些数据不可用无论什么原因。注意,即使一个集群是红色的,它仍然是部分功能(即它将继续搜索请求从服务可用的碎片)但是你可能需要尽快修复它,因为你有缺失的数据。
- nodes
curl 'localhost:9200/_cat/nodes?v'
host       ip        heap.percent ram.percent load node.role master name
wangyue-um 127.0.0.1           13          71 0.39 d         *      White Tiger
list all indices
curl 'localhost:9200/_cat/indices?v'
health status index              pri rep docs.count docs.deleted store.size pri.store.size
yellow open   .marvel-2015.09.28   1   1        390            0      2.7mb          2.7mb
get shards
curl 'localhost:9200/_cat/shards?v'
index              shard prirep state      docs store ip        node
.marvel-2015.09.28 0     p      STARTED     426 2.8mb 127.0.0.1 White Tiger
.marvel-2015.09.28 0     r      UNASSIGNED
shutdown
 curl -XPOST 'http://localhost:9200/_shutdown'
[2015-09-28 16:53:41,417][INFO ][action.admin.cluster.node.shutdown] [White Tiger] [cluster_shutdown]: requested, shutting down in [1s]
{"cluster_name":"elasticsearch","nodes":{"tF-kYPx2TTGUHvdgIuCxog":{"name":"White Tiger"}}}wangyue@wangyue-um:/home/cluster/apps/elasticsearch/elasticsearch-1.7.2$ [2015-09-28 16:53:42,419][INFO ][action.admin.cluster.node.shutdown] [White Tiger] [cluster_shutdown]: done shutting down all nodes except master, proceeding to master
[2015-09-28 16:53:42,422][INFO ][action.admin.cluster.node.shutdown] [White Tiger] shutting down in [200ms]
[2015-09-28 16:53:42,624][INFO ][action.admin.cluster.node.shutdown] [White Tiger] initiating requested shutdown...
[2015-09-28 16:53:42,624][INFO ][node                     ] [White Tiger] stopping ...
[2015-09-28 16:53:43,200][INFO ][node                     ] [White Tiger] stopped
[2015-09-28 16:53:43,200][INFO ][node                     ] [White Tiger] closing ...
[2015-09-28 16:53:43,204][INFO ][node                     ] [White Tiger] closed
浏览 Marvel and Sense
http://localhost:9200/_plugin/marvel/
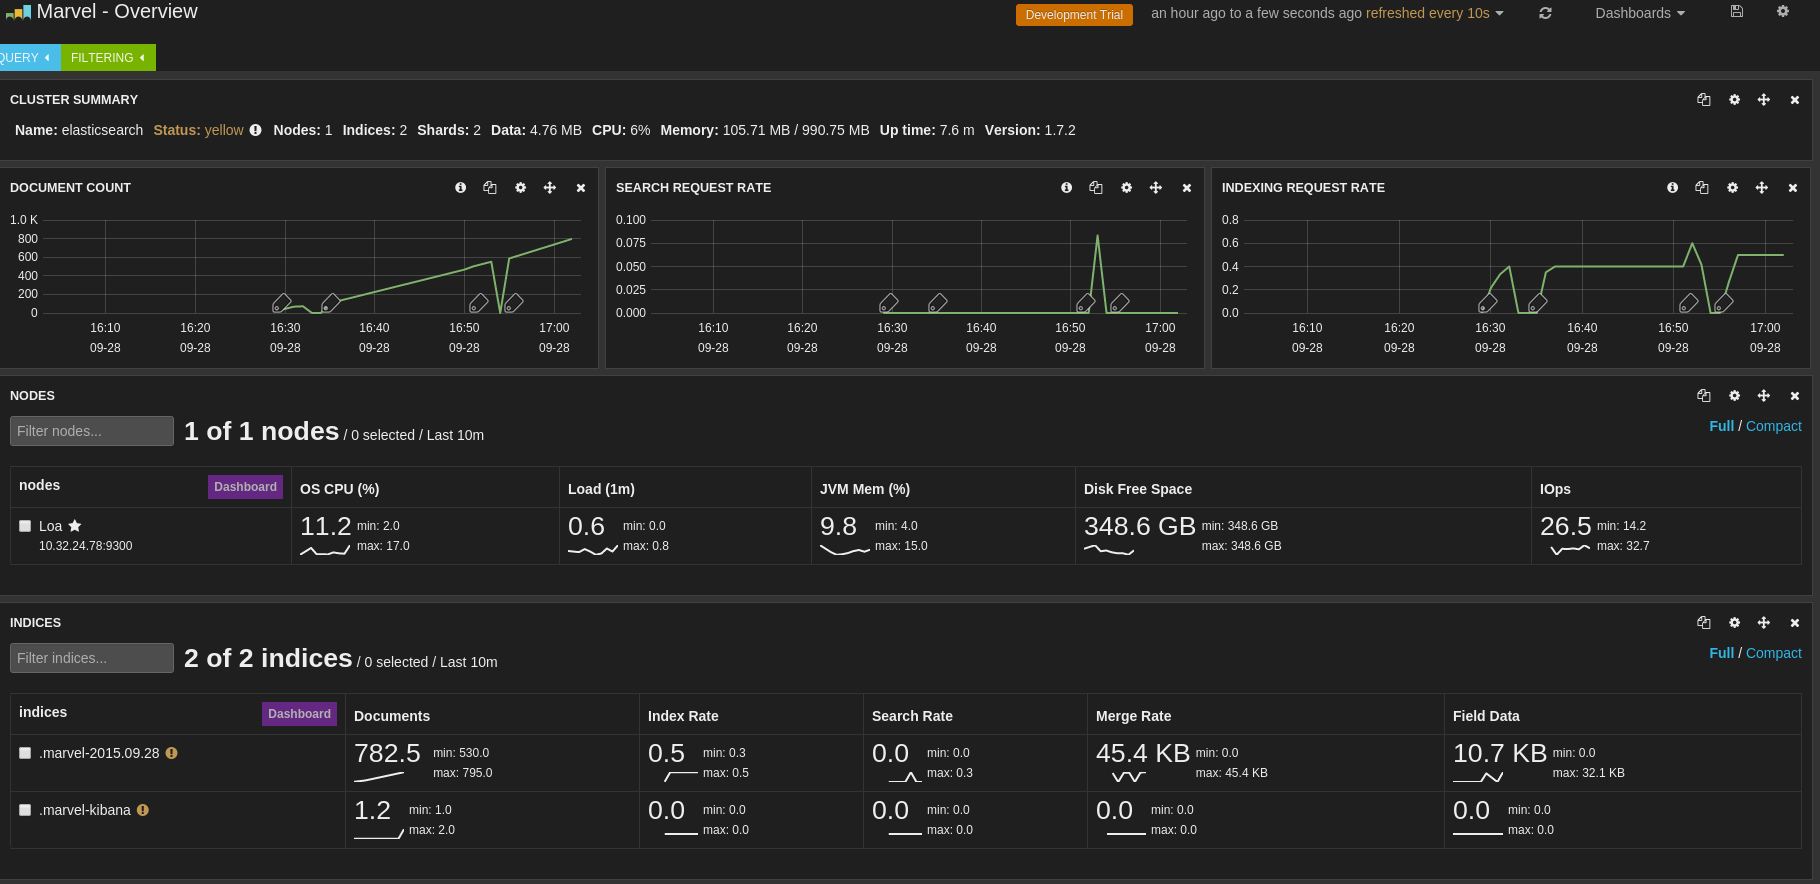
cluster:
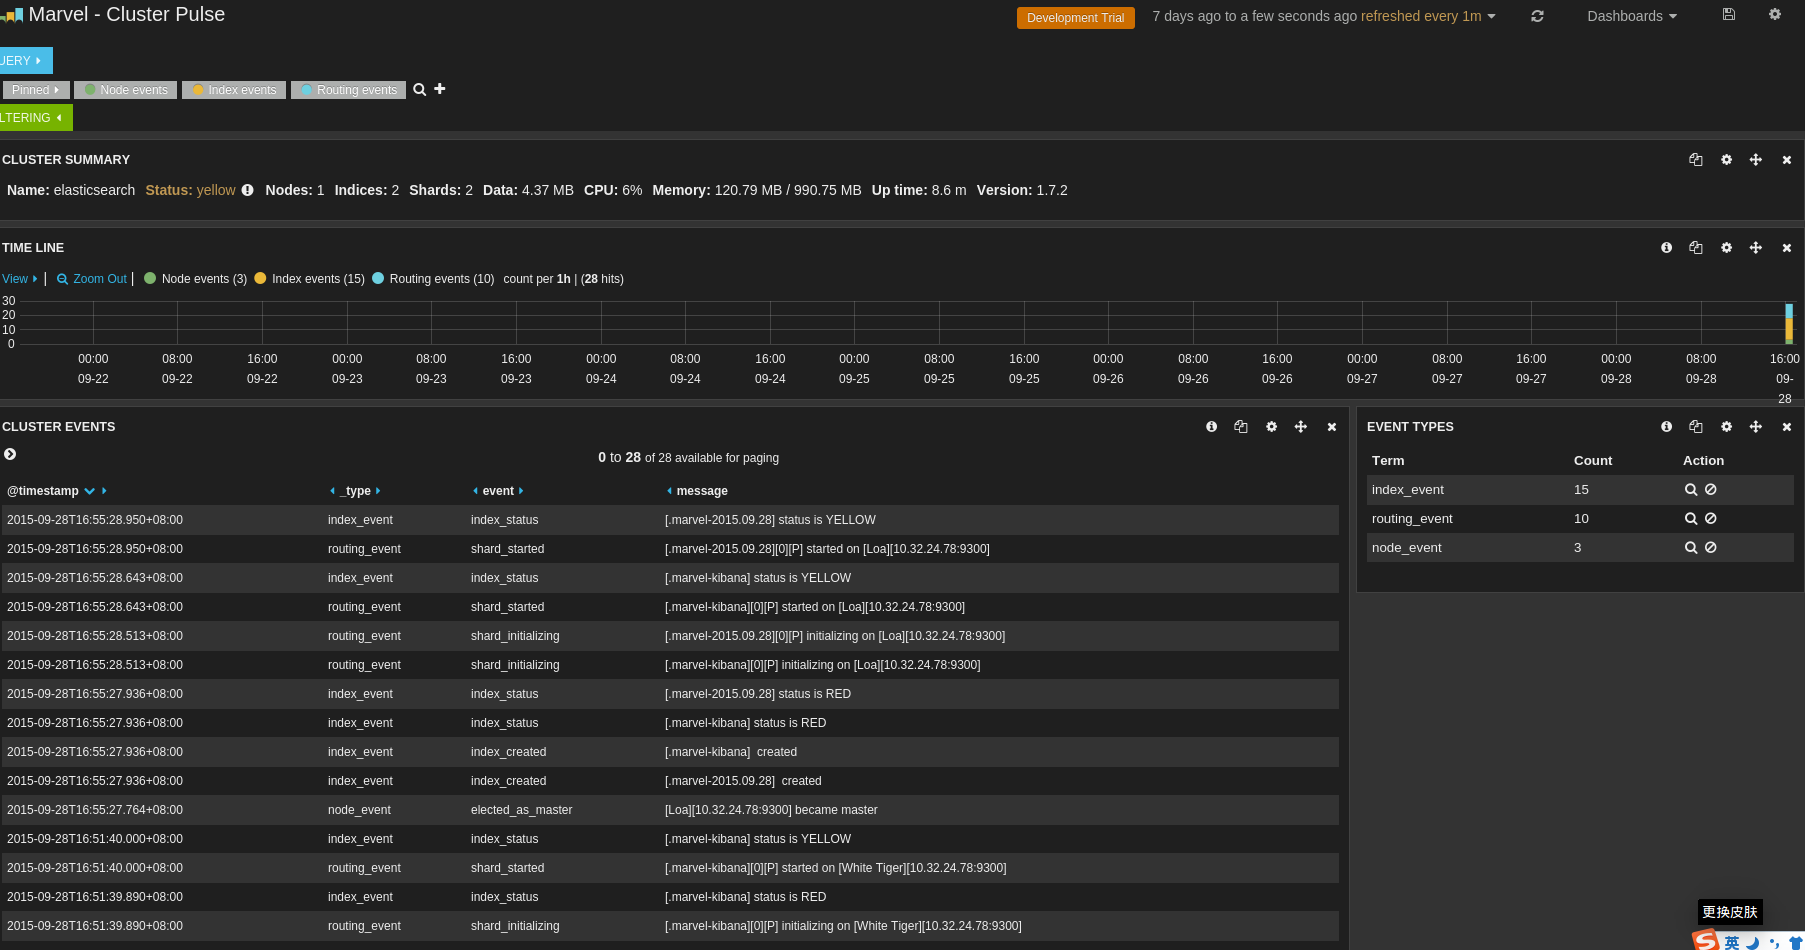
index:
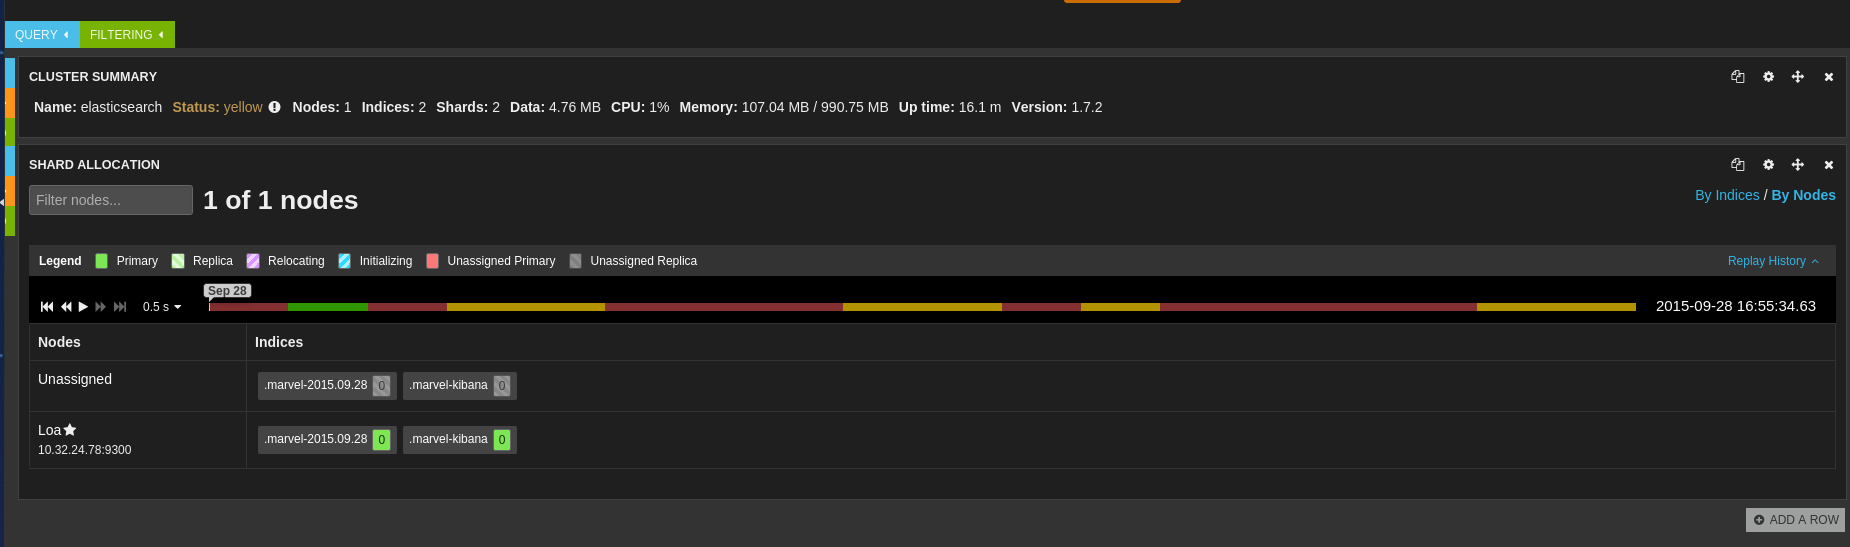
nodes:
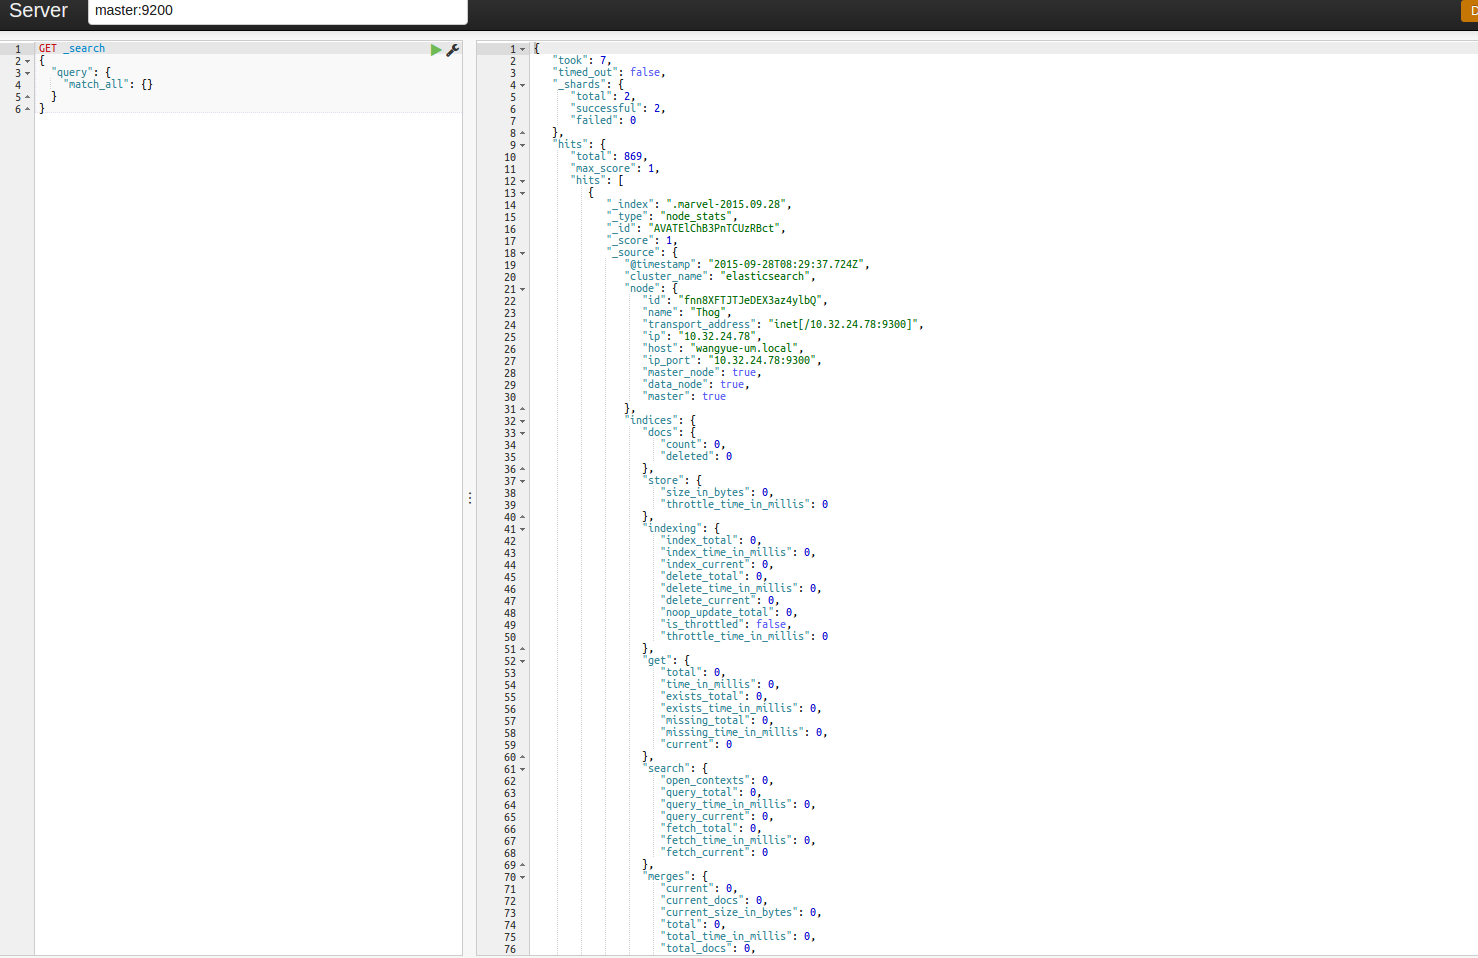
http://localhost:9200/_plugin/marvel/sense/

尊重原创,拒绝转载
http://blog.csdn.net/stark_summer/article/details/48786865


 3040
3040

 被折叠的 条评论
为什么被折叠?
被折叠的 条评论
为什么被折叠?
 到【灌水乐园】发言


