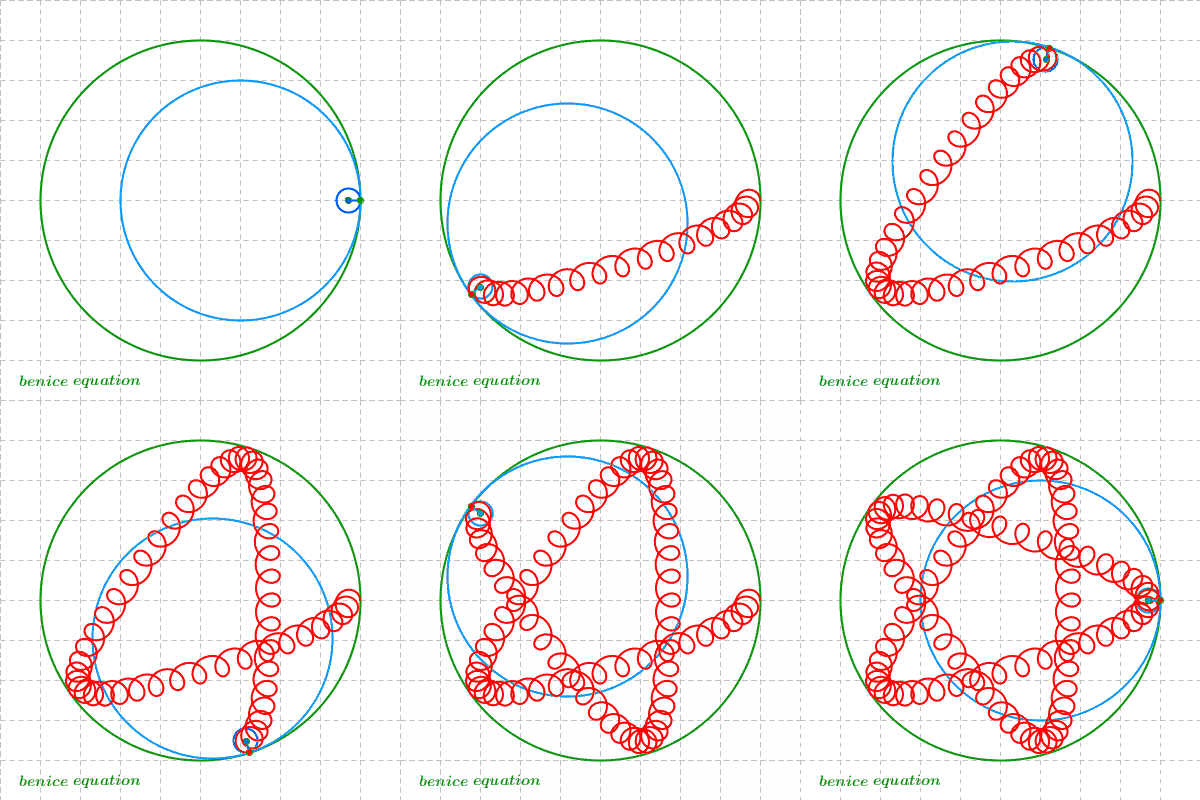
GeoGebra allows exporting animated
GIF images but does not export the Protocols of Construction, the ide of this post is how to include
GIF and animated Construction Protocols in LaTeX.
Animated GIF
For include animated GIFs Need ImageMagick program and one GIF animated, for this example we use the picture hypo_hypotrochoid_001.gif

from viewtopic.php?f=2&t=25044&p=88364&hilit=animated+gif#p88364
Now follow steps
1. Create a directory called test and copy hypo_hypotrochoid_001.gif
2.The following is convert the image into separate files, we have two cases
a) For Latex users (latex>dvisps>ps2pdf) open a command prompt, move to the test directory and enter the following line
b) For pdfLatex users (xelatex,lualatex) open a command prompt, move to the test directory and enter the following line
With this we have completed the process of conversion of images, we can now create your TEX file
3.We create a tex file and add the following lines into the preamble
4. And the body of the document add the line
a)For LaTeX
v)For pdfLaTeX
Compiled and finish, we have a PDF with an animated image.
Construction
To animated construction step we use the environment animateinline, this environment allows separate figure for steps, this will use the \newframe, the idea goes like this, we create our figure with GeoGebra and export, depending on the situation we have to add different lines.
1. Pstricks
2. PGF/TiKZ
Now we must create the "timeline", this is a file containing the order and time of the transparencies, the amount of overhead this ity in the amount of \newframe which is used, this file has the following form
Compressed file attached two examples pstanimate.pdf and tikzanimate.pdf
Hope this helps for users of GeoGebra and LaTeX
Saludos
Pablo
Animated GIF
For include animated GIFs Need ImageMagick program and one GIF animated, for this example we use the picture hypo_hypotrochoid_001.gif

from viewtopic.php?f=2&t=25044&p=88364&hilit=animated+gif#p88364
Now follow steps
1. Create a directory called test and copy hypo_hypotrochoid_001.gif
2.The following is convert the image into separate files, we have two cases
a) For Latex users (latex>dvisps>ps2pdf) open a command prompt, move to the test directory and enter the following line
Code:
convert hypo_hypotrochoid_001.gif -coalesce animate_%d.eps
then create the directory imgeps and copy ALL pictures in this.
b) For pdfLatex users (xelatex,lualatex) open a command prompt, move to the test directory and enter the following line
Code:
convert hypo_hypotrochoid_001.gif -coalesce animate_%d.pdf
then create the directory imgpdf and copy ALL pictures in this.
With this we have completed the process of conversion of images, we can now create your TEX file
3.We create a tex file and add the following lines into the preamble
Code:
\usepackage{graphicx}
\usepackage{animate}
\usepackage{animate}
4. And the body of the document add the line
a)For LaTeX
Code:
\animategraphics[height=2.8in,autoplay,controls]{12}{imgeps/animate_}{0}{120}
v)For pdfLaTeX
Code:
\animategraphics[height=2.8in,autoplay,controls]{12}{imgpdf/animate_}{0}{120}
Compiled and finish, we have a PDF with an animated image.
Construction
To animated construction step we use the environment animateinline, this environment allows separate figure for steps, this will use the \newframe, the idea goes like this, we create our figure with GeoGebra and export, depending on the situation we have to add different lines.
1. Pstricks
Code:
\begin{animateinline}[
begin={\begin{pspicture*}(...,...)(...,...)},
end={\end{pspicture*}},
controls,autoplay,timeline=time1.txt]{1}
\psset{...}
\code
\newframe
\code
\newframe
...
\end{animateinline}
begin={\begin{pspicture*}(...,...)(...,...)},
end={\end{pspicture*}},
controls,autoplay,timeline=time1.txt]{1}
\psset{...}
\code
\newframe
\code
\newframe
...
\end{animateinline}
2. PGF/TiKZ
Code:
\begin{animateinline}[
begin={
\begin{tikzpicture}[...]
\clip(...,...) rectangle (...,...);
},
end={\end{tikzpicture}},
controls,timeline=time2.txt]{1}
\code
\newframe
\code
\newframe
...
\end{animateinline}
begin={
\begin{tikzpicture}[...]
\clip(...,...) rectangle (...,...);
},
end={\end{tikzpicture}},
controls,timeline=time2.txt]{1}
\code
\newframe
\code
\newframe
...
\end{animateinline}
Now we must create the "timeline", this is a file containing the order and time of the transparencies, the amount of overhead this ity in the amount of \newframe which is used, this file has the following form
Code:
::0x0
::1x0
::2x0
::3x0
::4x0
::5x0
To fully understand how it works you should read the documentation of animate (
texdoc animate for TeXLive)
::1x0
::2x0
::3x0
::4x0
::5x0
Compressed file attached two examples pstanimate.pdf and tikzanimate.pdf
Hope this helps for users of GeoGebra and LaTeX
Saludos
Pablo
| Attachments: |
| File comment: Example using tikz and pstricks Downloaded 479 times |


 1786
1786

 被折叠的 条评论
为什么被折叠?


