


一、软件介绍
文末提供程序和源码下载
Visionatrix开源程序可以简化您的 AI 图像生成工作流程 - Visionatrix 是一个基于 ComfyUI 构建的直观界面。
二、Features 特征
- 易于设置和更新:通过简单的安装和无缝的版本更新进行快速设置。
- 简约的 UI:干净、用户友好的界面,专为日常工作流程使用而设计。
- 提示翻译支持:自动翻译媒体生成的提示。
- 稳定的工作流:版本控制和可升级的工作流。
- 可扩展性:通过同时执行任务工作程序运行多个实例,以提高工作效率。
- 多用户支持:轻松为多个用户配置并集成不同的用户后端。
- LLM 集成: 毫不费力地将 Ollama/Gemini 整合为您的 LLM ComfyUI 工作流程。
- 无缝集成:作为具有后端终端节点的服务运行,以实现顺利的项目集成。
- LoRA 集成:轻松将 CivitAI 的 LoRA 集成到您的流程中。
- Docker Compose:官方 Docker 镜像和预配置的 Docker Compose 文件。
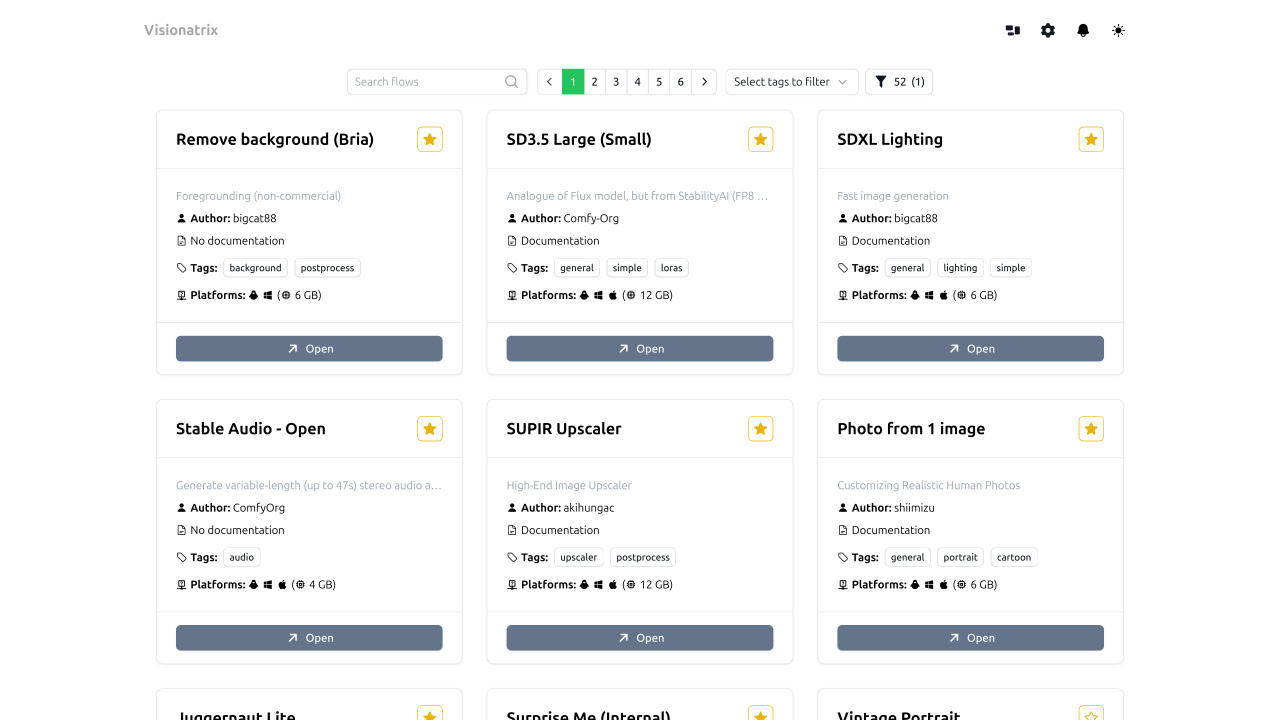
三、User Interface 🖼️ 用户界面
Access the Visionatrix UI at http://localhost:8288 (default).
在 http://localhost:8288 时访问 Visionatrix UI(默认)。
Note: Starting from version 1.10 Visionatrix launches ComfyUI webserver at http://127.0.0.1:8188
注意:从 1.10 版本开始,Visionatrix 在 http://127.0.0.1:8188
四、Installation 安装
Requirements 要求
- Python
3.10or higher. (3.12recommended)
Python3.10或更高版本。(3.12推荐) - GPU with at least
8 GBof memory (12GB recommended)
至少8 GB具有内存的 GPU(建议 12GB)
Quick Start (Linux/macOS/WSL)
快速入门 (Linux/macOS/WSL)
Install prerequisites (Python, Git, etc.)
安装先决条件(Python、Git 等)
For Ubuntu 22.04: 对于 Ubuntu 22.04:
sudo apt install wget curl python3-venv python3-pip build-essential git
It is also recommended to install FFMpeg dependencies with:
还建议使用以下命令安装 FFMpeg 依赖项:
sudo apt install ffmpeg libsm6 libxext6
easy_install.py script:下载并运行脚本
easy_install.py :
Note: This script will clone the Visionatrix repository into your current folder and perform the installation. After installation, you can always run
easy_installfrom the "scripts" folder.
注意:此脚本会将 Visionatrix 存储库克隆到您的当前文件夹中并执行安装。安装后,您始终可以从 “scripts” 文件夹运行easy_install。
Using wget: 使用 wget:
wget -O easy_install.py https://raw.githubusercontent.com/Visionatrix/Visionatrix/main/scripts/easy_install.py && python3 easy_install.py
Using curl: 使用 curl:
curl -o easy_install.py https://raw.githubusercontent.com/Visionatrix/Visionatrix/main/scripts/easy_install.py && python3 easy_install.py
Follow the prompts during installation. In most cases, everything should work smoothly.
在安装过程中按照提示进行作。在大多数情况下,一切都应该顺利进行。
To launch Visionatrix from the activated virtual environment:
要从激活的虚拟环境中启动 Visionatrix:
python -m visionatrix run --ui
Quick Start (Windows) 快速入门 (Windows)
We offer a portable version to simplify installation (no need for Git or Visual Studio compilers).
我们提供可移植版本来简化安装(无需 Git 或 Visual Studio 编译器)。
Currently, we provide versions for CUDA/CPU. If there's demand, we can add a DirectML version.
目前,我们提供 CUDA/CPU 版本。如果有需求,我们可以添加 DirectML 版本。
- Download: Visit our Releases page.
下载:请访问我们的 Releases 页面。 - Get the Portable Archive: Download
vix_portable_cuda.7z.
获取便携式存档: 下载vix_portable_cuda.7z. - Unpack and Run: Extract the archive and run
run_nvidia_gpu.batorrun_cpu.bat.
解压缩并运行:提取存档并运行run_nvidia_gpu.bat或run_cpu.bat。
Manual Installation 手动安装
Post-setup Configuration
⚙️ 设置后配置
Paths Configurations 路径配置
The easiest way to set up paths is through the user interface, by going to Settings->ComfyUI.
设置路径的最简单方法是通过用户界面转到 Settings->ComfyUI .
In most cases, the easiest way is to set ComfyUI base data folder to some absolute path where you want to store models, task results, and settings.
在大多数情况下,最简单的方法是设置为 ComfyUI base data folder 要存储模型、任务结果和设置的某个绝对路径。
This will allow you to freely reinstall everything from scratch without losing data or models.
这将允许您从头开始自由重新安装所有内容,而不会丢失数据或模型。
Note: For easy Windows portable upgrades, we assume you have
ComfyUI base data folderparameter set.
注意:为了轻松进行 Windows 便携版升级,我们假设您已ComfyUI base data folder设置参数。
HuggingFace and CivitAI Tokens
HuggingFace 和 CivitAI 代币
We highly recommend filling in both the CivitAI token and the HuggingFace token in the settings.
我们强烈建议在设置中同时填写 CivitAI 令牌和 HuggingFace 令牌。
Many models cannot be downloaded by public users without a token.
许多模型在没有 Token 的情况下无法被公共用户下载。
🔄 Updating Visionatrix 🔄 更新 Visionatrix
For Linux/macOS 对于 Linux/macOS
Run the easy_install script and select the "Update" option.
运行 easy_install 脚本并选择 “Update” 选项。
python3 easy_install.py
For Windows (Portable Version)
对于 Windows (便携式版本)
Updating the portable version involves:
更新便携版包括:
- Unpacking the new portable version.
拆包新的便携式版本。 - Moving
visionatrix.dbfrom the old version to the new one.
从旧版本迁移到visionatrix.db新版本。
Hint 提示
Alternatively, you can specify a custom path for visionatrix.db using the DATABASE_URI environment variable. This allows you to keep the database file outside the portable archive and skip step 2.
或者,您可以指定用于 visionatrix.db 使用环境变量的 DATABASE_URI 自定义路径。这允许您将数据库文件保存在可移植存档文件之外并跳过步骤 2。
For example, setting DATABASE_URI to:
例如,将 DATABASE_URI 设置为:
<span style="background-color:var(--bgColor-muted, var(--color-canvas-subtle))"><span style="color:var(--fgColor-default, var(--color-fg-default))"><span style="background-color:var(--bgColor-muted, var(--color-canvas-subtle))"><code>`sqlite+aiosqlite:///C:/Users/alex/visionatrix.db`
</code></span></span></span>
will direct Visionatrix to use the C:\Users\alex\visionatrix.db file.
将指示 Visionatrix 使用该文件 C:\Users\alex\visionatrix.db 。
Docker Compose
We provide official Docker images along with a pre-configured docker-compose.yml file, making deployment faster and easier. The file is located at the root of the Visionatrix repository.
我们提供官方 Docker 镜像以及预配置文件 docker-compose.yml ,使部署更快、更轻松。该文件位于 Visionatrix 存储库的根目录下。
Image Registries 映像注册表
Our Docker images are primarily hosted on GitHub Container Registry (GHCR): ghcr.io/visionatrix/visionatrix. This is the default used by the docker-compose.yml file.
我们的 Docker 镜像主要托管在 GitHub Container Registry (GHCR) 上: ghcr.io/visionatrix/visionatrix .这是 docker-compose.yml 文件使用的默认值。
For users who experience slow download speeds from GHCR (e.g., on certain cloud providers), we also provide a mirror on Docker Hub: docker.io/bigcat88/visionatrix.
对于从 GHCR 下载速度较慢的用户(例如,在某些云提供商上),我们还在 Docker Hub 上提供了一个镜像: docker.io/bigcat88/visionatrix 。
Available Services 可用服务
- visionatrix_nvidia: Visionatrix with
NVIDIA GPUsupport.
visionatrix_nvidia:Visionatrix 提供支持NVIDIA GPU。 - visionatrix_amd: Visionatrix with
AMD GPUsupport.
visionatrix_amd:Visionatrix 与AMD GPU支持。 - visionatrix_cpu: Visionatrix running on
CPUonly.
visionatrix_cpu:Visionatrix 仅在上运行CPU。 - pgsql: A PostgreSQL 17 container for the database.
pgsql:数据库的 PostgreSQL 17 容器。
Usage 用法
Choose the service appropriate for your hardware:
选择适合您硬件的服务:
-
For NVIDIA GPU support:
对于 NVIDIA GPU 支持:docker compose up -d visionatrix_nvidia -
For AMD GPU support:
对于 AMD GPU 支持:docker compose up -d visionatrix_amd -
For CPU mode: 对于 CPU 模式:
docker compose up -d visionatrix_cpu
By default, these commands will pull images from GHCR. A visionatrix-data directory will be created in the current directory in the host and used for the models, user, input and output files.
默认情况下,这些命令将从 GHCR 中提取映像。将在主机的当前目录中创建一个 visionatrix-data 目录,用于 models 、 user input 和 output 文件。
You can easily customize the configuration by modifying environment variables or volume mounts in the docker-compose.yml file.
您可以通过修改 docker-compose.yml 文件中的环境变量或卷挂载来轻松自定义配置。
Using the Docker Hub Mirror
使用 Docker Hub 镜像
If you prefer to pull images from Docker Hub instead of GHCR, you can set the VIX_IMAGE_BASE environment variable before running docker compose up.
如果您更喜欢从 Docker Hub 而不是 GHCR 拉取镜像,则可以在运行 docker compose up 之前设置 VIX_IMAGE_BASE 环境变量。
Method 1: Using a .env file
方法 1:使用 .env 文件
-
Create a file named
.envin the same directory as yourdocker-compose.ymlfile.
在与文件docker-compose.yml相同的目录中创建一个命名.env的文件。 -
Add the following line to the
.envfile:
将以下行添加到.env文件中:VIX_IMAGE_BASE=docker.io/bigcat88/visionatrix -
Now, run
docker compose upas usual. Compose will automatically read the.envfile and use the Docker Hub images.
现在,像往常一样运行docker compose up。Compose 将自动读取.env文件并使用 Docker Hub 映像。# Example: Start NVIDIA service using images from Docker Hub defined in .env docker compose up -d visionatrix_nvidia
Method 2: Setting the variable temporarily
方法 2:临时设置变量
You can set the environment variable directly on the command line for a single command execution:
您可以直接在命令行上为单个命令执行设置环境变量:
本文信息来源于GitHub作者地址:GitHub - Visionatrix/Visionatrix: AI Media processing using ComfyUI


 2259
2259

 被折叠的 条评论
为什么被折叠?
被折叠的 条评论
为什么被折叠?
 到【灌水乐园】发言


