


1.复习
新建项目
①.引入jar包

javax.annotation-api这个jar包是各种注解需要依赖的包,jdk8自身包含,不用加。jdk11移除了该包,需要加入。
日志包是4个spring核心包需要依赖的包。
再引入druid和mysql-connection-java这两个包。
②.建xml文件
建spring.xml
<?xml version="1.0" encoding="UTF-8"?>
<beans xmlns="http://www.springframework.org/schema/beans"
       xmlns:xsi="http://www.w3.org/2001/XMLSchema-instance"
       xmlns:context="http://www.springframework.org/schema/context"
       xsi:schemaLocation="http://www.springframework.org/schema/beans
       http://www.springframework.org/schema/beans/spring-beans.xsd
       http://www.springframework.org/schema/context
       https://www.springframework.org/schema/context/spring-context.xsd">

    <!--1.开包扫描
     对带有@Controller @Service @Repository @Component 进行IOC注册,注册到容器中
     对注册到容器中的bean对象,带有@Autowired @Resource 的di注解生效,用来维护对象间的关系
     -->
    <context:component-scan base-package="com.javasm"></context:component-scan>

</beans>
建dao.xml
<?xml version="1.0" encoding="UTF-8"?>
<beans xmlns="http://www.springframework.org/schema/beans"
       xmlns:xsi="http://www.w3.org/2001/XMLSchema-instance"
       xmlns:context="http://www.springframework.org/schema/context"
       xsi:schemaLocation="http://www.springframework.org/schema/beans
       http://www.springframework.org/schema/beans/spring-beans.xsd
       http://www.springframework.org/schema/context
       https://www.springframework.org/schema/context/spring-context.xsd">

    <context:property-placeholder location="jdbc.properties"></context:property-placeholder>

    <bean id="dataSource" class="com.alibaba.druid.pool.DruidDataSource" init-method="init" destroy-method="close">
        <property name="driverClassName" value="${jdbc.driver}"></property>
        <property name="url" value="${jdbc.url}"></property>
        <property name="username" value="${jdbc.username}"></property>
        <property name="password" value="${jdbc.password}"></property>
        <property name="initialSize" value="${jdbc.initSize}"></property>
        <property name="maxActive" value="${jdbc.maxActive}"></property>
    </bean>

</beans>
建jdbc.properties
jdbc.url=jdbc:mysql://127.0.0.1:3306/704A?useUnicode=true&characterEncoding=utf8&useSSL=true&serverTimezone=UTC
jdbc.driver=com.mysql.jdbc.Driver
jdbc.username=root
jdbc.password=root
jdbc.initSize=4
jdbc.maxActive=10
让spring.xml文件作为主配置文件,容器中只加载这一个文件即可:
<context:component-scan base-package="com.javasm"></context:component-scan>

<!--导入其他配置文件-->
<import resource="dao.xml"></import>
③.写接口及实现类
com.javasm.sys.service.IUserService
public interface IUserService {
    String getUnameById(Integer id);

    String getUphoneByUname(String uname);
}
(写接口习惯I开头)
com.javasm.sys.service.impl.UserServiceImpl
@Service
public class UserServiceImpl implements IUserService {
    @Autowired
    private DataSource ds;

    @Override
    public String getUnameById(Integer id) {
        Connection connection = null;
        try {
            connection = ds.getConnection();
            String sql = "select * from sys_user where id=?";
            PreparedStatement pst = connection.prepareStatement(sql);
            pst.setInt(1,1);
            ResultSet resultSet = pst.executeQuery();
            resultSet.next();
            String uname = resultSet.getString("uname");
            return uname;
        } catch (SQLException throwables) {
            throwables.printStackTrace();
        }finally {
            try {
                connection.close();
            } catch (SQLException throwables) {
                throwables.printStackTrace();
            }
        }
        return null;
    }

    @Override
    public String getUphoneByUname(String uname) {
        return null;
    }


}
测试:
com.javasm.TestApplicationContext:
public class TestApplicationContext {
    @Autowired
    private IUserService us;

    @Test
    public void test1_loadXML(){
        ClassPathXmlApplicationContext ac = new ClassPathXmlApplicationContext("spring.xml");
        IUserService us = ac.getBean(IUserService.class);
        String unameById = us.getUnameById(1);
        System.out.println(unameById);
        ac.close();
    }
}
2.junit与spring整合测试
目的:把测试类也注册进入容器,然后需要测试哪个对象,就注入哪个对象即可.
添加spring-test.jar

在测试类添加@Runwith(SpringJunit4ClassRunner.class)
在测试类添加@ContextConfiguration("classpath:spring.xml")
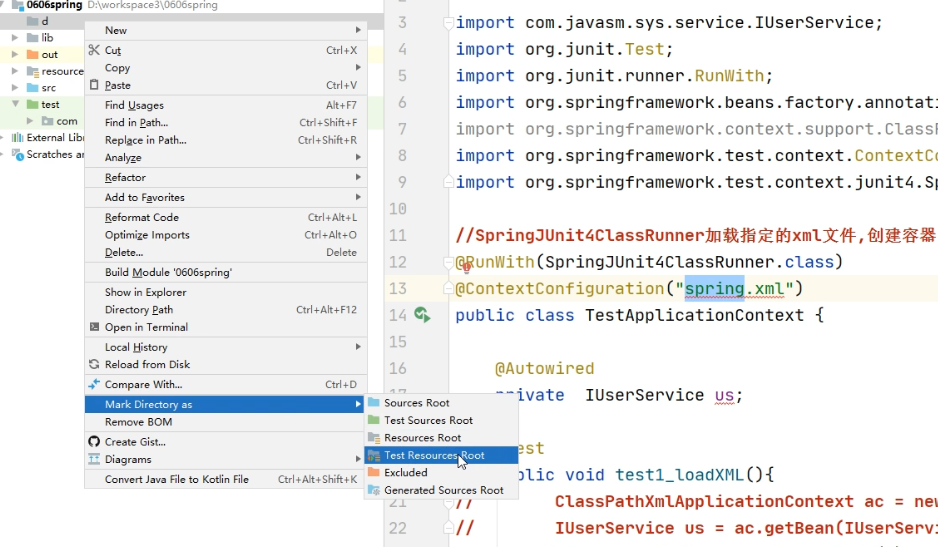
爆红是因为它默认找测试资源下的路径,不是Resources资源下的文件,故需要写绝对路径。
解析到classpath:开头的字符串后,会从类路径下找配置文件。(resource,src都是类路径)
//SpringJUnit4ClassRunner类用来加载指定的配置文件,初始化容器,并把指定的对象TestApplicationContext也注册到容器
@RunWith(SpringJUnit4ClassRunner.class)
@ContextConfiguration("classpath:spring.xml")
public class TestApplicationContext {
    @Autowired
    private IUserService us;

    @Test
    public void test1_loadXML(){
        String unameById = us.getUnameById(1);
        System.out.println(unameById);
    }
}
后续用springboot做项目用不着这些,一句话搞定。
3.什么是aop(***重要)
aop:面向切面对象编程,是对oop面向对象编程的一种补充与完善.(它本身也是一种oop编程)
我们常规的对象是领域模型对象(某个业务领域需要用到的对象,对应数据库就是业务表),即实体类,之前说的面向对象编程都是面向领域模型对象。给我们一个业务,会先分析该业务有哪些领域模型对象,比如贷款业务(贷款人,贷款机构,征信记录,贷款人的担保信息,放款业务员)。
当接触到一个新的业务,以oop的思想来提取出该业务相关的领域模型对象,提取出domain对象中的属性与方法,使用rose(一个工具)进行uml模型设计与分析,创建好数据库表.进行核心业务(申请,审核,放款)的编码实现.

此时为了数据安全,需要在进行参数的校验,需要在每一步业务执行的时候记录执行日志.类似日志,参数校验的业务称为辅助业务(非核心的业务),这些业务也就是切面对象.
aop:面向公共的非核心业务的辅助对象进行代码开发,常见:日志,数据校验,数据加密解密,事务控制.以代理模式把切面对象中的方法 插入 到核心对象方法的前后异常最终处.
补充:
POJO等价javaBean等价java对象
domain等价entity等价实体类等价领域模型对象
4.aop中的几个概念
1.目标对象(target):原生对象,此对象中的方法需要被扩展.需要被创建代理的对象(AlipayImpl.WechatPayImpl)
2.连接点方法(joinpoint):目标对象中的需要被扩展的方法,就是连接点方法
3.织入(weave): 在程序运行期间,以动态代理模式在工厂中在目标对象的连接点方法 的不同位置 插入 切面对象中的通知方法.
4.切面对象(aspect):辅助业务对象
5.通知方法(advisor):切面对象中的方法,分为前置通知,返回通知,异常通知,最终通知,环绕通知
6.切入点(pointcut):通过描述方法结构或者通过指定注解来描述一些连接点方法的集合.
5.spring中的aop注解使用(重要)
spring对aop进行了封装实现.spring本身就是一个工厂,内部注册了bean对象,spring内可以对这些bean对象进行再加工.
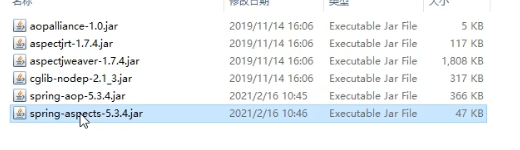
①.添加相关jar包
添加spring-aop;spring-aspect两个依赖包
aspectj第三方aop组件包.
添加cglib动态代理包,类似Proxy工具类的作用,cglib支持无接口对象创建代理.(使用Proxy工具类要求被代理对象必须有接口,实际上在spring里我们会确保service都会有接口)
②.在spring.xml文件中开启aop注解识别.
spring.xml:
<?xml version="1.0" encoding="UTF-8"?>
<beans xmlns="http://www.springframework.org/schema/beans"
       xmlns:xsi="http://www.w3.org/2001/XMLSchema-instance"
       xmlns:context="http://www.springframework.org/schema/context"
       xmlns:aop="http://www.springframework.org/schema/aop"
       xsi:schemaLocation="http://www.springframework.org/schema/beans http://www.springframework.org/schema/beans/spring-beans.xsd http://www.springframework.org/schema/context https://www.springframework.org/schema/context/spring-context.xsd http://www.springframework.org/schema/aop https://www.springframework.org/schema/aop/spring-aop.xsd">

    <context:component-scan base-package="com.javasm"></context:component-scan>

    <import resource="dao.xml"></import>

    <!--开启aop注解识别,识别sapectj组件的安排注解:@Aspect,@Pointcut,@Before,@AfterReturning,@Afterthrowing,@After,@Around
     这些注解生效的前提:对象注册进入容器
     proxy-target-class默认false,如果目标对象有接口,则使用Proxy创建代理类,没有接口则使用cglib组件创建代理类。若属性值
     为true,则为目标类创建代理全部用cglib组件。故可完全不加它
    -->
    <aop:aspectj-autoproxy proxy-target-class="false"></aop:aspectj-autoproxy>

</beans>
③.定义切面bean对象
④.定义切入点表达式
⑤.定义通知方法
拿复习中的例子:
//目标对象
@Service
public class UserServiceImpl implements IUserService {
    @Autowired
    private DataSource ds;

    //连接点方法
    @Override
    public String getUnameById(Integer id) {
        Connection connection = null;
        try {
            connection = ds.getConnection();
            String sql = "select * from sys_user where id=?";
            PreparedStatement pst = connection.prepareStatement(sql);
            pst.setInt(1,1);
            ResultSet resultSet = pst.executeQuery();
            resultSet.next();
            String uname = resultSet.getString("uname");
            return uname;
        } catch (SQLException throwables) {
            throwables.printStackTrace();
        }finally {
            try {
                connection.close();
            } catch (SQLException throwables) {
                throwables.printStackTrace();
            }
        }
        return null;
    }

    @Override
    public String getUphoneByUname(String uname) {
        return null;
    }


}
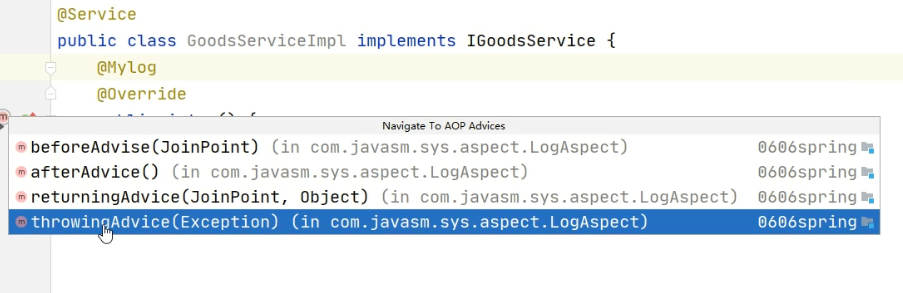
新建src.com.javasm.sys.aspect.LogAspect
//切面对象
@Component   //bean对象注册到容器
@Aspect      //表示是一个切面bean对象
public class LogAspect {

    //通过切入点表达式定义目标对象与连接点方法(字符串中指明类型以及对应的类中的方法,包括方法形参)
    @Pointcut("execution(java.lang.String com.javasm.sys.service.impl.UserServiceImpl.getUnameById(java.lang.Integer))")
    public void servicepc(){
    }

    //该注解表示:beforeAdvise方法作为前置通知织入到servicepc方法上的切入点表达式
    @Before("servicepc()")
    public void beforeAdvise(){
        System.out.println("前置通知");
    }

    @AfterReturning("servicepc()")
    public void returningAdvise(){
        System.out.println("返回通知");
    }

    @AfterThrowing("servicepc()")
    public void throwingAdvise(){
        System.out.println("异常通知");
    }

    @After("servicepc()")
    public void afterAdvise(){
        System.out.println("最终通知");
    }
}
测试:
先走前置通知,再getUnameById,再返回通知,没有异常不走异常通知(若有异常,必须抛出去才行),最后走最终通知。
看下在通知方法中能够获取的数据:
前置通知能获得目标对象类名,目标对象方法的参数
返回通知能获得核心业务方法的返回值(前置通知能得到的,返回通知都能得到)
异常通知能获得核心业务方法产生的异常信息 (肯定得不到返回值,已经异常了。也可得到前置通知得到的)
最终通知可获得前置通知获得的,得不到返回值和异常信息。
@Component
@Aspect
public class LogAspect {

    @Pointcut("execution(java.lang.String com.javasm.sys.service.impl.UserServiceImpl.getUnameById(java.lang.Integer))")
    public void servicepc(){
    }

    //获取哪个类里的哪个方法以及哪些实参,只需在该方法加JoinPoint连接点对象。
    //JoinPoint对象包含目标对象,连接点方法信息,传入的实参信息
    @Before("servicepc()")
    public void beforeAdvise(JoinPoint jp){
        Object target = jp.getTarget();  //目标对象
        MethodSignature signature = (MethodSignature)jp.getSignature(); //连接点方法对象
        Method method = signature.getMethod();  //目标方法
        Object[] args = jp.getArgs();   //实参数组
        Object aThis = jp.getThis();     //底层的代理对象
        System.out.println("前置通知");
    }

    //获取目标方法返回值,返回值类型用Object,是因为后续可能织入到其他方法中
    @AfterReturning(value="servicepc()",returning = "o")
    public void returningAdvise(JoinPoint jp,Object o){
        String name = jp.getTarget().getClass().getName();
        System.out.println("目标类名:"+name+",返回值:"+o);
        System.out.println("返回通知");
    }

    //也可得到前置通知的信息,参数传入JoinPoint jp即可
    @AfterThrowing(value = "servicepc()",throwing = "e")
    public void throwingAdvise(Exception e){
        System.out.println("异常通知"+e);
    }

    @After("servicepc()")
    public void afterAdvise(){
        System.out.println("最终通知");
    }
}
以上是切入点表达式的完整的写法,只对一个方法做织入。
实际开发中不可能出现只对某一个方法做织入的,因为这样的话没必要做面向切面,直接在方法中写入即可。
以下用通配的方法:
//不限制方法的返回值类型,不限功能模块,不限类名和方法名,不限参数类型和长度
@Pointcut("execution(* com.javasm.*.service.impl.*.*(..))")
public void servicepc(){
}
//也可指定方法名的前缀
@Pointcut("execution(* com.javasm.*.service.impl.*.get*(..))")
public void servicepc(){
}
切入点表达式的第二种写法:
通过自定义注解定义目标对象与连接点方法
新建com.javasm.sys.aspect.Mylog
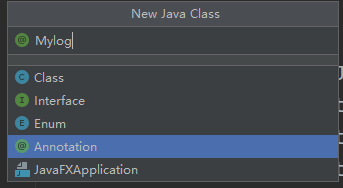
//注解的定义需要元注解的声明
//@Target表示该注解注解到哪个位置,ElementType.TYPE注解到类上,ElementType.METHOD注解到方法上
@Target({ElementType.TYPE,ElementType.METHOD})
//@Retention生命周期,RetentionPolicy.RUNTIME运行时注解,会保留在字节码文件,代码环境下可得到该注解信息。
//@Override是编译时注解或者说源码注解,不能保留在字节码文件
@Retention(RetentionPolicy.RUNTIME)
public @interface Mylog {
    String sname() default "";
    String value() default "";
}
//annotation里写注解
@Pointcut("@annotation(com.javasm.sys.aspect.Mylog)")
public void servicepc(){
}

//beforeAdvise方法作为前置通知织入到带有Mylog注解的方法上
@Before("servicepc()")
public void beforeAdvise(){
    System.out.println("前置通知");
}
如下,有注解的可以生效:
也可在注解上加信息
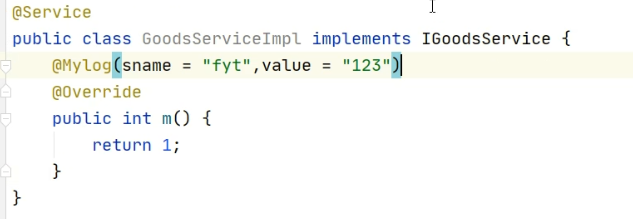
此时连接点对象里还有注解的信息。
@Before("servicepc()")
public void beforeAdvise(JoinPoint jp){
    Object target = jp.getTarget();
    MethodSignature signature = (MethodSignature)jp.getSignature();
    Method method = signature.getMethod();
    Object[] args = jp.getArgs();
    Object aThis = jp.getThis();

    //获取连接点方法的注解信息
    Class<?> aClass = target.getClass();
    try {
        Method method1 = aClass.getMethod(method.getName(), method.getParameterTypes());
        Mylog annotation = method1.getAnnotation(Mylog.class);
        String sname = annotation.sname();
        String value = annotation.value();
    } catch (NoSuchMethodException e) {
        e.printStackTrace();
    }
    System.out.println("前置通知");
}
⑥.使用环绕通知取到前四类通知
前面的四个通知可忘记
建com.javasm.sys.aspect.tx
@Target({ElementType.TYPE,ElementType.METHOD})
@Retention(RetentionPolicy.RUNTIME)
public @interface tx {
    //单纯作为一个注解,不承载数据
}
建com.javasm.sys.aspect.TxAspect
@Component
@Aspect
public class TxAspect {

    @Pointcut("@annotation(tx)")
    public void pc(){
    }

    //环绕通知
    //ProceedingJoinPoint是JoinPoint的子接口,有了新的方法。是Target,Method,实参,代理对象的封装
    public Object doTx(ProceedingJoinPoint jp){
        Object result = null;

        Object target = jp.getTarget();
        Object[] args = jp.getArgs();
        MethodSignature signature = (MethodSignature)jp.getSignature();
        Method method = signature.getMethod();

        try {
            System.out.println("前置通知");
            result = jp.proceed();  //执行核心业务方法
            System.out.println("返回通知,返回值为:"+result);
        } catch (Throwable throwable) {
            System.out.println("异常通知,异常对象为:"+throwable);
        }finally {
            System.out.println("最终通知");
        }

        return result;  //返回核心业务方法的返回值
    }

}
事务管理切面:
前置通知里从连接池打开连接
返回通知里提交连接
异常通知里回滚
最终通知关闭连接
这样,service层,dao层不用管这些操作。
6.spring中的aop的xml配置使用
后续不再用xml文件。
以xml配置的方式来配置切面,切入点,通知方法.
新建com.javasm.sys.aspect.LogAspect2
public class LogAspect2 {

    public void beforeAdvise(JoinPoint jp){
        System.out.println("前置通知");
    }

    public void returningAdvise(JoinPoint jp,Object O){
        System.out.println("返回通知");
    }

    public void throwingAdvise(Exception e){
        System.out.println("异常通知");

    }

    public void afterAdvise(){
        System.out.println("最终通知");
    }
}
在spring配置文件里:
<aop:config>
    <!--定义切入点表达式
    expression还是两种写法
    -->
    <aop:pointcut id="pc2" expression="@annotation(com.javasm.sys.aspect.tx)"/>
    <!--定义切面bean-->
    <aop:aspect ref="logAspect2">
         <aop:before method="beforeAdvise" pointcut-ref="pc2"></aop:before>
         <aop:after-returning method="returningAdvice" returning="o" pointcut-ref="pc2"></aop:after-returning>
         <aop:after-throwing method="throwingAdvice" throwing="e" pointcut-ref="pc2"></aop:after-throwing>
         <aop:after method="afterAdvice" pointcut-ref="pc2"></aop:after>
    </aop:aspect>
</aop:config>
若为环绕通知:
public class LogAspect2 {

    public Object adAround(ProceedingJoinPoint jp){
        Object proceed = null;
        try {
            System.out.println("前置通知");
            proceed = jp.proceed();
            System.out.println("返回通知");
        } catch (Throwable throwable) {
            System.out.println("异常通知"+throwable);
        }finally {
            System.out.println("最终通知");
        }
        return proceed;
    }
}
<aop:config>
    <aop:pointcut id="pc2" expression="@annotation(com.javasm.sys.aspect.tx)"/>
    <aop:aspect ref="logAspect2">
        <aop:around method="doAround" pointcut-ref="pc2"></aop:around>
    </aop:aspect>
</aop:config>


 214
214


 被折叠的 条评论
为什么被折叠?
被折叠的 条评论
为什么被折叠?
 到【灌水乐园】发言


