


ListView是Android开发的重要组件,它的作用是让需要的数据按照垂直视图以列表项的形式垂直排列。它不仅使用方便,效果还十分的COOOOOOOOOOL! 效果图如下:
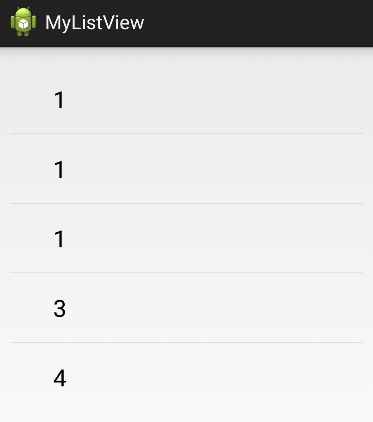
嗯,我是觉的效果是不错的。
下面是使用ListView的方法之一:使用SimpleAdapter创建ListView
不要被Simple这个词迷惑了,它并不简单,当然使用多了之后还是很简单的,这放在哪里都适用,熟能生巧吗。
首先是在布局文件中定义一个ListView,这是必然的:
<RelativeLayout xmlns:android="http://schemas.android.com/apk/res/android"
    xmlns:tools="http://schemas.android.com/tools"
    android:layout_width="match_parent"
    android:layout_height="match_parent">
    <ListView
        android:layout_width="match_parent"
        android:layout_height="wrap_content"
        android:id="@+id/main_lv"></ListView>
</RelativeLayout>
在布局文件中定义一个ListView,并写上id属性;
接着在java代码中用SimpleAdapter为该ListView配置信息:
public class MainActivity extends Activity {

    private int[] image = {R.drawable.a34,R.drawable.a35,R.drawable.a36};
    private String[] name = {"name1","name2","name3"};
    private String[] desc = {"desc1","desc2","desc3"};
    private SimpleAdapter adapter;
    private ListView listView ;
    private List<Map<String , Object>> data;

    @Override
    protected void onCreate(Bundle savedInstanceState) {
        // TODO Auto-generated method stub
        super.onCreate(savedInstanceState);
        setContentView(R.layout.activity_main);
        initView();
        initList();
        initAdapter();
    }
    private void initView() {
        listView = (ListView) findViewById(R.id.main_listView);
    }
    private void initList() {
        data = new ArrayList<Map<String,Object>>();
        for(int i=0;i<name.length;i++){
            Map<String , Object > map = new HashMap<String , Object >();
            map.put("name", name[i]);
            map.put("desc", desc[i]);
            map.put("icon", image[i]);
            data.add(map);
        }
    }
    private void initAdapter() {
        adapter = new SimpleAdapter(this, data, R.layout.item,
                new String[]{"name","desc","icon"},
                new int[]{R.id.item_name,R.id.item_desc,R.id.item_iv});
        listView.setAdapter(adapter);
    }
}
找到布局文件中的ListView,接着实例一个ArrayList,注意这里的List要求泛型必 须是Map< String,?> 。也就是说这里传入adapter的构造方法里的list集合的元素必须是一个个Map集合。
这里在实例SimpleAdapter的参数需要注意:
第一个参数context:this这没什么说的
第二个参数data:传入资源集合,格式必须是List< Map< String,?> >类型的集合
第三个参数Resource:每一项item的显示布局ID
第四个参数from:这个参数使一个Sring的数组,存放的是上述Map中的key值
第五个参数to:这个参数是一个int类型的数组,存放的是需要填充的组件id
本例中的列表项组件R.Layout.item定义如下:
<?xml version="1.0" encoding="utf-8"?>
<LinearLayout xmlns:android="http://schemas.android.com/apk/res/android"
    android:layout_width="match_parent"
    android:layout_height="match_parent" >
    <ImageView
        android:id="@+id/item_iv"
        android:layout_width="wrap_content"
        android:layout_height="wrap_content" />
    <LinearLayout
        android:layout_width="0dp"
        android:layout_height="wrap_content"
        android:layout_weight="1"
        android:orientation="vertical">
        <TextView
            android:layout_width="wrap_content"
            android:layout_height="wrap_content"
            android:id="@+id/item_name"/>
        <TextView
            android:layout_width="wrap_content"
            android:layout_height="wrap_content"
            android:id="@+id/item_desc"/>
    </LinearLayout>
</LinearLayout>
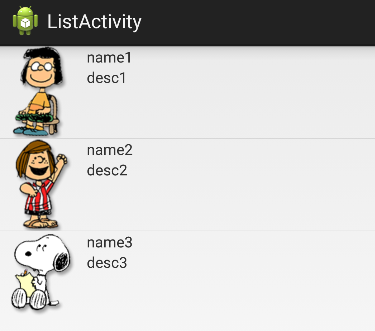
效果图如下:


 252
252

 被折叠的 条评论
为什么被折叠?
被折叠的 条评论
为什么被折叠?
 到【灌水乐园】发言


