


使用spring编写RMI示例
RMI概述
RMI最初被引入到Java平台中,为java开发者提供了一种强大的方法来实现java程序间的交互。
但是开发和访问RMI服务是非常乏味无聊的,它涉及到好几个步骤,包括程序的和手工的。
Spring简化了RMI模型,它提供了一个代理工厂bean,能让我们把RMI服务像本地JavaBean那样装配到Spring应用中。Spring还提供了一个远程导出器,用来简化把Spring管理的bean装为RMI服务的工作。
使用JDK开发RMI参见:使用远程服务——RMI(java版)_szuaudi的博客-CSDN博客
本篇对上面文章的示例进行改造,使用Spring编写一个RMI示例
在RMI之前,对于java开发者来说,远程调用的唯一选择就是CORBA,或者手工编写Socket程序。
编码
新建工程
在eclipse中新建maven工程

输入工程名称为rmi-spring

点击“Finish”,这样就创建了一个空的maven工程
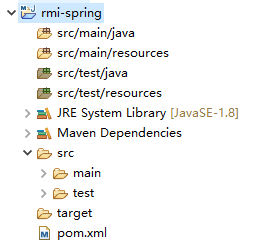
目录结构
在工程的pom.xml添加spring核心模块
<project xmlns="http://maven.apache.org/POM/4.0.0" xmlns:xsi="http://www.w3.org/2001/XMLSchema-instance" xsi:schemaLocation="http://maven.apache.org/POM/4.0.0 https://maven.apache.org/xsd/maven-4.0.0.xsd">
  <modelVersion>4.0.0</modelVersion>
  <groupId>me.aodi</groupId>
  <artifactId>rmi-spring</artifactId>
  <version>0.0.1-SNAPSHOT</version>
  <properties>
  	<org.springframework.version>4.3.17.RELEASE</org.springframework.version>
  </properties>
  <dependencies>
	<dependency>
		<groupId>org.springframework</groupId>
		<artifactId>spring-context</artifactId>
		<version>${org.springframework.version}</version>
	</dependency>
	<dependency>
		<groupId>org.springframework</groupId>
		<artifactId>spring-context-support</artifactId>
		<version>${org.springframework.version}</version>
	</dependency>
  </dependencies>
</project>
在工程中/rmi-spring/src/main/java添加如下包
- me.aodi包::应用程序跟目录;
- me.aodi.model:模拟数据模型;
- me.aodi.service:服务接口;
- me.aodi.service.impl:接口实现类;
在工程中/rmi-spring/src/main/resources中添加spring配置文件application.xml
<?xml version="1.0" encoding="UTF-8"?>
<beans xmlns="http://www.springframework.org/schema/beans" xmlns:xsi="http://www.w3.org/2001/XMLSchema-instance" xmlns:tx="http://www.springframework.org/schema/tx"
	xmlns:context="http://www.springframework.org/schema/context" xmlns:mvc="http://www.springframework.org/schema/mvc"
	xsi:schemaLocation="http://www.springframework.org/schema/beans
    http://www.springframework.org/schema/beans/spring-beans.xsd
    http://www.springframework.org/schema/context
    http://www.springframework.org/schema/context/spring-context.xsd">

	<!-- 设置组件扫描的基础包 -->
	<context:component-scan base-package="me.aodi" />
</beans>
编写rmi功能
- 新建me.aodi.model.User类模拟数据模型;
package me.aodi.model;

import java.io.Serializable;

public class User implements Serializable {
	private Integer id;
	private String name;
	public Integer getId() {
		return id;
	}
	public void setId(Integer id) {
		this.id = id;
	}
	public String getName() {
		return name;
	}
	public void setName(String name) {
		this.name = name;
	}
}
- 新建
me.aodi.service.UserService接口
package me.aodi.service;

import java.rmi.RemoteException;
import java.util.List;

import me.aodi.model.User;

public interface UserService{
	/**
	 * 返回所有user
	 * @return
	 * @throws RemoteException
	 */
	public List<User> all();
}
注意:与JDK的RMI相比,该接口要发布的方法不需要throws RemoteException
- 新建
me.aodi.service.impl.UserServiceImpl实现类
package me.aodi.service.impl;

import java.util.ArrayList;
import java.util.List;

import me.aodi.model.User;
import me.aodi.service.UserService;

public class UserServiceImpl implements UserService {

	/**
	 * 模拟返回所有user
	 */
	@Override
	public List<User> all()
	{
		User user = new User();
		user.setId(1);
		user.setName("用户1");
		List<User> list = new ArrayList<User>(1);
		list.add(user);
		return list;
	}

}
注意:与JDK的RMI相比,该类不需要extends UnicastRemoteObject
- 新建
me.aodi.RmiServer服务端类
package me.aodi;

import java.rmi.RemoteException;

import org.springframework.remoting.rmi.RmiServiceExporter;

import me.aodi.service.UserService;
import me.aodi.service.impl.UserServiceImpl;

/**
 * 服务器端
 * @author audi
 *
 */
public class RmiServer {

	public static void main(String[] args) {
		UserService userService = new UserServiceImpl();

		/**
		 * 导出RMI服务
		 */
		RmiServiceExporter rmiServiceExporter = new RmiServiceExporter();
		rmiServiceExporter.setService(userService);
		rmiServiceExporter.setServiceInterface(UserService.class);
		rmiServiceExporter.setServiceName("user");
		rmiServiceExporter.setRegistryPort(8001);
		try {
			rmiServiceExporter.afterPropertiesSet();
		} catch (RemoteException e) {
			e.printStackTrace();
		}

		System.out.println("user service publiced!");
	}
}
- 新建me.aodi.RmiClient客户端类
package me.aodi;

import java.util.List;

import org.springframework.remoting.rmi.RmiProxyFactoryBean;

import me.aodi.model.User;
import me.aodi.service.UserService;

/**
 * rmi客户端
 * @author audi
 *
 */
public class RmiClient {
	public static void main(String[] args) {
		/**
		 * 装配RMI服务
		 */
		RmiProxyFactoryBean rmiProxy = new RmiProxyFactoryBean();
		rmiProxy.setServiceUrl("rmi://localhost:8001/user");
		rmiProxy.setServiceInterface(UserService.class);
		rmiProxy.afterPropertiesSet();

		/**
		 * 调用远程service的方法
		 */
		UserService userService = (UserService) rmiProxy.getObject();
		List<User> users = userService.all();
		System.out.println("userService.all().size:"+users.size());
		if (users.size() > 0) {
			System.out.println("userService.all()[0].name:"+users.get(0).getName());
		}
	}
}
运行实例
-
编辑后的工程目录结构

-
运行服务端应用
在RmiServer打断点,防止程序立马执行完退出

-
调试模式运行RmiServer.java

程序会在断点处停止 -
RmiServer的运行日志:

注意:RmiServiceExporter会在指定主机及端口获取注册服务,未查询到才会新建注册服务。 -
运行RmiClient.java

RmiClient运行结束就退出了,控制台留下了运行时我们要输出的信息

改进
在日常的web开发中,应用程序在web容器运行,远程服务的发布就不能在main方法中调用。
其实,我们要做的只是定义一个RmiServiceExporter的bean了来导出RMI服务,或定义一个RmiProxyFactoryBean的 bean装配RMI服务。
可以做出以下改进:
- 对服务端进行改造
在spring的配置文件application-server.xml中定义RMI服务类bean:
<?xml version="1.0" encoding="UTF-8"?>
<beans xmlns="http://www.springframework.org/schema/beans" xmlns:xsi="http://www.w3.org/2001/XMLSchema-instance" xmlns:tx="http://www.springframework.org/schema/tx"
	xmlns:context="http://www.springframework.org/schema/context" xmlns:mvc="http://www.springframework.org/schema/mvc"
	xsi:schemaLocation="http://www.springframework.org/schema/beans
    http://www.springframework.org/schema/beans/spring-beans.xsd
    http://www.springframework.org/schema/context
    http://www.springframework.org/schema/context/spring-context.xsd">

	<bean id="userService" class="me.aodi.service.impl.UserServiceImpl"></bean>


	<!-- 定义RMI服务导出器 -->
	<bean class="org.springframework.remoting.rmi.RmiServiceExporter">
		<property name="service" ref="userService"/>
		<property name="serviceInterface" value="me.aodi.service.UserService"/>
		<property name="serviceName" value="user"/>
		<property name="registryPort" value="8001"/>
	</bean>
</beans>
注意:afterPropertiesSet方法会在bean创建后自动触发
在RmiServer的main方法中启动spring
package me.aodi;

import org.springframework.context.ApplicationContext;
import org.springframework.context.support.AbstractApplicationContext;
import org.springframework.context.support.ClassPathXmlApplicationContext;

/**
 * 服务器端
 * @author audi
 *
 */
public class RmiServer {

	public static void main(String[] args) {
		/**
		 * 启动spring
		 */
		ApplicationContext applicationContext = new ClassPathXmlApplicationContext("classpath:application-server.xml");
		System.out.println("user service publiced!");
		((AbstractApplicationContext) applicationContext).close();
	}
}
- 客户端改造
在spring的配置文件application-client.xml中定义装配RMI服务的bean:
<?xml version="1.0" encoding="UTF-8"?>
<beans xmlns="http://www.springframework.org/schema/beans" xmlns:xsi="http://www.w3.org/2001/XMLSchema-instance" xmlns:tx="http://www.springframework.org/schema/tx"
	xmlns:context="http://www.springframework.org/schema/context" xmlns:mvc="http://www.springframework.org/schema/mvc"
	xsi:schemaLocation="http://www.springframework.org/schema/beans
    http://www.springframework.org/schema/beans/spring-beans.xsd
    http://www.springframework.org/schema/context
    http://www.springframework.org/schema/context/spring-context.xsd">

	<!-- 定义RMI服务代理 -->
	<bean class="org.springframework.remoting.rmi.RmiProxyFactoryBean">
		<property name="serviceUrl" value="rmi://localhost:8001/user"/>
		<property name="serviceInterface" value="me.aodi.service.UserService"/>
	</bean>
</beans>
在RmiClient的main方法中使用RMI服务:
package me.aodi;

import java.util.List;

import org.springframework.context.support.ClassPathXmlApplicationContext;

import me.aodi.model.User;
import me.aodi.service.UserService;

/**
 * rmi客户端
 * @author audi
 *
 */
public class RmiClient {
	public static void main(String[] args) {
		/**
		 * 启动spring,获取service
		 */
		ClassPathXmlApplicationContext applicationContext = new ClassPathXmlApplicationContext("classpath:application-client.xml");
		UserService userService = applicationContext.getBean(UserService.class);
		applicationContext.close();
		/**
		 * 调用远程service的方法
		 */
		List<User> users = userService.all();
		System.out.println("userService.all().size:"+users.size());
		if (users.size() > 0) {
			System.out.println("userService.all()[0].name:"+users.get(0).getName());
		}
	}
}
- 我们也可以通过java注解的方式装配RMI服务相关的bean
分析
- 发布RMI服务
RmiServiceExporter是spring发布RMI服务的核心,在spring容器中定义RmiServiceExporter对象,RmiServiceExporter类继承了InitializingBean,RmiBasedExporter对象初始化后,会自动调用afterPropertiesSet方法:
	@Override
	public void afterPropertiesSet() throws RemoteException {
		prepare();
	}
afterPropertiesSet方法只是调用了prepare:
	/**
	 * Initialize this service exporter, registering the service as RMI object.
	 * <p>Creates an RMI registry on the specified port if none exists.
	 * @throws RemoteException if service registration failed
	 */
	public void prepare() throws RemoteException {
		checkService();

		if (this.serviceName == null) {
			throw new IllegalArgumentException("Property 'serviceName' is required");
		}

		// Check socket factories for exported object.
		if (this.clientSocketFactory instanceof RMIServerSocketFactory) {
			this.serverSocketFactory = (RMIServerSocketFactory) this.clientSocketFactory;
		}
		if ((this.clientSocketFactory != null && this.serverSocketFactory == null) ||
				(this.clientSocketFactory == null && this.serverSocketFactory != null)) {
			throw new IllegalArgumentException(
					"Both RMIClientSocketFactory and RMIServerSocketFactory or none required");
		}

		// Check socket factories for RMI registry.
		if (this.registryClientSocketFactory instanceof RMIServerSocketFactory) {
			this.registryServerSocketFactory = (RMIServerSocketFactory) this.registryClientSocketFactory;
		}
		if (this.registryClientSocketFactory == null && this.registryServerSocketFactory != null) {
			throw new IllegalArgumentException(
					"RMIServerSocketFactory without RMIClientSocketFactory for registry not supported");
		}

		this.createdRegistry = false;

		// Determine RMI registry to use.
		if (this.registry == null) {
			this.registry = getRegistry(this.registryHost, this.registryPort,
				this.registryClientSocketFactory, this.registryServerSocketFactory);
			this.createdRegistry = true;
		}

		// Initialize and cache exported object.
		this.exportedObject = getObjectToExport();

		if (logger.isInfoEnabled()) {
			logger.info("Binding service '" + this.serviceName + "' to RMI registry: " + this.registry);
		}

		// Export RMI object.
		if (this.clientSocketFactory != null) {
			UnicastRemoteObject.exportObject(
					this.exportedObject, this.servicePort, this.clientSocketFactory, this.serverSocketFactory);
		}
		else {
			UnicastRemoteObject.exportObject(this.exportedObject, this.servicePort);
		}

		// Bind RMI object to registry.
		try {
			if (this.replaceExistingBinding) {
				this.registry.rebind(this.serviceName, this.exportedObject);
			}
			else {
				this.registry.bind(this.serviceName, this.exportedObject);
			}
		}
		catch (AlreadyBoundException ex) {
			// Already an RMI object bound for the specified service name...
			unexportObjectSilently();
			throw new IllegalStateException(
					"Already an RMI object bound for name '"  + this.serviceName + "': " + ex.toString());
		}
		catch (RemoteException ex) {
			// Registry binding failed: let's unexport the RMI object as well.
			unexportObjectSilently();
			throw ex;
		}
	}
prepare方法中有大部分是做类型检查
然后通过getRegistry方法获取RMI注册器
		// Determine RMI registry to use.
		if (this.registry == null) {
			this.registry = getRegistry(this.registryHost, this.registryPort,
				this.registryClientSocketFactory, this.registryServerSocketFactory);
			this.createdRegistry = true;
		}
获取rmi服务接口类,主要代理Service,导出为Remote
		// Initialize and cache exported object.
		this.exportedObject = getObjectToExport();
	protected Remote getObjectToExport() {
		// determine remote object
		if (getService() instanceof Remote &&
				(getServiceInterface() == null || Remote.class.isAssignableFrom(getServiceInterface()))) {
			// conventional RMI service
			return (Remote) getService();
		}
		else {
			// RMI invoker
			if (logger.isDebugEnabled()) {
				logger.debug("RMI service [" + getService() + "] is an RMI invoker");
			}
			return new RmiInvocationWrapper(getProxyForService(), this);
		}
	}
最后,注册服务
		// Bind RMI object to registry.
		try {
			if (this.replaceExistingBinding) {
				this.registry.rebind(this.serviceName, this.exportedObject);
			}
			else {
				this.registry.bind(this.serviceName, this.exportedObject);
			}
		}
getRegistry方法中,如果注册主机名被设置,就尝试调用JDK的LocateRegistry.getRegistry方法获取register
		if (registryHost != null) {
			// Host explicitly specified: only lookup possible.
			if (logger.isInfoEnabled()) {
				logger.info("Looking for RMI registry at port '" + registryPort + "' of host [" + registryHost + "]");
			}
			Registry reg = LocateRegistry.getRegistry(registryHost, registryPort, clientSocketFactory);
			testRegistry(reg);
			return reg;
		}
否则,就调用受保护重载的getRegistry方法
		else {
			return getRegistry(registryPort, clientSocketFactory, serverSocketFactory);
		}
并在重载方法中调用JDK的LocateRegistry.createRegistry方法创建新的register
	protected Registry getRegistry(
			int registryPort, RMIClientSocketFactory clientSocketFactory, RMIServerSocketFactory serverSocketFactory)
			throws RemoteException {

		if (clientSocketFactory != null) {
			if (this.alwaysCreateRegistry) {
				logger.info("Creating new RMI registry");
				return LocateRegistry.createRegistry(registryPort, clientSocketFactory, serverSocketFactory);
			}
			if (logger.isInfoEnabled()) {
				logger.info("Looking for RMI registry at port '" + registryPort + "', using custom socket factory");
			}
			synchronized (LocateRegistry.class) {
				try {
					// Retrieve existing registry.
					Registry reg = LocateRegistry.getRegistry(null, registryPort, clientSocketFactory);
					testRegistry(reg);
					return reg;
				}
				catch (RemoteException ex) {
					logger.debug("RMI registry access threw exception", ex);
					logger.info("Could not detect RMI registry - creating new one");
					// Assume no registry found -> create new one.
					return LocateRegistry.createRegistry(registryPort, clientSocketFactory, serverSocketFactory);
				}
			}
		}

		else {
			return getRegistry(registryPort);
		}
	}
- 装配RMI服务
Spring的RmiProxyFactoryBean是一个工厂bean,该bean可以为RMI服务创建代理。
RmiProxyFactoryBean初始化后,会调用其afterPropertiesSet:
	@Override
	public void afterPropertiesSet() {
		super.afterPropertiesSet();
		if (getServiceInterface() == null) {
			throw new IllegalArgumentException("Property 'serviceInterface' is required");
		}
		this.serviceProxy = new ProxyFactory(getServiceInterface(), this).getProxy(getBeanClassLoader());
	}
afterPropertiesSet会查询RMI服务
	@Override
	public void afterPropertiesSet() {
		super.afterPropertiesSet();
		prepare();
	}

	/**
	 * Fetches RMI stub on startup, if necessary.
	 * @throws RemoteLookupFailureException if RMI stub creation failed
	 * @see #setLookupStubOnStartup
	 * @see #lookupStub
	 */
	public void prepare() throws RemoteLookupFailureException {
		// Cache RMI stub on initialization?
		if (this.lookupStubOnStartup) {
			Remote remoteObj = lookupStub();
			if (logger.isDebugEnabled()) {
				if (remoteObj instanceof RmiInvocationHandler) {
					logger.debug("RMI stub [" + getServiceUrl() + "] is an RMI invoker");
				}
				else if (getServiceInterface() != null) {
					boolean isImpl = getServiceInterface().isInstance(remoteObj);
					logger.debug("Using service interface [" + getServiceInterface().getName() +
						"] for RMI stub [" + getServiceUrl() + "] - " +
						(!isImpl ? "not " : "") + "directly implemented");
				}
			}
			if (this.cacheStub) {
				this.cachedStub = remoteObj;
			}
		}
	}
然后,创建RMI服务的动态代理,这样就可以把RMI服务生命为Spring管理的bean
prepare方法中会调用lookupStub来获取RMI服务,lookupStub获取RMI服务也是通过调用JDK的
LocateRegistry.getRegistry和Naming.lookup
	protected Remote lookupStub() throws RemoteLookupFailureException {
		try {
			Remote stub = null;
			if (this.registryClientSocketFactory != null) {
				// RMIClientSocketFactory specified for registry access.
				// Unfortunately, due to RMI API limitations, this means
				// that we need to parse the RMI URL ourselves and perform
				// straight LocateRegistry.getRegistry/Registry.lookup calls.
				URL url = new URL(null, getServiceUrl(), new DummyURLStreamHandler());
				String protocol = url.getProtocol();
				if (protocol != null && !"rmi".equals(protocol)) {
					throw new MalformedURLException("Invalid URL scheme '" + protocol + "'");
				}
				String host = url.getHost();
				int port = url.getPort();
				String name = url.getPath();
				if (name != null && name.startsWith("/")) {
					name = name.substring(1);
				}
				Registry registry = LocateRegistry.getRegistry(host, port, this.registryClientSocketFactory);
				stub = registry.lookup(name);
			}
			else {
				// Can proceed with standard RMI lookup API...
				stub = Naming.lookup(getServiceUrl());
			}
			if (logger.isDebugEnabled()) {
				logger.debug("Located RMI stub with URL [" + getServiceUrl() + "]");
			}
			return stub;
		}
		catch (MalformedURLException ex) {
			throw new RemoteLookupFailureException("Service URL [" + getServiceUrl() + "] is invalid", ex);
		}
		catch (NotBoundException ex) {
			throw new RemoteLookupFailureException(
					"Could not find RMI service [" + getServiceUrl() + "] in RMI registry", ex);
		}
		catch (RemoteException ex) {
			throw new RemoteLookupFailureException("Lookup of RMI stub failed", ex);
		}
	}
总结
与JDK的RMI开发,使用spring可以简化很多工作:
- 数据模型、服务接口及其实现类是POJO,从外观上看不出是RMI服务,对代码的侵入性极小;
- 通过配置RMI导出器及其代理可以方便的修改RMI服务的配置,这样代码就有了松散的耦合性;
- spring对RemoteException的封装减少了很多样板式代码,异常处理更加友好;
- 使用JDK编写的RMI客户端可以直接连接spring编写的RMI服务;


 417
417


 被折叠的 条评论
为什么被折叠?
被折叠的 条评论
为什么被折叠?
 到【灌水乐园】发言


