


适用说明:
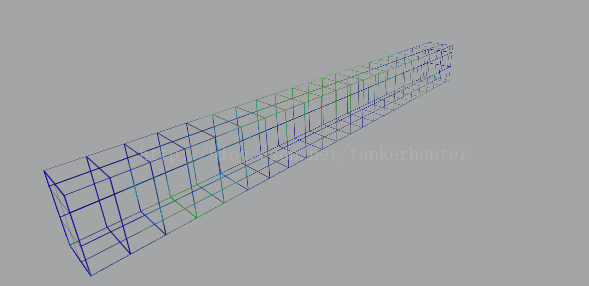
本文仅适用于模型比较简单,网格沿轴向分布的模型,如正方体,长方体等。
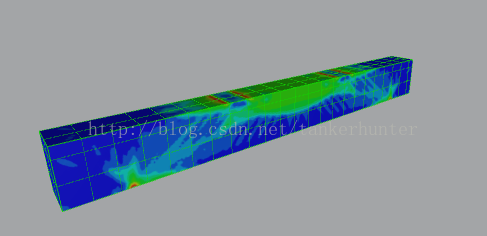
效果说明:
模型的贴图是完整的,但需要动态的按网格数来创建贴图实现指定效果,如下:
实现步骤:
一、获取网格数据
[System.Serializable]
public struct MeshStruct  {
    public int[] triangles;       // 网格的三角形
    public Vector2[] uvs;         // 网格的UV坐标
    public MeshStruct(int[] triangles,Vector2[] uvs)
    {
        this.vertices = vertices;
        this.triangles = triangles;
        this.uvs = uvs;
    }
}
以上结构体说明需要获取到的网格信息
二、限制获取颜色区域
using UnityEngine;
using UnityEngine.UI;
using UnityEngine.Events;
using System.Collections.Generic;

public static class TextureUtility
{
    /// <summary>
    /// 利用贴图获取网格贴图
    /// </summary>
    /// <param name="meshStruct"></param>
    /// <param name="texture"></param>
    /// <returns></returns>
    public static Texture2D GetLineTexture(MeshStruct meshData, Texture2D texture)
    {
        int width = texture.width;
        int height = texture.height;
        Texture2D newTexture = new Texture2D(width, height, TextureFormat.ARGB32, false);
        newTexture.alphaIsTransparency = true;
        Color[] colors = new Color[width * height];
        for (int i = 0; i < colors.Length; i++){
            colors[i] = Color.clear;
        }
        newTexture.SetPixels(colors);

        for (int k = 0; k < meshData.triangles.Length - 2; k += 3)
        {
            Vector2[] _uvs = new Vector2[3];
            int tID1 = meshData.triangles[k];
            int tID2 = meshData.triangles[k + 1];
            int tID3 = meshData.triangles[k + 2];

            _uvs[0] = meshData.uvs[tID1];
            _uvs[1] = meshData.uvs[tID2];
            _uvs[2] = meshData.uvs[tID3];

            for (int i = 0; i < _uvs.Length; ++i)
            {
                for (int j = i + 1; j < _uvs.Length; ++j)
                {
                    if (_uvs[i].x == _uvs[j].x || _uvs[i].y == _uvs[j].y)//轴向
                    {
                        float uvx1 = _uvs[i].x;
                        float uvy1 = _uvs[i].y;
                        float uvx2 = _uvs[j].x;
                        float uvy2 = _uvs[j].y;

                        int px1 = (int)(uvx1 * width);
                        int py1 = (int)(uvy1 * height);
                        int px2 = (int)(uvx2 * width);
                        int py2 = (int)(uvy2 * height);

                        int minpx = px1 < px2 ? px1 : px2;
                        int minpy = py1 < py2 ? py1 : py2;

                        int pw = Mathf.FloorToInt(Mathf.Abs((uvx1 - uvx2) * width));
                        int ph = Mathf.FloorToInt(Mathf.Abs((uvy1 - uvy2) * height));

                        for (int m = 0; m <= ph; m++)
                        {
                            for (int n = 0; n <= pw; n++)
                            {
                                Color colorline = texture.GetPixel(minpx + n, minpy + m);
                                newTexture.SetPixel(minpx + n, minpy + m, colorline);
                            }
                        }
                    }
                }
            }
        }
        newTexture.Apply();
        return newTexture;
    }
}
三、修改材质球shader类型
由于standard材质球不支持双面显示效果,这里使用这个Shader:
Particles/Alpha Blended public static Material GetParticalMaterial(Texture texture)
{
// Unity has a built-in shader that is useful for drawing
// simple colored things.
Shader shader = Shader.Find("Particles/Alpha Blended");
Material particMat = new Material(shader);
particMat.mainTexture = texture;
return particMat;
}


 被折叠的 条评论
为什么被折叠?
被折叠的 条评论
为什么被折叠?
 到【灌水乐园】发言


