


前言
实现基本的用户信息展示和分页是写一个项目的基础,接下来我将尽可能详细的给大家演示如何使SpringBoot+LayUI+Mybatis-Plus实现用户信息展示及分页
首先编写简单的前端页面
<!DOCTYPE html>
<html xmlns:th="http://www.thymeleaf.org">
<head>
<meta charset="UTF-8">
<title>Title</title>
<link rel="stylesheet" th:href="@{/layui/css/layui.css}" media="all">
<link rel="stylesheet" th:href="@{/css/layuimini.css?v=2.0.4.2}" media="all">
<link rel="stylesheet" th:href="@{/css/themes/default.css}" media="all">
<link rel="stylesheet" th:href="@{/lib/font-awesome-4.7.0/css/font-awesome.min.css}" media="all">
</head>
<body>
//在body中定义一个table
<table id="list" lay-filter="test" style="width: 100%"></table>
<script th:src="@{/layui/layui.js}"></script>
<script th:inline="javascript">
var ctxPath = [[@{/}]];
//在script中
layui.use('table', function(){
var table = layui.table;
table.render({
elem: '#list'
,url: ctxPath + 'user/userList' //数据接口
,page: true //是否分页
,cols: [[ //表头
{field: 'id', title: 'ID', width:80, sort: true, fixed: 'left'}
,{field: 'name', title: '用户名', width:80}
,{field: 'age', title: '年龄', width:80, sort: true}
,{field: 'sex', title: '性别', width:80}
]]
});
});
</script>
</body>
</html>
如果有不明白LayUI的小伙伴可以参考LayUI的使用文档.
我们知道,在table.render的url参数中,除了请求路径,layui的数据表格还会自动的传入两个参数page和limit,正是用于分页
Controller层代码
@Slf4j
@Controller
@RequestMapping("user")
public class UserController {

    @Resource
    private UserMapper userMapper;

    @RequestMapping("userList")
    @ResponseBody
    //直接使用@RequestParam注解获取请求路径上的参数,然后求出分页查询的起始值
    private Result<Object> getUserList(@RequestParam(value = "page") int page,@RequestParam(value = "limit") int limit){
        int startPage = (page - 1) * limit;//分页查询起始值
        int endPage = limit;
        List<User> list = userMapper.selectList(new QueryWrapper<User>().last("limit " + startPage + "," + endPage));//注意这里limit后面一定要加空格,要不然sql语句中显示的是limitstartPage,会报错
        Integer count = userMapper.selectCount(new QueryWrapper<User>().last("limit " + startPage + "," + endPage));
        return Result.success(list,count);
    }
}
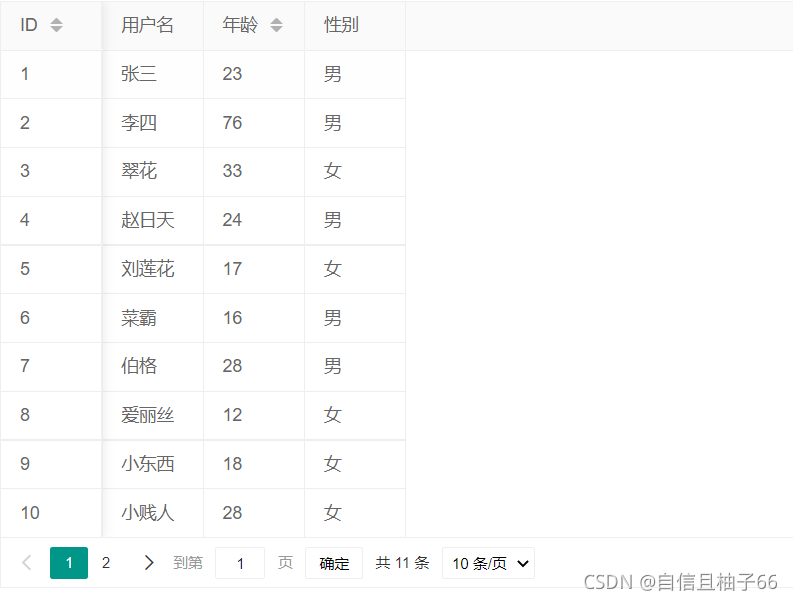
完成以上步骤就可以启动项目运行

成功!


 609
609

 被折叠的 条评论
为什么被折叠?
被折叠的 条评论
为什么被折叠?
 到【灌水乐园】发言


