


这里的实现demo来自DWR的官方实例中,我这边主要对其中用到的一些API进行注释。便于后期的学习。
1.实现原理简单剖析
1.web项目中都是通过uri地址作为唯一指定具体页面的途径
譬如说uri:/dwr/chat/java-chat.html 或者/dwr/xxx.do2.为此dwr可以通过uri获取所有在任何浏览器中打开uri的页面session
这些所有的session表示为一个集合3.有了这个集合,我们便可以对所有用户所在当前页面进行群发操作。当然这里结合Util类来
执行服务端和客户端的一些js操作。常用:
1、直接填充内容
2、调用js函数等
这样下面的例子看起来应该简单多了。
2.实现流程:
1.聊天实现类:
public class JavaChat
{
    /**
     * @param text The new message text to add
     */
    public void addMessage(String text)
    {
        // Make sure we have a list of the list 10 messages
        if (text != null && text.trim().length() > 0)
        {
            messages.addFirst(new Message(text));
            while (messages.size() > 10)
            {
                messages.removeLast();
            }
        }

        WebContext wctx = WebContextFactory.get();
        String currentPage = wctx.getCurrentPage();

        // Clear the input box in the browser that kicked off this page only
        Util utilThis = new Util(wctx.getScriptSession());
        utilThis.setValue("text", "");

        // For all the browsers on the current page:
        Collection sessions = wctx.getScriptSessionsByPage(currentPage);
        Util utilAll = new Util(sessions);

        // Clear the list and add in the new set of messages
        utilAll.removeAllOptions("chatlog");
        utilAll.addOptions("chatlog", messages, "text");
    }

    /**
     * The current set of messages
     */
    private LinkedList messages = new LinkedList();

    /**
     * The log stream
     */
    protected static final Logger log = Logger.getLogger(JavaChat.class);
}
2.聊天辅助bean实体:
public class Message
{
    /**
     * @param newtext the new message text
     */
    public Message(String newtext)
    {
        text = newtext;

        if (text.length() > 256)
        {
            text = text.substring(0, 256);
        }
    }

    /**
     * @return the message id
     */
    public long getId()
    {
        return id;
    }

    /**
     * @return the message itself
     */
    public String getText()
    {
        return text;
    }

    /**
     * When the message was created
     */
    private long id = System.currentTimeMillis();

    /**
     * The text of the message
     */
    private String text;
}
3.dwr配置
<dwr>

  <allow>

	 <!-- chat -->
    <create creator="new" javascript="JavascriptChat" scope="application">
      <param name="class" value="org.getahead.dwrdemo.chat.JavascriptChat"/>
    </create>
    <create creator="new" javascript="JavaChat" scope="application">
      <param name="class" value="org.getahead.dwrdemo.chat.JavaChat"/>
    </create>
    <convert converter="bean" match="org.getahead.dwrdemo.chat.Message"/>

  </allow>

</dwr>
4.页面调用:
<head>
  <meta http-equiv="Content-Type" content="text/html; charset=ISO-8859-1" />
  <title>DWR Thin Chat Version 2.0</title>
  <script type='text/javascript' src='../dwr/engine.js'> </script>
  <script type='text/javascript' src='../dwr/interface/JavaChat.js'> </script>
  <script type='text/javascript' src='../dwr/util.js'> </script>
  <script type="text/javascript">
    function sendMessage() {
      JavaChat.addMessage(dwr.util.getValue("text"));
    }
  </script>
  <link rel="stylesheet" type="text/css" href="../generic.css" />
</head>

<body οnlοad="dwr.engine.setActiveReverseAjax(true);">

<h1>Java Chat</h1>

<p>This is a very simple chat demo that uses reverse ajax to collect messages
and server-side browser manipulation to update the pages with the results.</p>

<p>
  Your Message:
  <input id="text" οnkeypress="dwr.util.onReturn(event, sendMessage)"/>
  <input type="button" value="Send" οnclick="sendMessage()"/>
</p>
<hr/>

<ul id="chatlog" style="list-style-type:none;">
</ul>

</body>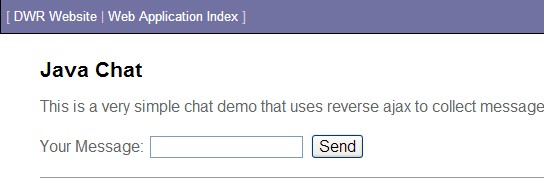


 4244
4244


 被折叠的 条评论
为什么被折叠?
被折叠的 条评论
为什么被折叠?
 到【灌水乐园】发言


