


1、相关概念
AOP
AOP(Aspect Oriented Programming)称为面向切面编程,可以说是OOP(Object Oriented Programming,面向对象编程)的补充和完善。OOP引入封装、继承、多态等概念来建立一种对象层次结构,可以很好地模拟事物处理过程中纵向的各个模块,但并不适合定义横向的关系。
例如在一个流程中的各个操作过程如下,每个操作过程需要进行日志的记录功能,因此在每个操作模块中都需要写日志记录的代码,这种散布在各个模块中的与具体的模块无关的代码被称为横切(cross cutting),在OOP设计中,它导致了大量代码的重复,而不利于各个模块的重用。
AOP技术恰恰相反,它利用一种称为"横切"的技术,剖解开封装的对象内部,将那些多个类共同使用的公共行为封装到一个可重用模块,提高了代码的重用性,降低模块之间的耦合度,并有利于未来的可操作性和可维护性。在程序开发中主要用来解决一些系统层面上的问题,比如日志,事务,权限等待,Struts2的拦截器设计就是基于AOP的思想,是个比较经典的例子。
AOP把软件系统分为两个部分:核心关注点和横切关注点。业务处理的主要流程是核心关注点,与之关系不大的部分是横切关注点。横切关注点的一个特点是,他们经常发生在核心关注点的多处,而各处基本相似,比如权限认证、日志、事物。AOP的作用在于分离系统中的各种关注点,将核心关注点和横切关注点分离开来。
AOP的实现方式有两种,一种是以AspectJ为代表的预编译方式,另一种是以Spring为代表的运行期动态代理。与AspectJ相比,SpringAOP并不是一种综合全面的AOP解决方案,它只是提供了一种与SpringIOC容器的整合用于解决开发中的常见问题。
术语
- Aspect(切面):横切关注点的模块化类,里面可以定义切入点和通知
- 目标对象(Target Object): 实现主要业务流程的核心关注点,是被通知或被代理对象。包含连接点
- JointPoint(连接点):程序执行过程中被拦截到的点,一般是对象的某个具体方法。
- Advice(通知):AOP在特定的切入点上执行的处理操作
- Pointcut(切入点):就是带有通知的连接点,AOP中通知和切入点表达式相关联
- AOP代理(AOP Proxy):AOP框架通过代理目标类所创建的对象。
- weave(织入):将切面应用到目标对象并创建AOP代理对象创建的过程
- introduction(引入):在不修改代码的前提下,引入可以在运行期为类动态地添加一些方法或字段
通知类型
- Before:在连接点的方法执行之前通知,@Before只需要指定切入点表达式即可
- AfterReturning:在目标方法正常完成后通知,@AfterReturning除了指定切入点表达式后,还可以指定一个返回值形参名returning,代表目标方法的返回值
- AfterThrowing:连接点方法抛出异常而退出时通知,@AfterThrowing除了指定切入点表达式后,还可以指定一个throwing的返回值形参名,可以通过该形参名来访问目标方法中所抛出的异常对象
- After:在目标方法完成之后执行,无论目标方法是否抛出异常。@After可以指定一个切入点表达式
- Around:环绕通知,在目标方法完成前后定义要执行的操作,环绕通知是最重要的通知类型,像事务,日志等都是环绕通知
2、Spring中使用AOP
基于XML方式配置
第一步使用maven创建一个项目并在pom.xml文件中导入依赖如下,除了spring和junit之外,还需要引入spring-aop、aspectjrt和aspectjweaver三个依赖。
<dependencies>
<dependency>
<groupId>org.springframework</groupId>
<artifactId>spring-context</artifactId>
<version>5.2.5.RELEASE</version>
</dependency>
<dependency>
<groupId>org.springframework</groupId>
<artifactId>spring-aop</artifactId>
<version>5.2.5.RELEASE</version>
</dependency>
<dependency>
<groupId>org.aspectj</groupId>
<artifactId>aspectjrt</artifactId>
<version>1.9.5</version>
</dependency>
<dependency>
<groupId>org.aspectj</groupId>
<artifactId>aspectjweaver</artifactId>
<version>1.9.5</version>
</dependency>
<dependency>
<groupId>org.junit.jupiter</groupId>
<artifactId>junit-jupiter</artifactId>
<version>5.4.2</version>
<scope>test</scope>
</dependency>
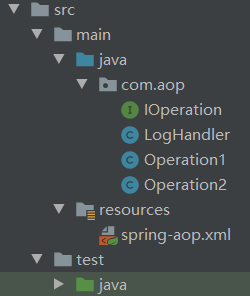
</dependencies>第二步创建一个简单的Java项目,如下图所示有一个IOperation接口,类Operation1与2实现了接口的doOperation()方法,代表执行业务逻辑的核心关注点。LogHandler用于进行日志输出的切面,代表横切关注点类,通过实现spring.aop的MethodBeforeAdvice、AfterReturningAdvice接口来定义切入点Before和AfterReturning类型的通知。类似地还有ThrowsAdvice接口的afterThrowing()方法
public interface IOperation {
    void doOperation();
}

public class Operation1 implements IOperation {
    public void doOperation() {
        System.out.println("执行业务操作1");
    }
}

public class Operation2 implements IOperation {
    public void doOperation() {
        System.out.println("执行业务操作2");
    }
}

//LogHandler
import org.springframework.aop.AfterReturningAdvice;
import org.springframework.aop.MethodBeforeAdvice;
import java.lang.reflect.Method;

public class LogHandler implements MethodBeforeAdvice, AfterReturningAdvice {
    public void afterReturning(Object o, Method method, Object[] objects, Object o1) throws Throwable {
        System.out.println("操作执行前,打印日志...");
    }

    public void before(Method method, Object[] objects, Object o) throws Throwable {
        System.out.println("操作执行后,打印日志...");
    }
}
第三步对spring的AOP进行配置,在resource下创建spring-aop.xml文件如下:首先定义被代理类的Bean--o1、o2和切面类logHandler。之后配置切入点和切面。最后设置AOP代理proxy1和proxy2.
<beans xmlns="http://www.springframework.org/schema/beans"
       xmlns:xsi="http://www.w3.org/2001/XMLSchema-instance"
       xsi:schemaLocation="http://www.springframework.org/schema/beans http://www.springframework.org/schema/beans/spring-beans.xsd">

    <!-- 定义目标类 -->
    <bean id="o1" class="com.aop.Operation1"/>
    <bean id="o2" class="com.aop.Operation2"/>
    <!-- 定义切面类 -->
    <bean id="logHandler" class="com.aop.LogHandler"/>

    <!-- 定义切入点,这里定义所有名为doOperaion的方法 -->
    <bean id="logPointcut" class="org.springframework.aop.support.JdkRegexpMethodPointcut">
        <property name="pattern" value=".*doOperation"/>
    </bean>
    <!-- 配置切面,使切入点与通知相关联 -->
    <bean id="logHandlerAdvisor" class="org.springframework.aop.support.DefaultPointcutAdvisor">
        <property name="advice" ref="logHandler"/>
        <property name="pointcut" ref="logPointcut"/>
    </bean>

    <!-- 为o1设置代理 -->
    <bean id="proxy1" class="org.springframework.aop.framework.ProxyFactoryBean">
        <!-- 代理的目标o1 -->
        <property name="target" ref="o1"/>
        <!-- 使用切面 -->
        <property name="interceptorNames" value="logHandlerAdvisor"/>
        <!-- 代理对应的接口 -->
        <property name="proxyInterfaces" value="com.aop.IOperation"/>
    </bean>
    <!-- 为o2设置代理 -->
    <bean id="proxy2" class="org.springframework.aop.framework.ProxyFactoryBean">
        <!-- 代理的目标o2 -->
        <property name="target" ref="o2"/>
        <!-- 使用切面 -->
        <property name="interceptorNames" value="logHandlerAdvisor"/>
        <!-- 代理对应的接口 -->
        <property name="proxyInterfaces" value="com.aop.IOperation"/>
    </bean>
</beans>
第四步在测试类中使用AOP代理proxy1、proxy2执行相应的操作
    @Test
    void printLog() {
        //读取上下文配置文件
        ApplicationContext appCtx = new ClassPathXmlApplicationContext("spring-aop.xml");
        IOperation op1 = (IOperation) appCtx.getBean("proxy1");      //通过代理proxy来使用Operation1对象
        IOperation op2 = (IOperation) appCtx.getBean("proxy2");

        op1.doOperation();
        op2.doOperation();
    }
执行结果如下左图,可见Operation1、Operation2得到了执行,并且在执行前后调用了切面类logHandler的方法进行了日志的输出。整个AOP的结构如下右图所示。


通过aop标签配置
由于通过xml方式配置过于繁琐,在spring2.0版本之后大多使用aop标签的方式进行配置。与xml不同的是,首先切面类不需要实现特定的接口的方法
//定义用于日志输出的切面类
public class LogHandler {
    public void beforeLog() {
        System.out.println("操作执行前打印日志...");
    }
}
其次在xml文件中使用<aop>标签进行配置如下,首先在<beans>标签内通过引入aop标签xmlns:aop="http://www.springframework.org/schema/aop",接着定义定义目标类o1、o2和切面类logHandler的bean。然后通过<aop:config>配置切面,并且在其中配置切入点和通知。
<?xml version="1.0" encoding="UTF-8"?>
<beans xmlns="http://www.springframework.org/schema/beans"
       xmlns:xsi="http://www.w3.org/2001/XMLSchema-instance" xmlns:aop="http://www.springframework.org/schema/aop"
       xsi:schemaLocation="http://www.springframework.org/schema/beans http://www.springframework.org/schema/beans/spring-beans.xsd http://www.springframework.org/schema/aop https://www.springframework.org/schema/aop/spring-aop.xsd">

    <!-- 定义目标类 -->
    <bean id="o1" class="com.aop.Operation1"/>
    <bean id="o2" class="com.aop.Operation2"/>
    <!-- 定义切面类,也就是切入点执行前后需要做的事情 -->
    <bean id="logHandler" class="com.aop.LogHandler"/>


    <!-- 切面配置 -->
    <aop:config>
        <!-- 配置切面为logHandler类 -->
        <aop:aspect id="logAop" ref="logHandler">
            <!-- 配置切入点为com.aop包下所有类的doOperation方法 -->
            <aop:pointcut id="operationPoint" expression="execution(* com.aop..*.*doOperation(..))"/>
            <!-- 配置before前置通知为beforeLog()方法 -->
            <aop:before method="beforeLog" pointcut-ref="operationPoint"/>
        </aop:aspect>
    </aop:config>
</beans>
在配置切入点时用到了execution表达式,还有一些常用的表达式如下。此外还有within()、this()、target()、args()、bean()等其他匹配的表达式类型。例如在com.aop.Operation2类中有doOperation()方法,
| execution(public * *(..)) | 切入点为所有 public 方法 |
| execution(* set*(..)) | 切入点为所有 set 方法 |
| execution(* com.aop.Operation2.*(..)) | 切入点为Operation2类的所有方法 |
| execution(* com.aop..(..)) | 切入点为aop包下所有类的方法 |
| execution(* com...(..)) | 切入点为com的所有包及其子包的所有方法 |
| execution(* com.aop..do*(..)) | 切入点为com.aop下所有类中以"do"开头的方法 |
配置通知使用的是<aop:before>标签,代表before类型的通知,类似地还有<aop:after-returning>、<aop:after-throwing>、<aop:after>、<aop:around>分别对应其他的通知类型。
最后在测试类中使用AOP,与xml配置不同的是,aop标签配置后可以直接使用原对象o1、o2而不必使用其代理对象
    @Test
    void printLog() {
        //读取上下文配置文件
        ApplicationContext appCtx = new ClassPathXmlApplicationContext("spring-aop.xml");
        IOperation op1 = (IOperation) appCtx.getBean("o1");      //直接使用Operation1对象
        IOperation op2 = (IOperation) appCtx.getBean("o2");

        op1.doOperation();
        op2.doOperation();
    }
Introduction引入
与一些具有动态类的高级语言相比,Java一旦编译完成就无法再为类添加新的功能了。这时我们可以使用引入(Introduction)来为已经编译好的类添加新的方法。如下所示我们要为Operation1类引入新的方法,首先定义引入的接口IIntroduction,接口的默认实现类IntroducedOperation
public interface IIntroduction {
    public void introduceOperate();
}

public class IntroducedOperation implements IIntroduction {
    public void introduceOperate(){
        System.out.println("执行引入的操作...");
    }
}
之后再<aop:config>中配置为Operation1类引入上面的接口
    <aop:config>
        <aop:aspect id="logAop" ref="logHandler">
            <!-- 为Operation1类引入IIntroduction接口 -->
            <aop:declare-parents types-matching="com.aop.Operation1"
                                 implement-interface="com.aop.IIntroduction"
                                 default-impl="com.aop.IntroducedOperation"/>
        </aop:aspect>
</aop:config>在test中测试如下,可见通过Operation1的对象o1可以使用引入的方法![]()
    @Test
    void printLog() {
        //读取上下文配置文件
        ApplicationContext appCtx = new ClassPathXmlApplicationContext("spring-aop.xml");
        //将Operation1对象o1转化为IIntroduction,并且调用引入的方法
        IIntroduction introduction=(IIntroduction) appCtx.getBean("o1");
        introduction.introduceOperate();
    }
3、AspectJ的AOP
使用配置
首先在配置文件中开启aspectJ切面类的自动扫描和代理
<?xml version="1.0" encoding="UTF-8"?>
<beans xmlns="http://www.springframework.org/schema/beans"
       xmlns:xsi="http://www.w3.org/2001/XMLSchema-instance"
       xmlns:context="http://www.springframework.org/schema/context"
       xmlns:aop="http://www.springframework.org/schema/aop"
       xsi:schemaLocation="http://www.springframework.org/schema/beans http://www.springframework.org/schema/beans/spring-beans.xsd http://www.springframework.org/schema/context https://www.springframework.org/schema/context/spring-context.xsd http://www.springframework.org/schema/aop https://www.springframework.org/schema/aop/spring-aop.xsd">

    <!-- 对com.aop.aspectj包下的类进行自动扫描 -->
    <context:component-scan base-package="com.aop.aspectj"/>
    <!-- 开启aspectj自动代理 -->
    <aop:aspectj-autoproxy/>
</beans>
第二步定义切面类,AspectJ会自动扫描并将添加了@Component和@Aspect注解的类注册为切面类。在切面类中通过@Pointcut注解以函数的方式定义切入点,其返回值为void。通过@Before来定义前置通知,括号内的参数为切入点,可以是之前已经定义的切入点,也可以是表达式。
package com.aop.aspectj;

import org.aspectj.lang.annotation.Aspect;
import org.aspectj.lang.annotation.Before;
import org.aspectj.lang.annotation.Pointcut;
import org.springframework.stereotype.Component;

@Component
@Aspect
public class LogAspect {
    //定义切入点,其接入点为类Operation1下的所有方法
    @Pointcut("execution(* com.aop.aspect.Operation1.*(..))")
    public void logPoint(){}

    //定义前置通知
    @Before("logPoint()")
    public void logBefore(){
        System.out.println("aspect输出前置通知");
    }
}
最后就可以定义并使用目标类Operation1的doOperation()方法执行操作,输出结果:![]()
package com.aop.aspectj;

import org.springframework.stereotype.Component;

@Component
public class Operation1 {
    public void doOperation(){
        System.out.println("执行操作");
    }
}


//测试方法
    @Test
    void aspectJ(){
        ApplicationContext appCtx = new ClassPathXmlApplicationContext("aspectj-aop.xml");
        Operation1 op1=(Operation1)appCtx.getBean("operation1");
        op1.doOperation();
    }
也可以使用注解的方式定义配置文件,在@Configuration的配置类上通过@ComponentScan来扫描组件类,并且通过@EnableAspectJAutoProxy开启AspectJ的自动代理。最后在使用aop时中通过AspectConfig类来加载配置类,而不是使用xml的配置文件
package com.aop.aspectj;

import org.springframework.context.annotation.ComponentScan;
import org.springframework.context.annotation.Configuration;
import org.springframework.context.annotation.EnableAspectJAutoProxy;

@Configuration
@ComponentScan("com.aop.aspectj")
@EnableAspectJAutoProxy
public class AspectConfig {
}

//测试类
    @Test
    void aspectJ(){
        //通过AspectConfig来加载配置类
        ApplicationContext appCtx=new AnnotationConfigApplicationContext(AspectConfig.class);
        Operation1 op1=(Operation1)appCtx.getBean("operation1");
        op1.doOperation();

    }
Advice通知
上面的例子中使用了@Before定义前置通知,类似地使用@AfterReturning定义函数返回时通知,其参数pointcut指定切入点,这里直接使用了表达式而不是之前定义的切入点。returning参数来接收切入点函数返回的结果。@AfterThrowing定义函数抛出异常返回时的通知,可以使用throwing参数来接收异常对象。@After来定义后置通知,无论函数是否抛出异常都会执行。
@Component
@Aspect
public class LogAspect {
    @AfterReturning(pointcut = "execution(* com.aop.aspectj.Operation1.doReturn(..))",
            returning = "returnValue")
    public void logReturning(Object returnValue){
        System.out.println("返回值:"+returnValue);
    }
}值得注意的是@Around定义的环绕通知的使用方法。环绕通知接收ProceedingJoinPoint对象作为参数,然后利用该对象的proceed()方法执行切入点的方法并得到返回值Object。因此我们可以在proceed()前后定义需要执行的前置、后置通知操作
//切面类的定义
@Component
@Aspect
public class LogAspect {
    @Pointcut("execution(* com.aop.aspectj.Operation1.*(..))")
    public void logPoint(){}

    @Around("logPoint()")
    public Object logAround(ProceedingJoinPoint pjp) throws Throwable {
        System.out.println("环绕通知前");
        Object obj=pjp.proceed();       //执行切入点操作
        System.out.println("环绕通知后,返回值:"+obj);
        return obj;
    }
}

//目标类Operation1
@Component
public class Operation1 {
    public String doReturn(){
        System.out.println("执行操作...");
        return "这是返回值";
    }
}

//测试类
@Test
    void aspectJ(){
        ApplicationContext appCtx = new ClassPathXmlApplicationContext("aspectj-aop.xml");
        Operation1 op1=(Operation1)appCtx.getBean("operation1");
        op1.doReturn();
    }
运行结果如下:
传递参数给Advice
使用args可以在通知中对切入点函数的参数进行捕获,并且传入到通知
//切面类
@Component
@Aspect
public class LogAspect {
    @Pointcut("execution(* com.aop.aspectj.Operation1.*(..))")
    public void logPoint(){}

    @Before("logPoint() && args(strArg)")                    //捕获连接点方法的参数
    public void logBefore(String strArg){                    //将参数传入到方法
        System.out.println("Advice接收参数:"+strArg);
    }
}

//目标类
@Component
public class Operation1 {
    //连接点函数
    public void doOperation(String str){
        System.out.println("执行操作");
    }
}

//测试方法
   @Test
    void aspectJ(){
        ApplicationContext appCtx = new ClassPathXmlApplicationContext("aspectj-aop.xml");
        Operation1 op1=(Operation1)appCtx.getBean("operation1");
        op1.doOperation("一个字符串参数");
}运行结果为![]()
类似地,可以使用@annotation来对注解中的参数进行捕获:@Before("logPoint() && @annotation(strAnno)")
//自定义注解
@Retention(RetentionPolicy.RUNTIME)
@Target(ElementType.METHOD)
public @interface MethodAnno {
    String value();
}

//目标类
@Component
public class Operation1 {
    @MethodAnno("这是一个注解字符串")                              //连接点函数添加注解
    public void doOperation(){
        System.out.println("执行操作");
    }
}

//切面类
@Component
@Aspect
public class LogAspect {
    @Pointcut("execution(* com.aop.aspectj.Operation1.*(..))")
    public void logPoint(){}

    @Before("logPoint() && @annotation(anno)")                    //通知接收注解
    public void logBefore(MethodAnno anno){
        System.out.println("Advice接收注解:"+anno.value());
    }
}输出结果![]()


 262
262


 被折叠的 条评论
为什么被折叠?
被折叠的 条评论
为什么被折叠?
 到【灌水乐园】发言


