


sql:https://download.csdn.net/download/tian__c/19475671
接口文档地址:https://easydoc.xyz/s/78237135
环境搭建
1、安装Linux虚拟机
-
下载&安装VirtualBox:https://www.virtualbox.org/, 要开启CPU虚拟化
-
下载vagrant
-
https://app.vagrantup.com/boxes/search Vagrant 官方镜像仓库
-
https://www.vagrantup.com/downloads.html Vagrant 下载
-
安装后重启系统。cmd中输入vagrant有版本代表成功了。
-
vagrant init centos/7,即可初始化一个centos7系统。(注意这个命令在哪个目录下执行的,他的Vagrantfile就生成在哪里) -
vagrant up启动虚拟机环境。 -
启动完成后ctrl+c退出
-
前面的页面中有ssh账号信息。
vagrant ssh就会连上虚拟机。可以使用exit退出
下次使用也可以直接vagrant up直接启动,但要确保当前目录在Vagrantfile下,不过我们也可以配置环境变量。启动后再次vagrant ssh连上即可
也可以用vagrantbox直接右键启动

默认虚拟机的ip地址不是固定ip,开发不方便
- 修改Vagrantfile
- 使用ipconfig查看ip,并修改
config.vm.network "private_network",ip:"169.254.249.10"" vagrant reload重启nagrant ssh连接ip addr查看ip- 互相能ping通

2、安装docker
#卸载系统之前的docker
sudo yum remove docker \
                  docker-client \
                  docker-client-latest \
                  docker-common \
                  docker-latest \
                  docker-latest-logrotate \
                  docker-logrotate \
                  docker-engine


sudo yum install -y yum-utils

# 配置镜像
sudo yum-config-manager \
    --add-repo \
    https://download.docker.com/linux/centos/docker-ce.repo

sudo yum install docker-ce docker-ce-cli containerd.io

sudo systemctl start docker
# 设置开机自启动
sudo systemctl enable docker

docker -v
sudo docker images

# 配置镜像加速
sudo mkdir -p /etc/docker
sudo tee /etc/docker/daemon.json <<-'EOF'
{
  "registry-mirrors": ["https://chqac97z.mirror.aliyuncs.com"]
}
EOF

sudo systemctl daemon-reload
sudo systemctl restart docker
docker安装mysql
- https://registry.hub.docker.com/search?q=mysql&type=image
- 用docker安装上mysql,去docker仓库里搜索mysql
sudo docker pull mysql:5.7

# --name指定容器名字 -v目录挂载 -p指定端口映射  -e设置mysql参数 -d后台运行
sudo docker run -p 3306:3306 --name mysql \
-v /mydata/mysql/log:/var/log/mysql \
-v /mydata/mysql/data:/var/lib/mysql \
-v /mydata/mysql/conf:/etc/mysql \
-e MYSQL_ROOT_PASSWORD=root \
-d mysql:5.7

参数说明
-p 3306:3306: 将容器的3306端口映射到主机的3306端口
-v /mydata/mysg/conf:/etc/mysgl:将配置文件夹挂载到主机
-v /mydata/mysg/log:/var/log/mysg!:将日志文件夹挂载到主机
-v /mydata/mysgl/data:/var/ib/mysgl/:将配置文件夹挂载到主机
-e MYSQL ROOT_ PASSWORD=root:初始化root用户的密码
su root 密码为vagrant,这样就可以不写sudo了
[root@localhost vagrant]# docker ps 查看正在运行的服务

Navicat连接mysql:
- 地址:169.254.249.10
- 账号:root
- 密码:root
进入mysql容器内部查看:
docker exec -it mysql bin/bash
exit;
mysql配置:
因为有目录映射,所以我们可以直接在镜像外执行
vi /mydata/mysql/conf/my.conf
[client]
default-character-set=utf8

[mysql]
default-character-set=utf8

[mysqld]
init_connect='SET collation_connection = utf8_unicode_ci'
init_connect='SET NAMES utf8'
character-set-server=utf8
collation-server=utf8_unicode_ci
skip-character-set-client-handshake
skip-name-resolve
重启:docker restart mysql
docker安装redis
- 如果直接挂载的话docker会以为挂载的是一个目录,所以我们先创建一个文件然后再挂载,在虚拟机中。
# 在虚拟机中
mkdir -p /mydata/redis/conf
touch /mydata/redis/conf/redis.conf

docker pull redis

docker run -p 6379:6379 --name redis \
-v /mydata/redis/data:/data \
-v /mydata/redis/conf/redis.conf:/etc/redis/redis.conf \
-d redis redis-server /etc/redis/redis.conf

# 直接进去redis客户端。
docker exec -it redis redis-cli
- 默认是不持久化的。在配置文件中输入appendonly yes,就可以aof持久化了。修改完docker restart redis,docker -it redis redis-cli
vi /mydata/redis/conf/redis.conf
# 插入下面内容
appendonly yes
保存

重启
docker restart redis
- 设置redis容器在docker启动的时候启动
docker update redis --restart=always
用Redis Desktop Manager连接redis

3、开发环境统一
- jdk1.8以上
- maven:在settings中配置阿里云镜像,配置jdk1.8。
     <!-- 阿里云仓库 -->
<mirrors>
	 <mirror>
			<id>nexus-aliyun</id>
			<mirrorOf>*</mirrorOf>
			<name>Nexus aliyun</name>
			<url>http://maven.aliyun.com/nexus/content/groups/public</url>
	</mirror>
</mirrors>
<profiles>
	<profile>
		<id>jdk-1.8</id>
		<activation>
			<activeByDefault>true</activeByDefault>
			<jdk>1.8</jdk>
		</activation>

		<properties>
			<maven.compiler.source>1.8</maven.compiler.source>
			<maven.compiler.target>1.8</maven.compiler.target>
			<maven.compiler.compilerVersion>1.8</maven.compiler.compilerVersion>
		</properties>
	</profile>
</profiles>
IDEA安装插件lombok,mybatisX。IDEA设置里配置好maven
安装vscode
下载vsCode用于前端管理系统。在vsCode里安装插件。
- Auto Close Tag
- Auto Rename Tag
- Chinese
- ESlint
- HTML CSS Support
- HTML Snippets
- JavaScript ES6
- Live Server
- open in brower
- Vetur
- Vue 2 Snippets
安装配置git
下载git客户端,右键桌面Git GUI/bash Here。去bash
# 配置用户名
git config --global user.name "username"  //(名字,随意写)

# 配置邮箱
git config --global user.email "55333@qq.com" // 注册账号时使用的邮箱

# 配置ssh免密登录
ssh-keygen -t rsa -C "55333@qq.com"
三次回车后生成了密钥:公钥私钥
cat ~/.ssh/id_rsa.pub

也可以查看密钥
浏览器登录码云后,个人头像上点设置--ssh公钥---随便填个标题---复制
ssh-rsa AAAAB3NzaC1yc2EAAAADAQABAAABgQCg0FWB5ait+D5iTyZ8Mviq1BO3bvWImDyonsz5lZ/Vj9xkUW+92tAWzpdBanFEZcDVfNPW1woOAp24oXSr+9MFY1E501QIsV1cvI1gt9QWPjMhlfTgs3sJ3ngOATEIJJMPWdZr6d+KJvp2sQN5gQJxv2EEYqSjP190bECO4fybKBZdimiN+++thint/QHIPUdw7MTlfiUv8vYgvoGgTkZc8EU+dFql7YraPanOteE68O1LNCJgUJZHj3kbzA/pcu0SLW0B7GIqNXEvqmSUzkAofbPERtI2yk9HXm8+VymEcS+vHlcYE6e1Y9mSkqrUX29dem6esvcMPsla8RFUs9md2Ps60VIBE1tVvTp6naLc4Zz7TmaVjvBDiByHCrnX+MiVHa2b8w9gOH/uwgH7jypwczwUn+LRLQCAwAVBGGU7L1CuDJlZIY0FsPS6znrWbQSkG6YVkeXyRiKLfLUMGTio+3bxhrtPZWajOzcQA8dV1QnWpfxwufAgHi+nl1TD5d8= 2512555150@qq.com

# 测试
ssh -T git@gitee.com
测试成功,就可以无密给码云推送仓库了
创建gitee仓库
- 在码云新建仓库,仓库名gulimall,选择语言java,在.gitignore选中maven(就会忽略掉maven一些个人无需上传的配置文件),许可证选Apache-2.0,开发模型选生成/开发模型,开发时在dev分支,发布时在master分支,创建。
- 复制链接
https://gitee.com/chensibo/gulimall.git

把链接粘贴,clone 下gitee上的项目
4、创建项目微服务
建module:gulimall-product

依次创建出以下服务
- 商品服务product
- 存储服务ware
- 订单服务order
- 优惠券服务coupon
- 用户服务member
共同点:
- 导入web和openFeign
- group:com.wlq.gulimall
- Artifact:gulimall-XXX
- 每一个服务,包名com.wlq.gulimall.XXX{product/order/ware/coupon/member}
- 模块名:gulimall-XXX
修改聚合服务的pom
<?xml version="1.0" encoding="UTF-8"?>
<project xmlns="http://maven.apache.org/POM/4.0.0" xmlns:xsi="http://www.w3.org/2001/XMLSchema-instance"
         xsi:schemaLocation="http://maven.apache.org/POM/4.0.0 https://maven.apache.org/xsd/maven-4.0.0.xsd">
    <modelVersion>4.0.0</modelVersion>
    <groupId>com.wlq.gulimall</groupId>
    <artifactId>gulimall</artifactId>
    <version>0.0.1-SNAPSHOT</version>
    <name>gulimall</name>
    <description>聚合服务</description>
    <packaging>pom</packaging>

    <modules>
        <module>gulimall-coupon</module>
        <module>gulimall-member</module>
        <module>gulimall-order</module>
        <module>gulimall-product</module>
        <module>gulimall-ware</module>
    </modules>


</project>
项目保存gitee
-
在maven窗口刷新,并点击+号,找到刚才的pom.xml添加进来,发现多了个root。这样比如运行root的clean命令,其他项目也一起clean了。
-
修改总项目的.gitignore,把小项目里的垃圾文件在提交的时候忽略掉
**/mvnw
**/mvnw.cmd
**/.mvn
**/target/
.idea
**/.gitignore
-
在version control/local Changes,点击刷新看Unversioned Files,可以看到变化。
-
全选最后剩下21个文件,选择右键、Add to VCS。
-
在IDEA中安装插件:gitee,重启IDEA。
在Dfault changelist右键点击commit,去掉右面的勾选Perform code analysis、CHECK TODO,然后点击COMMIT,有个下拉列表,点击commit and push才会提交到云端。此时就可以在浏览器中看到了。


- commit只是保存更新到本地
- push才是提交到gitee

5、数据库建立
设置容器自动启动
sudo docker update redis --restart=always
sudo docker update mysql--restart=always


创建SQL:连接Navicat
创建数据库:
- gulimall_oms
- gulimall_pms
- gulimall_sms
- gulimall_ums
- gulimall_wms

6、人人开源
https://gitee.com/renrenio/renren-fast.git
git.bash执行:
git clone https://gitee.com/renrenio/renren-fast.gitgit clone https://gitee.com/renrenio/renren-fast-vue
将下载的文件复制到gulimall项目
修改pom
<modules>
        <module>gulimall-coupon</module>
        <module>gulimall-member</module>
        <module>gulimall-order</module>
        <module>gulimall-product</module>
        <module>gulimall-ware</module>
        <module>renren-fast</module>
    </modules>
1、创建后台管理的数据库,在db文件里,复制mysql的

2、修改配置文件(后端)
spring:
    datasource:
        type: com.alibaba.druid.pool.DruidDataSource
        druid:
            driver-class-name: com.mysql.cj.jdbc.Driver
            url: jdbc:mysql://169.254.249.10:3306/gulimall_admin?useUnicode=true&characterEncoding=UTF-8&serverTimezone=Asia/Shanghai
            username: root
            password: root
访问:http://localhost:8080/renren-fast/

3、renren-fast-vue添加进vscode(前端)
将renren-fast-vue拖进vscode打开
4、安装node.js
node -v检查- 执行:
npm config set registry http://registry.npm.taobao.org/ - 然后去VScode的项目终端中输入
npm install,是要去拉取依赖 npm run dev- http://localhost:8001/#/login
注意要启动vagrant ssh,启动renren-fast

登入:
- admin
- admin
5、导入renren-generator
https://gitee.com/renrenio/renren-generator.git
<modules>
        <module>gulimall-coupon</module>
        <module>gulimall-member</module>
        <module>gulimall-order</module>
        <module>gulimall-product</module>
        <module>gulimall-ware</module>
        <module>renren-fast</module>
        <module>renren-generator</module>
    </modules>
server:
  port: 80

# mysql
spring:
  datasource:
    type: com.alibaba.druid.pool.DruidDataSource
    #MySQL配置
    driverClassName: com.mysql.cj.jdbc.Driver
    url: jdbc:mysql://169.254.249.10:3306/gulimall_pms?useUnicode=true&characterEncoding=UTF-8&useSSL=false&serverTimezone=Asia/Shanghai
    username: root
    password: root
mainPath=com.wlq
#\u5305\u540D
package=com.wlq.gulimall
moduleName=product
#\u4F5C\u8005
author=wlq
#Email
email=sunlightcs@gmail.com
#表前缀
tablePrefix=pms_
运行renren-generator主启动类
选中所有生成代码

解压后将main文件取代项目中的product中的main

6、逆向工程创建:建gulimall-common
<dependencies>
        <!-- https://mvnrepository.com/artifact/com.baomidou/mybatis-plus -->
        <dependency>
            <groupId>com.baomidou</groupId>
            <artifactId>mybatis-plus-boot-starter</artifactId>
            <version>3.2.0</version>
        </dependency>

        <dependency>
            <groupId>org.projectlombok</groupId>
            <artifactId>lombok</artifactId>
            <version>1.18.20</version>
        </dependency>

        <!-- https://mvnrepository.com/artifact/org.apache.httpcomponents/httpcore -->
        <dependency>
            <groupId>org.apache.httpcomponents</groupId>
            <artifactId>httpcore</artifactId>
            <version>4.4.12</version>
        </dependency>

        <dependency>
            <groupId>commons-lang</groupId>
            <artifactId>commons-lang</artifactId>
            <version>2.6</version>
        </dependency>

        <dependency>
            <groupId>javax.servlet</groupId>
            <artifactId>servlet-api</artifactId>
            <version>2.5</version>
            <scope>provided</scope>
        </dependency>


    </dependencies>
改product的pom(每个服务都添加)
		<dependency>
            <groupId>com.wlq.gulimall</groupId>
            <artifactId>gulimall-common</artifactId>
            <version>0.0.1-SNAPSHOT</version>
        </dependency>
根据product里的报错在renren-fast里找到相应的类进行导入直到不报错
common添加mysql数据源
根据自己mysql导入相应的版本
<!-- https://mvnrepository.com/artifact/com.baomidou/mybatis-plus -->
        <dependency>
            <groupId>com.baomidou</groupId>
            <artifactId>mybatis-plus-boot-starter</artifactId>
            <version>3.2.0</version>
        </dependency>
<!-- https://mvnrepository.com/artifact/mysql/mysql-connector-java -->
        <dependency>
            <groupId>mysql</groupId>
            <artifactId>mysql-connector-java</artifactId>
            <version>8.0.17</version>
        </dependency>
product项目下新建yml
spring:
  datasource:
    username: root
    password: root
    url: jdbc:mysql://169.254.249.10:3306/gulimall_pms?
    driver-class-name: com.mysql.cj.jdbc.Driver

mybatis-plus:
  mapper-locations: classpath:/mapper/**/*.xml
  global-config:
    db-config:
      id-type: auto #配置主键自增
启动类添加注解
@MapperScan("com.wlq.gulimall.product.dao")
@SpringBootApplication
public class GulimallProductApplication {

    public static void main(String[] args) {
        SpringApplication.run(GulimallProductApplication.class, args);
    }

}
test方法修改:
@SpringBootTest
class GulimallProductApplicationTests {

    @Autowired
    BrandService brandService;

    @Test
    void contextLoads() {

        BrandEntity brandEntity = new BrandEntity();

        brandEntity.setName("华为");
        brandService.save(brandEntity);
        System.out.println("保存成功....");
    }
    //查询
     //   List<BrandEntity> list = brandService.list(new QueryWrapper<BrandEntity>().eq("brand_id", 1L));
     //   list.forEach((item)->{
      //      System.out.println(item);
     //   });

}


7、为其它服务生成生成代码(按照第5步)
为每个服务添加server-port,以coupon为例,依次累加1000
spring:
  datasource:
    username: root
    password: root
    url: jdbc:mysql://169.254.249.10:3306/gulimall_sms?useUnicode=true&characterEncoding=UTF-8&useSSL=false&serverTimezone=Asia/Shanghai
    driver-class-name: com.mysql.cj.jdbc.Driver

mybatis-plus:
  mapper-locations: classpath:/mapper/**/*.xml
  global-config:
    db-config:
      id-type: auto #配置主键自增

server:
  port: 7000
并运行主启动类测试一下
springcloud Alibaba
1、简介
个人笔记:https://editor.csdn.net/md/?articleId=117130694
2、nacos注册中心
Common引入alibaba依赖:
<dependencyManagement>
        <dependencies>
            <dependency>
                <groupId>com.alibaba.cloud</groupId>
                <artifactId>spring-cloud-alibaba-dependencies</artifactId>
                <version>2.1.0.RELEASE</version>
                <type>pom</type>
                <scope>import</scope>
            </dependency>
        </dependencies>
    </dependencyManagement>
nacos依赖
<!--nacos-->
        <dependency>
            <groupId>com.alibaba.cloud</groupId>
            <artifactId>spring-cloud-starter-alibaba-nacos-discovery</artifactId>
        </dependency>
7000添加进nacos服务中心
YML
spring:
  datasource:
    username: root
    password: root
    url: jdbc:mysql://169.254.249.10:3306/gulimall_sms?useUnicode=true&characterEncoding=UTF-8&useSSL=false&serverTimezone=Asia/Shanghai
    driver-class-name: com.mysql.cj.jdbc.Driver

  cloud:
    nacos:
      discovery:
        server-addr: 127.0.0.1:8848
  application:
    name: gulimall-coupon

mybatis-plus:
  mapper-locations: classpath:/mapper/**/*.xml
  global-config:
    db-config:
      id-type: auto #配置主键自增

server:
  port: 7000
-
主启动加上:
@EnableDiscoveryClient -
启动nacos再启动7000
同样的方法将其他几个也注册进nacos注册中心中心
3、nacos配置中心
<!--配置中心-->
        <dependency>
            <groupId>com.alibaba.cloud</groupId>
            <artifactId>spring-cloud-starter-alibaba-nacos-config</artifactId>
        </dependency>
1、新建bootstrap.properties
spring.application.name=gulimall-coupon

spring.cloud.nacos.config.server-addr=127.0.0.1:8848
2、修改controller
@Value("${coupon.user.name")
    private String name;
    @Value("${coupon.user.age}")
    private Integer age;

    @RequestMapping("/test")
    public R test(){
        return R.ok().put("name",name).put("age",age);
    }
3、添加:@RefreshScope动态刷新
4、访问:http://localhost:7000/coupon/coupon/test
3、sentinel
4、seata
5、OSS
1、简介:
对象存储服务(Object Storage Service, Oss) 是一一种海量、安全、低成本、高可靠的云存储服务,适合存放任意类型的文件。容量和处理能力弹性扩展,多种存储类型供选择,全面优化存储成本。
springcloud
1、openfeign
		<dependency>
            <groupId>org.springframework.cloud</groupId>
            <artifactId>spring-cloud-starter-openfeign</artifactId>
        </dependency>
写一个优惠券会员服务
1、修改coupon的controller:
@RequestMapping("/member/list")
    public R membercoupons(){
        CouponEntity couponEntity = new CouponEntity();
        couponEntity.setCouponName("满100减10");
        return R.ok().put("coupons",Arrays.asList(couponEntity));
    }
2、在member中创建feign,在里面新建CouponFeignService接口
@FeignClient("gulimall-coupon")
public interface CouponFeignService {

    @RequestMapping("/coupon/coupon/member/list")
    public R membercoupons();
}
3、主启动类添加@EnableFeignClients(basePackages = "com.wlq.gulimall.member.feign")
4、修改member的controller
@Autowired
    CouponFeignService couponFeignService;

    @RequestMapping("/coupons")
    public R test(){
        MemberEntity memberEntity = new MemberEntity();
        memberEntity.setNickname("张三");

        R membercoupons = couponFeignService.membercoupons();

        return R.ok().put("member",memberEntity).put("coupons",membercoupons.get("coupons"));
    }
5、启动7000,8000
6、访问:http://localhost:8000/member/member/coupons

2、gateway
1、创建gulimall-gateway
2、主启动&POM
@SpringBootApplication(exclude = {DataSourceAutoConfiguration.class})
@EnableDiscoveryClient
public class GulimallGatewayApplication {

    public static void main(String[] args) {
        SpringApplication.run(GulimallGatewayApplication.class, args);
    }
}
<dependency>
            <groupId>com.wlq.gulimall</groupId>
            <artifactId>gulimall-common</artifactId>
            <version>0.0.1-SNAPSHOT</version>
        </dependency>
3、创建getway命名空间
新增配置:

4、YML
spring:
  cloud:
    nacos:
      discovery:
        server-addr: 127.0.0.1:8848
  application:
    name: gulimall-gateway
server:
  port: 88
application.properties
spring.cloud.nacos.discovery.server-addr=127.0.0.1:8848
spring.application.name=gulimall-gateway
server.port=88
bootstrap.properties
spring.application.name=gulimall-gateway

spring.cloud.nacos.config.server-addr=127.0.0.1:8848
spring.cloud.nacos.config.namespace=91198d24-4eee-48d3-9a91-f7d98f6614e0
5、启动
http://localhost:88/hello?url=baidu
3、sleuth+zipkin服务链路追踪
商品服务-三级分类
这里需要启动gateway,nacos,product,renren-fast
一、sql语句
gulimall_pms表pms_category的SQL语句:第一行有:pms_catelog.sql
二、查出所有分类及子分类
1、业务类
修改CategoryController
/**
     * 查出所有分类以及子分类,以树结构组装起来
     */
    public R list(){
        List<CategoryEntity> entities = categoryService.listWithTree();

        return R.ok().put("data",entities);
    }
修改CategoryService
public interface CategoryService extends IService<CategoryEntity> {

    PageUtils queryPage(Map<String, Object> params);

    List<CategoryEntity> listWithTree();
}
修改对应的Impl
@Override
    public List<CategoryEntity> listWithTree() {
        //1、查出所有分类
        List<CategoryEntity> entities = baseMapper.selectList(null);

        //2、组成父子的树形结构
        return entities;
    }
2、测试

三、组装成父子结构
1、业务类
修改CategoryEntity
@TableField(exist = false)
	private List<CategoryEntity> children;
Impl
@Override
    public List<CategoryEntity> listWithTree() {
        //1、查出所有分类
        List<CategoryEntity> entities = baseMapper.selectList(null);

        //2、组成父子的树形结构

        //2.1找到所有的一级分类
        List<CategoryEntity> level1Menus = entities.stream().filter(categoryEntity ->
            categoryEntity.getParentCid() == 0
        ).map((menu)->{
            menu.setChildren(getChildrens(menu,entities));
            return menu;
        }).sorted((menu1,menu2)->{
            return (menu1.getSort()==null?0:menu1.getSort()) - (menu2.getSort()==null?0:menu2.getSort());
        }).collect(Collectors.toList());

        return level1Menus;
    }

    //递归查找所有菜单的子菜单
    private List<CategoryEntity> getChildrens(CategoryEntity root,List<CategoryEntity> all){

        List<CategoryEntity> children = all.stream().filter(categoryEntity -> {
            return categoryEntity.getParentCid() == root.getCatId();
        }).map(categoryEntity -> {
            //找到子菜单
            categoryEntity.setChildren(getChildrens(categoryEntity,all));
            return categoryEntity;
        }).sorted((menu1,menu2)->{
            //菜单的排序
            return (menu1.getSort()==null?0:menu1.getSort()) - (menu2.getSort()==null?0:menu2.getSort());
        }).collect(Collectors.toList());

        return children;
    }
2、测试
访问:http://localhost:10000/product/category/list/tree
使用F12查看3级目录完成
四、与后台管理系统联调
编写前端项目
1、创建src\views\modules\product
2、新建category.vue
输入vue创建Vue模板:https://www.cnblogs.com/songjilong/p/12635448.html
3、使用element创建树级结构
https://element.eleme.cn/#/zh-CN/component/tree
<el-tree :data="data" :props="defaultProps" @node-click="handleNodeClick"></el-tree>

<script>
  export default {
    data() {
      return {
        data: [{
          label: '一级 1',
          children: [{
            label: '二级 1-1',
            children: [{
              label: '三级 1-1-1'
            }]
          }]
        }, {
          label: '一级 2',
          children: [{
            label: '二级 2-1',
            children: [{
              label: '三级 2-1-1'
            }]
          }, {
            label: '二级 2-2',
            children: [{
              label: '三级 2-2-1'
            }]
          }]
        }, {
          label: '一级 3',
          children: [{
            label: '二级 3-1',
            children: [{
              label: '三级 3-1-1'
            }]
          }, {
            label: '二级 3-2',
            children: [{
              label: '三级 3-2-1'
            }]
          }]
        }],
        defaultProps: {
          children: 'children',
          label: 'label'
        }
      };
    },
    methods: {
      handleNodeClick(data) {
        console.log(data);
      }
    }
  };
</script>
alt shift f代码整理
4、查看:

5、编写method(参照sys里的role.vue)
1、复制role.vue的请求模板
this.$http({
          url: this.$http.adornUrl('/sys/role/list'),
          method: 'get',
          params: this.$http.adornParams({
            'page': this.pageIndex,
            'limit': this.pageSize,
            'roleName': this.dataForm.roleName
          })
        }).then(({data}) => {
          if (data && data.code === 0) {
            this.dataList = data.page.list
            this.totalPage = data.page.totalCount
          } else {
            this.dataList = []
            this.totalPage = 0
          }
          this.dataListLoading = false
        })
修改:
 //方法集合
  methods: {
    handleNodeClick(data) {
      console.log(data);
    },
    getMenus(){
        this.$http({
          url: this.$http.adornUrl('/product/category/list/tree'),
          method: 'get'
        }).then(({data})=>{
            console.log("成功获取的菜单数据...",data.data)
            this.menus = data.data;
        })
    }
  },
  //生命周期 - 创建完成(可以访问当前this实例)
  created() {
      this.getMenus();
  },
2、修改config下的index.js,交给网关分配路径
  // api接口请求地址
  window.SITE_CONFIG['baseUrl'] = 'http://localhost:88/api';
3、将renren-fast添加进nacos服务注册中心
给renren-fast添加common依赖
<dependency>
            <groupId>com.wlq.gulimall</groupId>
            <artifactId>gulimall-common</artifactId>
            <version>0.0.1-SNAPSHOT</version>
        </dependency>
YML
spring:
  application:
    name: renren-fast
  cloud:
    nacos:
      discovery:
        server-addr: 127.0.0.1:8848
添加注解:@EnableDiscoveryClient
4、修改网关
YML
spring:
  cloud:
    gateway:
      routes:
        - id: test_route
          uri: https://www.baidu.com
          predicates:
            - Query=url,baidu

        - id: qq_route
          uri: https://www.qq.com
          predicates:
            - Query=url,qq

        - id: admin_route
          uri: lb"//renren-fast
          predicates:
            - Path=/api/**
  ## 前端项目,带前缀,/api
5、测试;http://localhost:8001/#/login

修改:注意:精确的path需要写在上面
spring:
  cloud:
    gateway:
      routes:
        - id: test_route
          uri: https://www.baidu.com
          predicates:
            - Query=url,baidu

        - id: qq_route
          uri: https://www.qq.com
          predicates:
            - Query=url,qq

        - id: product_route
          uri: lb://gulimall-product
          predicates:
            - Path=/api/product/**
          filters:
            - RewritePath=/api/(?<segment>.*),/$\{segment}
            # 路径重写,高精确的path写在上面

        - id: admin_route
          uri: lb://renren-fast
          predicates:
            - Path=/api/**
          filters:
            - RewritePath=/api/(?<segment>.*),/renren-fast/$\{segment}
            # 路径重写


  ## 前端项目,带前缀,/api
  ## http://Localhost:88/api/captcha.ipg   http://renren-fast:8080/renren-fast/captcha.jpg
  ## http://Localhost:88/api/product/category/list/tree  http://localhost:10000/product/category/list/tree
- 访问成功,点击登入发现报错
跨域异常

6、解决跨域问题
1、在gateway下新建config,CorsConfiguration类
import org.springframework.context.annotation.Bean;
import org.springframework.context.annotation.Configuration;
import org.springframework.web.cors.CorsConfiguration;
import org.springframework.web.cors.reactive.CorsWebFilter;
import org.springframework.web.cors.reactive.UrlBasedCorsConfigurationSource;


@Configuration
public class GulimallCorsConfiguration {

    @Bean
    public CorsWebFilter corsWebFilter(){

        UrlBasedCorsConfigurationSource source = new UrlBasedCorsConfigurationSource();

        CorsConfiguration corsConfiguration = new CorsConfiguration();

        //1、配置跨域
        corsConfiguration.addAllowedHeader("*");
        corsConfiguration.addAllowedMethod("*");
        corsConfiguration.addAllowedOrigin("*");
        corsConfiguration.setAllowCredentials(true);


        source.registerCorsConfiguration("/**",corsConfiguration);
        return new CorsWebFilter(source);

    }

}
2、将fast里的默认跨域注解掉 io.renren.config.CorsConfig
3、再重新启动
- 成功登入

7、树形展示三级分类(查询)
1、修改product,添加bootstrap.properties
spring.application.name=gulimall-product

spring.cloud.nacos.config.server-addr=127.0.0.1:8848
spring.cloud.nacos.config.namespace=86a8b9b7-a3f3-448b-a0e8-a812f1419032
添加命名空间

2、YML
spring:
  datasource:
    username: root
    password: root
    url: jdbc:mysql://169.254.249.10:3306/gulimall_pms?useUnicode=true&characterEncoding=UTF-8&useSSL=false&serverTimezone=Asia/Shanghai
    driver-class-name: com.mysql.cj.jdbc.Driver

  cloud:
    nacos:
      discovery:
        server-addr: 127.0.0.1:8848
  application:
    name: gulimall-product

mybatis-plus:
  mapper-locations: classpath:/mapper/**/*.xml
  global-config:
    db-config:
      id-type: auto #配置主键自增

server:
  port: 10000
3、主启动添加:@EnableDiscoveryClient
4、访问:http://Localhost:88/api/product/category/list/tree

5、修改vue
<template>
  <el-tree
    :data="menus"
    :props="defaultProps"
    @node-click="handleNodeClick"
  ></el-tree>
</template>
export default {
  //import引入的组件需要注入到对象中才能使用
  components: {},

  data() {
    return {
      menus: [],

      defaultProps: {
        children: "children",
        label: "name",
      },
    };
  },
6、访问http://localhost:8001/#/product-category

8、树形展示三级分类(删除)
<template>
  <el-tree
    :data="menus"
    :props="defaultProps"
    :expand-on-click-node="false"
    show-checkbox
    node-key="catId"
  >
    <span class="custom-tree-node" slot-scope="{ node, data }">
      <span>{{ node.label }}</span>
      <span>
        <el-button
          v-if="node.level <= 2"
          type="text"
          size="mini"
          @click="() => append(data)"
        >
          Append
        </el-button>
        <el-button
          v-if="node.childNodes.length == 0"
          type="text"
          size="mini"
          @click="() => remove(node, data)"
        >
          Delete
        </el-button>
      </span>
    </span>
  </el-tree>
</template>
//方法集合
  methods: {
    getMenus() {
      this.$http({
        url: this.$http.adornUrl("/product/category/list/tree"),
        method: "get",
      }).then(({ data }) => {
        console.log("成功获取的菜单数据...", data.data);
        this.menus = data.data;
      });
    },
    append(data) {
      console.log("append", data);
    },

    remove(node, data) {
      console.log("remove", node, data);
    },
  },
测试

9、逻辑删除
- postman发送请求测试

- 发现1432数据被删除了,mysql里面直接没有了
删除方法改进
1、修改CategoryController的删除方法
/**
     * 删除
     * @RequestBody:获取请求体,必须发送POST请求
     * SpringMVC自动将请求体的数据(json),转为对应的对象
     */
    @RequestMapping("/delete")
    public R delete(@RequestBody Long[] catIds){
//		categoryService.removeByIds(Arrays.asList(catIds));

        //1、检查当前删除的菜单,是否被别的地方引用

        categoryService.removeMenuByIds(Arrays.asList(catIds));

        return R.ok();
    }
2、修改CategoryService接口
void removeMenuByIds(List<Long> asList);
3、修改Impl
@Override
    public void removeMenuByIds(List<Long> asList) {

        //TODO 1、检查当前删除的菜单,是否被其他地方引用

        //逻辑删除
        baseMapper.deleteBatchIds(asList);
    }
4、修改yml
spring:
  datasource:
    username: root
    password: root
    url: jdbc:mysql://169.254.249.10:3306/gulimall_pms?useUnicode=true&characterEncoding=UTF-8&useSSL=false&serverTimezone=Asia/Shanghai
    driver-class-name: com.mysql.cj.jdbc.Driver

  cloud:
    nacos:
      discovery:
        server-addr: 127.0.0.1:8848
  application:
    name: gulimall-product

mybatis-plus:
  mapper-locations: classpath:/mapper/**/*.xml
  global-config:
    db-config:
      id-type: auto #配置主键自增
      logic-delete-value: 1
      logic-not-delete-value: 0

server:
  port: 10000

logging:
  level:
    com.wlq.gulimall: debug #打印日志
5、给been加上逻辑删除注解
/**
	 * 是否显示[0-不显示,1显示]
	 */
	@TableLogic(value = "1",delval = "0")
	private Integer showStatus;
6、postman测试

-
发现show_status变为了0

-
yml添加logging日志后发现:删除sql变成了update
logging:
  level:
    com.wlq.gulimall.product: debug
10、删除效果细化
1、修改method
remove(node, data) {
      var ids = [data.catId];
      this.$http({
        url: this.$http.adornUrl("/product/category/delete"),
        method: "post",
        data: this.$http.adornData(ids, false),
      }).then(({ data }) => {
        console.log("删除成功");
        this.getMenus();  //菜单刷新
      });
      console.log("remove", node, data);
    },
2、访问并删除一个

-
根据console里的 ID提示在数据库查看

-
发现165的status变为了0

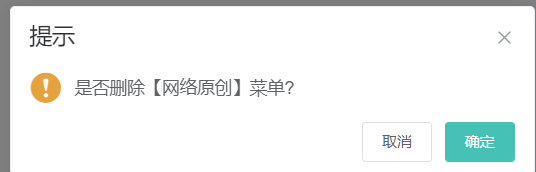
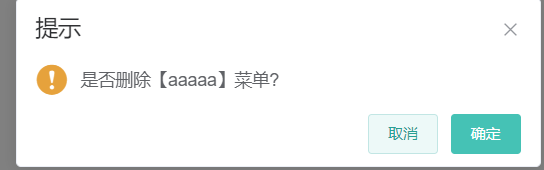
3、添加弹窗提示
remove(node, data) {
      var ids = [data.catId];
      this.$confirm(`是否删除【${data.name}】菜单?`, "提示", {
        confirmButtonText: "确定",
        cancelButtonText: "取消",
        type: "warning",
      }).then(() => {
        this.$http({
          url: this.$http.adornUrl("/product/category/delete"),
          method: "post",
          data: this.$http.adornData(ids, false),
        }).then(({ data }) => {
          console.log("删除成功");
          this.getMenus(); //菜单刷新
        });
      }).catch(()=>{

      });

      console.log("remove", node, data);
    },
4、添加消息提示
remove(node, data) {
      var ids = [data.catId];
      this.$confirm(`是否删除【${data.name}】菜单?`, "提示", {
        confirmButtonText: "确定",
        cancelButtonText: "取消",
        type: "warning",

      })
        .then(() => {
          this.$http({
            url: this.$http.adornUrl("/product/category/delete"),
            method: "post",
            data: this.$http.adornData(ids, false),
          }).then(({ data }) => {
            this.$message({
              message: "菜单删除成功",
              type: "success",
            });
            this.getMenus(); //菜单刷新
          });
        })
        .catch(() => {
          this.$message({
          message: '您取消了删除',
          type: 'warning'
        });
        });

      console.log("remove", node, data);
    },
- default-expanded-keys 默认展开的节点的 key 的数组
<template>
  <el-tree
    :data="menus"
    :props="defaultProps"
    :expand-on-click-node="false"
    show-checkbox
    node-key="catId"
    :default-expanded-keys="expandedKey"
  >
data() {
    return {
      menus: [],
      expandedKey:[],
      defaultProps: {
        children: "children",
        label: "name",
      },
    };
  },
this.getMenus(); //菜单刷新
this.expandedKey = [node.parent.data.catId] //设置要默认展开的菜单
UPDATE pms_category SET show_status=1将数据还原
11、新增
<el-dialog title="提示" :visible.sync="dialogVisible" width="30%">
      <el-form :model="category">
        <el-form-item label="分类名称">
          <el-input v-model="category.name" autocomplete="off"></el-input>
        </el-form-item>
      </el-form>
      <span slot="footer" class="dialog-footer">
        <el-button @click="dialogVisible = false">取 消</el-button>
        <el-button type="primary" @click="addCategory">确 定</el-button>
      </span>
    </el-dialog>
data() {
    return {
      category: { name: "", parentCid: 0, catLevel: 0, showStatus: 1, sort: 0 },
      menus: [],
      expandedKey: [],
      dialogVisible: false,
      defaultProps: {
        children: "children",
        label: "name",
      },
    };
  },
append(data) {
      console.log("append", data);
      this.dialogVisible = true;
      this.category.parentCid = data.catId;
      this.category.catLevel = data.catLevel * 1 + 1;
    },
method
//添加三级分类
    addCategory() {
      console.log("添加的三级分类数据", this.category);
      this.$http({
        url: this.$http.adornUrl("/product/category/save"),
        method: "post",
        data: this.$http.adornData(this.category, false),
      }).then(({ data }) => {
        this.$message({
          message: "菜单保存成功",
          type: "success",
        });
        //关闭对话框
        this.dialogVisible = false;
        this.getMenus(); //菜单刷新
        this.expandedKey = [this.category.parentCid]; //设置要默认展开的菜单
      });
    },
测试:


mysql也写入了:

12、基本修改
<el-button
            v-if="node.level <= 2"
            type="text"
            size="mini"
            @click="edit(data)"
          >
            edit
          </el-button>
<el-dialog :title="title" :visible.sync="dialogVisible" width="30%" :close-on-click-modal="false">
      <el-form :model="category">
        <el-form-item label="分类名称">
          <el-input v-model="category.name" autocomplete="off"></el-input>
        </el-form-item>
        <el-form-item label="图标">
          <el-input v-model="category.icon" autocomplete="off"></el-input>
        </el-form-item>
        <el-form-item label="计量单位">
          <el-input
            v-model="category.productUnit"
            autocomplete="off"
          ></el-input>
        </el-form-item>
      </el-form>
      <span slot="footer" class="dialog-footer">
        <el-button @click="dialogVisible = false">取 消</el-button>
        <el-button type="primary" @click="submitData">确 定</el-button>
      </span>
    </el-dialog>
- method
//方法集合
  methods: {
    getMenus() {
      this.$http({
        url: this.$http.adornUrl("/product/category/list/tree"),
        method: "get",
      }).then(({ data }) => {
        console.log("成功获取的菜单数据...", data.data);
        this.menus = data.data;
      });
    },
    append(data) {
      console.log("append", data);
      this.dialogType = "add";
      this.title = "添加分类";
      this.dialogVisible = true;
      this.category.parentCid = data.catId;
      this.category.catLevel = data.catLevel * 1 + 1;
      this.category.catId = null;
      this.category.name = "";
      this.category.icon = "";
      this.category.productUnit = "";
      this.category.sort = 0;
      this.category.showStatus = 1;
    },

    //修改
    edit(data) {
      console.log("要修改的数据", data);
      this.dialogType = "edit";
      this.title = "修改分类";
      this.dialogVisible = true;

      //发送请求获取当前节点最新的数据
      this.$http({
        url: this.$http.adornUrl(`/product/category/info/${data.catId}`),
        method: "get",
      }).then(({ data }) => {
        //请求成功
        console.log("要回显的数据", data);
        this.category.name = data.data.name;
        this.category.catId = data.data.catId;
        this.category.icon = data.data.icon;
        this.category.productUnit = data.data.productUnit;
        this.category.parentCid = data.data.parentCid;
      });
    },

    //提交数据(双重绑定)
    submitData() {
      if (this.dialogType == "add") {
        this.addCategory();
      }
      if (this.dialogType == "edit") {
        this.editCategory();
      }
    },

    //修改三级分类数据
    editCategory() {
      //解构
      var { catId, name, icon, productUnit } = this.category;
      // var data = {catId:catId,name:name,icon:icon,productUnit:productUnit};

      this.$http({
        url: this.$http.adornUrl("/product/category/update"),
        method: "post",
        data: this.$http.adornData({ catId, name, icon, productUnit }, false),
      }).then(({ data }) => {
        this.$message({
          message: "菜单修改成功",
          type: "success",
        });
        this.dialogVisible = false; //关闭对话框
        this.getMenus(); //菜单刷新
        this.expandedKey = [this.category.parentCid]; //设置要默认展开的菜单
      });
    },

    //添加三级分类
    addCategory() {
      console.log("添加的三级分类数据", this.category);
      this.$http({
        url: this.$http.adornUrl("/product/category/save"),
        method: "post",
        data: this.$http.adornData(this.category, false),
      }).then(({ data }) => {
        this.$message({
          message: "菜单保存成功",
          type: "success",
        });
        //关闭对话框
        this.dialogVisible = false;
        this.getMenus(); //菜单刷新
        this.expandedKey = [this.category.parentCid]; //设置要默认展开的菜单
      });
    },

    remove(node, data) {
      var ids = [data.catId];
      this.$confirm(`是否删除【${data.name}】菜单?`, "提示", {
        confirmButtonText: "确定",
        cancelButtonText: "取消",
        type: "warning",
      })
        .then(() => {
          this.$http({
            url: this.$http.adornUrl("/product/category/delete"),
            method: "post",
            data: this.$http.adornData(ids, false),
          }).then(({ data }) => {
            this.$message({
              message: "菜单删除成功",
              type: "success",
            });
            this.getMenus(); //菜单刷新
            this.expandedKey = [node.parent.data.catId]; //设置要默认展开的菜单
          });
        })
        .catch(() => {
          this.$message({
            message: "您取消了删除",
            type: "warning",
          });
        });

      console.log("remove", node, data);
    },
  },
data() {
    return {
      category: {
        name: "",
        parentCid: 0,
        catLevel: 0,
        showStatus: 1,
        sort: 0,
        catId: null,
        productUnit: "",
        icon: "",
      },
      title: "",
      dialogType: "", //edit,add
      menus: [],
      expandedKey: [],
      dialogVisible: false,
      defaultProps: {
        children: "children",
        label: "name",
      },
    };
  },
- 获取最新的值
修改controller
/**
     * 信息
     */
    @RequestMapping("/info/{catId}")
    public R info(@PathVariable("catId") Long catId){
		CategoryEntity category = categoryService.getById(catId);

        return R.ok().put("data", category);
    }
测试:
-
修改:


-
添加:


-
删除

13、修改-拖拽效果
el-tree添加draggable 和 :allow-drop=“allowDrop”
<el-tree
      :data="menus"
      :props="defaultProps"
      :expand-on-click-node="false"
      show-checkbox
      node-key="catId"
      :default-expanded-keys="expandedKey"
      draggable
      :allow-drop="allowDrop"
    >
data添加初始值
data() {
    return {

      maxLevel: 0,

      },
    };
  },
写allowDrop方法
allowDrop(draggingNode, dropNode, type) {
      //1、被拖动的当前节点以及所在的父节点总层数不能大于3

      //1、被拖动的当前节点总层数
      console.log("allowDrop:", draggingNode, dropNode, type);
      //
      this.countNodeLevel(draggingNode.data);
      // 当前正在拖动的节点+父节点所在的深度不大于3即可
      let deep = this.maxLevel - draggingNode.data.catLevel + 1;
      console.log("深度:", deep);

      //  this.maxLevel
      if (type == "inner") {
        return (deep + dropNode.level) <= 3;
      } else {
        return (deep + dropNode.parent.level) <= 3;
      }
    },
    countNodeLevel(node) {
      // 找到所有的子节点,求出最大深度
      if (node.children != null && node.children.length > 0) {
        for (let i = 0; i < node.children.length; i++) {
          if (node.children[i].catLevel > this.maxLevel) {
            this.maxLevel = node.children[i].catLevel;
          }
          this.countNodeLevel(node.children[i]);
        }
      }
    },
14、修改-拖拽数据收集

<el-tree
      :data="menus"
      :props="defaultProps"
      :expand-on-click-node="false"
      show-checkbox
      node-key="catId"
      :default-expanded-keys="expandedKey"
      draggable
      :allow-drop="allowDrop"
      @node-drop="handleDrop"
    >
method
	handleDrop(draggingNode, dropNode, dropType, ev) {
      console.log("handleDrop: ", draggingNode, dropNode, dropType);
      //1、当前节点最新的父节点id
      let pCid = 0;
      let siblings = null;
      if (dropType == "before" || dropType == "after") {
        pCid =
          dropNode.parent.data.catId == undefined
            ? 0
            : dropNode.parent.data.catId;
        siblings = dropNode.parent.childNodes;
      } else {
        pCid = dropNode.data.catId;
        siblings = dropNode.childNodes;
      }

      //2、当前拖拽节点的最新顺序
      for (let i = 0; i < siblings.length; i++) {
        if (siblings[i].data.catId == draggingNode.data.catId) {
          //如果遍历的是当前正在拖拽的节点
          let catLevel = draggingNode.level;
          if (siblings[i].level != draggingNode.level) {
            //当前节点的层级发生变化
            catLevel = siblings[i].level;
            //修改它子节点的层级
            this.updateChildNodeLevel(siblings[i]);
          }
          this.updateNodes.push({
            catId: siblings[i].data.catId,
            sort: i,
            parentCid: pCid,
          });
        } else {
          this.updateNodes.push({ catId: siblings[i].data.catId, sort: i });
        }
      }

      //3、当前拖拽节点的最新层级
      console.log("updateNodes", this.updateNodes);
    },
    updateChildNodeLevel(node) {
      if (node.childNodes.length > 0) {
        for (let i = 0; i < node.childNodes.length; i++) {
          var cNode = node.childNodes[i].data;
          this.updateNodes.push({
            catId: cNode.catId,
            catLevel: node.childNodes[i].level,
          });
          this.updateChildNodeLevel(node.childNodes[i]);
        }
      }
    },
data
data() {
    return {
      category: {
        name: "",
        parentCid: 0,
        catLevel: 0,
        showStatus: 1,
        sort: 0,
        catId: null,
        productUnit: "",
        icon: "",
      },
      updateNodes: [],
      maxLevel: 0,
      title: "",
      dialogType: "", //edit,add
      menus: [],
      expandedKey: [],
      dialogVisible: false,
      defaultProps: {
        children: "children",
        label: "name",
      },
    };
  },
15、修改-拖拽功能完成(收集的数据发送给后端)
/**
     * 批量修改
     */
    @RequestMapping("/update/sort")
    public R updateSort(@RequestBody CategoryEntity[] category){
        categoryService.updateBatchById(Arrays.asList(category));

        return R.ok();
    }
-
postman 测试
-
[{"catId":1,"sort":10},{"catId":225,"catLevel":2}]

-
查看225数据
SELECT * FROM pms_category WHERE cat_id = 225
-
发现level变为了2

-
1号的sort变为了10

-
修改method
	//3、当前拖拽节点的最新层级
      console.log("updateNodes", this.updateNodes);
      this.$http({
        url: this.$http.adornUrl("/product/category/update/sort"),
        method: "post",
        data: this.$http.adornData(this.updateNodes, false),
      }).then(({ data }) => {
        this.$message({
          message: "菜单顺序等修改成功",
          type: "success",
        });
        //刷新菜单
        this.getMenus();
        this.expandedKey = [pCid]; //设置要默认展开的菜单
        this.updateNodes = [];
        this.maxLevel = 0;
      });
16、添加按钮控制是否需要拖拽
- 添加按钮
<div>
    <el-switch v-model="draggable" active-text="开启拖拽" inactive-text="关闭拖拽">
    </el-switch>
    <el-tree
      :data="menus"
      :props="defaultProps"
      :expand-on-click-node="false"
      show-checkbox
      node-key="catId"
      :default-expanded-keys="expandedKey"
      :draggable="draggable"
      :allow-drop="allowDrop"
      @node-drop="handleDrop"
    >
- data添加
draggable: false,
17、批量保存,免得拖一下跟数据库交互一下
- 添加一个按钮
<el-button @click="batchSave">批量保存</el-button>
- data添加
pCid: [],
- 在handleDrop方法后面添加
this.pCid.push(pCid);
handleDrop(draggingNode, dropNode, dropType, ev) {
      console.log("handleDrop: ", draggingNode, dropNode, dropType);
      //1、当前节点最新的父节点id
      let pCid = 0;
      let siblings = null;
      if (dropType == "before" || dropType == "after") {
        pCid =
          dropNode.parent.data.catId == undefined
            ? 0
            : dropNode.parent.data.catId;
        siblings = dropNode.parent.childNodes;
      } else {
        pCid = dropNode.data.catId;
        siblings = dropNode.childNodes;
      }
      this.pCid.push(pCid);
- 将前面数据发送给后端的代码剪切进batchSave方法里
batchSave() {
      this.$http({
        url: this.$http.adornUrl("/product/category/update/sort"),
        method: "post",
        data: this.$http.adornData(this.updateNodes, false),
      }).then(({ data }) => {
        this.$message({
          message: "菜单顺序等修改成功",
          type: "success",
        });
        //刷新菜单
        this.getMenus();
        this.expandedKey = this.pCid; //设置要默认展开的菜单
        this.updateNodes = [];
        this.maxLevel = 0;
        // this.pCid = 0;
      });
    },
- 修改batchSave()方法
		//刷新菜单
        this.getMenus();
        this.expandedKey = this.pCid; //设置要默认展开的菜单
        this.updateNodes = [];
        this.maxLevel = 0;
        // this.pCid = 0;
- 修改allowDrop
(如果是拿数据库的level,进行批量保存之前数据并没有存进数据库,从而可能导致拖拽的节点判断错误)
this.countNodeLevel(draggingNode);
// 当前正在拖动的节点+父节点所在的深度不大于3即可
let deep = Math.abs(this.maxLevel - draggingNode.level) + 1;
countNodeLevel(node) {
      // 找到所有的子节点,求出最大深度
      if (node.childNodes != null && node.childNodes.length > 0) {
        for (let i = 0; i < node.childNodes.length; i++) {
          if (node.childNodes[i].level > this.maxLevel) {
            this.maxLevel = node.childNodes[i].level;
          }
          this.countNodeLevel(node.childNodes[i]);
        }
      }
    },
18、删除-批量删除
- 添加按钮
<el-button type="danger" @click="batchDelete">批量删除</el-button>
<el-tree
      :data="menus"
      :props="defaultProps"
      :expand-on-click-node="false"
      show-checkbox
      node-key="catId"
      :default-expanded-keys="expandedKey"
      :draggable="draggable"
      :allow-drop="allowDrop"
      @node-drop="handleDrop"
      ref="menuTree"
    >
- getCheckedNodes

- method
//批量删除
    batchDelete() {
      let catIds = [];
      let checkedNodes = this.$refs.menuTree.getCheckedNodes();
      console.log("被选中的节点", checkedNodes);
      for (let i = 0; i < checkedNodes.length; i++) {
        catIds.push(checkedNodes[i].catId);
      }
      this.$confirm(`是否批量删除【${catIds}】菜单?`, "提示", {
        confirmButtonText: "确定",
        cancelButtonText: "取消",
        type: "warning",
      })
        .then(() => {
          this.$http({
            url: this.$http.adornUrl("/product/category/delete"),
            method: "post",
            data: this.$http.adornData(catIds, false),
          }).then(({ data }) => {
            this.$message({
              message: "菜单批量删除成功",
              type: "success",
            });
            this.getMenus();
          });
        })
        .catch(() => {});
    },
品牌管理-使用逆向工程的前后端代码
1、新增品牌管理

- 复制(逆向工程生成的)


- 重启
npm run dev

- 修改utils下的index.js的是否拥有权限
/**
 * 是否有权限
 * @param {*} key
 */
export function isAuth (key) {
  // return JSON.parse(sessionStorage.getItem('permissions') || '[]').indexOf(key) !== -1 || false
  return true
}
- 测试新增,修改,删除

2、效果优化和快速显示开关
- 由于前段总报语法错误,其实没有错误
- 将build\webpack.base.conf.js里的createLintingRule注释掉
const createLintingRule = () => ({
  // test: /\.(js|vue)$/,
  // loader: 'eslint-loader',
  // enforce: 'pre',
  // include: [resolve('src'), resolve('test')],
  // options: {
  //   formatter: require('eslint-friendly-formatter'),
  //   emitWarning: !config.dev.showEslintErrorsInOverlay
  // }
})
-
重启后报错消失
-
修改brand.vue,添加开关
<el-table-column
        prop="showStatus"
        header-align="center"
        align="center"
        label="显示状态"
      >
        <template slot-scope="scope">
          <el-switch
            v-model="scope.row.showStatus"
            active-color="#13ce66"
            inactive-color="#ff4949"
          >
          </el-switch>
        </template>
      </el-table-column>
同理修改brand-add-or-update.vue
<el-form-item label="显示状态" prop="showStatus">
        <el-switch
            v-model="dataForm.showStatus"
            active-color="#13ce66"
            inactive-color="#ff4949"
          >
          </el-switch>
      </el-form-item>
- 监听开关状态

- brand.vue修改switch,添加监听事件
<el-switch
            v-model="scope.row.showStatus"
            active-color="#13ce66"
            inactive-color="#ff4949"
            @change="updateBrandStatus(scope.row)"
          >
          </el-switch>
- 编写method,实现updateBrandStatus
//开关监听
    updateBrandStatus(data) {
      console.log("最新信息:", data);
      //解构
      let { brandId, showStatus } = data;
      //发送请求,修改状态
      this.$http({
        url: this.$http.adornUrl("/product/brand/update"),
        method: "post",
        data: this.$http.adornData(
          { brandId: brandId, showStatus: showStatus ? 1 : 0 },
          false
        ),
      }).then(({ data }) => {
        this.$message({
          message: "状态更新成功",
          type: "success",
        });
      });
    },
- 由于switch只识别true和false,修改相对应的值为1和0
<el-switch
            v-model="scope.row.showStatus"
            active-color="#13ce66"
            inactive-color="#ff4949"
            :active-value="1"
            :inactive-value="0"
            @change="updateBrandStatus(scope.row)"
          >
- 测试


3、文件上传
1、云储存开通与使用
开通对象存储OSS:https://common-buy.aliyun.com/?spm=5176.7933691.J_5253785160.2.61b84c59Fi9NqM&commodityCode=oss
1、创建bucket

- 上传的文件可通过URL直接访问

4、阿里云对象储存方式

安装SDK
<dependency>
    <groupId>com.aliyun.oss</groupId>
    <artifactId>aliyun-sdk-oss</artifactId>
    <version>3.10.2</version>
</dependency>
简单上传
文档:https://help.aliyun.com/document_detail/84781.html?spm=a2c4g.11186623.6.936.a01826fd211WcS
-
查看endpointID

-
添加子账户

选择使用子用户,创建用户

-
添加权限

-
复制

-
写test(product)
@Test
    public void testUpload() throws FileNotFoundException {
        // yourEndpoint填写Bucket所在地域对应的Endpoint。以华东1(杭州)为例,Endpoint填写为https://oss-cn-hangzhou.aliyuncs.com。
        String endpoint = "oss-cn-shenzhen.aliyuncs.com";
        // 阿里云账号AccessKey拥有所有API的访问权限,风险很高。强烈建议您创建并使用RAM用户进行API访问或日常运维,请登录RAM控制台创建RAM用户。
        String accessKeyId = "LTAI5tJjtcA2vHdjbu97jWDP";
        String accessKeySecret = "gKo9taMkPfYpx5H22TanJjq7BqbNNd";

        // 创建OSSClient实例。
        OSS ossClient = new OSSClientBuilder().build(endpoint, accessKeyId, accessKeySecret);

        // 填写本地文件的完整路径。如果未指定本地路径,则默认从示例程序所属项目对应本地路径中上传文件流。
        InputStream inputStream = new FileInputStream("C:\\Users\\Administrator\\Desktop\\picture\\dlam.png");
        // 填写Bucket名称和Object完整路径。Object完整路径中不能包含Bucket名称。
        ossClient.putObject("gulimall-wlq", "dlam.png", inputStream);

        // 关闭OSSClient。
        ossClient.shutdown();

        System.out.println("上传完成...");
    }
- 运行

每次都需要一对配置很麻烦
导入OSS-Starter
- 将SDK注释
<!--<dependency>-->
            <!--<groupId>com.aliyun.oss</groupId>-->
            <!--<artifactId>aliyun-sdk-oss</artifactId>-->
            <!--<version>3.10.2</version>-->
        <!--</dependency>-->
- 导入OSS-Starter
<!-- oss-starter -->
        <dependency>
            <groupId>com.alibaba.cloud</groupId>
            <artifactId>spring-cloud-starter-alicloud-oss</artifactId>
        </dependency>
- 修改product的YML
spring:
  cloud:
    alicloud:
      access-key: LTAI5tJjtcA2vHdjbu97jWDP
      secret-key: gKo9taMkPfYpx5H22TanJjq7BqbNNd
      oss:
        endpoint: oss-cn-shenzhen.aliyuncs.com
- test
@Autowired
    OSSClient ossClient;

    @Test
    public void testUpload2() throws FileNotFoundException {

        InputStream inputStream = new FileInputStream("C:\\Users\\Administrator\\Desktop\\picture\\qqfc4.jpeg");

        ossClient.putObject("gulimall-wlq", "qqfc4.jpeg", inputStream);

        ossClient.shutdown();

        System.out.println("上传完成...");
    }
这里如果报空指针异常 在class上添加 @RunWith(SpringRunner.class)- 测试

- 总结
- 引入oss-starter
- 配置key,endpoint相关信 息即可
- 使用ossclient进行相关操作
新建module(gulimall-third-party)
- 选择web和openfeign

- xml
将common里的oss-starter引用删掉,并放在这里gulimall-third-party
<!-- oss-starter -->
        <dependency>
            <groupId>com.alibaba.cloud</groupId>
            <artifactId>spring-cloud-starter-alicloud-oss</artifactId>
        </dependency>
		<dependency>
            <groupId>com.wlq.gulimall</groupId>
            <artifactId>gulimall-common</artifactId>
            <version>0.0.1-SNAPSHOT</version>
            <exclusions>
                <exclusion>
                    <groupId>com.baomidou</groupId>
                    <artifactId>mybatis-plus-boot-starter</artifactId>
                </exclusion>
            </exclusions>
        </dependency>
<dependencyManagement>
    <dependencies>
        <dependency>
            <groupId>com.alibaba.cloud</groupId>
            <artifactId>spring-cloud-alibaba-dependencies</artifactId>
            <version>2.1.0.RELEASE</version>
            <type>pom</type>
            <scope>import</scope>
        </dependency>
    </dependencies>
</dependencyManagement>
-
创建命名空间

-
将product里yml写的oss配置删除,并在配置中心创建oss.yml

-
bootstrap.properties
spring.application.name=gulimall-third-party
spring.cloud.nacos.config.server-addr=127.0.0.1:8848
spring.cloud.nacos.config.namespace=b78b2e2a-7249-47fa-9968-104cf4646678
spring.cloud.nacos.config.ext-config[0].data-id=oss.yml
spring.cloud.nacos.config.ext-config[0].group=DEFAULT_GROUP
#动态刷新
spring.cloud.nacos.config.ext-config[0].refresh=true
- YML
spring:
  cloud:
    nacos:
      discovery:
        server-addr: 127.0.0.1:8848
    alicloud:
     access-key: LTAI5tJjtcA2vHdjbu97jWDP
     secret-key: gKo9taMkPfYpx5H22TanJjq7BqbNNd
     oss:
        endpoint: oss-cn-shenzhen.aliyuncs.com
        bucket: gulimall-wlq

  application:
    name: gulimall-third-party

server:
  port: 30000
-
主启动添加:
@EnableDiscoveryClient,并启动 -
测试test
	@Autowired
    OSSClient ossClient;

    @Test
    public void testUpload2() throws FileNotFoundException {

        InputStream inputStream = new FileInputStream("C:\\Users\\Administrator\\Desktop\\picture\\qqfc5.jpeg");

        ossClient.putObject("gulimall-wlq", "qqfc5.jpeg", inputStream);

        ossClient.shutdown();

        System.out.println("上传完成...");
    }
- 查看

服务端签名后直传
官方文档:https://help.aliyun.com/document_detail/31926.html?spm=a2c4g.11186623.6.1733.4d8914a0ClFUYU
应用服务器核心代码解析
应用服务器源码包含了签名直传服务和上传回调服务两个功能。
- 签名直传服务
- 签名直传服务响应客户端发送给应用服务器的GET消息,代码片段如下:
protected void doGet(HttpServletRequest request, HttpServletResponse response)
            throws ServletException, IOException {

        String accessId = "<yourAccessKeyId>"; // 请填写您的AccessKeyId。
        String accessKey = "<yourAccessKeySecret>"; // 请填写您的AccessKeySecret。
        String endpoint = "oss-cn-hangzhou.aliyuncs.com"; // 请填写您的 endpoint。
        String bucket = "bucket-name"; // 请填写您的 bucketname 。
        String host = "https://" + bucket + "." + endpoint; // host的格式为 bucketname.endpoint
        // callbackUrl为 上传回调服务器的URL,请将下面的IP和Port配置为您自己的真实信息。
        String callbackUrl = "http://88.88.88.88:8888";
        String dir = "user-dir-prefix/"; // 用户上传文件时指定的前缀。

        // 创建OSSClient实例。
        OSS ossClient = new OSSClientBuilder().build(endpoint, accessId, accessKey);
        try {
            long expireTime = 30;
            long expireEndTime = System.currentTimeMillis() + expireTime * 1000;
            Date expiration = new Date(expireEndTime);
            // PostObject请求最大可支持的文件大小为5 GB,即CONTENT_LENGTH_RANGE为5*1024*1024*1024。
            PolicyConditions policyConds = new PolicyConditions();
            policyConds.addConditionItem(PolicyConditions.COND_CONTENT_LENGTH_RANGE, 0, 1048576000);
            policyConds.addConditionItem(MatchMode.StartWith, PolicyConditions.COND_KEY, dir);

            String postPolicy = ossClient.generatePostPolicy(expiration, policyConds);
            byte[] binaryData = postPolicy.getBytes("utf-8");
            String encodedPolicy = BinaryUtil.toBase64String(binaryData);
            String postSignature = ossClient.calculatePostSignature(postPolicy);

            Map<String, String> respMap = new LinkedHashMap<String, String>();
            respMap.put("accessid", accessId);
            respMap.put("policy", encodedPolicy);
            respMap.put("signature", postSignature);
            respMap.put("dir", dir);
            respMap.put("host", host);
            respMap.put("expire", String.valueOf(expireEndTime / 1000));
            // respMap.put("expire", formatISO8601Date(expiration));

            JSONObject jasonCallback = new JSONObject();
            jasonCallback.put("callbackUrl", callbackUrl);
            jasonCallback.put("callbackBody",
                    "filename=${object}&size=${size}&mimeType=${mimeType}&height=${imageInfo.height}&width=${imageInfo.width}");
            jasonCallback.put("callbackBodyType", "application/x-www-form-urlencoded");
            String base64CallbackBody = BinaryUtil.toBase64String(jasonCallback.toString().getBytes());
            respMap.put("callback", base64CallbackBody);

            JSONObject ja1 = JSONObject.fromObject(respMap);
            // System.out.println(ja1.toString());
            response.setHeader("Access-Control-Allow-Origin", "*");
            response.setHeader("Access-Control-Allow-Methods", "GET, POST");
            response(request, response, ja1.toString());

        } catch (Exception e) {
            // Assert.fail(e.getMessage());
            System.out.println(e.getMessage());
        } finally {
            ossClient.shutdown();
        }
    }
OSS获取服务端签名
- 新建controller:OssController(gulimall-third-party)
@RestController
public class OssController {

    @Autowired
    OSSClient ossClient;

    @Value("${spring.cloud.alicloud.oss.endpoint}")
    private String endpoint;
    @Value("${spring.cloud.alicloud.oss.bucket}")
    private String bucket;
    @Value("${spring.cloud.alicloud.access-key}")
    private String accessId;


    @RequestMapping("oss/policy")
    public Map<String, String>  policy(){

        String host = "https://" + bucket + "." + endpoint; // host的格式为 bucketname.endpoint

        String format = new SimpleDateFormat("yyyy-MM-dd").format(new Date());
        String dir = format+"/"; // 用户上传文件时指定的前缀。

        Map<String, String> respMap = null;
        try {
            long expireTime = 30;
            long expireEndTime = System.currentTimeMillis() + expireTime * 1000;
            Date expiration = new Date(expireEndTime);
            // PostObject请求最大可支持的文件大小为5 GB,即CONTENT_LENGTH_RANGE为5*1024*1024*1024。
            PolicyConditions policyConds = new PolicyConditions();
            policyConds.addConditionItem(PolicyConditions.COND_CONTENT_LENGTH_RANGE, 0, 1048576000);
            policyConds.addConditionItem(MatchMode.StartWith, PolicyConditions.COND_KEY, dir);

            String postPolicy = ossClient.generatePostPolicy(expiration, policyConds);
            byte[] binaryData = postPolicy.getBytes("utf-8");
            String encodedPolicy = BinaryUtil.toBase64String(binaryData);
            String postSignature = ossClient.calculatePostSignature(postPolicy);

            respMap = new LinkedHashMap<String, String>();
            respMap.put("accessid", accessId);
            respMap.put("policy", encodedPolicy);
            respMap.put("signature", postSignature);
            respMap.put("dir", dir);
            respMap.put("host", host);
            respMap.put("expire", String.valueOf(expireEndTime / 1000));
            // respMap.put("expire", formatISO8601Date(expiration));


        } catch (Exception e) {
            // Assert.fail(e.getMessage());
            System.out.println(e.getMessage());
        } finally {
            ossClient.shutdown();
        }
        return respMap;
    }
}
- 启动
访问:http://localhost:30000/oss/policy

- 修改网关添加映射
YML
- id: third_party_route
            uri: lb://gulimall-third-party
            predicates:
              - Path=/api/thirdparty/**
            filters:
              - RewritePath=/api/thirdparty(?<segment>.*),/$\{segment}
- 访问测试
http://localhost:88/api/thirdparty/oss/policy

OSS前后联调测试上传
-
将upload复制进components
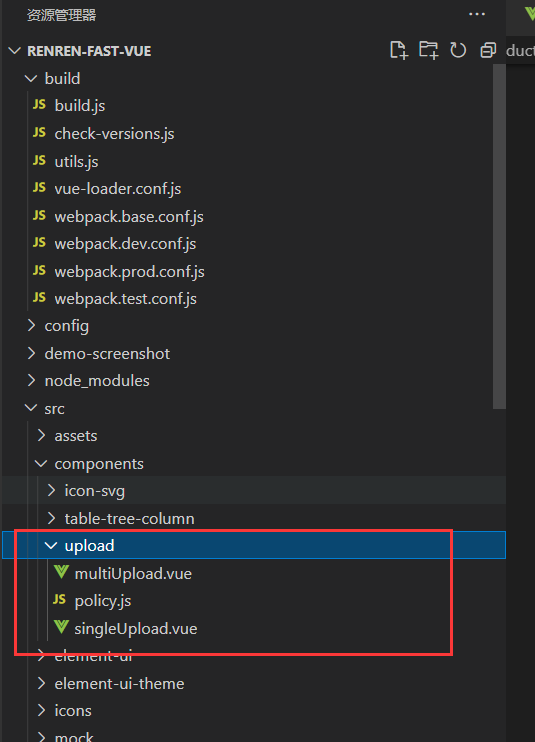
-
复制阿里云的bucket域名

-
修改upload里的vue
<el-upload
      action="http://gulimall-wlq.oss-cn-shenzhen.aliyuncs.com"
    >
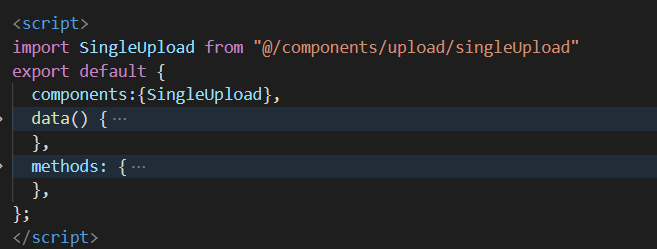
- 修改product\brand-add-or-update.vue
<script>
import SingleUpload from "@/components/upload/singleUpload"
</srcipt>
- 修改singleupload.vue
beforeUpload(file) {
        let _self = this;
        return new Promise((resolve, reject) => {
          policy().then(response => {
            console.log("响应的数据",response);
            _self.dataObj.policy = response.data.policy;
            _self.dataObj.signature = response.data.signature;
            _self.dataObj.ossaccessKeyId = response.data.accessid;
            _self.dataObj.key = response.data.dir +getUUID()+'_${filename}';
            _self.dataObj.dir = response.data.dir;
            _self.dataObj.host = response.data.host;
            console.log("响应的数据222",_self.dataObj);
            resolve(true)
          }).catch(err => {
            reject(false)
          })
        })
      },
- 添加
components:{SingleUpload},
<el-form-item label="品牌logo地址" prop="logo">
        <!-- <el-input v-model="dataForm.logo" placeholder="品牌logo地址"></el-input> -->
        <single-upload v-model="dataForm.logo"></single-upload>
      </el-form-item>
- 修改OssController
@RequestMapping("oss/policy")
    public R policy(){
	    ....
        return R.ok().put("data",respMap);
    }
-
前端上传文件测试发现报错(跨域)

-
OSS添加跨域


-
还报错的话修改
expireTime = 60000 -
上传成功查看阿里云


表单效验(品牌新增功能调试)
- 修改brand-add-or-update.vue
<el-form-item label="显示状态" prop="showStatus">
        <el-switch
            v-model="dataForm.showStatus"
            active-color="#13ce66"
            inactive-color="#ff4949"
            :active-value="1"
            :inactive-value="0"
          >
          </el-switch>
      </el-form-item>
- 测试新增,新增一个小米

- 添加自定义列和图片显示
<el-table-column
        prop="logo"
        header-align="center"
        align="center"
        label="品牌logo地址"
      >
        <template slot-scope="scope">
          <el-image
            style="width: 100px; height: 80px"
            :src="scope.row.logo"
            fit="contain"
          ></el-image>
        </template>
      </el-table-column>
- 发现报错不能找到image组件,去element官网修改src\element-ui\index.js
/**
 * UI组件, 统一使用饿了么桌面端组件库(https://github.com/ElemeFE/element)
 *
 * 使用:
 *  1. 项目中需要的组件进行释放(解开注释)
 *
 * 注意:
 *  1. 打包只会包含释放(解开注释)的组件, 减少打包文件大小
 */
import Vue from 'vue'
import {
  Pagination,
  Dialog,
  Autocomplete,
  Dropdown,
  DropdownMenu,
  DropdownItem,
  Menu,
  Submenu,
  MenuItem,
  MenuItemGroup,
  Input,
  InputNumber,
  Radio,
  RadioGroup,
  RadioButton,
  Checkbox,
  CheckboxButton,
  CheckboxGroup,
  Switch,
  Select,
  Option,
  OptionGroup,
  Button,
  ButtonGroup,
  Table,
  TableColumn,
  DatePicker,
  TimeSelect,
  TimePicker,
  Popover,
  Tooltip,
  Breadcrumb,
  BreadcrumbItem,
  Form,
  FormItem,
  Tabs,
  TabPane,
  Tag,
  Tree,
  Alert,
  Slider,
  Icon,
  Row,
  Col,
  Upload,
  Progress,
  Spinner,
  Badge,
  Card,
  Rate,
  Steps,
  Step,
  Carousel,
  CarouselItem,
  Collapse,
  CollapseItem,
  Cascader,
  ColorPicker,
  Transfer,
  Container,
  Header,
  Aside,
  Main,
  Footer,
  Timeline,
  TimelineItem,
  Link,
  Divider,
  Image,
  Calendar,
  Loading,
  MessageBox,
  Message,
  Notification
} from 'element-ui';

Vue.use(Pagination);
Vue.use(Dialog);
Vue.use(Autocomplete);
Vue.use(Dropdown);
Vue.use(DropdownMenu);
Vue.use(DropdownItem);
Vue.use(Menu);
Vue.use(Submenu);
Vue.use(MenuItem);
Vue.use(MenuItemGroup);
Vue.use(Input);
Vue.use(InputNumber);
Vue.use(Radio);
Vue.use(RadioGroup);
Vue.use(RadioButton);
Vue.use(Checkbox);
Vue.use(CheckboxButton);
Vue.use(CheckboxGroup);
Vue.use(Switch);
Vue.use(Select);
Vue.use(Option);
Vue.use(OptionGroup);
Vue.use(Button);
Vue.use(ButtonGroup);
Vue.use(Table);
Vue.use(TableColumn);
Vue.use(DatePicker);
Vue.use(TimeSelect);
Vue.use(TimePicker);
Vue.use(Popover);
Vue.use(Tooltip);
Vue.use(Breadcrumb);
Vue.use(BreadcrumbItem);
Vue.use(Form);
Vue.use(FormItem);
Vue.use(Tabs);
Vue.use(TabPane);
Vue.use(Tag);
Vue.use(Tree);
Vue.use(Alert);
Vue.use(Slider);
Vue.use(Icon);
Vue.use(Row);
Vue.use(Col);
Vue.use(Upload);
Vue.use(Progress);
Vue.use(Spinner);
Vue.use(Badge);
Vue.use(Card);
Vue.use(Rate);
Vue.use(Steps);
Vue.use(Step);
Vue.use(Carousel);
Vue.use(CarouselItem);
Vue.use(Collapse);
Vue.use(CollapseItem);
Vue.use(Cascader);
Vue.use(ColorPicker);
Vue.use(Transfer);
Vue.use(Container);
Vue.use(Header);
Vue.use(Aside);
Vue.use(Main);
Vue.use(Footer);
Vue.use(Timeline);
Vue.use(TimelineItem);
Vue.use(Link);
Vue.use(Divider);
Vue.use(Image);
Vue.use(Calendar);


Vue.use(Loading.directive)

Vue.prototype.$loading = Loading.service
Vue.prototype.$msgbox = MessageBox
Vue.prototype.$alert = MessageBox.alert
Vue.prototype.$confirm = MessageBox.confirm
Vue.prototype.$prompt = MessageBox.prompt
Vue.prototype.$notify = Notification
Vue.prototype.$message = Message

Vue.prototype.$ELEMENT = { size: 'medium' }
- 再次测试,发现图片显示空白

- 修改image
<template slot-scope="scope">
          <!-- <el-image
            style="width: 100px; height: 80px"
            :src="scope.row.logo"
            fit="contain"
          ></el-image> -->
          <img :src="scope.row.logo" style="width: 100px; height: 80px">
        </template>
- 成功显示

- 修改排序,添加number
<el-form-item label="排序" prop="sort">
        <el-input v-model.number="dataForm.sort" placeholder="排序"></el-input>
      </el-form-item>
- 修改dataRule(brand-add-or-update.vue)
firstLetter: [
          {
            validator: (rule, value, callback) => {
              if (value === "") {
                callback(new Error("首字母必须填写"));
              } else if (!/^[a-zA-Z]$/.test(value)) {
                callback(new Error("首字母必须是a-z或A-Z之间"));
              } else {
                callback();
              }
            },
            trigger: "blur",
          },
        ],
        sort: [
          {
            validator: (rule, value, callback) => {
              if (value === "") {
                callback(new Error("首字母必须填写"));
              } else if (!Number.isInteger(value) || value<0) {
                callback(new Error("排序必须是一个大于等于0的整数"));
              } else {
                callback();
              }
            },
            trigger: "blur",
          },
        ],
data
dataForm: {
        brandId: 0,
        name: "",
        logo: "",
        descript: "",
        showStatus: 1,
        firstLetter: "",
        sort: 0,
      },
- 测试

后端也要进行效验(JSR303)
1、品牌添加校验
- 给需要效验的数据的been添加注解,比如这里是品牌的效验,在brandentity上添加注解
- 注意:这里要使用注解需要引入validation-api
- entity:
@NotBlank 不能为空
/**
	 * 品牌名
	 */
	@NotBlank
	private String name;
- controller,
@Valid:告诉springmvc这个字段需要效验
/**
     * 保存
     */
    @RequestMapping("/save")
    public R save(@Valid @RequestBody BrandEntity brand){
        brandService.save(brand);

        return R.ok();
    }
-
使用postman跳过前端效验进行测试

-
直接badrequest

-
修改message提示内容
/**
	 * 品牌名
	 */
	@NotBlank(message = "品牌名必须提交")
	private String name;
2、获取校验结果
给校验的bean后紧跟一个BindingResult, 就可以获取到校验的结果
- controller
/**
     * 保存
     */
    @RequestMapping("/save")
    public R save(@Valid @RequestBody BrandEntity brand, BindingResult result){
        if (result.hasErrors()){
            Map<String,String> map = new HashMap<>();
            //1、获取效验的错误
            result.getFieldErrors().forEach((item)->{
                //FieldError 获取到错误提示
                String message = item.getDefaultMessage();
                //获取错误属性的名字
                String field = item.getField();
                map.put(field,message);
            });

            return R.error(400,"提交的数据不合法").put("data",map);

        }else{
            brandService.save(brand);
        }


        return R.ok();
    }
- postman 测试

3、同理修改其它几个
@Data
@TableName("pms_brand")
public class BrandEntity implements Serializable {
	private static final long serialVersionUID = 1L;

	/**
	 * 品牌id
	 */
	@TableId
	private Long brandId;

	/**
	 * 品牌名
	 */
	@NotBlank(message = "品牌名必须提交")
	private String name;

	/**
	 * 品牌logo地址
	 */
	@NotEmpty
	@URL(message = "logo必须是一个合法的URL地址")
	private String logo;

	/**
	 * 介绍
	 */
	private String descript;

	/**
	 * 显示状态[0-不显示;1-显示]
	 */
	private Integer showStatus;

	/**
	 * 检索首字母
	 * @Pattern:自定义
	 */
	@NotEmpty
	@Pattern(regexp = "/^[a-zA-z]$/",message = "检索首字母必须是一个字母")
	private String firstLetter;

	/**
	 * 排序
	 */
	@NotEmpty
	@Min(value = 0,message = "排序必须大于等于0")
	private Integer sort;


}
- postman测试

问题:这样每个业务里的新增修改都要加入这些效验功能,代码重复
4、统一异常处理 ControllerAdvice
- 将上面写的BindingResult注释掉
/**
     * 保存
     */
    @RequestMapping("/save")
    public R save(@Valid @RequestBody BrandEntity brand /*,BindingResult result*/){
//        if (result.hasErrors()){
//            Map<String,String> map = new HashMap<>();
//            //1、获取效验的错误
//            result.getFieldErrors().forEach((item)->{
//                //FieldError 获取到错误提示
//                String message = item.getDefaultMessage();
//                //获取错误属性的名字
//                String field = item.getField();
//                map.put(field,message);
//            });
//
//            return R.error(400,"提交的数据不合法").put("data",map);
//
//        }else{
//            brandService.save(brand);
//        }

        brandService.save(brand);

        return R.ok();
    }
- 新建exception.GulimallExceptionControllerAdvice.java
/**
 * 集中处理所有异常
 */
//@ControllerAdvice(basePackages = "com.wlq.gulimall.product.controller")
//@ResponseBody
@Slf4j
@RestControllerAdvice(basePackages = "com.wlq.gulimall.product.controller")
public class GulimallExceptionControllerAdvice {

    @ExceptionHandler(value = Exception.class)
    public R handleVaildException(Exception e){
        log.error("数据效验出现问题{},异常类型:{}",e.getMessage(),e.getClass());
        return R.error();
    }
}
- postman测试

- 查看控制台
ERROR 4780 --- [io-10000-exec-1] .g.p.e.GulimallExceptionControllerAdvice : 数据效验出现问题
arguments []; default message [sort]]; default message [不能为null]] ,
异常类型:class.org.springframework.web.bind.MethodArgumentNotValidException
- 根据控制台提示的异常类型修改controller:
class.org.springframework.web.bind.MethodArgumentNotValidException
/**
 * 集中处理所有异常
 */
//@ControllerAdvice(basePackages = "com.wlq.gulimall.product.controller")
//@ResponseBody
@Slf4j
@RestControllerAdvice(basePackages = "com.wlq.gulimall.product.controller")
public class GulimallExceptionControllerAdvice {

    @ExceptionHandler(value = MethodArgumentNotValidException.class)
    public R handleVaildException(MethodArgumentNotValidException e){
        log.error("数据效验出现问题{},异常类型:{}",e.getMessage(),e.getClass());
        BindingResult bindingResult = e.getBindingResult();

        Map<String,String> errorMap = new HashMap<>();
        bindingResult.getFieldErrors().forEach((fieldError) -> {
            errorMap.put(fieldError.getField(),fieldError.getDefaultMessage());
        });
        return R.error(400,"数据校验出现问题").put("data",errorMap);
    }
}
- postman测试

- 还能写更多异常处理,
建议在项目里的异常都抛出器,都用ControllerAdvice来感知处理
/**
 * 集中处理所有异常
 */
//@ControllerAdvice(basePackages = "com.wlq.gulimall.product.controller")
//@ResponseBody
@Slf4j
@RestControllerAdvice(basePackages = "com.wlq.gulimall.product.controller")
public class GulimallExceptionControllerAdvice {

    //数据校验异常处理
    @ExceptionHandler(value = MethodArgumentNotValidException.class)
    public R handleVaildException(MethodArgumentNotValidException e){
        log.error("数据效验出现问题{},异常类型:{}",e.getMessage(),e.getClass());
        BindingResult bindingResult = e.getBindingResult();

        Map<String,String> errorMap = new HashMap<>();
        bindingResult.getFieldErrors().forEach((fieldError) -> {
            errorMap.put(fieldError.getField(),fieldError.getDefaultMessage());
        });
        return R.error(400,"数据校验出现问题").put("data",errorMap);
    }

    //其它异常,如果异常能匹配的上面的精确异常就走上面的,否则就走这个最大的异常处理
    @ExceptionHandler(value = Throwable.class)
    public R handleException(Throwable throwable){
        return R.error();
    }
}
5、状态码推荐这样做
- 错误码和错误信息定义类
- 1.错误码定义规则为5位数字
- 2.前两位表示业务场景,最后三位表示错误码。例如: 10001。10:通用001:系 统未知异常
- 3.维护错误码后需要维护错误描述,将他们定义为枚举形式
- 错误码列表:
- 10 :通用
- 001 :参数格式校验
- 11 :商品
- 12 :订单
- 13 :购物车
- 14 :物流
- 10 :通用
common创建exception,再创建一个枚举BizCodeEnume
public enum BizCodeEnume {
    UNKNOW_EXCEPTION(10000,"系统未知异常"),
    VAILD_EXCEPTION(10001,"参数格式校验失败");

    private int code;
    private String msg;
    BizCodeEnume(int code ,String msg){
        this.code = code;
        this.msg = msg;
    }

    public int getCode() {
        return code;
    }

    public String getMsg() {
        return msg;
    }
}
- 修改GulimallExceptionControllerAdvice的错误码和错误码信息
//数据校验异常处理
    @ExceptionHandler(value = MethodArgumentNotValidException.class)
    public R handleVaildException(MethodArgumentNotValidException e){
        ...
        return R.error(BizCodeEnume.VAILD_EXCEPTION.getCode(),BizCodeEnume.VAILD_EXCEPTION.getMsg()).put("data",errorMap);
    }

    //其它异常,如果异常能匹配的上面的精确异常就走上面的,否则就走这个最大的异常处理
    @ExceptionHandler(value = Throwable.class)
    public R handleException(Throwable throwable){
        return R.error(BizCodeEnume.UNKNOW_EXCEPTION.getCode(),BizCodeEnume.UNKNOW_EXCEPTION.getMsg());
    }
- postman测试

6、分组校验(多场景复制校验)
common新建valid,再新建接口AddGroup,UpdateGroup(空接口)
新增
- 修改BrandEntity
// @NotBlank(message = "品牌名必须提交",groups = {AddGroup.class,UpdateGroup.class})
//给校验注解标注什么情况需要进行校验

/**
	 * 品牌id
	 */
	@NotNull(message = "修改必须指定品牌id",groups = UpdateGroup.class)
	@Null(message = "新增不能指定id",groups = AddGroup.class)
	@TableId
	private Long brandId;

	/**
	 * 品牌名
	 */
	@NotBlank(message = "品牌名必须提交",groups = {AddGroup.class,UpdateGroup.class})
	private String name;

	/**
	 * 品牌logo地址
	 */
	@NotEmpty(groups = {AddGroup.class})
	@URL(message = "logo必须是一个合法的URL地址",groups = {AddGroup.class,UpdateGroup.class})
	private String logo;
- 修改controller:
@Validated({AddGroup.class})指定一个或者多个分组,就会安装这个分组进行校验
/**
     * 保存
     */
    @RequestMapping("/save")
    public R save(@Validated({AddGroup.class}) @RequestBody BrandEntity brand){
        brandService.save(brand);

        return R.ok();
    }
- postman测试


修改
- 修改controller
/**
     * 修改
     */
    @RequestMapping("/update")
    public R update(@Validated(UpdateGroup.class) @RequestBody BrandEntity brand){
		brandService.updateById(brand);

        return R.ok();
    }
- entity
@Data
@TableName("pms_brand")
public class BrandEntity implements Serializable {
	private static final long serialVersionUID = 1L;

	/**
	 * 品牌id
	 */
	@NotNull(message = "修改必须指定品牌id",groups = UpdateGroup.class)
	@Null(message = "新增不能指定id",groups = AddGroup.class)
	@TableId
	private Long brandId;

	/**
	 * 品牌名
	 */
	@NotBlank(message = "品牌名必须提交",groups = {AddGroup.class,UpdateGroup.class})
	private String name;

	/**
	 * 品牌logo地址
	 */
	@NotBlank(groups = {AddGroup.class})
	@URL(message = "logo必须是一个合法的URL地址",groups = {AddGroup.class,UpdateGroup.class})
	private String logo;

	/**
	 * 介绍
	 */
	private String descript;

	/**
	 * 显示状态[0-不显示;1-显示]
	 */
	private Integer showStatus;

	/**
	 * 检索首字母
	 * @Pattern:自定义
	 */
	@NotEmpty(groups = {AddGroup.class})
	@Pattern(regexp = "^[a-zA-z]$",message = "检索首字母必须是一个字母",groups = {AddGroup.class,UpdateGroup.class})
	private String firstLetter;

	/**
	 * 排序
	 */
	@NotNull(groups = {AddGroup.class})
	@Min(value = 0,message = "排序必须大于等于0",groups = {AddGroup.class,UpdateGroup.class})
	private Integer sort;

}
注意:默认没有指定分组的校验注解@NotBlank,在分组校验情况下不生效,只会在@Validated生效;
7、自定义效验
1)、编写一个自定义的校验注解
2)、编写一个自定义的校验器
3)、关联自定义的校验器和自定义的校脸注解
- entity
	/**
	 * 显示状态[0-不显示;1-显示]
	 */
	@ListValue(vals={0,1},groups = {AddGroup.class})
	private Integer showStatus;
<dependency>
            <groupId>javax.validation</groupId>
            <artifactId>validation-api</artifactId>
            <version>2.0.1.Final</version>
            <scope>compile</scope>
        </dependency>
- 创建com.wlq.common.valid.ListValue(自定义的校验注解)
@Documented
@Constraint(
        validatedBy = {ListValueConstraintValidator.class}
)
@Target({ElementType.METHOD, ElementType.FIELD, ElementType.ANNOTATION_TYPE, ElementType.CONSTRUCTOR, ElementType.PARAMETER, ElementType.TYPE_USE})
@Retention(RetentionPolicy.RUNTIME)
public @interface ListValue {

    String message() default "{com.wlq.common.valid.ListValue.message}";

    Class<?>[] groups() default {};

    Class<? extends Payload>[] payload() default {};

    int[] vals() default {};

}
- 创建ValidationMessages.properties
com.wlq.common.valid.ListValue.message=必须提交指定的值
- 创建ListValueConstraintValidator(自定义的校验器)
public class ListValueConstraintValidator implements ConstraintValidator<ListValue,Integer> {

    private Set<Integer> set = new HashSet<>();

    //初始化方法
    @Override
    public void initialize(ListValue constraintAnnotation) {

        int [] vals = constraintAnnotation.vals();
        for (int val : vals){
            set.add(val);
        }

    }

    /**
     * 判断是否校验成功
     * @param value
     * @param context
     * @return
     */
    @Override
    public boolean isValid(Integer value, ConstraintValidatorContext context) {

        return set.contains(value);
    }
}
- 测试

- 测试新增

8、完善
- 修改显示状态出现效验异常

- 错误分析
@NotBlank(message = "品牌名必须提交",groups = {AddGroup.class,UpdateGroup.class})
品牌名的非空判断里面带有UpdateGroup.class,所有在修改状态显示的时候由于其也携带UpdateGroup.class,所有也会一并校验品牌名是否为空。解决:我们单独写一个update来处理
- 修改BrandController,添加一个修改显示状态的方法,不再使用同一个update
	/**
     * 修改状态显示
     */
    @RequestMapping("/update/status")
    public R updateStatus(@Validated(UpdateStatusGroup.class) @RequestBody BrandEntity brand){
        brandService.updateById(brand);

        return R.ok();
    }
-
common的valid新增UpdateStatusGroup接口

-
修改entity
	/**
	 * 显示状态[0-不显示;1-显示]
	 */
	@NotNull(groups = {AddGroup.class, UpdateStatusGroup.class})
	@ListValue(vals={0,1},groups = {AddGroup.class, UpdateStatusGroup.class})
	private Integer showStatus;
- 修改brand.vue
updateBrandStatus(data) {
      console.log("最新信息:", data);
      //解构
      let { brandId, showStatus } = data;
      //发送请求,修改状态
      this.$http({
        url: this.$http.adornUrl("/product/brand/update/status"),
        method: "post",
        data: this.$http.adornData(
          { brandId: brandId, showStatus: showStatus ? 1 : 0 },
          false
        ),
      }).then(({ data }) => {
        this.$message({
          message: "状态更新成功",
          type: "success",
        });
      });
    },
- 报错消失

SPU&SKU
SPU: Standard Product Unit (标准化产品单元)
是商品信息聚合的最小单位,是一组可复用、易检索的标准化信息的集合,该集合描述了个产品的特性。
SKU: Stock Keeping Unit (库存量单位)
即库存进出计量的基本单元,可以是以件,盒,托盘等为单位。SKU这是对于大型连锁超市DC (配送中心)物流管理的一一个必要的方法。现在已经被引申为产品统一编号的简称,每种产品均对应有唯一的SKU号。
平台属性:基本属性、规格参数、销售属性
每个分类下的商品共享规格参数,与销售属性。只是有些商品不一定要用这个分类下全部的属性:
- 属性是以三级分类组织起来的
- 规格参数中有些是可以提供检索的
- 规格参数也是基本属性,他们具有自己的分组
- 属性的分组也是以三级分类组织起来的
- 属性名确定的,但是值是每一个商品不同来决定的


- 在gulimall_admin下运行sql文件:sys_menus.sql
1、基本属性(属性分组)
前端组件抽取&父子组件交互
前端组件抽取
-
新建views\modules\common\category.vue,用于公共使用

-
修改common下的category.vue
<template>
  <el-tree :data="menus" :props="defaultProps" node-key="catId" ref="menuTree">
  </el-tree>
</template>
data() {
    //这里存放数据
    return {
      menus: [],
      expandedKey: [],
      defaultProps: {
        children: "children",
        label: "name",
      },
    };
  },
methods: {
      //获取菜单数据
    getMenus() {
      this.$http({
        url: this.$http.adornUrl("/product/category/list/tree"),
        method: "get",
      }).then(({ data }) => {
        console.log("成功获取的菜单数据...", data.data);
        this.menus = data.data;
      });
    },
  },
created() {
      this.getMenus();
  },
- 新建attrgroup.vue

- 使用分栏间隔布局

- 修改product下的attrgroup.vue
<template>
  <el-row :gutter="20">
    <el-col :span="6">菜单</el-col>
    <el-col :span="18">表格</el-col>
  </el-row>
</template>
- 导入common下的category.vue
import Category from '../common/category'

export default {
  //import引入的组件需要注入到对象中才能使用
  //组件名:组件对象,相同可以写一个
  components: {Category:Category},
<template>
  <el-row :gutter="20">
    <el-col :span="6">
        <category></category>
    </el-col>
    <el-col :span="18">
        表格
    </el-col>
  </el-row>
</template>
-
查看

-
复制逆向工程生成的代码

-
复制
-
复制template下的div放到表格里面

-
复制script全部
-
复制attrgroup-add-or-update.vue到product
-
查看效果

父子组件交互
父子组件传递数据
1、子组件给父组件传递数据,使用事件机制,子组件给父组件发送一个事件,携带上数据。
//向父组件发送事件
        this.$emit("事件名",携带的数据...);
- 使用node-click事件

- 修改common下的category.vue
<template>
  <el-tree :data="menus" :props="defaultProps" node-key="catId" ref="menuTree" @node-click="nodeclick">
  </el-tree>
</template>
- 添加nodeclick方法
//回调
    nodeclick(data,node,component){
        console.log("子组件category的节点被点击",data,node,component);
        //向父组件发送事件
        this.$emit("tree-node-click",data,node,component);
    },
- 修改attrgroup.vue
<el-col :span="6">
      <category @tree-node-click="treenodeclick"></category>
    </el-col>
method
	//感知树节点被点击
      treenodeclick(data,node,component){
          console.log("attrgroup感知到categrop的节点被点击",data,node,component);
          console.log("刚才被点击的是:"+data.name,"id为:"+data.catId);
      },
- 测试

获取分类属性分组
- 修改AttrGroupController
/**
     * 列表
     */
    @RequestMapping("/list/{catelogId}")
    public R list(@RequestParam Map<String, Object> params,
                  @PathVariable Long catelogId){
//        PageUtils page = attrGroupService.queryPage(params);

        PageUtils page = attrGroupService.queryPage(params,catelogId);

        return R.ok().put("page", page);
    }
- service添加方法
public interface AttrGroupService extends IService<AttrGroupEntity> {

    PageUtils queryPage(Map<String, Object> params);

    PageUtils queryPage(Map<String, Object> params, Long catelogId);
}
- 添加方法的实现
@Override
    public PageUtils queryPage(Map<String, Object> params, Long catelogId) {
        if (catelogId == 0){
            IPage<AttrGroupEntity> page = this.page(new Query<AttrGroupEntity>().getPage(params),
                    new QueryWrapper<AttrGroupEntity>());
            return new PageUtils(page);
        }else {
            String key = (String) params.get("key");
            //select * from psm_attr_group where catelog_id=? and (attr_group_id=key or attr_group_name like %key%)
            QueryWrapper<AttrGroupEntity> wrapper =new QueryWrapper<AttrGroupEntity>().eq("catelog_id",catelogId);
            if (!StringUtils.isEmpty(key)){
                wrapper.and((obj)->{
                    obj.eq("attr_group_id",key).or().like("attr_group_name",key);
                });
            }

            IPage<AttrGroupEntity> page = this.page(new Query<AttrGroupEntity>().getPage(params),wrapper);
            return new PageUtils(page);
        }
    }
- postman测试

- 查看debug日志打印的SQL语句
==>  Preparing: SELECT attr_group_id,icon,catelog_id,sort,descript,attr_group_name FROM pms_attr_group WHERE (catelog_id = ? AND ( (attr_group_id = ? OR attr_group_name LIKE ?) ))
2021-06-10 16:16:47.379 DEBUG 12808 --- [io-10000-exec-1] c.w.g.p.dao.AttrGroupDao.selectPage      : ==> Parameters: 1(Long), aa(String), %aa%(String)
2021-06-10 16:16:47.398 DEBUG 12808 --- [io-10000-exec-1] c.w.g.p.dao.AttrGroupDao.selectPage      : <==      Total: 0
后台测试没问题了
- 调整前端
date
catId: 0,
- 修改URL
url: this.$http.adornUrl(`/product/attrgroup/list/${this.catId}`),
//感知树节点被点击
    treenodeclick(data, node, component) {
      console.log("attrgroup感知到categrop的节点被点击", data, node, component);
      console.log("刚才被点击的是:" + data.name, "id为:" + data.catId);
      if(node.level == 3){
        this.catId = data.catId;
        this.getDataList();//重新查询
      }

    },
- 测试

- 修改查到的231数据
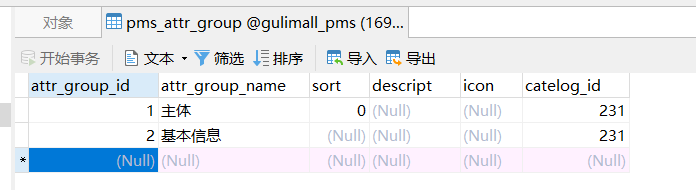
- 再次点击231移动电源

- 测试查询根据id和组名


分组新增&级联选择器
- 级联选择器

- 修改attrgroup-add-or-update.vue
<el-form-item label="所属分类id" prop="catelogId">
        <!-- <el-input v-model="dataForm.catelogId" placeholder="所属分类id"></el-input> @change="handleChange"-->
        <el-cascader
          v-model="dataForm.catelogIds"
          :options="categorys"
          :props="props"	//指定选项的值为选项对象的某个属性值
        ></el-cascader>
      </el-form-item>
- date
visible: false,
      props: {
        value:"catId",
        label:"name",
        children:"children"
      },
      categorys: [],
      dataForm: {
        attrGroupId: 0,
        attrGroupName: "",
        sort: "",
        descript: "",
        icon: "",
        catelogIds: [],
        catelogId: 0,
      },
- method
methods: {
	//获取菜单
    getCategorys() {
      this.$http({
        url: this.$http.adornUrl("/product/category/list/tree"),
        method: "get",
      }).then(({ data }) => {
        console.log("成功获取的菜单数据...", data.data);
        this.menus = data.data;
      });
    },
dataFormSubmit() {
			  ....
              catelogId: this.dataForm.catelogIds[this.dataForm.catelogIds.length-1],
              ....
    },
- created
created(){
    this.getCategorys();
  }
- 查看效果

- 修改categoryEntity,空数组就不显示
	//这个字段不为空的时候返回才带数据
	@JsonInclude(JsonInclude.Include.NON_EMPTY)
	@TableField(exist = false)
	private List<CategoryEntity> children;
- 测试,没有出现空数组

成功
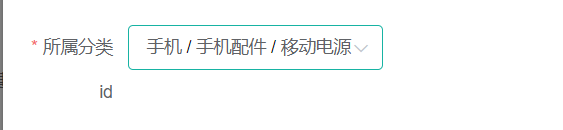
- 测试新增


- 分组修改,没有回现

- 修改init
init(id) {
    		.....
          }).then(({ data }) => {
            if (data && data.code === 0) {
				....
              //查出catelogId完整路径
              this.dataForm.catelogPath = data.attrGroup.catelogPath;
            }

    },

- 修改AttrGroupEntity
@TableField(exist = false)//在数据库中不存在
	private Long[] catelogPath;
- 修改controller
	@Autowired
    private CategoryService categoryService;

	/**
     * 信息
     */
    @RequestMapping("/info/{attrGroupId}")
    public R info(@PathVariable("attrGroupId") Long attrGroupId){
		AttrGroupEntity attrGroup = attrGroupService.getById(attrGroupId);

		Long catelogId = attrGroup.getCatelogId();
		Long[] path = categoryService.findCatelogPath(catelogId);

		attrGroup.setCatelogPath(path);

        return R.ok().put("attrGroup", attrGroup);
    }
- service
public interface CategoryService extends IService<CategoryEntity> {

    PageUtils queryPage(Map<String, Object> params);

    List<CategoryEntity> listWithTree();

    void removeMenuByIds(List<Long> asList);

    /**
     * 找到catelogid的完整路径
     * [父/子/孙]
     * @param catelogId
     * @return
     */
    Long[] findCatelogPath(Long catelogId);
}
- 实现
//[2,25,225]
    @Override
    public Long[] findCatelogPath(Long catelogId) {
        List<Long> paths = new ArrayList<>();
        List<Long> parentPath = findParentPath(catelogId,paths);

        Collections.reverse(parentPath);

        return parentPath.toArray(new Long[parentPath.size()]);
    }
    ///225,25,2
    private List<Long> findParentPath(Long catelogId,List<Long> paths){
        //1、搜集当前节点id
        paths.add(catelogId);
        CategoryEntity byId = this.getById(catelogId);
        if(byId.getParentCid()!=0){
            findParentPath(byId.getParentCid(),paths);
        }
        return paths;
    }
- test
@Autowired
    CategoryService categoryService;

    public void testFindPath(){
        Long[] catelogPath = categoryService.findCatelogPath(225L);
        log.info("完整路径:{}", Arrays.asList(catelogPath));
    }

-
查看前端

-
完善
问题:新增没有回现

-
closed

<el-dialog
    :title="!dataForm.attrGroupId ? '新增' : '修改'"
    :close-on-click-modal="false"
    :visible.sync="visible"
    @closed="dialogClose"
  >
methods: {
    dialogClose(){
      this.dataForm.catelogPath = [];
    },
- 查看

- 完善,可搜索的级联选择
<el-cascader
          v-model="dataForm.catelogPath"
          :options="categorys"
          :props="props"
          filterable
          placeholder="试试搜索:手机"
        ></el-cascader>
- 查看

2、品牌管理优化
品牌分类关联与级联更新
1、分页插件&模糊查询
- product下新建config.MyBatisConfig
官网:https://mp.baomidou.com/guide/page.html
@Configuration
@EnableTransactionManagement    //开启事务
@MapperScan("com.wlq.gulimall.product.dao")
public class MyBatisConfig {
    //引入分页插件
    // 旧版
    @Bean
    public PaginationInterceptor paginationInterceptor() {
        PaginationInterceptor paginationInterceptor = new PaginationInterceptor();
        // 设置请求的页面大于最大页后操作, true调回到首页,false 继续请求  默认false
         paginationInterceptor.setOverflow(true);
        // 设置最大单页限制数量,默认 500 条,-1 不受限制
         paginationInterceptor.setLimit(1500);
        // 开启 count 的 join 优化,只针对部分 left join
        paginationInterceptor.setCountSqlParser(new JsqlParserCountOptimize(true));
        return paginationInterceptor;
    }
}
- 模糊查询
BrandServiceImpl
@Slf4j
@Service("brandService")
public class BrandServiceImpl extends ServiceImpl<BrandDao, BrandEntity> implements BrandService {

    @Override
    public PageUtils queryPage(Map<String, Object> params) {
        //获取key
        String key = (String) params.get("key");

//        System.out.println("key:"+key);


        //检索条件
        QueryWrapper<BrandEntity> queryWrapper = new QueryWrapper<>();
        if (!StringUtils.isEmpty(key)){
            //非空就要进行模糊检索
            queryWrapper.eq("brand_id",key).or().like("name",key);
        }
        IPage<BrandEntity> page = this.page(
                new Query<BrandEntity>().getPage(params),
                queryWrapper
        );

        return new PageUtils(page);
    }

}
- 测试

- 复制

覆盖src\views\modules
2、关联分类
- 修改CategoryBrandRelationController
/**
     * 获取当前品牌关联的所有分类列表
     */
    @GetMapping("/catelog/list")
    public R cateloglist(@RequestParam("brandId") Long brandId){
        List<CategoryBrandRelationEntity> data = categoryBrandRelationService.list(
                new QueryWrapper<CategoryBrandRelationEntity>().eq("brand_id",brandId));

        return R.ok().put("data", data);
    }
- 修改save方法
/**
     * 保存
     */
    @RequestMapping("/save")
    public R save(@RequestBody CategoryBrandRelationEntity categoryBrandRelation){
		categoryBrandRelationService.saveDetail(categoryBrandRelation);

        return R.ok();
    }
CategoryBrandRelationService
public interface CategoryBrandRelationService extends IService<CategoryBrandRelationEntity> {

    PageUtils queryPage(Map<String, Object> params);

    void saveDetail(CategoryBrandRelationEntity categoryBrandRelation);
}
CategoryBrandRelationServiceImpl
	@Autowired
    BrandDao brandDao;

    @Autowired
    CategoryDao categoryDao;

@Override
    public void saveDetail(CategoryBrandRelationEntity categoryBrandRelation) {
        Long brandId = categoryBrandRelation.getBrandId();
        Long catelogId = categoryBrandRelation.getCatelogId();

        //1、查询详细名字
        BrandEntity brandEntity = brandDao.selectById(brandId); //根据品牌id查到品牌详情
        CategoryEntity categoryEntity = categoryDao.selectById(catelogId);

        categoryBrandRelation.setBrandName(brandEntity.getName());
        categoryBrandRelation.setCatelogName(categoryEntity.getName());

        this.save(categoryBrandRelation);
    }
- 测试

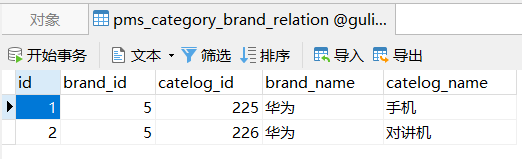
3、级联更新(数据一致性)


如果别处修改了品牌命名或目录名字,每个表应该也会同步修改
1、brand修改(使用UpdateWrapper)
- 修改brandcontroller的update方法
/**
     * 修改
     */
    @RequestMapping("/update")
    public R update(@Validated(UpdateGroup.class) @RequestBody BrandEntity brand){
		brandService.updateDatail(brand);

        return R.ok();
    }
- brandServiceImpl
	@Autowired
    CategoryBrandRelationService categoryBrandRelationService;

	@Override
    public void updateDatail(BrandEntity brand) {
        //保证冗余字段数据一致
        this.updateById(brand);
        if (!StringUtils.isEmpty(brand.getName())){
            //同步更新其他关联表中的数据
            categoryBrandRelationService.updateById(brand.getBrandId(),brand.getName());

            //TODO 更新其它关联
        }
    }
- 修改CategoryBrandRelationServiceImpl
@Override
    public void updateById(Long brandId, String name) {
        CategoryBrandRelationEntity relationEntity = new CategoryBrandRelationEntity;
        relationEntity.setBrandId(brandId);
        relationEntity.setBrandName(name);
        this.update(relationEntity,new UpdateWrapper<CategoryBrandRelationEntity>().eq("brand_id",brandId));
    }
- 测试


2、Category修改(使用sql语句)
- CategoryController
/**
     * 修改
     */
    @RequestMapping("/update")
    public R update(@RequestBody CategoryEntity category){
		categoryService.updateCascade(category);

        return R.ok();
    }
- CategoryService添加实现
void updateCascade(CategoryEntity category);
- CategoryServiceImpl
	@Autowired
    CategoryBrandRelationService categoryBrandRelationService;

	/**
     * 级联更新所有关联的数据
     * @param category
     */
    @Override
    @Transactional
    public void updateCascade(CategoryEntity category) {
        //更新自己
        this.updateById(category);
        //更新关联表
        categoryBrandRelationService.updateCategory(category.getCatId(),category.getName());
    }
- CategoryBrandRelationService
void updateCategory(Long catId, String name);
- CategoryBrandRelationServiceImpl
@Override
    public void updateCategory(Long catId, String name) {
        this.baseMapper.updateCategory(catId,name);
    }
- CategoryBrandRelationDao
@Mapper
public interface CategoryBrandRelationDao extends BaseMapper<CategoryBrandRelationEntity> {

    //如果以后mybatis声明的map接口有两个参数,一定要使用@Param为每一个参数起一个自己的名字,否则你想要获取参数的值就很麻烦
    void updateCategory(@Param("catId") Long catId, @Param("name") String name);
}
- mybatis-plus使用alt+enter自动生成sql
<?xml version="1.0" encoding="UTF-8"?>
<!DOCTYPE mapper PUBLIC "-//mybatis.org//DTD Mapper 3.0//EN" "http://mybatis.org/dtd/mybatis-3-mapper.dtd">

<mapper namespace="com.wlq.gulimall.product.dao.CategoryBrandRelationDao">

	<!-- 可根据自己的需求,是否要使用 -->
    <resultMap type="com.wlq.gulimall.product.entity.CategoryBrandRelationEntity" id="categoryBrandRelationMap">
        <result property="id" column="id"/>
        <result property="brandId" column="brand_id"/>
        <result property="catelogId" column="catelog_id"/>
        <result property="brandName" column="brand_name"/>
        <result property="catelogName" column="catelog_name"/>
    </resultMap>
    <update id="updateCategory">
        UPDATE 'pms_category_brand_relation' SET catelog_name=#{catId} WHERE catelog_id=#{name}
    </update>


</mapper>
- 测试


- 在BrandServiceImpl的updateDatail和CategoryServiceImpl的updateCascade方法前面加上@Transactional事务注解
3、规格参数
规格参数新增与VO
1、新增
1、给查询全部添加模糊查询
- 修改AttrGroupController
@Override
    public PageUtils queryPage(Map<String, Object> params, Long catelogId) {
        String key = (String) params.get("key");
        //select * from psm_attr_group where catelog_id=? and (attr_group_id=key or attr_group_name like %key%)
        QueryWrapper<AttrGroupEntity> wrapper =new QueryWrapper<AttrGroupEntity>();
        if (!StringUtils.isEmpty(key)){
            wrapper.and((obj)->{
                obj.eq("attr_group_id",key).or().like("attr_group_name",key);
            });
        }
        if (catelogId == 0){
            IPage<AttrGroupEntity> page = this.page(new Query<AttrGroupEntity>().getPage(params),
                    wrapper);
            return new PageUtils(page);
        }else {
            wrapper.eq("catelog_id",catelogId);

            IPage<AttrGroupEntity> page = this.page(new Query<AttrGroupEntity>().getPage(params),wrapper);
            return new PageUtils(page);
        }
    }
2、规格参数
- 测试新增

- 查看数据库
pms_attr_attrgroup_relation表没有对应,需要添加private Long attrGroupId;规范使用Vo
2、Vo
1、object划分
规格参数新增时,请求的URL:Request URL:
http://localhost:88/api/product/attr/base/list/0t=1588731762158&page=1&limit=10&key=
当有新增字段时,我们往往会在entity实体类中新建一个字段,并标注数据库中不存在该字段
如在一些Entity中,为了让mybatis-plus与知道某个字段不与数据库匹配,
    那么就加个
    @TableField(exist=false)
    private Long attrGroupId;
然而这种方式并不规范,比较规范的做法是,新建一个vo文件夹,将每种不同的对象,按照它的功能进行了划分。在java中,涉及到了这几种类型
PO、DO、TO、DTO
1.PO持久对象
PO就是对应数据库中某个表中的一条记录,多个记录可以用PO的集合。PO中应该不包含任何对数据的操作。
2、DO(Domain 0bject)领域对象
就是从现实世界中推象出来的有形或无形的业务实体。
3.TO(Transfer 0bject),数据传输对象传输的对象
不同的应用程序之间传输的对象。微服务
4.DTO(Data Transfer Obiect)数据传输对象
这个概念来源于J2EE的设汁模式,原来的目的是为了EJB的分布式应用握供粗粒度的数据实体,以减少分布式调用的次数,从而握分布式调用的性能和降低网络负载,但在这里,泛指用于示层与服务层之间的数据传输对象。
5.VO(value object)值对象
通常用于业务层之间的数据传递,和PO一样也是仅仅包含数据而已。但应是抽象出的业务对象,可以和表对应,也可以不,这根据业务的需要。用new关韃字创建,由GC回收的
View object:视图对象
接受页面传递来的对象,封装对象
将业务处理完成的对象,封装成页面要用的数据
6.BO(business object)业务对象
从业务模型的度看.见IJML元#领嵫模型的领嵫对象。封装业务逻辑的java对象,通过用DAO方法,结合PO,VO进行业务操作。businessobject:业务对象主要作用是把业务逻辑封装为一个对苤。这个对象可以包括一个或多个其它的对彖。比如一个简历,有教育经历、工怍经历、社会关系等等。我们可以把教育经历对应一个PO工作经历
7、POJO简单无规则java对象
8、DAO
2、新建VO对象
Request URL: http://localhost:88/api/product/attr/save,现在的情况是,它在保存的时候,只是保存了attr,并没有保存attrgroup,为了解决这个问题,我们新建了一个vo/AttrVo.java,在原Attr基础上增加了attrGroupId字段,使得保存新增数据的时候,也保存了它们之间的关系。
通过BeanUtils.copyProperties(attr,attrEntity);能够实现在两个Bean之间属性对拷
- AttrVo
@Data
public class AttrVo {
/**
* 属性id
*/
private Long attrId;
/**
* 属性名
*/
private String attrName;
/**
* 是否需要检索[0-不需要,1-需要]
*/
private Integer searchType;
/**
* 属性图标
*/
private String icon;
/**
* 可选值列表[用逗号分隔]
*/
private String valueSelect;
/**
* 属性类型[0-销售属性,1-基本属性,2-既是销售属性又是基本属性]
*/
private Integer attrType;
/**
* 启用状态[0 - 禁用,1 - 启用]
*/
private Long enable;
/**
* 所属分类
*/
private Long catelogId;
/**
* 快速展示【是否展示在介绍上;0-否 1-是】,在sku中仍然可以调整
*/
private Integer showDesc;
private Long attrGroupId;
}
- 修改AttrController
/**
* 保存
*/
@RequestMapping("/save")
public R save(@RequestBody AttrVo attr){
attrService.saveAttr(attr);
return R.ok();
}
- AttrService
void saveAttr(AttrVo attr);
- impl
@Autowired
AttrAttrgroupRelationDao relationDao;
@Transactional
@Override
public void saveAttr(AttrVo attr) {
AttrEntity attrEntity = new AttrEntity();
BeanUtils.copyProperties(attr,attrEntity);
//1、保存基本数据
this.save(attrEntity);
//2、保存关联关系
AttrAttrgroupRelationEntity relationEntity = new AttrAttrgroupRelationEntity();
relationEntity.setAttrGroupId(attr.getAttrGroupId());
relationEntity.setAttrId(attrEntity.getAttrId());
relationDao.insert(relationEntity);
}
- 测试

- 查看数据库


3、分页查询
- 修改AttrController
// /product/attr/base/list/{catelogId}
@GetMapping("/base/list/{catelogId}")
public R baseAttrList(@RequestParam Map<String,Object> params,
@PathVariable("catelogId") Long catelogId){
PageUtils page = attrService.queryBaseAttrPage(params,catelogId);
return R.ok().put("page",page);
}
- AttrService
PageUtils queryBaseAttrPage(Map<String, Object> params, Long catelogId);
- impl
@Override
public PageUtils queryBaseAttrPage(Map<String, Object> params, Long catelogId) {
QueryWrapper<AttrEntity> queryWrapper = new QueryWrapper<>();
if (catelogId != 0){
queryWrapper.eq("catelog_id",catelogId);
}
String key = (String) params.get("key");
if (!StringUtils.isEmpty(key)){
//attr_id attr_name
queryWrapper.and((wrapper)->{
wrapper.eq("attr_id",key).or().like("attr_name",key);
});
}
IPage<AttrEntity> page = this.page(
new Query<AttrEntity>().getPage(params),
queryWrapper
);
return new PageUtils(page);
}
- 测试

发现这里还有显示所属分类和所属分组,抽取Vo
- 新建AttrRespVo
@Data
public class AttrRespVo extends AttrVo {
/**
* "catelogName":"手机/数码/手机" //所属分类名字
* "groupName":"主体",//所属分组名字
*/
private String catelogName;
private String groupName;
}
- AttrServiceImpl
@Override
public PageUtils queryBaseAttrPage(Map<String, Object> params, Long catelogId) {
QueryWrapper<AttrEntity> queryWrapper = new QueryWrapper<>();
if (catelogId != 0){
queryWrapper.eq("catelog_id",catelogId);
}
String key = (String) params.get("key");
if (!StringUtils.isEmpty(key)){
//attr_id attr_name
queryWrapper.and((wrapper)->{
wrapper.eq("attr_id",key).or().like("attr_name",key);
});
}
IPage<AttrEntity> page = this.page(
new Query<AttrEntity>().getPage(params),
queryWrapper
);
PageUtils pageUtils = new PageUtils(page);
List<AttrEntity> records = page.getRecords();
List<AttrRespVo> respVos = records.stream().map((attrEntity) -> {
AttrRespVo attrRespVo = new AttrRespVo();
BeanUtils.copyProperties(attrEntity, attrRespVo);
//1、设置分类和分组的名字
AttrAttrgroupRelationEntity attrId = relationDao.selectOne(new QueryWrapper<AttrAttrgroupRelationEntity>().eq("attr_id", attrEntity.getAttrId()));
if (attrId != null) {
AttrGroupEntity attrGroupEntity = attrGroupDao.selectById(attrId.getAttrGroupId());
attrRespVo.setGroupName(attrGroupEntity.getAttrGroupName());
}
CategoryEntity categoryEntity = categoryDao.selectById(attrEntity.getCatelogId());
if (categoryEntity != null) {
attrRespVo.setCatelogName(categoryEntity.getName());
}
return attrRespVo;
}).collect(Collectors.toList());
pageUtils.setList(respVos);
return (pageUtils);
}
- 测试

测试修改发现并没有写入数据库
4、规格修改
- 修改AttrRespVo
@Data
public class AttrRespVo extends AttrVo {
/**
* 所属分类,所属分组
* "catelogName":"手机/数码/手机" //所属分类名字
* "groupName":"主体",//所属分组名字
*
* "catelogPath": [2, 34, 225] //分类完整路径
*/
private String catelogName;
private String groupName;
private Long[] catelogPath;
}
- 修改AttrController
/**
* 信息
*/
@RequestMapping("/info/{attrId}")
public R info(@PathVariable("attrId") Long attrId){
// AttrEntity attr = attrService.getById(attrId);
AttrRespVo respVo = attrService.getAttrInfo(attrId);
return R.ok().put("attr", respVo);
}
- service添加实现getAttrInfo
- 修改AttrServiceImpl
@Override
public AttrRespVo getAttrInfo(Long attrId) {
//数据要封装到VO里面
AttrRespVo respVo = new AttrRespVo();
//先查到attr的详细信息
AttrEntity attrEntity = this.getById(attrId);
//再设置到分组信息
//1、先将查询到的信息attrEntity拷贝到respVo里面
BeanUtils.copyProperties(attrEntity,respVo);
//2、再给respVo放 所属分组id,所属分类完整路径
//通过分组关联信息获取分组id relationDao:分组关联表
AttrAttrgroupRelationEntity attrgroupRelation = relationDao.selectOne(new QueryWrapper<AttrAttrgroupRelationEntity>().eq("attr_id", attrId));
if (attrgroupRelation!=null){
respVo.setAttrGroupId(attrgroupRelation.getAttrGroupId());
//通过查到当前分组对应的详细信息,拿到当前名字
AttrGroupEntity attrGroupEntity = attrGroupDao.selectById(attrgroupRelation.getAttrGroupId());
if (attrGroupEntity!=null){
respVo.setGroupName(attrGroupEntity.getAttrGroupName());
}
}
//再设置类信息
//注入CategoryService,通过id查询到完整路径
Long catelogId = attrEntity.getCatelogId();
Long[] catelogPath = categoryService.findCatelogPath(catelogId);
respVo.setCatelogPath(catelogPath);
CategoryEntity categoryEntity = categoryDao.selectById(catelogId);
if (categoryEntity!=null){
respVo.setGroupName(categoryEntity.getName());
}
return respVo;
}
-
测试

-
修改更新方法
/**
* 修改
*/
@RequestMapping("/update")
public R update(@RequestBody AttrVo attr){
attrService.updateAttr(attr);
return R.ok();
}
- service添加updateAttr实现
/**
* 商品属性
*
* @author wlq
* @email sunlightcs@gmail.com
* @date 2021-06-02 17:00:13
*/
public interface AttrService extends IService<AttrEntity> {
PageUtils queryPage(Map<String, Object> params);
void saveAttr(AttrVo attr);
PageUtils queryBaseAttrPage(Map<String, Object> params, Long catelogId);
AttrRespVo getAttrInfo(Long attrId);
void updateAttr(AttrVo attr);
}
- 添加service实现impl
@Transactional
@Override
public void updateAttr(AttrVo attr) {
AttrEntity attrEntity = new AttrEntity();
// 将页面带来的attr信息copy给attrEntity
BeanUtils.copyProperties(attr,attrEntity);
this.updateById(attrEntity);
//1、修改分组关联
// attrgroupRelationEntity:需要更新的值
AttrAttrgroupRelationEntity relationEntity = new AttrAttrgroupRelationEntity();
relationEntity.setAttrGroupId(attr.getAttrGroupId());
relationEntity.setAttrId(attr.getAttrId());
//判断是否是修改还是新增
Integer count = relationDao.selectCount(new QueryWrapper<AttrAttrgroupRelationEntity>().eq("attr_id", attr.getAttrId()));
if (count>0){
// 修改
relationDao.update(relationEntity,new UpdateWrapper<AttrAttrgroupRelationEntity>().eq("attr_id",attr.getAttrId()));
}else {
// 新增
relationDao.insert(relationEntity);
}
}
- 测试
修改之前

修改之后


4、销售属性维护
1、查询

- 修改AttrController
/*
//获取分类规格参数 base
//获取分类销售属性 sale
*/
// /product/attr/base/list/{catelogId}
@GetMapping("/{attrType}/list/{catelogId}")
public R baseAttrList(@RequestParam Map<String,Object> params,
@PathVariable("catelogId") Long catelogId,
@PathVariable("attrType") String type){
PageUtils page = attrService.queryBaseAttrPage(params,catelogId,type);
return R.ok().put("page",page);
}
- service添加上type
PageUtils queryBaseAttrPage(Map<String, Object> params, Long catelogId, String type);
- impl
QueryWrapper<AttrEntity> queryWrapper = new QueryWrapper<AttrEntity>().eq("attr_type","base".equalsIgnoreCase(type)?1:0);
// 现在有两个检索条件:catelogId分类id ; 属性的类型:type
if (catelogId != 0){
queryWrapper.eq("catelog_id",catelogId);
}
}
-
测试

-
新增属性

-
发现没有显示,控制台报错空指针
-
修改,需要判断,销售属性没有分组,规格参数才进行设置分类分组名字
//1、设置分类和分组的名字
// 判断,销售属性没有分组,规格参数才进行设置分类分组名字
if ("base".equalsIgnoreCase(type)){
AttrAttrgroupRelationEntity attrId = relationDao.selectOne(new QueryWrapper<AttrAttrgroupRelationEntity>().eq("attr_id", attrEntity.getAttrId()));
if (attrId != null) {
AttrGroupEntity attrGroupEntity = attrGroupDao.selectById(attrId.getAttrGroupId());
attrRespVo.setGroupName(attrGroupEntity.getAttrGroupName());
}
}
-
再次测试,数据出现
-
还有一个问题
数据库中间表pms_ attr_attrgroup_ relation
- 3号销售属性在中间表中的分组分类id也存了空的关联关系


- 原因是共用了一个save方法
2、修改保存判断
public void saveAttr(AttrVo attr) {
AttrEntity attrEntity = new AttrEntity();
BeanUtils.copyProperties(attr,attrEntity);
//1、保存基本数据
this.save(attrEntity);
//2、保存关联关系
// 1 表示为 基本属性 , 0为销售属性
if (attr.getAttrType() == 1){
AttrAttrgroupRelationEntity relationEntity = new AttrAttrgroupRelationEntity();
relationEntity.setAttrGroupId(attr.getAttrGroupId());
relationEntity.setAttrId(attrEntity.getAttrId());
relationDao.insert(relationEntity);
}
}
- 由于需要经常进行属性类型的判读,我们抽取出来,写到common里面
- 新建:
com.wlq.common.constant.ProductConstant
public class ProductConstant {
public enum AttrEnum{
ATTR_TYPE_BASE(1,"基本属性"),ATTR_TYPE_SALE(0,"销售属性");
private int code;
private String msg;
AttrEnum(int code,String msg){
this.code = code;
this.msg = msg;
}
public int getCode() {
return code;
}
public String getMsg() {
return msg;
}
}
}
- 修改saveAttr
public void saveAttr(AttrVo attr) {
AttrEntity attrEntity = new AttrEntity();
BeanUtils.copyProperties(attr,attrEntity);
//1、保存基本数据
this.save(attrEntity);
//2、保存关联关系
// 1 表示为 基本属性 , 0为销售属性
if (attr.getAttrType() == ProductConstant.AttrEnum.ATTR_TYPE_BASE.getCode()){
AttrAttrgroupRelationEntity relationEntity = new AttrAttrgroupRelationEntity();
relationEntity.setAttrGroupId(attr.getAttrGroupId());
relationEntity.setAttrId(attrEntity.getAttrId());
relationDao.insert(relationEntity);
}
}
- 修改保存方法queryBaseAttrPage
QueryWrapper<AttrEntity> queryWrapper = new QueryWrapper<AttrEntity>().eq("attr_type","base".equalsIgnoreCase(type)?ProductConstant.AttrEnum.ATTR_TYPE_BASE.getCode():ProductConstant.AttrEnum.ATTR_TYPE_SALE.getCode());
- 修改getAttrInfo,判断基本属性才进行回显
// 判断基本属性才进行回显
if (attrEntity.getAttrType()== ProductConstant.AttrEnum.ATTR_TYPE_BASE.getCode()){
//2、再给respVo放 所属分组id,所属分类完整路径
//通过分组关联信息获取分组id relationDao:分组关联表
AttrAttrgroupRelationEntity attrgroupRelation = relationDao.selectOne(new QueryWrapper<AttrAttrgroupRelationEntity>().eq("attr_id", attrId));
if (attrgroupRelation!=null){
respVo.setAttrGroupId(attrgroupRelation.getAttrGroupId());
//通过查到当前分组对应的详细信息,拿到当前名字
AttrGroupEntity attrGroupEntity = attrGroupDao.selectById(attrgroupRelation.getAttrGroupId());
if (attrGroupEntity!=null){
respVo.setGroupName(attrGroupEntity.getAttrGroupName());
}
}
}
- 同理修改updateAttr
public void updateAttr(AttrVo attr) {
AttrEntity attrEntity = new AttrEntity();
// 将页面带来的attr信息copy给attrEntity
BeanUtils.copyProperties(attr,attrEntity);
this.updateById(attrEntity);
if (attrEntity.getAttrType()==ProductConstant.AttrEnum.ATTR_TYPE_BASE.getCode()){
//1、修改分组关联
// attrgroupRelationEntity:需要更新的值
AttrAttrgroupRelationEntity relationEntity = new AttrAttrgroupRelationEntity();
relationEntity.setAttrGroupId(attr.getAttrGroupId());
relationEntity.setAttrId(attr.getAttrId());
//判断是否是修改还是新增
Integer count = relationDao.selectCount(new QueryWrapper<AttrAttrgroupRelationEntity>().eq("attr_id", attr.getAttrId()));
if (count>0){
// 修改
relationDao.update(relationEntity,new UpdateWrapper<AttrAttrgroupRelationEntity>().eq("attr_id",attr.getAttrId()));
}else {
// 新增
relationDao.insert(relationEntity);
}
}
}
-
重新添加一个销售属性

-
查看

关联关系表就不会插入销售属性了

5、查询分组关联属性&删除、新增关联
- 获取属性分组的关联的所有属性
编写 /product/attrgroup/{attrgroupId}/attr/relation
- AttrGroupController
@Autowired
AttrService attrService;
// /product/attrgroup/{attrgroupId}/attr/relation //获取属性分组的关联的所有属性
@GetMapping("/{attrgroupId}/attr/relation")
public R attrRelation(@PathVariable("attrgroupId") Long attrgroupId){
List<AttrEntity> entities = attrService.getRelationAttr(attrgroupId);
return R.ok().put("data",entities);
}
- 添加service
List<AttrEntity> getRelationAttr(Long attrgroupId);
- impl
/**
* 根据分组id查找关联的所有基本属性
* // 根据中间表的attr_group_id 找到 attr_id 再去到attr表中进行查询
* @param attrgroupId
* @return
*/
@Override
public List<AttrEntity> getRelationAttr(Long attrgroupId) {
List<AttrAttrgroupRelationEntity> entities = relationDao.selectList(new QueryWrapper<AttrAttrgroupRelationEntity>().eq("attr_group_id", attrgroupId));
List<Long> attrIds = entities.stream().map((attr) -> {
return attr.getAttrId();
}).collect(Collectors.toList());
if (attrIds == null || attrIds.size() == 0){
return null;
}
Collection<AttrEntity> attrEntities = this.listByIds(attrIds);
return (List<AttrEntity>) attrEntities;
}
- 测试

1、删除属性与分组的关联关系
由于只需两个请求参数:[{“attrId”:1,“attrGroupId”:2}]
- 编写Vo:AttrGroupRelationVo
@Data
public class AttrGroupRelationVo {
//{"attrId":1,"attrGroupId":2}
private Long attrId;
private Long attrGroupId;
}
- AttrGroupController
/**
* 删除属性与分组的关联关系
*/
///product/attrgroup/attr/relation/delete
@GetMapping("/attr/relation/delete")
public R deleteRelation(AttrGroupRelationVo[] vos){
attrService.deleteRelation(vos);
return R.ok();
}
- service
- impl
/**
* 删除属性与分组的关联关系
* @param vos
*/
@Override
public void deleteRelation(AttrGroupRelationVo[] vos) {
List<AttrAttrgroupRelationEntity> entities = Arrays.asList(vos).stream().map((item) -> {
AttrAttrgroupRelationEntity relationEntity = new AttrAttrgroupRelationEntity();
BeanUtils.copyProperties(item, relationEntity);
return relationEntity;
}).collect(Collectors.toList());
relationDao.deleteBatchRelation(entities);
}
- 添加deleteBatchRelation 批量删除方法实现
@Mapper
public interface AttrAttrgroupRelationDao extends BaseMapper<AttrAttrgroupRelationEntity> {
void deleteBatchRelation(@Param("entities") List<AttrAttrgroupRelationEntity> entities);
}
- 修改AttrAttrgroupRelationDao.xml
<delete id="deleteBatchRelation">
DELETE FROM `pms_attr_attrgroup_relation` WHERE
<foreach collection="entities" item="item" separator=" OR ">
(attr_id=#{item.attrId} AND attr_group_id=#{item.attrGroupId})
</foreach>
</delete>
-
测试


-
在点击新建关联,应该会查出本属性没有关联的其它属性
2、获取属性分组没有关联的其他属性
- AttrGroupController
/**
* 获取属性分组没有关联的其他属性
*/
///product/attrgroup/{attrgroupId}/noattr/relation
@GetMapping("/{attrgroupId}/noattr/relation")
public R attrNoRelation(@PathVariable("attrgroupId") Long attrgroupId,
@RequestParam Map<String, Object> params){
PageUtils page = attrService.getNoRelationAttr(params,attrgroupId);
return R.ok().put("page",page);
}
PageUtils getNoRelationAttr(Map<String, Object> params, Long attrGroupId);
- impl
/**
* 获取当前分组没有关联的所有属性
* @param params
* @param attrgroupId
* @return
*/
@Override
public PageUtils getNoRelationAttr(Map<String, Object> params, Long attrgroupId) {
//1、当前分组只能关联自己所属的分类里面的所有属性
AttrGroupEntity attrGroupEntity = attrGroupDao.selectById(attrgroupId);
Long catelogId = attrGroupEntity.getCatelogId();
//2、当前分组只能关联别的分组没有引用的属性
//2.1)、当前分类下的其它分组
List<AttrGroupEntity> group = attrGroupDao.selectList(new QueryWrapper<AttrGroupEntity>().eq("catelog_id", catelogId).ne("attr_group_id",attrgroupId));
List<Long> collect = group.stream().map((item) -> {
return item.getAttrGroupId();
}).collect(Collectors.toList());
//2.2)、这些分类关联的属性
List<AttrAttrgroupRelationEntity> groupId = relationDao.selectList(new QueryWrapper<AttrAttrgroupRelationEntity>().in("attr_group_id", collect));
List<Long> attrIds = groupId.stream().map((item) -> {
return item.getAttrId();
}).collect(Collectors.toList());
//2.3)、从当前分类的所有属性中移除这些属性
QueryWrapper<AttrEntity> wrapper = new QueryWrapper<AttrEntity>().eq("catelog_id", catelogId).notIn("attr_id", attrIds);
if (attrIds!=null && attrIds.size()>0){
wrapper.notIn("attr_id",attrIds);
}
//由于返回是一个分页,调用分页方法调用条件查询,页面会传来分页参数,并且有模糊查询,wrapper
String key = (String) params.get("key");
if (!StringUtils.isEmpty(key)){
wrapper.and((w)->{
w.eq("attr_id",key).or().like("attr_name",key);
});
}
IPage<AttrEntity> page = this.page(new Query<AttrEntity>().getPage(params), wrapper);
PageUtils pageUtils = new PageUtils(page);
return pageUtils;
}
- 测试新建关联


- 这里有一个问题
如果已经关联了一个基本属性,再新建还是会显示
- 排除自己已有的基本属性
修改AttrServiceImpl
//2.1)、当前分类下的其他分组
List<AttrGroupEntity> group = attrGroupDao.selectList(new QueryWrapper<AttrGroupEntity>().eq("catelog_id", catelogId));
List<Long> collect = group.stream().map(item -> {
return item.getAttrGroupId();
}).collect(Collectors.toList());
- 查看


3、新增关联
@Autowired
AttrAttrgroupRelationService relationService;
/**
* 新增关联
* @param vos
* @return
*/
///product/attrgroup/attr/relation
@PostMapping("/attr/relation")
public R addRelation(@RequestBody List<AttrGroupRelationVo> vos){
relationService.saveBatch(vos);
return R.ok();
}
- impl
@Override
public void saveBatch(List<AttrGroupRelationVo> vos) {
List<AttrAttrgroupRelationEntity> collect = vos.stream().map(item -> {
AttrAttrgroupRelationEntity relationEntity = new AttrAttrgroupRelationEntity();
BeanUtils.copyProperties(item, relationEntity);
return relationEntity;
}).collect(Collectors.toList());
this.saveBatch(collect);
}
- 发现控制台报空指针
//1、设置分类和分组的名字
if("base".equalsIgnoreCase(type)){
AttrAttrgroupRelationEntity attrId = relationDao.selectOne(new QueryWrapper<AttrAttrgroupRelationEntity>().eq("attr_id", attrEntity.getAttrId()));
if (attrId != null && attrId.getAttrGroupId()!=null) {
AttrGroupEntity attrGroupEntity = attrGroupDao.selectById(attrId.getAttrGroupId());
attrRespVo.setGroupName(attrGroupEntity.getAttrGroupName());
}
}
public void saveAttr(AttrVo attr) {
AttrEntity attrEntity = new AttrEntity();
// attrEntity.setAttrName(attr.getAttrName());
BeanUtils.copyProperties(attr,attrEntity);
//1、保存基本数据
this.save(attrEntity);
//2、保存关联关系
if(attr.getAttrType() == ProductConstant.AttrEnum.ATTR_TYPE_BASE.getCode() && attr.getAttrGroupId()!=null){
AttrAttrgroupRelationEntity relationEntity = new AttrAttrgroupRelationEntity();
relationEntity.setAttrGroupId(attr.getAttrGroupId());
relationEntity.setAttrId(attrEntity.getAttrId());
relationDao.insert(relationEntity);
}
}
- 测试


- 添加记录


 3622
3622


 被折叠的 条评论
为什么被折叠?
被折叠的 条评论
为什么被折叠?
 到【灌水乐园】发言


