


实现以下功能:加载本地图片->填写文字->截屏->分享。
1.尝试自己调用微信接口实现分享功能,申请APPID未通过,理由是:你的提供的官方网站为他人网站,此次审核不予通过,建议提供有效的官网重新提交申请。微信接口已经不对个人开放了吧。

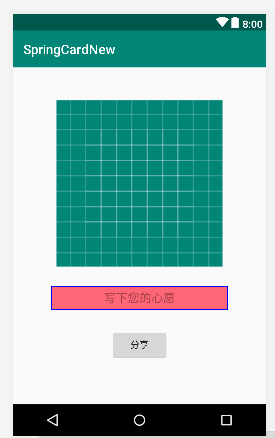
2.页面布局很简单ImageView+EditText+Button
<?xml version="1.0" encoding="utf-8"?>
<RelativeLayout xmlns:android="http://schemas.android.com/apk/res/android"
    xmlns:app="http://schemas.android.com/apk/res-auto"
    xmlns:tools="http://schemas.android.com/tools"
    android:layout_width="match_parent"
    android:layout_height="match_parent"

    tools:context=".MainActivity">


    <ImageView
        android:id="@+id/imageView"
        android:layout_width="283dp"
        android:layout_height="252dp"
        android:layout_centerHorizontal="true"
        android:layout_marginTop="50dp"
        app:srcCompat="@drawable/ic_launcher_background" />

    <EditText
        android:id="@+id/word"
        android:layout_width="267dp"
        android:layout_height="35dp"
        android:layout_below="@id/imageView"
        android:layout_centerHorizontal="true"
        android:layout_marginTop="30dp"
        android:background="#f67"
        android:gravity="center"
        android:hint="写下您的心愿"
        android:inputType="text|textCapWords" />

    <Button
        android:id="@+id/button"
        android:layout_width="wrap_content"
        android:layout_height="wrap_content"
        android:text="分享"
        android:layout_below="@id/word"
        android:layout_centerHorizontal="true"
        android:layout_marginTop="30dp"/>
</RelativeLayout>
3.主程序
为ImageView添加监听事件,监听到点击之后打开图片目录,并调用Glide加载图片到imageView中。
为Button添加监听事件,监听到点击之后截屏,并创建Intent对象,调用系统自带分享功能对截图进行分享。
package com.example.wxt.springcardnew;

import android.content.Intent;
import android.graphics.Bitmap;
import android.net.Uri;
import android.os.Bundle;
import android.os.Environment;
import android.provider.MediaStore;
import android.view.View;
import android.view.Window;
import android.view.WindowManager;
import android.widget.Button;
import android.widget.ImageView;
import com.bumptech.glide.Glide;
import java.io.File;
import java.io.FileOutputStream;
import java.util.Calendar;
import androidx.appcompat.app.AppCompatActivity;

public class MainActivity extends AppCompatActivity {
    private ImageView mPhoto;
    private Button share;
    String imagePath;

    @Override
    protected void onCreate(Bundle savedInstanceState) {
        super.onCreate(savedInstanceState);
        this.supportRequestWindowFeature(Window.FEATURE_NO_TITLE);//取消标题栏
        this.getWindow().setFlags(WindowManager.LayoutParams.FLAG_FULLSCREEN,WindowManager.LayoutParams.FLAG_FULLSCREEN);//取消状态栏
        setContentView(R.layout.activity_main);
        mPhoto=(ImageView) findViewById(R.id.imageView);
        //.get().load("file:///storage/emulated/0/Pictures/Screenshots/59.png").into(mPhoto);
        //为ImageView添加监听事件,监听到点击之后打开图片目录,并调用Glide加载图片到imageView中。
        mPhoto.setOnClickListener(new View.OnClickListener() {
            @Override
            public void onClick(View v) {
                Intent intent = new Intent(Intent.ACTION_PICK,null);
                intent.setDataAndType(MediaStore.Images.Media.EXTERNAL_CONTENT_URI,"image/*");//MediaStore.Images.Media.EXTERNAL_CONTENT_URI为本地图库
                startActivityForResult(intent,100);
            }
        });

        share = findViewById(R.id.button);
        share.setOnClickListener(new View.OnClickListener() {
        //为Button添加监听事件,监听到点击之后截屏,并创建Intent对象,调用系统自带分享功能对截图进行分享。
            @Override
            public void onClick(View v) {
                screenshot();//截图并存到本地,由于调用系统自带分享功能必须传入图片的Uri,因此要将图片先储存在调用其地址。
                share.setVisibility(View.VISIBLE);
                File file = new File(imagePath);
                Intent shareIntent = new Intent();
                shareIntent.setAction(Intent.ACTION_SEND);
                //其中imgUri为图片的标识符
                shareIntent.putExtra(Intent.EXTRA_STREAM, Uri.fromFile(file));
                shareIntent.setType("image/*");
                //切记需要使用Intent.createChooser,否则会出现别样的应用选择框,您可以试试
                shareIntent = Intent.createChooser(shareIntent, "Here is the title of Select box");
                startActivity(shareIntent);
            }
            ////截图并存到本地,由于调用系统自带分享功能必须传入图片的Uri,因此要将图片先储存在调用其地址。
            private void screenshot(){
                share.setVisibility(View.INVISIBLE);
                View view = getWindow().getDecorView();
                view.setDrawingCacheEnabled(true);
                view.buildDrawingCache();
                Bitmap bmp = view.getDrawingCache();

//                Intent textIntent = new Intent(Intent.ACTION_SEND);
//                textIntent.setType("text/plain");
//                textIntent.putExtra(Intent.EXTRA_TEXT, "这是一段分享的文字");
//                startActivity(Intent.createChooser(textIntent, "分享"));

                if (bmp != null)
                {
                    try {
                        // 获取内置SD卡路径
                        String sdCardPath = Environment.getExternalStorageDirectory().getPath();
                        // 图片文件路径
                        long currentTime=Calendar.getInstance().getTimeInMillis();
                        imagePath = sdCardPath + "/" +currentTime+".png";
                        File file = new File(imagePath);
                        FileOutputStream os = new FileOutputStream(file);
                        bmp.compress(Bitmap.CompressFormat.PNG, 100, os);
                        os.flush();
                        os.close();
                    } catch (Exception e) {
                    }
                }
            }
        });
    }
//监听到图片点击事件调用此方法,Glide调用方发非常简单,data.getData()为当前选择的图片的Uri,mPhoto为显示imageView,Glide.with(this).load(data.getData()).into(mPhoto)。
    @Override
    protected void onActivityResult(int requestCode, int resultCode, Intent data) {
        super.onActivityResult(requestCode, resultCode, data);
        if (resultCode==RESULT_OK && requestCode==100){
            if(data!=null){
//                Glide.with(this).load(R.mipmap.ic_launcher).into(mPhoto);
//                Glide.with(this).load("/storage/emulated/0/Pictures/Screenshots/59.png").into(mPhoto);
                  Glide.with(this).load(data.getData()).into(mPhoto);

                //Glide.with(this).load(R.mipmap.ic_launcher).into(m);
                //Picasso.get().load("file://"http://goo.gl/gEgYUd"").into(mPhoto);
               // Picasso.get().load(R.mipmap.ic_launcher).into(mPhoto);
                //Bitmap bitmap=BitmapFactory.decodeFile(data.getData().getPath());
                //mPhoto.setImageBitmap(bitmap);
            }
        }
    }
}
4.生成带有keystore文件签名的apk,借鉴了这篇博文https://blog.csdn.net/github_2011/article/details/60966976


 1051
1051


 被折叠的 条评论
为什么被折叠?
被折叠的 条评论
为什么被折叠?
 到【灌水乐园】发言


