


const 常量构造函数,如果控件是,则前面加;如果常量构造函数包含有非常量构造函数,则不加,内部是的控件单独加
1.Flutter学习网址
Flutter 中文官网 https://flutter.cn/
Flutter 官网:https://flutter.dev/
Flutter Packages官网:https://pub.dev/
2.环境搭建,真机调试
第8步提前操作
1.总步骤
Flutter Android 环境搭建
- 电脑上面安装JDK
- 电脑上面下载安装AS
- 电脑上面下载配置 Flutter SDK
- 电脑上配置Flutter国内镜像
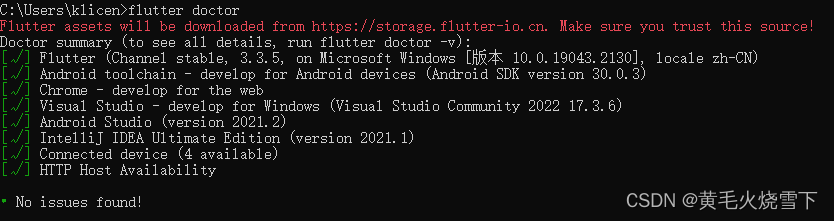
- 运行 flutter doctor 命令检测环境是否配置成功,更具提示安装对应软件
- AS 安装Flutter 插件
- 创建运行Flutter项目
2.AS 安装插件:Flutter 和Dart
3.Flutter sdk
Flutter sdk(使用最新版本) 下载路径 https://docs.flutter.dev/development/tools/sdk/releases?tab=windows#windows
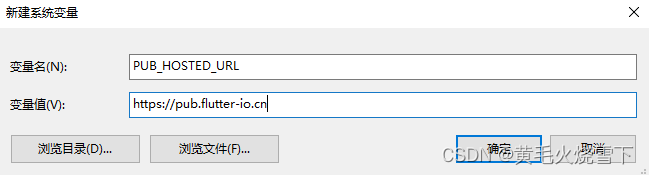
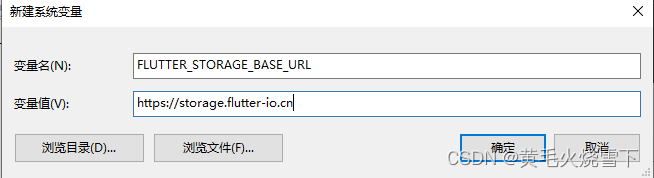
4.Flutter 国内镜像
Flutter 国内镜像地址 https://docs.flutter.dev/community/china
export PUB_HOSTED_URL=https://pub.flutter-io.cn
export FLUTTER_STORAGE_BASE_URL=https://storage.flutter-io.cn
git clone -b dev https://github.com/flutter/flutter.git
export PATH="$PWD/flutter/bin:$PATH"
cd ./flutter
flutter doctor
5.flutter doctor
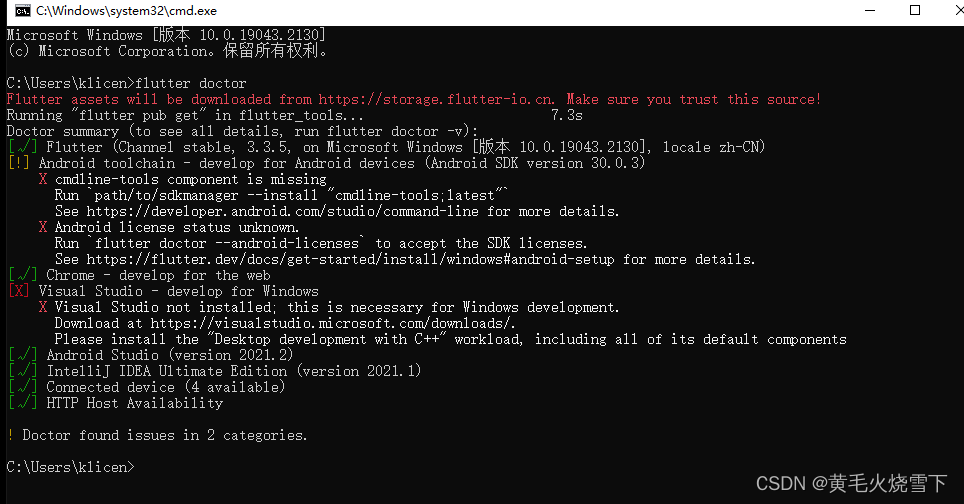
 flutter doctor --android-licenses 一路点y
(非必须)Visual Studio 如果需要开发桌面应用 https://visualstudio.microsoft.com/downloads/
C++ CMake tools for Windows 必须下载 1.5G
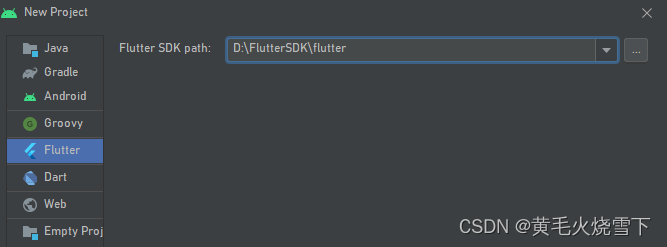
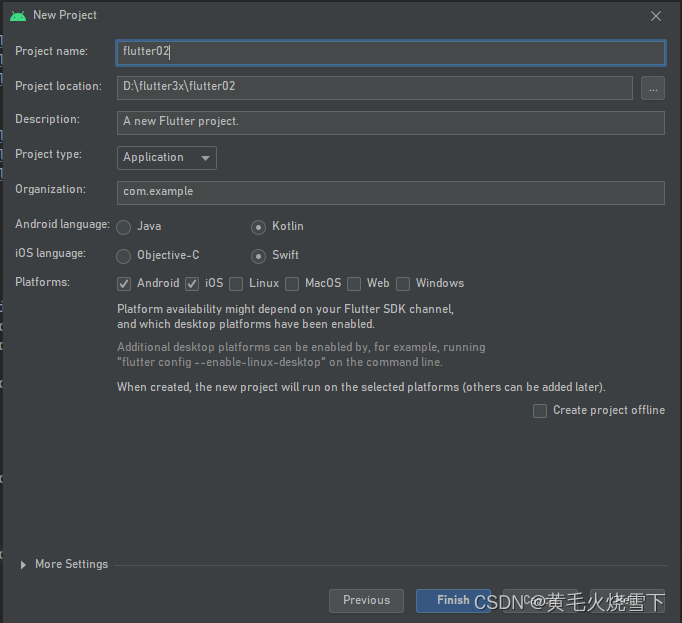
 #### 6.AS 新建flutter项目 (项目目录都是小写)
7.AS 打开创建好的android 项目
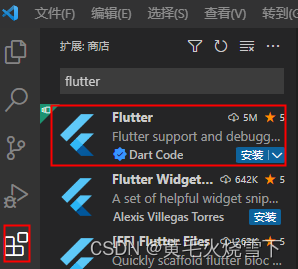
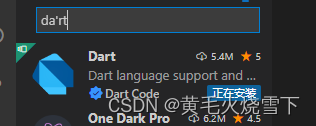
8.vs下载即操作
vs下载路径:https://code.visualstudio.com/
插件:fluter dart Awesome FlutterSnippets(flutter提示工具)
不同的插件,快捷方式不一样
9.快捷键操作项目
vs 打开flutter文件夹
flutter run
flutter run -d all
ctrl+s 保存
常用快捷键(鼠标点到控制台)
r键:点击后热加载,也算是重新加载
R键:热重启项目
P键:显示网络,这个可以很好的掌握布局情况,工作中很有用
o键:切换Android和ios的预览模式
q键 :退出调试模式 ctrl+c
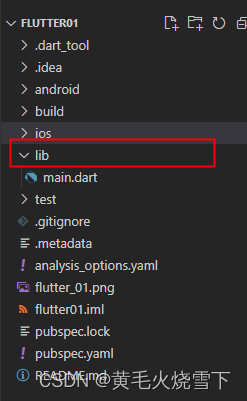
3.Flutter 目录结构介绍 入口 自定义Widget Center组件 Text组件 MaterailAp组件 Scaffpld组件礼包
lib 项目目录
pubspec.yaml 配置文件 项目依赖 项目版本号
analysis_options.yaml 分析dart语法文件,老项目升级成新项目有警告信息的话可以删掉此文件,可以全部删掉,有利于语法规范
import 'package:flutter/material.dart';

void main() {
  runApp(MaterialApp(
    home: Scaffold(
      appBar: AppBar(title: const Text("你好Flutter")),
      body: HomeWidge(),
    ),
  ));
}

class HomeWidge extends StatelessWidget {
  @override
  Widget build(BuildContext context) {
    return const Center(
        child: Text("我是一个文本",
            textDirection: TextDirection.ltr,
            style: TextStyle(fontSize: 25.0, color: Colors.red)));
  }
}
4.Container组件 Text组件
const(常量构造函数) 规范 ,也可以不加
import 'package:flutter/material.dart';

void main() {
  runApp(MaterialApp(
    home: Scaffold(
      appBar: AppBar(title: const Text("你好Flutter")),
      body: Column(
        children: [MyApp(), MyButton(), MyText()],
      ),
    ),
  ));
}

class HomeWidge extends StatelessWidget {
  @override
  Widget build(BuildContext context) {
    return const Center(
        child: Text("我是一个文本",
            textDirection: TextDirection.ltr,
            style: TextStyle(fontSize: 25.0, color: Colors.red)));
  }
}

class MyApp extends StatelessWidget {
  const MyApp({Key? key}) : super(key: key);
  @override
  Widget build(BuildContext context) {
    return Center(
      child: Container(
        margin: const EdgeInsets.fromLTRB(0, 60, 0, 0),
        alignment: Alignment.center,
        height: 200,
        width: 200,
        // transform: Matrix4.skewY(0.2),
        decoration: BoxDecoration(
            color: Colors.yellow,
            gradient: const LinearGradient(colors: [Colors.red, Colors.orange]),
            boxShadow: const [
              BoxShadow(
                color: Colors.blue,
                offset: Offset(2.0, 2.0),
                blurRadius: 10.0,
              )
            ],
            border: Border.all(color: Colors.red, width: 2),
            borderRadius: BorderRadius.circular(8)),
        child: const Text(
          "你好Flutter",
          style: TextStyle(fontSize: 20),
        ),
      ),
    );
  }
}

class MyButton extends StatelessWidget {
  const MyButton({super.key});

  @override
  Widget build(BuildContext context) {
    return Container(
      alignment: Alignment.center,
      width: 200,
      height: 40,
      decoration: BoxDecoration(
        color: Colors.blue,
        borderRadius: BorderRadius.circular(10),
      ),
      margin: const EdgeInsets.fromLTRB(0, 40, 0, 0),
      child: const Text("按钮",
          style: TextStyle(
            color: Colors.white,
            fontSize: 20,
          )),
    );
  }
}

class MyText extends StatelessWidget {
  const MyText({super.key});

  @override
  Widget build(BuildContext context) {
    return Container(
      alignment: Alignment.center,
      width: 200,
      height: 200,
      decoration: const BoxDecoration(
        color: Colors.yellow,
      ),
      child: const Text(
        "如果是负值,会让单词变得更紧凑如果是负值,会让单词变得更紧凑",
        textAlign: TextAlign.left,
        maxLines: 2,
        overflow: TextOverflow.ellipsis,
        style: TextStyle(
            fontSize: 20.0,
            fontWeight: FontWeight.bold,
            color: Colors.red,
            fontStyle: FontStyle.italic),
      ),
    );
  }
}
5.图片Image组件 本地图片 远程图片 图片剪切 圆形图片
上下间距
SizedBox( height: 20)
import 'package:flutter/material.dart';

class MyApp2 extends StatelessWidget {
  const MyApp2({super.key});

  @override
  Widget build(BuildContext context) {
    return Center(
      child: Container(
        width: 150,
        height: 150,
        alignment: Alignment.center,
        decoration: BoxDecoration(
            color: Colors.yellow,
            borderRadius: BorderRadius.circular(10),
            image: const DecorationImage(
                fit: BoxFit.cover,
                image: NetworkImage(
                    "https://www.itying.com/themes/itying/images/ionic4.png"))),
        // child: Image.network(
        //   "https://www.itying.com/themes/itying/images/ionic4.png",
        //   fit: BoxFit.cover,
        // ),
      ),
    );
  }
}

//实现圆形图片
class Circular extends StatelessWidget {
  const Circular({super.key});

  @override
  Widget build(BuildContext context) {
    return Center(
      child: ClipOval(
        child: Image.network(
          "https://www.itying.com/themes/itying/images/ionic4.png",
          width: 150.0,
          height: 150.0,
          fit: BoxFit.cover,
        ),
      ),
    );
  }
}

class LocationImg extends StatelessWidget {
  const LocationImg({super.key});

  @override
  Widget build(BuildContext context) {
    return Center(
      child: ClipOval(
        child: Image.asset(
          "images/a.jpg",
          width: 150.0,
          height: 150.0,
          fit: BoxFit.cover,
        ),
      ),
    );
  }
}
6.ICON图标组件 自带图标 和自定义图标
用处不大
7.列表(ListView GridView)组件
2.GridView创建网格列表主要有下面三种方式
- 1、可以通过GridView.count 实现网格布局
- 2、可以通过GridView.extent 实现网格布局
- 3、通过GridView.builder实现动态网格布局
| GridView.count | GridView.extent | |
|---|---|---|
| crossAxisCount 一行的Widget数量 | maxCrossAxisExtent 横轴子元素的最大长度 | |
| gridDelegate | SliverGridDelegateWithFixedCrossAxisCount | SliverGridDelegateWithMaxCrossAxisExtent |
import 'package:flutter/material.dart';
import 'package:flutter01/res/listData.dart';

void main() {
  runApp(const MyApp());
}

class MyApp extends StatelessWidget {
  const MyApp({super.key});

  @override
  Widget build(BuildContext context) {
    return MaterialApp(
      theme: ThemeData(primarySwatch: Colors.yellow),
      home: Scaffold(
        appBar: AppBar(title: Text("Fluter app")),
        body: MyHomePage(),
      ),
    );
  }
}

class MyHomePage extends StatelessWidget {
  const MyHomePage({super.key});
  Widget _initGridViewData(context, index) {
    return Container(
      decoration: BoxDecoration(border: Border.all(color: Colors.black26)),
      child: Column(
        children: [
          Image.network(listData[index]["imageUrl"]),
          const SizedBox(height: 10),
          Text(
            listData[index]["title"],
            style: const TextStyle(fontSize: 18),
          )
        ],
      ),
    );
  }

  @override
  Widget build(BuildContext context) {
    return GridView.builder(
      padding: const EdgeInsets.all(10),
      itemCount: listData.length,
        gridDelegate: const SliverGridDelegateWithFixedCrossAxisCount(
            crossAxisSpacing: 10,
            mainAxisSpacing: 10,
            crossAxisCount: 2,
            childAspectRatio: 1),
        itemBuilder: _initGridViewData);
  }
}
List listData = [
  {
    "title": "Candy shop",
    "author": "Mohamed Chain",
    "imageUrl": "https://www.itying.com/images/flutter/1.png",
  },
];
8.Flutter页面布局 Padding Row Column flex Expanded
this.icon 是 this.icon=icon; 的简写
required this.color 中 required 表明是必传参数
this.color = Colors.red 这个写,写可以不传
class IconContainer extends StatelessWidget {
  Color color;
  double size;
  IconData icon;
  IconContainer(this.icon,
      {Key? key, this.color = Colors.red, this.size = 32.0})
      : super(key: key);
  IconContainer1(
      {Key? key, this.color = Colors.red, this.size = 32.0}): super(key: key) {
this.icon=icon;
      }

  @override
  Widget build(BuildContext context) {
    return Container(
      height: 100,
      width: 100,
      color: this.color,
      child: Icon(icon, color: color, size: size),
    );
  }
}
double.infinity 和double.maxFinite可以让当前元素的width或者height达到父元素的尺寸
底层代码,只能用在Container容器里
width: double.infinity,
height: double.infinity,
flex Expanded 弹性布局

9.Flutter页面布局 Stack层叠组件,Stack与Align 、Stack与Positioned实现定位布局
1.最常用 Stack与Positioned
FlutterMediaQuery获取屏幕宽度和高度
final size = MediaQuery.of(context).size;
size.width,
alignment: Alignment(-1, 1),
算法实现
(Alignment.xchildWidth/2+childWidth/2, Alignment.ychildHeight/2+childHeight/2)

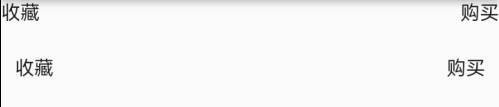
2.具体实例:相对与容器定位
import 'package:flutter/material.dart';
import 'package:flutter01/res/listData.dart';

void main() {
  runApp(const MyApp());
}

class MyApp extends StatelessWidget {
  const MyApp({super.key});

  @override
  Widget build(BuildContext context) {
    return MaterialApp(
      theme: ThemeData(primarySwatch: Colors.yellow),
      home: Scaffold(
        appBar: AppBar(title: Text("Fluter app")),
        body: MyHomePage(),
      ),
    );
  }
}

class MyHomePage extends StatelessWidget {
  const MyHomePage({super.key});

  @override
  Widget build(BuildContext context) {
    final size = MediaQuery.of(context).size;
    return Column(
      children: [
        SizedBox(
          width: double.infinity,
          height: 40,
          child: Stack(
            children: const [
              Align(
                alignment: Alignment.topLeft,
                child: Text("收藏"),
              ),
              Align(
                alignment: Alignment.topRight,
                child: Text("购买"),
              ),
            ],
          ),
        ),
        SizedBox(
          width: double.infinity,
          height: 40,
          child: Stack(
            children: const [
              Positioned(left: 10, child: Text("收藏")),
              Positioned(right: 10, child: Text("购买")),
            ],
          ),
        )
      ],
    );
  }
}
9.Flutter页面布局 AspectRatio、 Card、 CircleAvatar 组件
1.child的宽高比 AspectRatio
用在控制图片的宽高比
 AspectRatio(
      aspectRatio: 3 / 1,
      child: Container(
        color: Colors.red,
      ),
    )
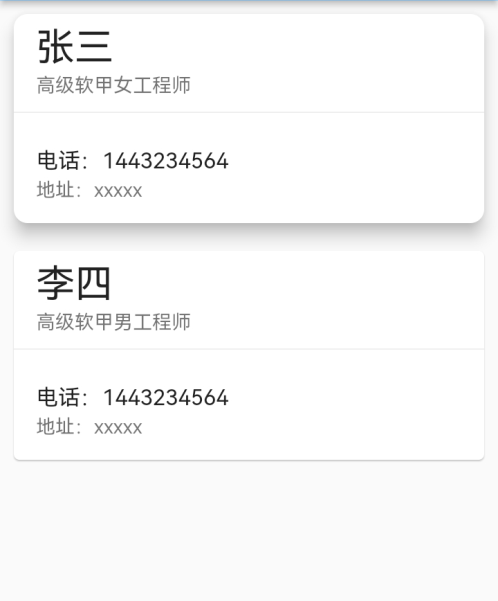
2 .卡片布局Card
import 'package:flutter/material.dart';

void main() {
  runApp(const MyApp());
}

class MyApp extends StatelessWidget {
  const MyApp({super.key});

  @override
  Widget build(BuildContext context) {
    return MaterialApp(
      theme: ThemeData(primarySwatch: Colors.blue),
      home: Scaffold(
        appBar: AppBar(title: Text("Fluter app")),
        body: MyHomePage(),
      ),
    );
  }
}

class MyHomePage extends StatelessWidget {
  const MyHomePage({super.key});

  @override
  Widget build(BuildContext context) {
    final size = MediaQuery.of(context).size;
    return ListView(
      children: [
        Card(
          margin: EdgeInsets.all(10),
          elevation: 10,
          shape:
              RoundedRectangleBorder(borderRadius: BorderRadius.circular(10)),
          child: Column(
            children: const [
              ListTile(
                title: Text(
                  "张三",
                  style: TextStyle(fontSize: 28),
                ),
                subtitle: Text("高级软甲女工程师"),
              ),
              Divider(),
              ListTile(
                title: Text(
                  "电话:1443234564",
                ),
                subtitle: Text("地址:xxxxx"),
              )
            ],
          ),
        ),
        Card(
          margin: EdgeInsets.all(10),
          child: Column(
            children: const [
              ListTile(
                title: Text(
                  "李四",
                  style: TextStyle(fontSize: 28),
                ),
                subtitle: Text("高级软甲男工程师"),
              ),
              Divider(),
              ListTile(
                title: Text(
                  "电话:1443234564",
                ),
                subtitle: Text("地址:xxxxx"),
              )
            ],
          ),
        )
      ],
    );
  }
}
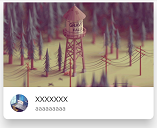
3 .卡片图文列表
ListView(
      children: [
        Card(
          margin: const EdgeInsets.all(10),
          elevation: 20,
          shape:
              RoundedRectangleBorder(borderRadius: BorderRadius.circular(10)),
          child: Column(
            children: [
              AspectRatio(
                aspectRatio: 16 / 9,
                child: Image.network(
                  "https://www.itying.com/images/flutter/1.png",
                  fit: BoxFit.cover,
                ),
              ),
              ListTile(
                leading: ClipOval(
                    child: Image.network(
                  "https://www.itying.com/images/flutter/2.png",
                  fit: BoxFit.cover,
                  height: 40,
                  width: 40,
                )),
                title: const Text("XXXXXXX"),
                subtitle: const Text("aaaaaaaaa"),
              )
            ],
          ),
        )
      ],
    )
4 .实现一个圆形图片 CircleAvatar
 CircleAvatar(
                  backgroundImage: NetworkImage(
                      "https://www.itying.com/images/flutter/3.png"),
                )
ClipOval(
                    child: Image.network(
                  "https://www.itying.com/images/flutter/2.png",
                  fit: BoxFit.cover,
                  height: 40,
                  width: 40,
                ))
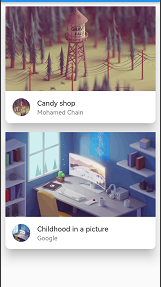
5 .动态卡片图文列表
import 'package:flutter/material.dart';
import './res/listData.dart';

void main() {
  runApp(const MyApp());
}

class MyApp extends StatelessWidget {
  const MyApp({super.key});

  @override
  Widget build(BuildContext context) {
    return MaterialApp(
      theme: ThemeData(primarySwatch: Colors.blue),
      home: Scaffold(
        appBar: AppBar(title: Text("Fluter app")),
        body: MyHomePage(),
      ),
    );
  }
}

class MyHomePage extends StatelessWidget {
  const MyHomePage({super.key});
  List<Widget> _initCardDate() {
    var tempList = listData.map((value) {
      return Card(
        margin: const EdgeInsets.all(10),
        elevation: 20,
        shape: RoundedRectangleBorder(borderRadius: BorderRadius.circular(10)),
        child: Column(
          children: [
            AspectRatio(
              aspectRatio: 16 / 9,
              child: Image.network(
                value["imageUrl"],
                fit: BoxFit.cover,
              ),
            ),
            ListTile(
              leading: CircleAvatar(
                backgroundImage: NetworkImage(value["imageUrl"]),
              ),
              title: Text(value["title"]),
              subtitle: Text(value["author"]),
            )
          ],
        ),
      );
    });
    return tempList.toList();
  }

  @override
  Widget build(BuildContext context) {
    final size = MediaQuery.of(context).size;
    return ListView(
      children: _initCardDate(),
    );
  }
}
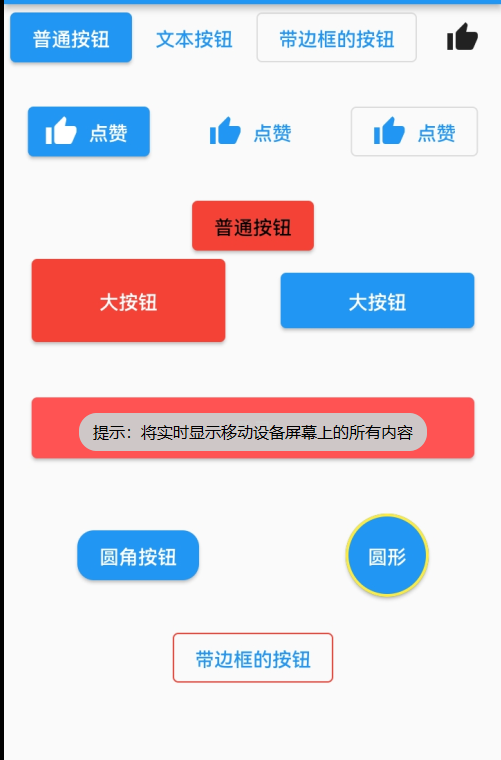
10.Flutter按钮组件 Elevatedbutton、TextButton、OutlineButton、IconButton
19
import 'package:flutter/material.dart';
import './res/listData.dart';

void main() {
  runApp(const MyApp());
}

class MyApp extends StatelessWidget {
  const MyApp({super.key});

  @override
  Widget build(BuildContext context) {
    return MaterialApp(
      theme: ThemeData(primarySwatch: Colors.blue),
      home: Scaffold(
        appBar: AppBar(title: Text("Fluter app")),
        body: MyHomePage(),
      ),
    );
  }
}

class MyHomePage extends StatelessWidget {
  const MyHomePage({super.key});

  @override
  Widget build(BuildContext context) {
    final size = MediaQuery.of(context).size;
    return ListView(
      children: [
        Row(
          mainAxisAlignment: MainAxisAlignment.spaceAround,
          children: [
            ElevatedButton(
                onPressed: () {
                  print("ElevatedButton");
                },
                child: const Text("普通按钮")),
            TextButton(onPressed: () {}, child: const Text("文本按钮")),
            OutlinedButton(onPressed: () {}, child: const Text("带边框的按钮")),
            IconButton(onPressed: () {}, icon: const Icon(Icons.thumb_up))
          ],
        ),
        const SizedBox(
          height: 20,
        ),
        Row(
          mainAxisAlignment: MainAxisAlignment.spaceAround,
          children: [
            ElevatedButton.icon(
                onPressed: () {},
                icon: const Icon(Icons.thumb_up),
                label: const Text("点赞")),
            TextButton.icon(
                onPressed: () {},
                icon: const Icon(Icons.thumb_up),
                label: const Text("点赞")),
            OutlinedButton.icon(
                onPressed: () {},
                icon: const Icon(Icons.thumb_up),
                label: const Text("点赞")),
          ],
        ),
        const SizedBox(
          height: 20,
        ),
        Row(
          mainAxisAlignment: MainAxisAlignment.spaceAround,
          children: [
            ElevatedButton(
                style: ButtonStyle(
                    backgroundColor: MaterialStateProperty.all(Colors.red),
                    foregroundColor: MaterialStateProperty.all(Colors.black)),
                onPressed: () {},
                child: const Text("普通按钮")),
          ],
        ),
        Row(
          mainAxisAlignment: MainAxisAlignment.spaceAround,
          children: [
            Container(
              width: 140,
              height: 60,
              child: ElevatedButton(
                  style: ButtonStyle(
                      backgroundColor: MaterialStateProperty.all(Colors.red),
                      foregroundColor: MaterialStateProperty.all(Colors.white)),
                  onPressed: () {},
                  child: const Text("大按钮")),
            ),
            SizedBox(
              width: 140,
              height: 40,
              child: ElevatedButton(onPressed: () {}, child: const Text("大按钮")),
            )
          ],
        ),
        const SizedBox(
          height: 20,
        ),
        Row(
          children: [
            Expanded(
              flex: 1,
              child: Container(
                margin: const EdgeInsets.all(20),
                height: 44,
                child: ElevatedButton(
                    style: ButtonStyle(
                        backgroundColor:
                            MaterialStateProperty.all(Colors.redAccent),
                        foregroundColor:
                            MaterialStateProperty.all(Colors.white)),
                    onPressed: () {},
                    child: const Text("登录")),
              ),
            )
          ],
        ),
        const SizedBox(
          height: 20,
        ),
        Row(
          mainAxisAlignment: MainAxisAlignment.spaceAround,
          children: [
            ElevatedButton(
                style: ButtonStyle(
                    shape: MaterialStateProperty.all(RoundedRectangleBorder(
                        borderRadius: BorderRadius.circular(12)))),
                onPressed: () {},
                child: const Text("圆角按钮")),
            Container(
              height: 60,
              width: 60,
              child: ElevatedButton(
                  style: ButtonStyle(
                      shape: MaterialStateProperty.all(const CircleBorder(
                          side: BorderSide(width: 2, color: Colors.yellow)))),
                  onPressed: () {},
                  child: const Text("圆形")),
            )
          ],
        ),
        SizedBox(
          height: 20,
        ),
        Row(
          mainAxisAlignment: MainAxisAlignment.spaceAround,
          children: [
            OutlinedButton(
              onPressed: () {},
              child: const Text("带边框的按钮"),
              style: ButtonStyle(
                  side: MaterialStateProperty.all(
                      BorderSide(width: 1, color: Colors.red))),
            )
          ],
        )
      ],
    );
  }
}
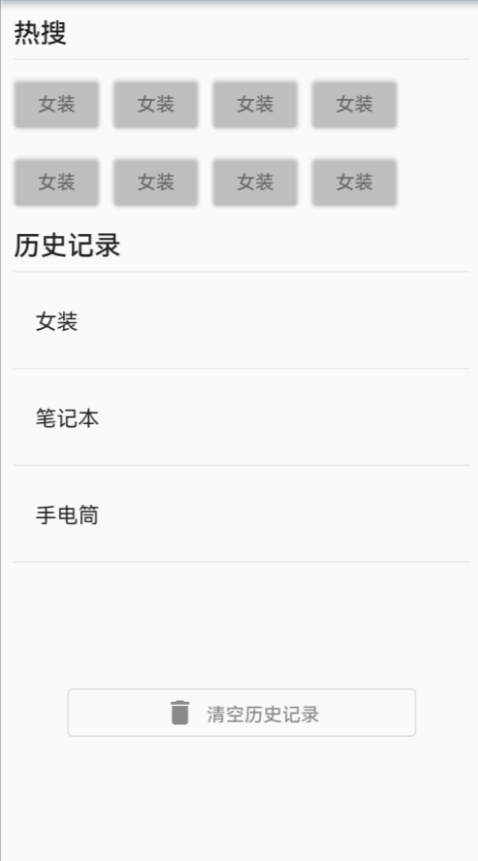
11.使用Wrap组件实现电商APP搜索页面布局
21
ListView 不能嵌套ListView
import 'package:flutter/material.dart';
import './res/listData.dart';

void main() {
  runApp(const MyApp());
}

class MyApp extends StatelessWidget {
  const MyApp({super.key});

  @override
  Widget build(BuildContext context) {
    return MaterialApp(
      theme: ThemeData(primarySwatch: Colors.blue),
      home: Scaffold(
        appBar: AppBar(title: Text("Fluter app")),
        body: MyHomePage(),
      ),
    );
  }
}

class MyHomePage extends StatelessWidget {
  const MyHomePage({super.key});

  @override
  Widget build(BuildContext context) {
    final size = MediaQuery.of(context).size;
    return ListView(
      padding: const EdgeInsets.all(10),
      children: [
        Row(
          children: [Text('热搜', style: Theme.of(context).textTheme.titleLarge)],
        ),
        const Divider(),
        Wrap(
          spacing: 10,
          runSpacing: 10,
          children: [
            Button("女装", onPressed: () {}),
            Button("女装", onPressed: () {}),
            Button("女装", onPressed: () {}),
            Button("女装", onPressed: () {}),
            Button("女装", onPressed: () {}),
            Button("女装", onPressed: () {}),
            Button("女装", onPressed: () {}),
            Button("女装", onPressed: () {}),
          ],
        ),
        const SizedBox(
          height: 10,
        ),
        Row(
          children: [
            Text('历史记录', style: Theme.of(context).textTheme.titleLarge)
          ],
        ),
        const Divider(),
        Column(
          children: const [
            ListTile(
              title: Text("女装"),
            ),
            Divider(),
            ListTile(
              title: Text("笔记本"),
            ),
            Divider(),
            ListTile(
              title: Text("手电筒"),
            ),
            Divider(),
          ],
        ),
        const SizedBox(
          height: 40,
        ),
        Padding(
          padding: const EdgeInsets.all(40),
          child: OutlinedButton.icon(
              style: ButtonStyle(
                  foregroundColor: MaterialStateProperty.all(Colors.black45)),
              onPressed: () {},
              icon: const Icon(Icons.delete),
              label: const Text(
                "清空历史记录",
              )),
        )
      ],
    );
  }
}

//自定义按钮组件
class Button extends StatelessWidget {
  String text; //按钮的文字
  void Function()? onPressed; //方法
  Button(this.text, {super.key, required this.onPressed});
  @override
  Widget build(BuildContext context) {
    return ElevatedButton(
        style: ButtonStyle(
            backgroundColor:
                MaterialStateProperty.all(Color.fromARGB(31, 248, 247, 247)),
            foregroundColor: MaterialStateProperty.all(Colors.black45)),
        onPressed: onPressed,
        child: Text(text));
  }
}
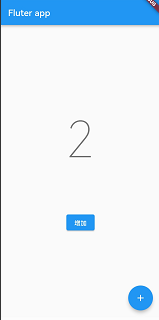
12.StatefulWidget有状态组件
setState(() {
});
通俗的讲:如果我们想改变页面中的数据的话这个时候就需要用到StatefulWidget
21
里面是const 就无法在外面加const
1.计数界面
//有状态组件
class _HomePageState extends State<HomePage> {
  int _countNum = 0;

  @override
  Widget build(BuildContext context) {
    return Scaffold(
      appBar: AppBar(title: Text("Fluter app")),
      floatingActionButton: FloatingActionButton(
        onPressed: () {
          setState(() {
            _countNum++;
          });
        },
        child: const Icon(Icons.add),
      ),
      body: Center(
        child: Column(
          mainAxisAlignment: MainAxisAlignment.center,
          children: [
            Text(
              "$_countNum",
              style: Theme.of(context).textTheme.headline1,
            ),
            const SizedBox(
              height: 100,
            ),
            ElevatedButton(
                onPressed: () {
                  setState(() {
                    _countNum++;
                  });

                  print(_countNum);
                },
                child: const Text("增加"))
          ],
        ),
      ),
    );
  }
}
2.添加列表界面

//有状态组件
class _HomePageState extends State<HomePage> {
  final List<String> _list = [];
  @override
  Widget build(BuildContext context) {
    return Scaffold(
      appBar: AppBar(title: Text("Fluter app")),
      floatingActionButton: FloatingActionButton(
        onPressed: () {
          setState(() {
            _list.add("我是一个新增列表");
          });
        },
        child: const Icon(Icons.add),
      ),
      body: ListView(
        children: _list.map((value) {
          return ListTile(title: Text(value));
        }).toList(),
      ),
    );
  }
}
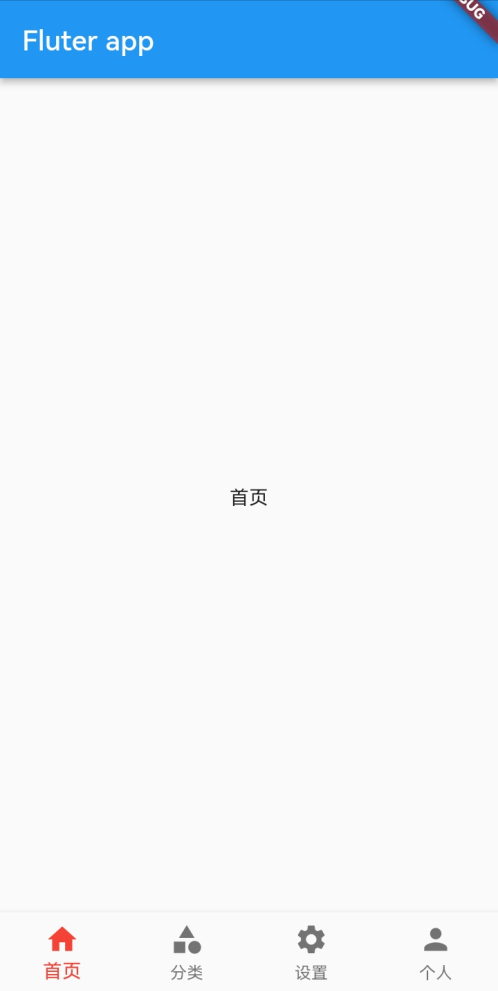
13.Scaffold BottomNavigatioinBar自定义底部导航栏
import 'package:flutter/material.dart';
import './tabs/home.dart';
import './tabs/category.dart';
import './tabs/setting.dart';
import './tabs/user.dart';

class MyHomePage extends StatefulWidget {
  const MyHomePage({super.key});

  @override
  State<MyHomePage> createState() => _MyHomePageState();
}

//有状态组件
class _MyHomePageState extends State<MyHomePage> {
  int _currentIndex = 0;
  final List<Widget> _pages = [
    HomePage(),
    Category(),
    SettingPage(),
    UserPage()
  ];
  @override
  Widget build(BuildContext context) {
    return Scaffold(
      appBar: AppBar(title: Text("Fluter app")),
      bottomNavigationBar: BottomNavigationBar(
        fixedColor: Colors.red, //选中的颜色
        iconSize: 25, //底部菜单大小
        currentIndex: _currentIndex, //第几个菜单选项
        type: BottomNavigationBarType.fixed, //如果底部有四个以上的菜单的时候,就需要配置这个参数
        onTap: (index) {
          //点击选项触发的方法
          setState(() {
            _currentIndex = index;
          });
        },
        items: const [
          BottomNavigationBarItem(icon: Icon(Icons.home), label: "首页"),
          BottomNavigationBarItem(icon: Icon(Icons.category), label: "分类"),
          BottomNavigationBarItem(icon: Icon(Icons.settings), label: "设置"),
          BottomNavigationBarItem(icon: Icon(Icons.person), label: "个人")
        ],
      ),
      body: _pages[_currentIndex],
    );
  }
}
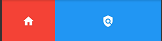
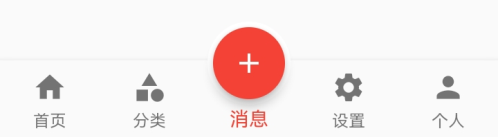
14.FloatingActionButton实现类似闲鱼APP底部导航凸起按钮
import 'package:flutter/material.dart';
import './tabs/home.dart';
import './tabs/category.dart';
import './tabs/setting.dart';
import './tabs/user.dart';
import './tabs/message.dart';

class MyHomePage extends StatefulWidget {
  const MyHomePage({super.key});

  @override
  State<MyHomePage> createState() => _MyHomePageState();
}

//有状态组件
class _MyHomePageState extends State<MyHomePage> {
  int _currentIndex = 0;
  final List<Widget> _pages = [
    HomePage(),
    Category(),
    MessagePage(),
    SettingPage(),
    UserPage()
  ];
  @override
  Widget build(BuildContext context) {
    return Scaffold(
      appBar: AppBar(title: Text("Fluter app")),
      bottomNavigationBar: BottomNavigationBar(
        fixedColor: Colors.red, //选中的颜色
        iconSize: 25, //底部菜单大小
        currentIndex: _currentIndex, //第几个菜单选项
        type: BottomNavigationBarType.fixed, //如果底部有四个以上的菜单的时候,就需要配置这个参数
        onTap: (index) {
          //点击选项触发的方法
          setState(() {
            _currentIndex = index;
          });
        },
        items: const [
          BottomNavigationBarItem(icon: Icon(Icons.home), label: "首页"),
          BottomNavigationBarItem(icon: Icon(Icons.category), label: "分类"),
          BottomNavigationBarItem(icon: Icon(Icons.message), label: "消息"),
          BottomNavigationBarItem(icon: Icon(Icons.settings), label: "设置"),
          BottomNavigationBarItem(icon: Icon(Icons.person), label: "个人")
        ],
      ),
      floatingActionButton: Container(
        height: 60,
        width: 60,
        padding: const EdgeInsets.all(4),
        margin: const EdgeInsets.only(top: 4),
        decoration: BoxDecoration(
            color: Colors.white, borderRadius: BorderRadius.circular(30)),
        child: FloatingActionButton(
          backgroundColor: _currentIndex == 2 ? Colors.red : Colors.blue,
          onPressed: () {
            setState(() {
              _currentIndex = 2;
            });
          },
          child: const Icon(Icons.add),
        ),
      ),
      floatingActionButtonLocation: FloatingActionButtonLocation.centerDocked,
      body: _pages[_currentIndex],
    );
  }
}
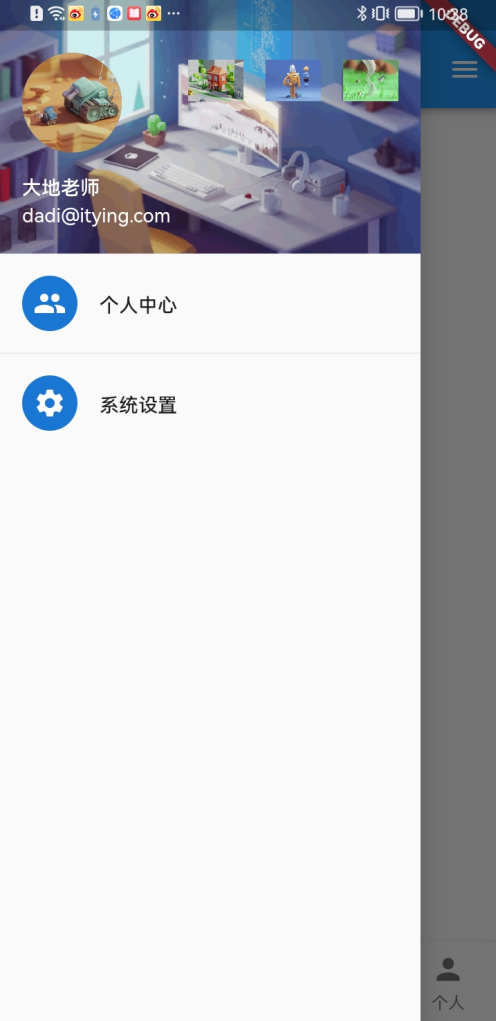
15.Drawer侧边栏,不同设备调试Flutter程序
在Scaffold组件里面传入drawer参数可以定义左侧边栏,传入endDrawer可以定义右侧边栏。侧边栏默认是隐藏的,我们可以通过手指滑动显示侧边栏,也可以通过点击按钮显示侧边栏。
1.Flutter DrawerHeader

在上一个代码中增加以下代码
 drawer: Drawer(
          child: Column(
        children: <Widget>[
          DrawerHeader(
            decoration: const BoxDecoration(
                color: Colors.yellow,
                image: DecorationImage(
                    image: NetworkImage(
                        "https://www.itying.com/images/flutter/2.png"),
                    fit: BoxFit.cover)),
            child: ListView(
              children: <Widget>[Text('我是一个头部')],
            ),
          ),
          const ListTile(
            title: Text("个人中心"),
            leading: CircleAvatar(child: Icon(Icons.people)),
          ),
          const Divider(),
          const ListTile(
            title: Text("系统设置"),
            leading: CircleAvatar(child: Icon(Icons.settings)),
          )
        ],
      )),
2.Flutter UserAccountsDrawerHeader
 drawer: Drawer(
          child: Column(
        children: <Widget>[
          UserAccountsDrawerHeader(
            accountName: const Text("大地老师"),
            accountEmail: const Text("dadi@itying.com"),
            currentAccountPicture: const CircleAvatar(
              backgroundImage:
                  NetworkImage("https://www.itying.com/images/flutter/3.png"),
            ),
            decoration: const BoxDecoration(
                color: Colors.yellow,
                image: DecorationImage(
                    image: NetworkImage(
                        "https://www.itying.com/images/flutter/2.png"),
                    fit: BoxFit.cover)),
            otherAccountsPictures: <Widget>[
              Image.network("https://www.itying.com/images/flutter/4.png"),
              Image.network("https://www.itying.com/images/flutter/5.png"),
              Image.network("https://www.itying.com/images/flutter/6.png")
            ],
          ),
          const ListTile(
            title: Text("个人中心"),
            leading: CircleAvatar(child: Icon(Icons.people)),
          ),
          const Divider(),
          const ListTile(
            title: Text("系统设置"),
            leading: CircleAvatar(child: Icon(Icons.settings)),
          )
        ],
      )),
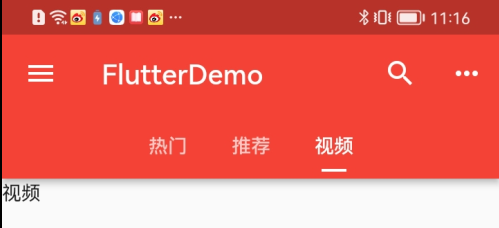
15.Flutter AppBar TabBar TabBarView 实现类似头条顶部滑动导航
1.AppBar自定义顶部按钮图标、颜色

appBar: AppBar(
        backgroundColor: Colors.red, //导航栏背景颜色
        leading: IconButton(
            //左侧按钮图标
            icon: const Icon(Icons.menu),
            onPressed: () {
              print('menu Pressed');
            }),
        title: const Text('FlutterDemo'),
        actions: [
          //右侧按钮图标
          IconButton(
              icon: const Icon(Icons.search),
              onPressed: () {
                print('Search Pressed');
              }),
          IconButton(
              icon: const Icon(Icons.more_horiz),
              onPressed: () {
                print('more_horiz Pressed');
              })
        ],
      ),
2.去掉debug样式
class MyApp extends StatelessWidget {
  const MyApp({super.key});

  @override
  Widget build(BuildContext context) {
    return MaterialApp(
      debugShowCheckedModeBanner: false,//去掉debug样式
      theme: ThemeData(primarySwatch: Colors.blue),
      home: HomePage(),
    );
  }
}
3.Flutter AppBar结合TabBar实现顶部Tab切换
1.关键代码
class _HomePageState extends State<HomePage>
    with SingleTickerProviderStateMixin {
  late TabController _tabController;
  //生命周期函数:当前组件初始化的时候就会触发
  @override
  void initState() {
    super.initState();
    _tabController = TabController(length: 3, vsync: this);
    _tabController.addListener(() {
      if (_tabController.animation!.value == _tabController.index) {
        print(_tabController.index); //获取点击或滑动页面的索引值
      }
    });
  }

  @override
  Widget build(BuildContext context) {
    return Scaffold(
      appBar: AppBar(
        bottom: TabBar(
          isScrollable: true,
          indicatorColor: Colors.white,
          indicatorWeight: 2,
          indicatorPadding: EdgeInsets.all(5),
          indicatorSize: TabBarIndicatorSize.label,
          // indicator: BoxDecoration(
          //     color: Colors.blue, borderRadius: BorderRadius.circular(10)),
          controller: _tabController,
          tabs: const [
            Tab(child: Text("热门")),
            Tab(child: Text("推荐")),
            Tab(child: Text("视频"))
          ],
        ),
      ),
      body: TabBarView(
        controller: _tabController,
        children: const [Text("热门"), Text("推荐"), Text("视频")],
      ),
    );
  }
}
2.完整代码
import 'package:flutter/material.dart';

void main() {
  runApp(const MyApp());
}

class MyApp extends StatelessWidget {
  const MyApp({super.key});

  @override
  Widget build(BuildContext context) {
    return MaterialApp(
      debugShowCheckedModeBanner: false,
      theme: ThemeData(primarySwatch: Colors.blue),
      home: HomePage(),
    );
  }
}

class HomePage extends StatefulWidget {
  const HomePage({super.key});

  @override
  State<HomePage> createState() => _HomePageState();
}

class _HomePageState extends State<HomePage>
    with SingleTickerProviderStateMixin {
  late TabController _tabController;
  //生命周期函数:当前组件初始化的时候就会触发
  @override
  void initState() {
    super.initState();
    _tabController = TabController(length: 3, vsync: this);
    _tabController.addListener(() {
      if (_tabController.animation!.value == _tabController.index) {
        print(_tabController.index); //获取点击或滑动页面的索引值
      }
    });
  }

  @override
  Widget build(BuildContext context) {
    return Scaffold(
      appBar: AppBar(
        backgroundColor: Colors.red, //导航栏背景颜色
        leading: IconButton(
            //左侧按钮图标
            icon: const Icon(Icons.menu),
            onPressed: () {
              print('menu Pressed');
            }),
        title: const Text('FlutterDemo'),
        actions: [
          //右侧按钮图标
          IconButton(
              icon: const Icon(Icons.search),
              onPressed: () {
                print('Search Pressed');
              }),
          IconButton(
              icon: const Icon(Icons.more_horiz),
              onPressed: () {
                print('more_horiz Pressed');
              })
        ],
        bottom: TabBar(
          isScrollable: true,
          indicatorColor: Colors.white,
          indicatorWeight: 2,
          indicatorPadding: EdgeInsets.all(5),
          indicatorSize: TabBarIndicatorSize.label,
          // indicator: BoxDecoration(
          //     color: Colors.blue, borderRadius: BorderRadius.circular(10)),
          controller: _tabController,
          tabs: const [
            Tab(child: Text("热门")),
            Tab(child: Text("推荐")),
            Tab(child: Text("视频"))
          ],
        ),
      ),
      body: TabBarView(
        controller: _tabController,
        children: const [Text("热门"), Text("推荐"), Text("视频")],
      ),
    );
  }
}
4.BottomNavigationBar 的页面中使用Tabbar
HomePage 中写的代码
import 'package:flutter/material.dart';

class HomePage extends StatefulWidget {
  const HomePage({super.key});

  @override
  State<HomePage> createState() => _HomePageState();
}

class _HomePageState extends State<HomePage>
    with SingleTickerProviderStateMixin {
  late TabController _tabController;
  //生命周期函数:当前组件初始化的时候就会触发
  @override
  void initState() {
    super.initState();
    _tabController = TabController(length: 3, vsync: this);
    _tabController.addListener(() {
      if (_tabController.animation!.value == _tabController.index) {
        print(_tabController.index); //获取点击或滑动页面的索引值
      }
    });
  }

  @override
  Widget build(BuildContext context) {
    return Scaffold(
      appBar: PreferredSize(
        preferredSize: Size.fromHeight(40),
        child: Container(
          height: 40,
          child: AppBar(
            elevation: 0.5,
            backgroundColor: Colors.white,
            centerTitle: true,
            title: TabBar(
              labelStyle: TextStyle(fontSize: 14),
              isScrollable: true,
              indicatorColor: Colors.red,
              labelColor: Colors.red,
              unselectedLabelColor: Colors.black,
              indicatorWeight: 2,
              indicatorPadding: EdgeInsets.all(5),
              indicatorSize: TabBarIndicatorSize.label,
              // indicator: BoxDecoration(
              //     color: Colors.blue, borderRadius: BorderRadius.circular(10)),
              controller: _tabController,
              tabs: const [
                Tab(child: Text("热门")),
                Tab(child: Text("推荐")),
                Tab(child: Text("视频"))
              ],
            ),
          ),
        ),
      ),
      body: TabBarView(
        controller: _tabController,
        children: const [Text("热门"), Text("推荐"), Text("视频")],
      ),
    );
  }
}
1.PreferredSize可以改变appBar的高度
Scaffold(
appBar: PreferredSize(
preferredSize: Size.fromHeight(50),
child: AppBar(
....
)
),
body: Test(),
)
2. 自定义KeepAliveWrapper 缓存页面
解决: 跳转其它页面返回后,自动回到了顶部
引入之后,包括在需要缓冲的外层
KeepAliveWrapper
import 'package:flutter/material.dart';

class KeepAliveWrapper extends StatefulWidget {
  const KeepAliveWrapper(
      {Key? key, @required this.child, this.keepAlive = true})
      : super(key: key);
  final Widget? child;
  final bool keepAlive;
  @override
  State<KeepAliveWrapper> createState() => _KeepAliveWrapperState();
}

class _KeepAliveWrapperState extends State<KeepAliveWrapper>
    with AutomaticKeepAliveClientMixin {
  @override
  Widget build(BuildContext context) {
    return widget.child!;
  }

  @override
  bool get wantKeepAlive => widget.keepAlive;
  @override
  void didUpdateWidget(covariant KeepAliveWrapper oldWidget) {
    if (oldWidget.keepAlive != widget.keepAlive) {
// keepAlive 状态需要更新,实现在 AutomaticKeepAliveClientMixin 中
      updateKeepAlive();
    }
    super.didUpdateWidget(oldWidget);
  }
}
3.监听TabController改变事件(两种方式)
  //生命周期函数:当前组件初始化的时候就会触发
  @override
  void initState() {
    super.initState();
    _tabController = TabController(length: 3, vsync: this);
    _tabController.addListener(() {
      //不判断回获取两次
      if (_tabController.animation!.value == _tabController.index) {
        print(_tabController.index); //获取点击或滑动页面的索引值
      }
    });
  }
TabBar(
              //只能监听点击事件,不能监听滑动
              onTap:(value) {

              },
   )
完整代码
import 'package:flutter/material.dart';
import '../tools/KeepAliveWrapper.dart';

class HomePage extends StatefulWidget {
  const HomePage({super.key});

  @override
  State<HomePage> createState() => _HomePageState();
}

class _HomePageState extends State<HomePage>
    with SingleTickerProviderStateMixin {
  late TabController _tabController;
  //生命周期函数:当前组件初始化的时候就会触发
  @override
  void initState() {
    super.initState();
    _tabController = TabController(length: 3, vsync: this);
    _tabController.addListener(() {
      //不判断回获取两次
      if (_tabController.animation!.value == _tabController.index) {
        print(_tabController.index); //获取点击或滑动页面的索引值
      }
    });
  }

//组件销毁的时候触发
  @override
  void dispose() {
    // TODO: implement dispose
    super.dispose();
    _tabController.dispose();
  }

  @override
  Widget build(BuildContext context) {
    return Scaffold(
      appBar: PreferredSize(
        preferredSize: Size.fromHeight(40),
        child: Container(
          height: 40,
          child: AppBar(
            elevation: 0.5,
            backgroundColor: Colors.white,
            centerTitle: true,
            title: TabBar(
              //只能监听点击事件,不能监听滑动
              onTap: (value) {},
              labelStyle: TextStyle(fontSize: 14),
              isScrollable: true,
              indicatorColor: Colors.red,
              labelColor: Colors.red,
              unselectedLabelColor: Colors.black,
              indicatorWeight: 2,
              indicatorPadding: EdgeInsets.all(5),
              indicatorSize: TabBarIndicatorSize.label,
              // indicator: BoxDecoration(
              //     color: Colors.blue, borderRadius: BorderRadius.circular(10)),
              controller: _tabController,
              tabs: const [
                Tab(child: Text("热门")),
                Tab(child: Text("推荐")),
                Tab(child: Text("视频"))
              ],
            ),
          ),
        ),
      ),
      body: TabBarView(
        controller: _tabController,
        children: const [
          KeepAliveWrapper(
            child: Text(("热门")),
          ),
          KeepAliveWrapper(
            child: Text(("推荐")),
          ),
          KeepAliveWrapper(
            child: Text(("视频")),
          ),
        ],
      ),
    );
  }
}
16.Flutter 路由
1.普通路由使用
import '../SearchPage.dart';

Center(
child: ElevatedButton(onPressed: (){
Navigator.of(context).push(
MaterialPageRoute(builder: (context){
return const SearchPage();
})
);
}, child: const Text("跳转到搜索页面")),
)
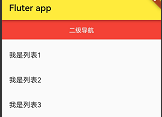
2.传值路由使用
Navigator.of(context)
                    .push(MaterialPageRoute(builder: (context) {
                  return const SearchPage(
                    title: "搜索页面",
                  );
                }));
import 'package:flutter/material.dart';

class SearchPage extends StatefulWidget {
  final String title;
  const SearchPage({super.key, this.title = "默认Search Page"});

  @override
  State<SearchPage> createState() => _SearchPageState();
}

class _SearchPageState extends State<SearchPage> {
  @override
  Widget build(BuildContext context) {
    return Scaffold(
      appBar: AppBar(
        title: Text(widget.title),//获取SearchPage定义的title
      ),
      body: Center(
        child: Text("搜索页面"),
      ),
    );
  }
}
3.返回到上一页
Navigator.pop(context);
Navigator.of(context).pop();
17.Flutter 统一管理路由:命名路由
1.跳转
Navigator.pushNamed(context, "/search");
main.dart
import 'package:flutter/material.dart';
import './pages/tabs.dart';
import './pages/search.dart';

void main() {
  runApp(const MyApp());
}

class MyApp extends StatelessWidget {
  const MyApp({super.key});

  @override
  Widget build(BuildContext context) {
    return MaterialApp(
      debugShowCheckedModeBanner: false,
      theme: ThemeData(primarySwatch: Colors.blue),
      //home: const MyHomePage(),
      initialRoute: "/",
      routes: {
        '/': (contxt) => const MyHomePage(),
        '/search': (contxt) => const SearchPage(),
      },
    );
  }
}
2.跳转传值(和上面写法不一样)
  Navigator.pushNamed(context, '/search', arguments: {
                  "title": "搜索页面",
                });
main.dart
import 'package:flutter/material.dart';
import './pages/tabs.dart';
import './pages/search.dart';

void main() {
  runApp(MyApp());
}

class MyApp extends StatelessWidget {
  //1、定义Map类型的routes
  Map routes = {
    '/': (contxt) => const MyHomePage(),
    '/search': (context, {arguments}) => SearchPage(arguments: arguments),
  };
  MyApp({super.key});

  @override
  Widget build(BuildContext context) {
    return MaterialApp(
      debugShowCheckedModeBanner: false,
      theme: ThemeData(primarySwatch: Colors.blue),
      //home: const MyHomePage(),
      initialRoute: "/",
      //2、调用onGenerateRoute处理
      onGenerateRoute: (RouteSettings settings) {
        // 统一处理
        final String? name = settings.name;
        final Function? pageContentBuilder = routes[name];
        if (pageContentBuilder != null) {
          if (settings.arguments != null) {
            final Route route = MaterialPageRoute(
                builder: (context) =>
                    pageContentBuilder(context, arguments: settings.arguments));
            return route;
          } else {
            final Route route = MaterialPageRoute(
                builder: (context) => pageContentBuilder(context));
            return route;
          }
        }
        return null;
      },
    );
  }
}
search.dart
import 'package:flutter/material.dart';

class SearchPage extends StatefulWidget {
  final String title;
  final Map arguments;
  const SearchPage(
      {super.key, this.title = "默认Search Page", required this.arguments});

  @override
  State<SearchPage> createState() => _SearchPageState();
}

class _SearchPageState extends State<SearchPage> {
  @override
  void initState() {
    print(widget.arguments);
  }

  @override
  Widget build(BuildContext context) {
    return Scaffold(
      floatingActionButton: FloatingActionButton(
        onPressed: () {
          Navigator.pop(context);
        },
        child: Icon(Icons.back_hand),
      ),
      appBar: AppBar(
        title: Text(widget.title), //获取SearchPage定义的title
      ),
      body: Center(
        child: Text("搜索页面"),
      ),
    );
  }
}
3.Flutter 中的命名路由单独抽离到一个文件
新建routers/routers.dart 配置路由
import 'package:flutter/material.dart';
import '../tabs.dart';
import '../search.dart';

final Map<String, Function> routes = {
  '/': (contxt) => const MyHomePage(),
  '/search': (context, {arguments}) => SearchPage(arguments: arguments),
};
var onGenerateRoute = (RouteSettings settings) {
// 统一处理
  final String? name = settings.name;
  final Function? pageContentBuilder = routes[name];
  if (pageContentBuilder != null) {
    if (settings.arguments != null) {
      final Route route = MaterialPageRoute(
          builder: (context) =>
              pageContentBuilder(context, arguments: settings.arguments));
      return route;
    } else {
      final Route route =
          MaterialPageRoute(builder: (context) => pageContentBuilder(context));
      return route;
    }
  }
  return null;
};
main.dart
class MyApp extends StatelessWidget {
  const MyApp({super.key});

  @override
  Widget build(BuildContext context) {
    return MaterialApp(
        debugShowCheckedModeBanner: false,
        theme: ThemeData(primarySwatch: Colors.blue),
        //home: const MyHomePage(),
        initialRoute: "/",
        //2、调用onGenerateRoute处理
        onGenerateRoute: onGenerateRoute);
  }
}
18.Flutter 中替换路由、 返回到根路由
1.相当于要跳转的目标替换了本页面
Navigator.of(context).pushReplacementNamed('/registerSecond');
2.返回到根路由
Navigator.of(context).pushAndRemoveUntil(
MaterialPageRoute(builder: (BuildContext context) {
return const Tabs();
}), (route) => false);
3.Flutter Android 和Ios使用同样风格的路由跳转
import ‘package:flutter/cupertino.dart’;
MaterialPageRoute改为CupertinoPageRoute
flutter run
19.Dialog
1.普通dialog async await
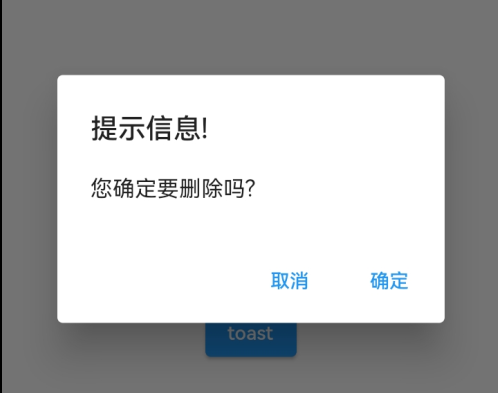
void _alertDialog() async {
    var result = await showDialog(
        context: context,
        builder: (context) {
          return AlertDialog(
            title: const Text("提示信息!"),
            content: const Text("您确定要删除吗?"),
            actions: <Widget>[
              TextButton(
                child: const Text("取消"),
                onPressed: () {
                  print("取消");
                  Navigator.pop(context, 'Cancle');
                },
              ),
              TextButton(
                child: const Text("确定"),
                onPressed: () {
                  print("确定");
                  Navigator.of(context).pop("Ok");
                  // Navigator.pop(context, "Ok");
                },
              )
            ],
          );
        });
    print(result);
  }
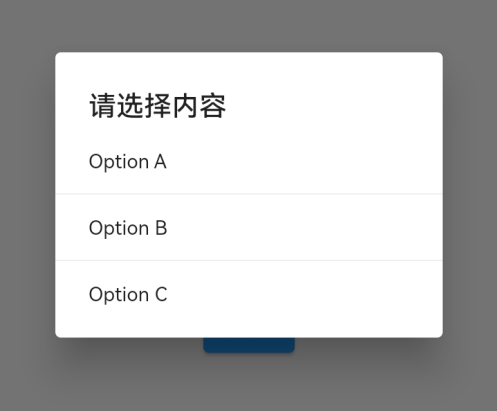
2.simpleDialog
 void _simpleDialog() async {
    var result = await showDialog(
        barrierDismissible: true, //表示点击灰色背景的时候是否消失弹出框
        context: context,
        builder: (context) {
          return SimpleDialog(
            title: const Text("请选择内容"),
            children: <Widget>[
              SimpleDialogOption(
                child: const Text("Option A"),
                onPressed: () {
                  print("Option A");
                  Navigator.pop(context, "A");
                },
              ),
              const Divider(),
              SimpleDialogOption(
                child: const Text("Option B"),
                onPressed: () {
                  print("Option B");
                  Navigator.pop(context, "B");
                },
              ),
              const Divider(),
              SimpleDialogOption(
                child: const Text("Option C"),
                onPressed: () {
                  print("Option C");
                  Navigator.pop(context, "C");
                },
              ),
            ],
          );
        });
    print(result);
  }
3.showModalBottomSheet
_modelBottomSheet() async {
    var result = await showModalBottomSheet(
        context: context,
        builder: (context) {
          return SizedBox(
            height: 220,
            child: Column(
              children: <Widget>[
                ListTile(
                  title: const Text("分享 A"),
                  onTap: () {
                    Navigator.pop(context, "分享 A");
                  },
                ),
                const Divider(),
                ListTile(
                  title: const Text("分享 B"),
                  onTap: () {
                    Navigator.pop(context, "分享 B");
                  },
                ),
                const Divider(),
                ListTile(
                  title: const Text("分享 C"),
                  onTap: () {
                    Navigator.pop(context, "分享 C");
                  },
                )
              ],
            ),
          );
        });
    print(result);
  }
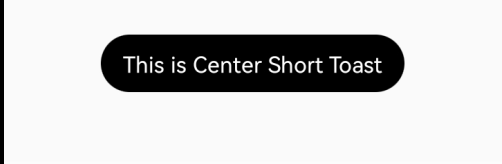
4.toast 重启
https://pub.dev/packages/fluttertoast
20.自定义Dialog
import 'dart:async';
import 'package:flutter/material.dart';

// ignore: must_be_immutable
class MyDialog extends Dialog {
  String title;
  String content;
  Function()? onClosed;
  MyDialog(
      {Key? key,
      required this.title,
      required this.onClosed,
      this.content = ""})
      : super(key: key);
  @override
  Widget build(BuildContext context) {
    return Material(
      type: MaterialType.transparency,
      child: Center(
          child: Container(
        height: 300,
        width: 300,
        color: Colors.white,
        child: Column(
          children: <Widget>[
            Padding(
              padding: const EdgeInsets.all(10),
              child: Stack(
                children: <Widget>[
                  Align(
                    alignment: Alignment.center,
                    child: Text(title),
                  ),
                  Align(
                    alignment: Alignment.centerRight,
                    child: InkWell(
                      onTap: onClosed,
                      child: const Icon(Icons.close),
                    ),
                  )
                ],
              ),
            ),
            const Divider(),
            Container(
              padding: const EdgeInsets.all(10),
              width: double.infinity,
              child: Text(content, textAlign: TextAlign.left),
            )
          ],
        ),
      )),
    );
  }
}
void _myDialog() async {
    await showDialog(
        barrierDismissible: true, //表示点击灰色背景的时候是否消失弹出框
        context: context,
        builder: (context) {
          return MyDialog(
              title: '标题',
              onClosed: () {
                print("关闭");
                Navigator.of(context).pop();
              },
              content: "我是一个内容");
        });
  }
21.PageView
1.PageView
PageView(
        // scrollDirection: Axis.vertical, // 滑动方向为垂直方向
          children: [
            Center(
              child: Text(
                "1",
                style: Theme.of(context).textTheme.headline1,
              ),
            ),
            Center(
              child: Text(
                "2",
                style: Theme.of(context).textTheme.headline1,
              ),
            ),
            Center(
              child: Text(
                "3",
                style: Theme.of(context).textTheme.headline1,
              ),
            ),
            Center(
              child: Text(
                "4",
                style: Theme.of(context).textTheme.headline1,
              ),
            ),
            Center(
              child: Text(
                "5",
                style: Theme.of(context).textTheme.headline1,
              ),
            ),
            Center(
              child: Text(
                "6",
                style: Theme.of(context).textTheme.headline1,
              ),
            )
          ],
        )
2.PageView.builder
import 'package:flutter/material.dart';

class MyPageView extends StatefulWidget {
  const MyPageView({super.key});

  @override
  State<MyPageView> createState() => _MyPageViewState();
}

class _MyPageViewState extends State<MyPageView> {
  @override
  Widget build(BuildContext context) {
    return Scaffold(
        appBar: AppBar(
          title: const Text("pageview演示"),
        ),
        body: PageView.builder(
          scrollDirection: Axis.vertical, // 滑动方向为垂直方向
          itemBuilder: (BuildContext context, int index) {
            return MyPage(text: "$index");
          },
          itemCount: 10,
        ));
  }
}

class MyPage extends StatefulWidget {
  final String text;
  const MyPage({super.key, required this.text});
  @override
  State<MyPage> createState() => _MyPageState();
}

class _MyPageState extends State<MyPage> {
  @override
  Widget build(BuildContext context) {
    return Center(
      child: Text(widget.text, style: Theme.of(context).textTheme.headline1),
    );
  }
}
3.PageView 上拉无限加载
import 'package:flutter/material.dart';

class MyPageView extends StatefulWidget {
  const MyPageView({super.key});

  @override
  State<MyPageView> createState() => _MyPageViewState();
}

class _MyPageViewState extends State<MyPageView> {
  final List<Widget> _list = [];
  @override
  void initState() {
    super.initState();
    for (var i = 0; i < 10; i++) {
      _list.add(MyPage(text: "$i"));
    }
  }

  @override
  Widget build(BuildContext context) {
    return Scaffold(
        appBar: AppBar(
          title: const Text("pageview演示"),
        ),
        body: PageView(
          scrollDirection: Axis.vertical, // 滑动方向为垂直方向

          onPageChanged: (index) {
            print(index);
            print(_list.length);
            if (index + 2 == _list.length) {
              setState(() {
                for (var i = 0; i < 10; i++) {
                  _list.add(MyPage(text: "$i"));
                }
              });
            }
          },
          children: _list,
        ));
  }
}

class MyPage extends StatefulWidget {
  final String text;
  const MyPage({super.key, required this.text});
  @override
  State<MyPage> createState() => _MyPageState();
}

class _MyPageState extends State<MyPage> {
  @override
  Widget build(BuildContext context) {
    return Center(
      child: Text(widget.text, style: Theme.of(context).textTheme.headline1),
    );
  }
}
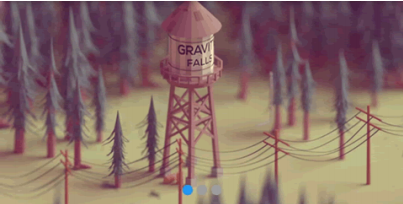
4.PageView 实现一个无限轮播的轮播图
List.generate(widget.pageList.length, (i) { })
设置 left: 0, right: 0,就会占满一行
Flutter定时器
const timeout = Duration(seconds: 3);
var t=Timer.periodic(timeout, (timer) {
print('afterTimer='+DateTime.now().toString()););
// timer.cancel(); // 取消定时器
});
t.cancel(); // 取消定时器
import 'package:flutter/material.dart';
import './swiper.dart';

class MyPageView extends StatefulWidget {
  const MyPageView({super.key});

  @override
  State<MyPageView> createState() => _MyPageViewState();
}

class _MyPageViewState extends State<MyPageView> {
  List<Widget> pageList = [];
  @override
  void initState() {
    List listData = [
      {
        "imageUrl": 'https://www.itying.com/images/flutter/1.png',
      },
      {
        "imageUrl": 'https://www.itying.com/images/flutter/2.png',
      },
      {
        "imageUrl": 'https://www.itying.com/images/flutter/3.png',
      }
    ];

    for (int i = 0; i < listData.length; ++i) {
      pageList.add(PicturePage(
        url: listData[i]["imageUrl"],
      ));
    }
  }

  @override
  Widget build(BuildContext context) {
    return Scaffold(
        appBar: AppBar(
          title: const Text("pageview演示"),
        ),
        body: SizedBox(
          height: 200,
          child: PageView(
            //scrollDirection: Axis.vertical, // 滑动方向为垂直方向
            children: [Swiper(pageList: pageList)],
          ),
        ));
  }
}

class MyPage extends StatefulWidget {
  final String text;
  const MyPage({super.key, required this.text});
  @override
  State<MyPage> createState() => _MyPageState();
}

class _MyPageState extends State<MyPage> {
  @override
  Widget build(BuildContext context) {
    return Center(
      child: Text(widget.text, style: Theme.of(context).textTheme.headline1),
    );
  }
}
import 'package:flutter/material.dart';
import 'dart:async';

class Swiper extends StatefulWidget {
  final double width;
  final double height;
  final List<Widget> pageList;
  const Swiper(
      {super.key,
      this.width = double.infinity,
      this.height = 200,
      required this.pageList});
  @override
  State<Swiper> createState() => _SwiperState();
}

class _SwiperState extends State<Swiper> {
  late PageController _pageController;
  int _currentPageIndex = 0;
  late Timer timer;
  @override
  void initState() {
    super.initState();
    _pageController = PageController(initialPage: 0);
    const timeout = Duration(seconds: 3);
    timer = Timer.periodic(timeout, (timer) {
      //跳转
      _pageController.animateToPage(
          (_currentPageIndex + 1) % (widget.pageList.length),
          curve: Curves.linear,
          duration: const Duration(milliseconds: 200));
      // timer.cancel(); // 取消定时器
    });
  }

  @override
  void dispose() {
    super.dispose();
    timer.cancel();
    _pageController.dispose();
  }

  @override
  Widget build(BuildContext context) {
    return Stack(
      children: [
        SizedBox(
          width: double.infinity,
          height: 200,
          child: PageView.builder(
              controller: _pageController,
              onPageChanged: (int index) {
                setState(() {
                  _currentPageIndex = index % (widget.pageList.length);
                });
              },
              itemCount: 10000,
              itemBuilder: (context, index) {
                return widget.pageList[index % (widget.pageList.length)];
              }),
        ),
        Positioned(
          bottom: 10,
          left: 0,
          right: 0,
          child: Row(
            mainAxisAlignment: MainAxisAlignment.center,
            children: List.generate(widget.pageList.length, (i) {
              return Container(
                margin: const EdgeInsets.fromLTRB(2, 0, 2, 0),
                width: 10,
                height: 10,
                decoration: BoxDecoration(
                    shape: BoxShape.circle,
                    color: _currentPageIndex == i ? Colors.blue : Colors.grey),
              );
            }).toList(),
          ),
        ),
      ],
    );
  }
}

class PicturePage extends StatefulWidget {
  final String url;
  final double width;
  final double height;
  const PicturePage(
      {super.key,
      required this.url,
      this.width = double.infinity,
      this.height = 200});
  @override
  State<PicturePage> createState() => _PicturePageState();
}

class _PicturePageState extends State<PicturePage> {
  @override
  Widget build(BuildContext context) {
    print(widget.url);
    return SizedBox(
      width: widget.width,
      height: widget.height,
      child: Image.network(widget.url, fit: BoxFit.cover),
    );
  }
}
5. AutomaticKeepAliveClientMixin 缓存PageView页面
6.自定义KeepAliveWrapper 缓存页面
KeepAliveWrapper(
child: Text((“热门”)),
),


 6286
6286


 被折叠的 条评论
为什么被折叠?
被折叠的 条评论
为什么被折叠?
 到【灌水乐园】发言


